• Decor & Design
  • DIY
  • Guide
  • Home Improvement
  • Smart Home
DormyHome
keep your memories alive
Home » Paints
Category:

Paints

How to Paint Furniture Without Sanding
BrushFurniturePaints

A Guide to Painting Furniture without Sanding

by David Parker October 18, 2023
written by David Parker

Painting furniture can be a fun DIY project, but sanding can be real work. It creates dust, takes up much time, and requires some muscle power. But what if we told you that there’s a way to achieve a smooth and beautiful paint finish without all that sanding problem? We’ll find a simple and easy way to paint furniture without sanding.

If you want to refresh an old piece of furniture or add some color to your decor, our step-by-step instructions will make the process effortless. We’ll find the materials you’ll need, the effortless preparation steps, and the best painting techniques to get a professional-looking result. So, if you’re ready to change your furniture with a fresh coat of paint and skip the sandpaper, let’s find out. You’ll be amazed at how clear and effective this method can be.

Let’s start the process of changing your furniture.

Why Avoid Sanding?

Why Avoid Sanding?

Sanding furniture before painting can be messy and time-consuming work. It’s all about removing the old paint, which creates dust and needs a big cleanup. Some furniture, especially ones with fancy designs or odd shapes, can be hard to sand properly.

But don’t worry, there are easier and quicker ways to do it. You can use special chemicals to remove the old paint without the messy sanding part. Or you can use a good primer that sticks well to the old paint, so you don’t have to sand it at all. These methods make painting furniture easier and faster, even if you’re not a DIY expert, and they keep your furniture looking awesome. So, you can give your furniture paint, no sanding, if it’s a plain table or a fancy dresser.

Materials You’ll Need for Furniture Painting

Materials You'll Need for Furniture Painting

Before you start, gather these things

  • Furniture piece: Choose the item you want to paint, whether it’s a table, chair, dresser, or any other piece of furniture.
  • Screwdriver and hardware: If your furniture has hardware like knobs or handles, remove them using a screwdriver.
  • Cleaning supplies: To ensure a clean surface, you’ll need mild dish soap, warm water, and a cloth or sponge.
  • Primer: A good quality bonding primer is important. It helps the paint stick to the surface without sanding.
  • Paint: Choose your preferred paint color and finish. Latex or acrylic paints are excellent choices for furniture.
  • Paintbrushes and rollers: High-quality brushes and rollers will give you a smoother finish.
  • Painter’s tape: Use this to protect any areas you don’t want to paint.
  • Drop cloth or newspaper: Protect your workspace against paint drips and spills.

Steps to Paint Furniture without Sanding

Follow these simple steps to make painting your furniture easy:

Step 1: Clean the Furniture

Clean the Furniture

If you want your furniture to look nice, clean it well. Just use some mild soap and water to get clear of dirt, grease, or grime. After cleaning, be sure to wash it off and let it dry completely. This furniture paint, with no sanding, will leave your furniture looking clean and good to go. Regular cleaning helps your furniture last longer and stay in perfect shape. So, don’t forget to give it the best cleaning now and then to keep it looking great for years to come.

Step 2: Remove Hardware

Remove Hardware .jpg

When you want to paint your furniture, and it has knobs, handles, or things like that, here’s what you can do. If you can easily take them off, remove them before you start painting. This furniture paint, no sanding, will make the painting much clearer because you won’t get paint on it by accident. But what if they don’t come off easily? No problem. You can still protect them by using painter’s tape. Just wrap the hardware with this special tape, making sure it’s covered well. This way, your knobs and handles won’t get any paint on them while you’re giving your furniture a fresh look. Whether you’re a DIY fan or just cleaning your home, this tip will simplify painting.

Step 3: Apply Primer

Apply Primer

Before you start painting your furniture, use a special primer. This helps furniture paint; no sanding helps the paint stick better and gives a shiny finish. Just follow the instructions on the primer to know how long to wait between coats of paint. This way, you’ll do perfect work, and your furniture will look awesome when you’re done. So, take your time, follow these easy steps, and you’ll have wonderfully painted furniture that you can be proud of. Don’t rush; instead, do each step carefully. Your patience and attention to detail will pay off, leaving you with a nice, refreshed living space that you’ll love.

Step 4: Paint

Paint

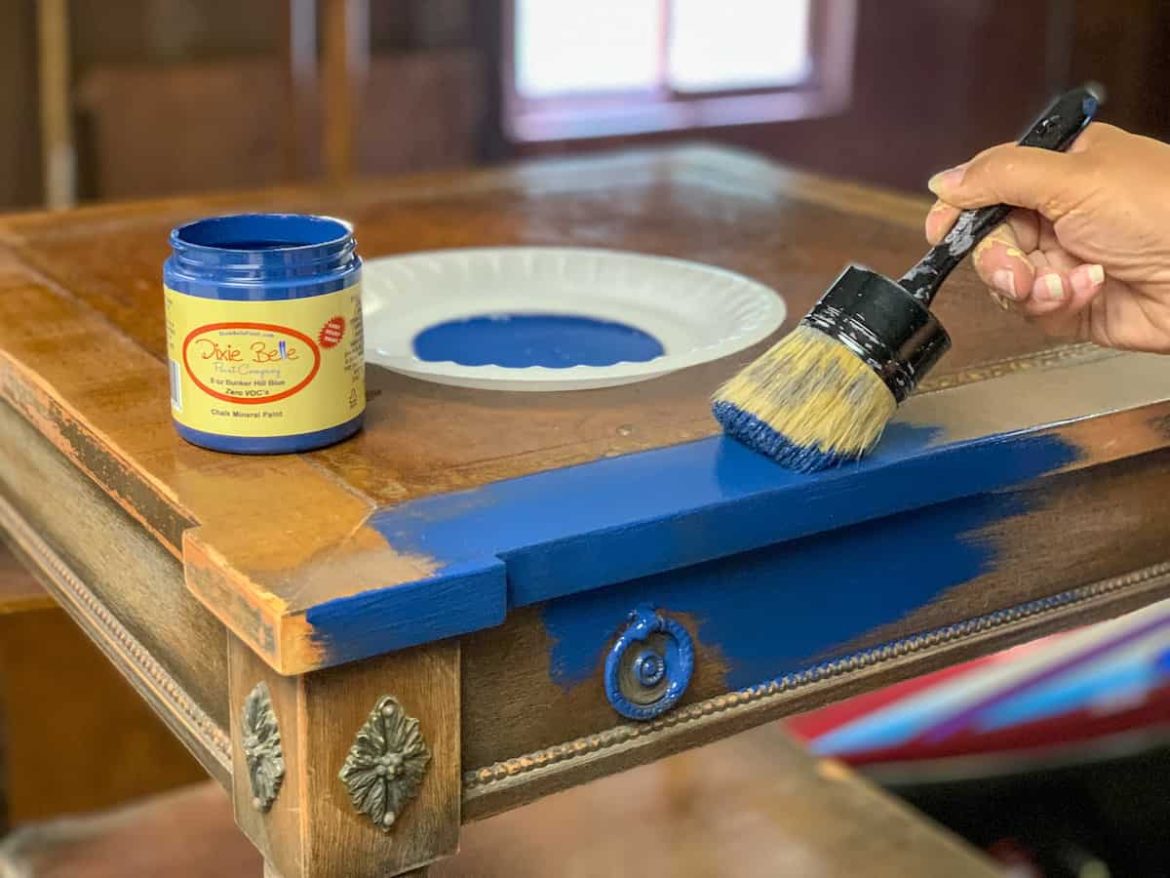
When your primer is all dry, it’s time to paint. Get the best paintbrush or roller for a smooth job. Put on the paint in thin, even layers, and don’t rush. Wait until each layer has dried before applying the next one. This way, your paint job will look great and stay that way for a long time. So, enjoy the process and see your space change with each coat of furniture paint, no sanding.

Step 5: Sand-Free Techniques

Sand-Free Techniques .jpg

Some special paints from certain brands are handy. They make your things shiny without the need for tough sandpaper. So, if you want your projects to look wonderful without all that sanding work, these paints are a real-time and effort-saver. You’ll like how things turn out. Whether you’re fixing furniture, cleaning your home, or doing fun DIY things, these paints are the way to go. Take the convenience and the better look these wonderful paints bring to your projects. Make your crafting experience better with furniture paint, no sanding, and see your creations come out nice and effortless.

Step 6: Optional Distressing

Optional Distressing

To make your project look old and cool, do this after painting. Get some sandpaper or a sanding block, and use them gently. Don’t press too hard. Just lightly rub them on the surface to show a little bit of the base paint or wood underneath where you want it to look old. This furniture painting, with no sanding, makes your project look special and aged, giving it a vintage style. It’s an easy way to get that trendy, simple look without any hard steps. So, give it a try and play around with sanding.

Step 7: Protect and Seal

Protect and Seal

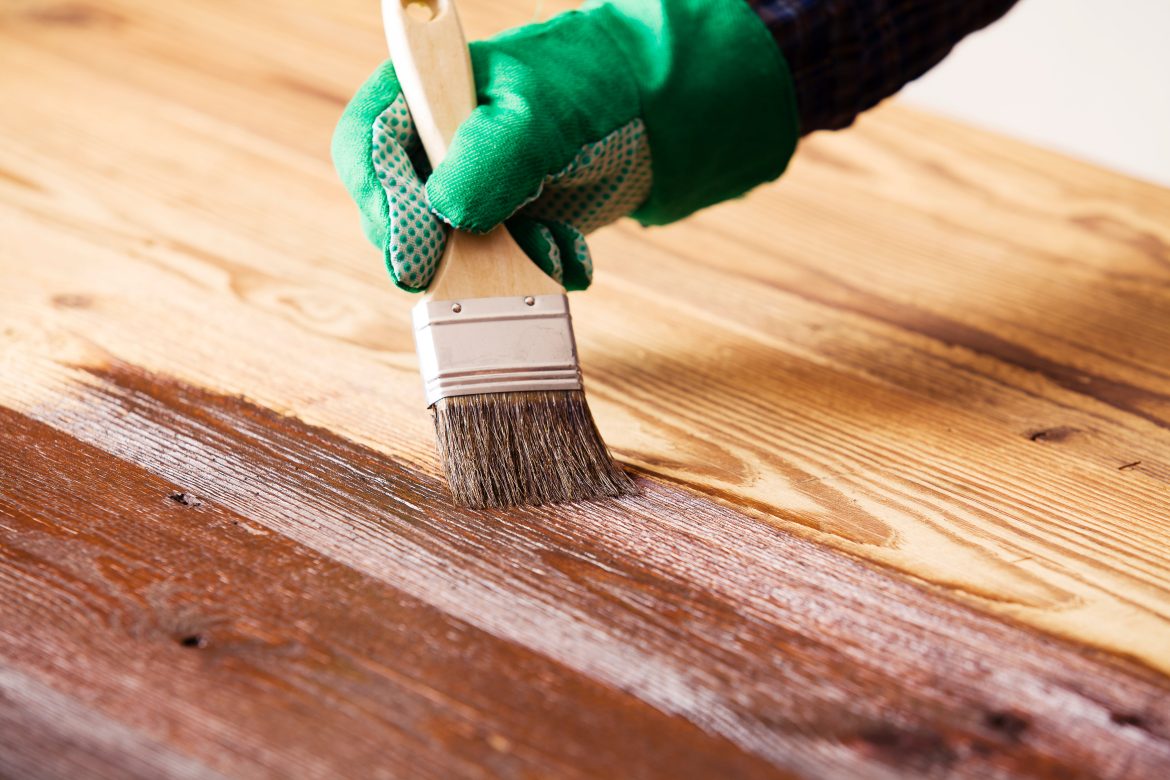
After you’re happy with how the paint looks and feels on your project, think about giving it extra protection. You can use a clear coating like polyurethane or furniture wax. This furniture paint no sanding step is especially important if you know your project will be used often and might get scratched or worn out. Polyurethane is like a strong shield for your paint, protecting it from damage. Furniture wax, on the other hand, gives a polished, protective layer and adds a little shine to your work. So, whether it’s a piece of furniture that gets a lot of use or something you want to keep looking nice, don’t forget to do this last step to ensure your paint job stays great for a long time.

Tips for a Successful Finish

Tips for a Successful Finish

1. Work in a Well-Ventilated Area

When you’re painting things, it’s really important to have fresh air around you to stay safe. Paint and sealant things can let out chemicals that are not good to breathe. Breathing in these chemicals can hurt your health. Ventilation is just a fancy word for removing these bad chemical fumes and bringing in fresh air. You can make fine ventilation happen by doing effortless things. Open windows and doors to let fresh air in and push the bad fumes out. If that’s not enough, you can wear a special respirator mask. So, when you’re working with furniture paint, no sanding or sealants, always make sure you have lots of fresh air around you to stay safe and healthy.

2. Use the Right Brushes

To make your painting look smooth, choose superb brushes or foam rollers. The type of paint you use decides which tools to use. For thick paints like oil-based ones, pick brushes with natural bristles. They’re amazing for these paints and make things shiny. If you’re using water-based paints like latex or acrylic, foam rollers are your best bet. They make it easy to put on an even and polished coat on your walls. So, don’t forget to choose the right brushes or foam rollers based on your paint type. It’s a simple step that can make a big difference in how your furniture is painted without sanding.

3. Follow the Manufacturer’s Instructions

Different kinds of paint have special instructions for how to put them on and how long you need to wait for them to dry. It’s important to pay attention to these guidelines to get the best results. When you’re painting, whether it’s walls, furniture, or art, take a moment to check the label or product info. They’ll tell you things like the best tools to use, how to get the surface ready, and the ideal conditions for painting. Drying times can also be different. Certain paints dry fast, while others need more time to dry. Hurrying this step can lead to streaks or uneven surfaces. Being patient when waiting for furniture to be painted and not sanding to dry is a good idea. Follow the suggested drying times to make sure your project turns out great. So, don’t forget, each kind of paint has its own rules. By following them closely, you’ll make your painting experience smoother and the results better.

4. Be Patient

If you rush through painting, your project might not turn out well. So, take it slow and be patient. When you paint furniture, let each coat of paint dry completely before adding more. Don’t skip this step! It might seem like it’s taking a while, but it’s worth it. Being patient and letting each coat dry well will make your project look much better and shinier. Remember that it’s better to wait a some longer than to hurry and end up with a messy result. So, go at a comfortable pace, give those paint layers plenty of time to dry, and you’ll be rewarded with a fantastic-looking piece of furniture. Your patience will pay off, and your project will turn out great.

Best Paint for Furniture without Sanding

Best Paint for Furniture without Sanding

1. Chalk Paint

Chalk paint is a great pick for cleaning up old furniture without the need for sanding. It sticks well to different surfaces and can give your pieces a nice, old-fashioned look. Brands like Annie Sloan and Rust-Oleum offer lots of pretty colors and finishes to choose from for your furniture redo. Chalk paint makes it clear to give your old things a fresh and stylish appearance, and that’s why many people who like DIY projects and home decorating enjoy using it. You won’t have to spend ages sanding, as chalk furniture paint does not go on smoothly and hides flaws well. Whether you want a simple, shabby, attractive vibe or a classy vintage style, chalk paint offers plenty of options. So, if you’re looking for an easy way to change your furniture and get that attractive, old-timey look, chalk paint is perfect—no more tough sanding work. Grab your paintbrush and enjoy the makeover.

2. Milk Paint

Milk paint is awesome because it makes things look flat, not shiny, and is effortless. You don’t even have to sand the surface before you paint it. If you’re considering which brands are good, look into General Finishes and Miss Mustard Seed’s Milk Paint. They’re known for doing perfect work, so whether you’re a beginner or have some experience, milk paint can help you make surfaces look flat and important. Milk paint is an amazing tool for furniture and decor. It’s perfect if you want a matte, non-shiny look. You won’t have to struggle with sandpaper before you paint. Just get some General Finishes or Miss Mustard Seed’s Milk Paint, and you’re ready to roll. This furniture paint with no sanding is famous for making great paint that works well. So, whether you’re just starting or have done this before, milk paint can help you make a beautiful flat finish that’ll make your things look fantastic.

3. Acrylic Paint

Acrylic paints are clear to use, and you can find them easily. They’re best for giving your furniture a makeover. Start with a fine base coat to make the furniture paint, no sanding stick well, and then put on a special layer to keep it looking fresh. Brands like Benjamin Moore and Behr make paints that can handle many uses, so your furniture will look good for a long time. The cool thing about acrylic paints is they come in lots of colors. Whether you want bright and brave or subtle and classy, acrylics work for both. They dry fast, so you won’t have to wait too long to see your furniture’s new look. So, get some acrylic paints and see your furniture become amazing. You’ll be surprised at how great it looks and how your space feels fresh and exciting.

4. Spray Paint

When it comes to painting small pieces of furniture or difficult little details, grab a spray can. Brands like Krylon and Rust-Oleum offer many colors and finishes in spray cans that make painting a snap. Spray paint is plain to use and gives you a smooth, even coat every time. Whether you’re fixing up a little table or adding some color to twisted designs, spray paint is the way to go. Just pick your favorite color, and you’re all set to make your furniture look amazing. Give it a try, and you won’t be let down. Your furniture will look fantastic with some effort. Spray furniture paint, no sanding is a must-have tool for people who love DIY and decorating their homes. Enjoy the simplicity and accuracy of spray painting for all your furniture projects.

Conclusion

Painting furniture without sanding doesn’t have to be a difficult task. We’ve learned some simple steps to change your old, tired furniture into something fresh and stylish. First, clean your furniture thoroughly to get clear of dirt and grime. Then, choose the right paint and primer for your project. Apply a primer if needed; it helps the furniture paint, and no sanding sticks better. When painting, use even swipe and take your time to avoid drips.

Let each coat completely dry before adding more. Don’t forget to protect your work area with dirty clothes and wear old clothes. And when you’re done, clean your brushes and rollers immediately with soap and water. So, there you have it, an easy way to give your furniture a new look without any difficulty of sanding. It’s a budget-friendly, time-saving option that anyone can do.

Don’t forget you can use different colors and finishes to match your style.

October 18, 2023 0 comments
0 FacebookTwitterPinterestEmail
Painting Furniture Without Sanding or Priming
BrushPaints

How to Paint Furniture without Sanding or Priming

by David Parker October 18, 2023
written by David Parker

Painting furniture without sanding or priming is similar to giving your old things a colorful and amazing look without too much hard work. Consider whether you have a table or a chair that’s seen better days. It might have scratches or doesn’t look as good as it used to.

Sanding and priming can be a lot of work. But guess what? You can skip all that. Painting without sanding or priming is similar to a shortcut to make a fresh look. You can choose any color you like and start painting. It can be easy to grab a brush and make your furniture look nice again. The best part is that it works on all sorts of furniture, from tables and chairs to dressers and cabinets. It’s something anyone can do. So, if you want to try painting furniture without sanding, check out these steps.

We’ll show you how to make your old stuff look amazing again with just a few simple steps.

Can You Paint Furniture without Sanding?

Can You Paint Furniture without Sanding?

Yes, you can paint furniture without sanding it beforehand. This technique is known as no-sanding painting. Instead of using sandpaper, you clean the furniture thoroughly and apply a special type of paint called chalk paint. Chalk paint easily sticks to the furniture’s surface without the need for any sanding or priming. It’s a fast and easy method to give your furniture a new appearance.

Painting furniture without sanding is a great choice, especially if you want to avoid the struggle of sanding down the old finish. This method can save you time and effort. To start, gather your cleaning supplies, including Microfiber Cleaning Cloths and chalk paint. Begin by wiping down the furniture to remove any dirt or dust. Then, apply the chalk paint with a brush or roller. You might have to put on another layer to make it cover better. Once the paint is dry, your furniture will have a fresh, updated look.

Best Furniture Paints without sanding

1. Chalk Paint

Chalk Paint

Chalk paint is a great option for redoing furniture. You don’t have to sand or prime it, making it uncomplicated. Just put it on your furniture. Chalk paint dries fast and gives a nice flat look. It also has many colors to match your style. This way, you can make your furniture look new without too much effort. It’s a budget-friendly and time-saving way to renovate your home. So, don’t worry about complicated steps; grab some chalk paint and give your furniture a fresh look.

2. Milk Paint

Milk Paint

Milk paint is a very good choice. It’s made from things like milk, lime, and colors. It makes your furniture look old and nice. You don’t need to sand or prime. Just mix it with water, put it on with a brush, and you get that old-time look. Painting without sanding can save you time and effort. It’s a good way to refresh your pieces. This paint is easy to use. It’s not hard like some other paints. You can make your furniture look cool without too much work. So, if you want a quick and easy way to make your furniture look vintage, try milk paint. It’s natural and fun to use. Also, consider using Wood Furniture Finishing Wax for added protection and to increase the finish of your painted furniture.

3. Mineral Paints

Mineral Paints

Mineral paints are really tough and good to use. They stick to things well, even if you don’t sand them first. No need for any sanding or priming things. These paints have many colors and shiny or not-shiny looks so you can use them on all kinds of furniture. If you’re thinking about painting furniture without sanding, mineral paints are a great choice. They make it super easy to give your furniture a new look. You won’t have to struggle or work too hard to make it look nice. Just get some mineral paint and get creative.

4. Enamel Paints

Enamel Paints

Enamel paints work really well on furniture because they make it look shiny and nice. You don’t have to sand or prime the furniture before using them, so that’s easy. They also keep your furniture safe from getting old and damaged. Suppose you want to try painting furniture without sanding; this paint is good for your work.

Material Used for Painting Furniture without Sanding

Material Used for Painting Furniture without Sanding

Electric Screwdriver

An electric screwdriver is like a super-fast, twisty tool. It helps you remove the furniture so you can paint every part easily. Just press a button, and it twists screws out super quick. When you’re painting furniture without sanding, you want things to be as simple as possible. These tools are just helpful to you. You don’t have to work super hard to get screws out. Once you take everything apart, painting is like coloring. You pick your favorite colors and brush them on. It’s all about making your furniture look awesome. So, get your electric screwdriver and start painting without sanding.

Krud Kutter and Damp Rag

Krud Kutter is a special cleaning liquid. You can use it to make your furniture clean. Just mix it with water and use a wet cloth. This is important when you want to paint furniture without sanding. Cleaning your furniture with Krud Kutter is easy. First, get a bucket of water. Then, pour some Krud Kutter into the water. Mix it up. Now, take a wet rag or cloth. Dip it into the water with Krud Kutter. Wipe your furniture with the wet rag. It will remove dirt and grime. Your furniture will be nice and clean. After cleaning with Krud Kutter, you’re ready to paint. Painting furniture without sanding is a time-saver.

Heirloom Traditions Paint in Oyster

This paint is simple. It comes in a can. Oyster is a soft, creamy color. It’s perfect for making your furniture look fresh and new. Just dip a paintbrush in the can and start painting. You don’t need to do heavy work like sanding. Think of giving your chairs, tables, or dressers a new life with this paint. You can do it all by yourself—no need to hire someone or spend lots of money. Painting furniture without sanding can save you time and effort. So, get your can of oyster paint and make your furniture. It’s easy and budget-friendly.

Paint Brush

A paintbrush is like a special tool for your furniture. You use it to add color. It’s kind of like when you color with a big, soft crayon. Be sure to cover all the little corners and bumps. Painting furniture without sanding can be done, too. You don’t need to make the surface rough first. Just use a brush and paint right on. This is similar to giving your furniture a colorful makeover. When you’re done, it’ll look all fresh and new. And you did it without any sandpaper. So, don’t be afraid to pick up that paintbrush set and upgrade your furniture.

Foam Roller

A foam roller is like a big, soft paintbrush. It helps you paint your furniture without sanding. Just roll it on your furniture, covering much of the surface simultaneously. This makes your furniture look really good, and you don’t need to do much work. You move the roller back and forth, and your furniture gets a fresh color. It’s a simple way to make your old furniture look new again. You might be thinking why it’s important to use a foam roller. Well, it’s because it saves you time and effort. When you use a foam roller, you don’t have to sand your furniture first. Sanding can be hard work, and it takes a long time. But with a foam roller, you can skip that step and still get great results.

Tack Cloth

A tack cloth is kind of like a special cleaning rag. It is sticky, so it grabs all the little pieces of dirt before you start painting. You can use it to wipe down your furniture, and then you’re all set to paint without any sanding. Painting furniture without sanding is a simple way to freshen up your old pieces. You don’t have to work very hard. Remember, when you use the tack cloth and Disposable Gloves, make sure to go over the whole surface so it’s nice and clean. This way, your paint will stick better, and your furniture will look nice and new. So, if you want to update your furniture without much work, try painting it without sanding. It can make a big difference in how your furniture looks.

Farmhouse All-In-One Paint Scratch Test

Farmhouse All-In-One Paint Scratch Test

Farmhouse all-in-one paint is a special kind of paint. It’s strong and lasts a long time. You can check how strong it is by trying a little test. Take a coin or a key and gently rub it on the painted surface. If the paint doesn’t come off easily, that means it’s good for your furniture. This paint keeps your furniture safe from regular use. When you want to change the color of your furniture without a lot of work, you must try using a Deglosser before painting. This paint can help you with that, too. It’s easy to use and can make your furniture look different without much effort. So, if you want your furniture to look nice and last a long time, consider using this kind of paint. It’s simple and makes your furniture stronger.

Painting Tables with Farmhouse All-In-One Paint

Painting Tables with Farmhouse All-In-One Paint .jpg

You can try Farmhouse All-In-One Paint for painting furniture without sanding. It’s really uncomplicated. You don’t need to sand anything beforehand. All you need to do is choose the color you like, get a brush, and start painting. This paint works great; it covers nicely and dries fast. Your tables will look fantastic with a fresh, pretty appearance. Using Nitrile Gloves while painting will also help protect your hands. Using this paint is like giving a new and amazing upgrade to your furniture. It’s a quick and easy way to give your tables a new and lovely appearance without all the hard sanding work. So, if you want to refresh your furniture without the struggle of sanding, give Farmhouse All-In-One Paint a try. You’ll be amazed at how easy it is to upgrade your tables with this paint.

Remove Dresser Hardware

Remove Dresser Hardware

Remove any handles, knobs, or other hardware from your dresser. You can use a screwdriver or pliers if it’s hard to do. Doing this makes sure the paint goes on easily without any problems. Now, let’s talk about painting furniture without sanding. It’s a process that saves you time and effort. You don’t have to do much hard work before you start painting. Next, get your paint ready. Choose a color you like and get a brush or a roller. You can use a brush if you want to be more precise or a roller if you want to cover a big area quickly. Dip your brush or roller in the paint and apply it to the dresser. Be careful not to get paint on the floor or anywhere else you don’t want it. Use a Paint Tray and Liners to keep your work area clean and organized. After you’ve done painting, allow the dresser to dry. It could take a few hours or even all night. After it’s dry, put the hardware back on, and your dresser will look great. Painting furniture without sanding can be a simple way to give your furniture a fresh new look.

Clean Dresser

Clean Dresser

Clean your dresser with a wet cloth. This removes dust, dirt, and any messy elements on it. Having a clean surface is super important for the paint to stick right. After you’ve wiped it down, let it dry for a bit. Now, let’s talk about painting furniture without sanding, which is a cool trick. You can do this on your dresser, too. First, get some paint in the color you like. Then, start painting your dresser with a brush or a roller. Make sure to cover it all evenly. If you want it to look extra nice, you can do two coats. Just wait for the first coat to dry before adding the second. It’s like giving your dresser a fancy new outfit. Once it’s all dry, put your things back on it, and you’ve got a fresh-looking piece of furniture without all the hard sanding work. It’s easy and makes your dresser look awesome.

Paint the Dresser with Heirloom Traditions Paint

Paint the Dresser with Heirloom Traditions Paint

Now, it’s time to put the paint on your furniture. You should use Heirloom Traditions Paint. This paint is good because you don’t have to sand or prime it before using it. You can use a brush or a roller to put the paint on. Make sure to put on a smooth coat of paint. After you finish one coat, let it dry before putting on another coat. This way, your dresser will look nice with the paint on it, and you won’t have to do all the extra work of sanding or priming. Painting furniture without sanding can save you time and effort, and Heirloom Traditions Paint is a good choice for this. So, give it a try and paint your dresser with ease.

Steps to Paint Any Furniture without Sanding

Steps to Paint Any Furniture without Sanding

  • Clean: Start by cleaning the furniture. Use a wet cloth or sponge to clean the dust and dirt.
  • Gather Supplies: Get your painting supplies ready. You’ll need paint, a brush or roller, a paint tray, and some old newspapers or a drop cloth to protect your floor.
  • Choose Paint: Pick the paint color you like. Make sure it’s suitable for the type of furniture you’re painting.
  • Mix Paint: Open the paint can and stir it well with a stick. Mix it until it’s smooth.
  • Apply Paint: Dip your brush or roller into the paint and apply it to the furniture. Do this by making straight and even lines to cover the whole furniture surface.
  • Let it Dry: Let the first layer of paint dry all the way. This may take a few hours.
  • Apply Second Coat: Apply a second coat of paint in the same way as the first. This helps ensure even coverage and a nice finish.
  • Final Drying: Let the furniture dry thoroughly. It might take a day or more, depending on the paint type and weather.
  • Optional Seal: If you want extra protection, you can apply a clear sealant after the paint has dried.
  • Enjoy Your New Look: Once everything is dry, your furniture is ready to use again with its fresh coat of paint.

Conclusion

Painting furniture without sanding or priming can be a simple and enjoyable way to give your old pieces a fresh and colorful look. You don’t need to do any hard work before adding new paint. Just clean the furniture well, choose your favorite colors, and apply the paint. This easy method saves time and effort. You can do it yourself without any fancy tools or techniques.

Also, you’ll have a chance to be creative with your furniture’s new look. You can make it bright, playful, or stylish, depending on your taste. So, if you have old furniture that needs a new lease on life, don’t worry about sanding and priming. Just grab some paint and get started. It’s a fun and budget-friendly way to upgrade your space.

Give it a try, and you’ll be amazed at how easy and rewarding it can be.

October 18, 2023 0 comments
0 FacebookTwitterPinterestEmail
Best Chalk Paint Brushes
BrushPaints

15 Best Brush for Chalk Paint to Buy Online

by Marco Bianchi October 18, 2023
written by Marco Bianchi

Everybody loves to have a sweet-looking house, which should be beautiful from both inside and outside. But for that, you should have the best paint colors, colored with the best paint brushes. Especially when it comes to furniture, you should make sure that you have the best brush for chalk paint that will make your existing furniture look more good. These are special tools for painting furniture and making it look nice.

Chalk paintbrushes help you put the paint on smoothly and make your projects look amazing. There are many different kinds of brushes, and each one has its special job. Some are good for big areas, and others are great for small details. If you want your furniture to look good, choosing the right brush is important. Even if you have a not so good looking furniture, you can change the whole perspective by using the best chalk paint brushes.

So, let’s see what are some of the best paintbrushes out there.

1. Chalkology Chalk Paint Brush

Chalkology Chalk Paint Brush

Features

The Chalkology Chalk Paint Brush is made to work well for all kinds of chalk paint projects. It’s good for both beginners and experienced painters. The brush is designed specially to make sure the paint goes on smoothly and accurately. This means even if you’re new to using chalk paint and want the best brush for chalk paint, you can still make your project look really good. The brush has high-quality bristles holding the paint, so it won’t drip or leave streaks on your work. You can use it on many different things like furniture or decorations, giving everything an even coat of paint. The handle of the brush is made with a lot of thought, so it’s easy to hold and lets you do both small, detailed work and big, sweeping strokes.

Pros

  • Works for all types of chalk paint projects
  • Good for beginners and experienced painters
  • Makes paint go on smoothly and accurately
  • High-quality bristles prevent drips and streaks
  • It can be used on different surfaces
  • Comfortable handle for detailed and broad strokes

Cons

  • Requires careful cleaning, which can take some time.
  • It may be relatively more expensive compared to some other brushes.

2. Brossum Large Paint Brush

Brossum Large Paint Brush

Features

The Brossum Large Paint Brush is a really good tool, especially if you’re working on big chalk paint projects. The brush has wide bristles that help you cover many areas quickly and evenly. This makes it great for painting big things like furniture or large walls. You can use this brush on different materials like wood and metal, which is pretty handy. The way the brush is shaped makes it comfortable to hold, even if you’re working for a long time, so your hand won’t get tired easily because you use the best brush for chalk paint.

Pros

  • Works especially well for big chalk paint projects
  • Wide bristles cover a lot of area quickly and evenly
  • Good for painting furniture and large walls
  • It can be used on different materials like wood and metal
  • Comfortable to hold, even during long painting sessions
  • Bristles hold onto the paint well, preventing messy drips and streaks

Cons

  • The wide bristles may not be as precise for detailed work.
  • The Brossum Large Paint Brush may not be the best choice for smaller choices.

3. Bristello Paint Brush Set

Bristello Paint Brush Set

Features

The Bristello Paint Brush Set is a great choice for artists and people who want really good brushes for painting. It comes with lots of different brush sizes so that you can do both detailed work and big strokes. Each brush is made carefully, with good bristles that work well with chalk paint. This makes sure that every time you paint, it goes on smoothly and looks nice. Using the best brush for chalk paint gives you a lot of options.

Pros

  • It is a good choice for artists and people who want good brushes
  • Comes with different brush sizes for detailed and big strokes
  • High-quality bristles work well with chalk paint
  • Ensures smooth and consistent application
  • Gives you lots of options for painting
  • Soft handles for comfortable painting

Cons

  • It can be Costly.
  • Not fit for everyone.

4. FolkArt Home Decor Brush Set

FolkArt Home Decor Brush Set

Features

The FolkArt Home Decor Brush Set is made with great care and attention to detail. Each brush in this set has natural bristles that make your project look professional. There are brushes of different shapes and sizes in the set so you can use them for lots of different techniques. Whether you’re fixing up furniture, adding decorative touches, or making wall art, these brushes can do the job well, as these are the best brushes for chalk paint. The special thing about them is that they work with both chalk and acrylic paints. This means you have a lot of options for what you can create. They’re also easy to clean so you can use them for a long time.

Pros

  • Made with care and attention to detail
  • Natural bristles for a professional finish
  • Different brushes for different techniques
  • Works with both chalk and acrylic paints
  • Easy to clean for long-lasting use

Cons

  • The set could be a bit pricey.
  • The variety of brush options might be confusing for some.

5. New Renaissance Painting Brush

New Renaissance Painting Brush

Features

The New Renaissance Painting Brush is made with great care and skill, showing off some great craftsmanship. It’s perfect for artists and people who want to be precise in their work and want the best brush for chalk paint. The brush has very fine bristles that can do even the softest strokes, giving your projects a level of detail that makes them stand out. It’s designed to feel just right in your hand, so you won’t get tired even if you’re painting for a long time. It’s one of the best brushes for chalk paint. The brush is of really high quality, so every stroke you make is important in making your final piece look perfect. Whether you like gentle designs or want things to look refined, this brush will be there for you, helping you turn your creative ideas into amazing art with confidence and ease.

Pros

  • Made with amazing skill and care
  • Perfect for precise work
  • Fine bristles for detailed strokes

Cons

  • Expensive
  • Limited availability

6. Brossum Round Wax Brush

Brossum Round Wax Brush

Features

The Brossum Round Wax Brush is designed to give chalk-painted surfaces a top-quality wax finish. Its rounded shape is perfect for reaching hard corners and ensuring everything gets a nice, even coat of wax. The bristles of this brush are just right, not too soft, not too hard. This means you have really good control over how you put on the wax. When you use the Brossum Round Wax Brush, you can be sure your wax finishes will look great without any rough spots. The brush is the best brush for chalk paint so you can use it again and again for all your chalk paint projects.

Pros

  • Ideal for achieving top-quality wax finishes
  • Rounded shape for reaching tricky spots
  • Balanced bristles for precise application

Cons

  • Fewer Size Options
  • Requires Proper Cleaning

7. FolkArt Wax Brushes

FolkArt Wax Brushes

Features

The FolkArt Wax Brushes are specially made tools for giving your chalk-painted projects a perfect wax finish. They have soft bristles that make sure the wax goes on smoothly and evenly, giving you a finish that looks great. These brushes are designed very carefully to make them easy to use to cover different surfaces evenly. They’re built to last a long time, so they’ll be with you whenever you need them for wax finishing, and these are some of the best brushes for chalk paint.

Pros

  • Perfect for achieving a smooth wax finish on chalk-painted projects
  • Soft bristles for smooth and consistent application
  • Easy to use for even coverage on various surfaces

Cons

  • No protective case.
  • Limited size options.

8. Vintage Tonality Paint Brush

Vintage Tonality Paint Brush

Features

The Vintage Tonality Paint Brush Set is a set of brushes for many painting projects. Each brush in this set is made carefully and with a lot of attention to detail. They have really good bristles that make the chalk paint go on smoothly and evenly. This set has brushes of different shapes and sizes so that you can do many different painting techniques, from small, detailed work to big, sweeping strokes. The brushes’ handles are soft and easy to hold, which means you can control your brush strokes well, and this brush is one of the best brushes for chalk paint.

Pros

  • Made for a variety of painting projects
  • Each brush is carefully crafted
  • High-quality bristles for smooth and even application
  • Different shapes and sizes for various techniques

Cons

  • Limited brush variety.
  • Potential shedding of bristles.

9. Zibra Paint Brush

Zibra Paint Brush

Features

The Zibra Paint Brush is a really good tool for painting. It’s made specially to ensure you can paint efficiently and accurately with chalk paint. The brush has high-quality bristles that hold onto the paint well and prevent drips or streaks. This means you can use it on different surfaces like furniture or metal, and it’ll always give you really good results. The handle of the brush is a nice touch. It fits nicely in your hand, so you can hold it securely and paint smoothly because this is one of the best brushes for chalk paint.

Pros

  • Reliable tool for painting
  • Unique design for efficient and precise application
  • High-quality bristles prevent drips and streaks
  • It can be used on different surfaces
  • Comfortable handle for a secure grip

Cons

  • Pricey
  • Limited size options

10. Heirloom Traditions Brush

Heirloom Traditions Brush

Features

The Heirloom Traditions Brush is a top-quality tool made for artists and those who want to be precise in their chalk paint projects. It’s especially good for fine details. The brush has very fine bristles that make accurate strokes and smooth finishes. This makes it an excellent choice for people who want their work to be very precise. The brush is made with a good weight balance, and it’s easy to hold. This means you can use it for a long time without your hand getting tired. It’s the best brush for chalk paint, which means it’s made to very high-quality standards.

Pros

  • Premium tool for precision and fine detailing
  • Best for accurate strokes and smooth finishes
  • Balanced weight and comfortable grip for extended use
  • Professional-grade quality and craftsmanship
  • Enables fantastic results with confidence
  • Perfect for artists and craftspeople
  • Maintains quality and precision in chalk paint projects

Cons

  • Delicate bristles
  • Not suitable for large areas

11. Annie Sloan Paint Brush

Annie Sloan Paint Brush

Features

The Annie Sloan Paint Brush is a reliable tool for getting really good results with chalk paint. It’s made with a lot of care, and it has high-quality bristles that make sure the paint goes on smoothly and evenly. The design of the brush helps you have more control over how the paint goes on, so you can do detailed work or big strokes. As this is one of the best brushes for chalk paint, the handle is easy to hold so that you can work comfortably and precisely. Whether you’re fixing up furniture, working on decorations, or doing other creative projects, this brush is a good choice for getting the best results with chalk paint.

Pros

  • Trusted tool for professional-grade results
  • High-quality bristles for smooth application
  • Gives better control over brush strokes
  • Suitable for detailed and broader work
  • Comfortable and precise handle

Cons

  • May be expensive
  • Some users may find it too big for very detailed work

12. FolkArt Plaid Brushes

FolkArt Plaid Brushes

Features

The FolkArt Plaid Brushes are important tools for artists and anyone aiming for high-quality results with chalk paint. They are carefully crafted with natural bristles that give a smooth and even application. This set comes with brushes in various shapes and sizes, letting you use different techniques for detailed work or broader strokes. These brushes can be used with both chalk and acrylic paints, giving you more options for your creative projects. Keeping these best brushes for chalk paint clean and in good condition is simple, ensuring they stay dependable tools for all your projects.

Pros

  • Important for achieving professional-grade finishes
  • Compatible with both chalk and acrylic paints
  • Easy to clean and maintain

Cons

  • Some users may find natural bristles shed over time
  • The set may not include all brush shapes needed for specific projects

13. Retique It Chalk Brushes

Retique It Chalk Brushes

Features

The Retique It Chalk Brushes are made especially for using chalk-based paints and finishes. They’re built with care to give you precise and smooth coverage. The best brush for chalk paint is designed to be easy to hold so you can make controlled and steady strokes. They work on lots of different surfaces, which means you can use them for all sorts of projects.

Pros

  • Specialized for chalk paints
  • Precise and even coverage
  • Comfortable grip
  • Versatile for different surfaces
  • Professional-looking results

Cons

  • Higher cost
  • Requires careful cleaning for longevity

14. Wooster Brush Paintbrush

Wooster Brush Paintbrush

Features

The Wooster Brush Paintbrush is the best brush for chalk paint to get professional-level results with chalk paint. It’s made with high-quality bristles to make sure the paint goes on smoothly and evenly. The design of the brush is all about precision, giving you great control over how the paint goes on, whether you’re doing detailed work or broader strokes. The handle is made to be comfortable in your hand so you can work easily and with accuracy. Whether you’re designing your furniture, doing decor projects, or letting your creativity flow, this is a go-to brush for chalk paint that you can trust to give you the best results.

Pros

  • Gets professional results
  • Smooth application
  • Precise control
  • Comfortable grip
  • Versatile use
  • Noticeable improvement

Con

  • Higher price
  • Slightly heavy

15. Mont Marte Chalk Brush Set

Mont Marte Chalk Brush Set

Features

The Mont Marte Chalk Brush Set is a collection of brushes made for various painting projects. Each brush in this set is crafted with precision and care, featuring high-quality bristles that deliver consistent and smooth application of chalk paint. The set includes brushes of different shapes and sizes, allowing many techniques, from detailed work to broader strokes, to be used. The handle of this brush provides a comfortable grip, ensuring you have precise control over your brush strokes. It does not matter what thing you are using it for; the Mont Marte chalk brush is one of the best brushes for chalk paint.

Pros

  • Best for achieving top-quality looks
  • A rounded shape Helps more
  • Better bristles for accurate use

Cons

  • Less Size Options
  • Requires Proper Cleaning

Conclusion

So, those are some of the best brushes for chalk paint. These brushes make painting with chalk paint easy and fun. They have special bristles that make your strokes smooth and precise. And they feel good in your hand, so you can paint for a long time without getting tired. These brushes are made with care and high-quality materials, so they last a long time. You can use them for all sorts of projects, from detailed designs to simple finishes.

No matter what you’re working on, these brushes help you create amazing results. Try them out and see which one feels better for you. Because having the best furniture will not only make your whole house look amazing but it will also show how much you care about colors and shades.

So, pick one of these brushes that suits you.

October 18, 2023 0 comments
0 FacebookTwitterPinterestEmail
How to Cane Furniture and Repair Chair Caning by Hand
FurniturePaints

A Guide to Furniture Caning and Handwoven Chair Repairs

by David Parker October 17, 2023
written by David Parker

Are you ready to learn a handy skill that can breathe new life into your old chairs? Repairing furniture caning by hand is a craft that allows you to revive worn-out furniture and give it a fresh, attractive appearance. So that you can easily learn how to fix them by hand, and it’s not as hard as you might think.

We’ll show you how to move furniture and chairs by hand; you won’t need fancy tools or complicated skills. If you want to save money on furniture repairs, this process is accessible to everyone. You’ll experience the satisfaction of giving your old chairs a fresh, comfortable look. We’ll see the basics of caning and provide step-by-step instructions to make the process smooth and enjoyable.

So, let’s find out how to do furniture caning and repair chair caning by hand to add a touch of artistry to your home!

Why Choose Cane Furniture?

Why Choose Cane Furniture?

Cane furniture has become really popular lately, and there are some best reasons for that. It’s made from natural materials, which makes it seem nice, lasts a long time, and is good for the environment. So, if you want furniture caning for inside your home or outside, a cane is a great choice.

1. Natural Beauty: Cane furniture has a classic, natural appearance that works well with many different interior design styles. Their earthy colors and detailed weaving patterns bring a delightful feel to any room.

2. Lightweight and Maneuverable: Cane furniture has a notable advantage: they’re super light, so you can easily shift and rearrange them, giving you many options for decorating.

3. Durability: Although cane furniture may look fine, they are actually quite strong. They can handle everyday use well and are less likely to get damaged than other materials. So, choosing them is a smart decision for long-lasting furniture caning.

4. Eco-Friendly: Cane furniture is made from materials that come from sources that can be renewed, which makes them best for the environment. When you pick rattan or cane furniture, you’re helping the planet by supporting sustainable methods of nature.

5. Comfort: Cane furniture often has cushions or padding, offering comfort and a natural appearance.

How Much Cane Do I Need to Get?

How Much Cane Do I Need to Get?

Calculating the correct amount of cane for your chair repair or furniture caning project is important to prevent wasting materials or running out. This easy-to-follow guide will help you figure out the right quantity to use.

1. Measure the Seat: Measure the length and width of the seat or area you plan to cane. Calculate the square footage by multiplying these dimensions together.

2. Caning Pattern: Different caning patterns require varying amounts of cane. For standard cane webbing patterns, you’ll typically need approximately one square foot of cane per chair.

3. Account for Extras: It’s best idea to purchase a bit more than your calculated amount to account for mistakes or future repairs.

Tools Needed for Furniture Caning

Tools Needed for Furniture Caning

Furniture caning holds a classic attraction, and if you’re keen to learn the art of caning, you’ll need a few essential tools to get started. Here, we’ll walk you through each tool you’ll need and why it’s necessary for this fascinating craft.

1. Strand Chair Cane: A strand chair cane is the main thing you’ll need for weaving. It comes from the rattan palm, which is known for being bendy and strong. Before you use it for weaving, it’s usually soaked to make it flexible.

2. Binder Cord: A binder cord, or lacing cord, plays a major role in keeping the cane strands secure on a chair. It stops them from coming undone and ensures that the cane stays tightly woven within the chair’s frame.

3. Work Table: Your workspace needs a strong and comfortable work table that is just the right size for your chair. This table gives you stability while you work and helps you concentrate on the detailed weaving process.

4. Measuring Tape: In chair caning, it’s important to be accurate. Using a measuring tape will help you make sure the gaps between the cane strands are the same, which will make your finished chair look good and work well.

5. Chair Caning Pegs: Chair caning pegs, often made of hardwood, are used to hold the cane in place while you weave. They help maintain even tension and spacing as you work your way across the chair.

6. Dish Pan: You’ll need a dishpan filled with warm water to soak your cane strands. This helps to make them softer and more flexible, which makes weaving much easier in furniture caning.

7. Water Bucket: A water bucket is a important tool for chair caning. You use it to soak both the cane strands and the binder cord. When you soak them, they become softer and more flexible, which makes them easier to use.

8. Scissors: Scissors come in handy when you need to trim extra cane to make your caning project appear neat and perfect. Being careful while trimming is essential to make it look like a pro job.

9. Hammer: A small hammer is important for securing the caning pegs and tightening the cane strands during the weaving process. It helps maintain even tension and ensures that the furniture caning is securely attached to the chair frame.

10. Glue: Glue may be necessary for certain repair jobs, such as securing loose joints or damaged parts of the chair frame. It provides additional longevity to the repaired chair.

11. Spray Bottle: You use a spray bottle filled with water to keep the cane strands wet while you weave. This helps to keep the cane from getting dry and breaking while you’re working.

12. Bath Towel: A bath towel is used to wipe excess water from the cane strands and to press and shape the furniture caning as it dries gently. It aids in achieving a smooth and even surface.

How to Cane Chairs and Other Furniture

How to Cane Chairs and Other Furniture .jpg

Step 1: Prepare Your Work Area

To start chairs and other furniture caning, it’s important to make a neat and well-arranged workspace. Find a roomy and well-lit area where you can easily move around the furniture. Get all the tools you’ll need ready, such as cane strands, a chair caning kit, a sharp knife, scissors, a towel, and a bucket of warm water. This setup will make sure your caning project goes smoothly without any problems.

Step 2: Measure Correctly

Accurate measurements are major for a successful chair caning project. To get started, measure the seat opening of the chair frame carefully and think about both its length and width. Make sure your measurements are accurate and free of mistakes to prevent any fitting problems when you’re caning. Remember that caning materials come in different widths. So, it’s essential to choose the right size based on your measurements to achieve a smooth and perfect finish.

Step 3: Cutting Out The Old Seat

To start caning, first, you must take off the old seat. Flip the chair upside down safely and make sure it won’t wobble. Now, use a utility knife or chisel to gently cut around the edges of the old furniture caning, detaching it from the chair’s frame. Be careful to avoid harming the chair’s structure and go slowly. When you’ve completely removed the old caning, get rid of any leftover bits and give the seat frame a good cleaning.

Step 4: Remove Old Caning

After you’ve removed the old seat, the next thing to do is get rid of any leftover bits of the old cane material. You might need to use a utility knife to scrape away any remaining strands of cane or glue. Ensure the seat frame is nice and smooth, without anything in the way, so you can start fresh when putting on the new cane. Once you’ve cleared away all the old things and made the frame clean, you’re all set to begin the caning process.

Step 5. Measure and Cut

After taking off the old furniture caning and cleaning the seat frame, the next thing to do is to get the new cane sheets ready. First, lay out the cane material and measure it based on the size of the chair seat you measured earlier. Ensure the cane sheets are a bit bigger than the seat hole to fit well and be trimmed properly. Once you’ve measured and marked the cane sheets, cut them carefully to fit using scissors. Being accurate here will make sure they stay secure.

Step 6: Soak Cane Sheets

To prepare the cane for the chair seat, start by soaking the cane sheets in warm water. Put the sheets in a bucket of warm water for about 20-30 minutes. This soaking step makes the cane softer and easier to handle. Just be careful not to soak it for too long, as that can stretch and weaken the cane. Once you’ve finished soaking, take the cane sheets out of the water and gently dry them with a towel to get rid of extra moisture.

Step 7: Add Cane to The Chair Seat

Now that the cane sheets are flexible and ready let’s put them on the chair seat. Begin by putting the wet cane sheet over the seat hole, ensuring it covers the whole area. Carefully press the cane into the indents or grooves on the seat frame, starting from the middle and moving outward. Use a special tool or a wedge to push the cane firmly so it fits easily. Keep doing this, weaving the cane in a pattern of going over and under until the whole seat is covered. Cut off any extra cane, leaving a small edge around the seat.

Step 8: Remove Excess Cane

After you’ve attached the cane to the chair seat, the next thing to do is to get rid of any extra furniture caning material. To do this, use a utility knife or scissors to gently trim the parts of the cane that stick out along the edge of the seat. Be careful not to damage the newly woven cane, and cut as close to the frame as possible. This step is important to make the chair look tidy, and it also keeps away any rough or sharp edges that could make sitting in the chair uncomfortable.

Step 9: Clean out The Groove

Before you go on, look closely at the lines or dents on the chair frame where the woven cane is. While caning, some glue or bits of cane might have gotten stuck in these lines. To make the surface smooth and even, use a small chisel or a pointed tool to remove any extra cane or glue from these lines gently. This is a major step to make your work seem really good.

Step 10: Fill the Groove with Glue

Now that the grooves are clean and clear of any dirt or bits, it’s time to attach the cane in place for best firmly. To do this, put on a thin and even layer of wood glue inside those grooves. Make sure the glue covers everything evenly. This sticky thing will stick the cane to the seat frame and give it strong support that will last a long time. Be careful not to use too much glue, or it might spill out and make a mess. Just use enough to make a strong bond without any gooey overflow.

Step 11: Attach the New Spline

To make your cane chair stronger and more secure, you should add a new strip called a spline. A screen spline is a thin, bendable piece of wood or rattan that goes into the groove around the edge of the seat frame. First, measure how long the spline should be to match the chair seat’s outer edge. Then, carefully push the spline into the groove, on top of the cane and the glue. The spline does two important jobs: it keeps the cane in place and gives your caning project a neat finish.

Step 12: Press the Cane Into the Groove

Once you’ve put the spline in place, grab a caning tool or a mallet. Use it to push the cane into the groove firmly. Make sure the cane stays put and doesn’t have any loose or uneven spots. Doing this step makes the Furniture caning Seem strong and neat, improving both its strength and how it looks.

Where to Order Cane

Where to Order Cane .jpg

When you’re all set to start fixing chairs or repairing furniture by hand, it’s really important to find good quality cane. The best news is, there are several places where you can find it.

1. Craft Stores: Most craft stores have chair caning supplies, such as different-sized cane materials. You can either go to the store or look on their website to find what you need.

2. Online Retailers: Many websites sell everything you need for furniture caning, such as cane materials, tools, and instructions. You can begin your search on popular sites like Amazon and eBay, as well as specialty cane supply stores.

3. Specialty Woodworking Shop: If you have woodworking shops in your area, they might carry chair caning supplies or direct you to local suppliers.

Benefits of Caning Furniture by Hand

Benefits of Caning Furniture by Hand .jpeg

1. Authenticity: Hand caning is a method that keeps antique and vintage furniture true to its original artistry. It helps preserve the authentic appearance and character of these pieces, something that collectors often value greatly.

2. Unique Artistry: Hand caning is a skilled art form that allows artisans to showcase their talents and creativity. The unique patterns and weaves made by skilled caners can add a touch of artistic attraction to the furniture caning.

3. Increased Value: Antique and vintage furniture fans often find that having a piece that’s been hand-caned can make it much more valuable. People who appreciate old furniture really like it when the piece has been fixed up using the old-fashioned ways.

4. Repairability: Hand-caned furniture is relatively easy to repair if damage occurs in the future. Unlike factory-made, mass-produced seats, which may require complete replacement, hand-caned seats can often be patched or reworked by a skilled caner.

Conclusion

Learning how to repair cane chairs by hand is a valuable skill that can help you save money and preserve your lovely furniture caning. With practice and patience, you can become skilled at this craft and give old chairs a fresh lease on life. To get started, gather your materials, prepare the chair, weave the cane, and secure the ends. Take your time, follow the instructions carefully, and don’t get discouraged when facing challenges.

It’s important to choose the right type of cane for your project, whether it’s pre-woven sheets or individual strands. Each has its benefits, so pick the one that suits your needs best. Maintenance is also important to ensure your caned chairs last for years. Keep them clean and regularly check for loose strands or signs of wear.

It allows you to restore your furniture’s beauty and function while improving your crafting skills.

October 17, 2023 0 comments
0 FacebookTwitterPinterestEmail
Best Paint Brushes For Polyurethane
FurniturePaints

The Best Paint Brushes for Applying Polyurethane

by Marco Bianchi October 17, 2023
written by Marco Bianchi

Polyurethane is a durable coating that can add beauty and longevity to your projects, but using the right paint brush is important to achieve a smooth and even application. We’ll help you choose the best brush for polyurethane needs.

We’ll find everything for you to pick the perfect brush without any confusion.

We’ll find various types of brushes, including bristle brushes and foam brushes, and discuss their pros and cons. You’ll also learn about the important factors to consider when selecting a paintbrush, such as brush size and shape.

We’ll provide practical tips to ensure that your polyurethane projects turn out beautifully. So, whether you’re refinishing your kitchen cabinets, restoring a wooden table, or working on any polyurethane project, let’s make your work easier by finding the best paint brush for the work.

Let’s start and make your projects the best.

Understanding Polyurethane

Understanding Polyurethane

Think about polyurethane as a tough shield for your wood and metal belongings. It’s like a coat that makes things look great and keeps them safe. You can use it on furniture, metal storage cabinets, and floors to stop water, scratches, and damage.

To use the best brush for polyurethane the right way, you need the right tools, like brushes. If you don’t have the right tools, it can be a bit tricky. So, ensure you have the right gear to make your wood and metal things look awesome and stay protected. With the right tools, you can be the hero your furniture and floors need.

So, be ready to release the power of polyurethane and keep your valuable things safe and looking fantastic. For DIY and home improvement, polyurethane is your handy helper. With the right tools, you can be the hero your furniture and floors deserve.

So, ensure you’ve got the gear to change your items into showstoppers while providing them with the tough protection they need. Take the power of polyurethane and safeguard your cherished belongings in style.

Characteristics of the Best Brushes for Polyurethane

Characteristics of the Best Brushes for Polyurethane

1. Bristle Material

Choosing the right brush bristles is important when you’re working with polyurethane. For polyurethane projects, go for brushes with natural bristles like those made from hog hair. But why, you ask? Well, These best brushes for polyurethane are special.

They can grab onto the polyurethane and spread it out evenly. Think about that. With the right brush, you can make it all smooth and nice. Natural bristle brushes do the same thing for polyurethane. They help you get a perfect, smooth finish that looks good.

So, when you’re getting ready to use polyurethane, don’t forget to pick a brush with hog hair or other natural bristles. It’s not just about making your work easier. It’s about getting a fantastic result. When you use the right brush, applying polyurethane becomes a breeze, and your project turns out awesome.

2. Brush Shape

The brush you pick matters when you’re working with polyurethane. For polyurethane, it’s best to use a flat or angled brush. These brushes are like the pros’ secret tools because they make it easy to apply polyurethane just the way you want, especially when you’re working on flat surfaces.

A flat best brush for polyurethane has a wide, flat surface that’s ideal for covering big areas smoothly. It’s a bit like using a paint roller for polyurethane. Now, an angled brush has slanted bristles that make it clear to get into corners and tight spots so you can be precise.

So, if you want your polyurethane work to look nice and even, don’t forget to grab a flat or angled brush. They make it plain to do top-notch work, whether you’re sprucing up furniture or adding a protective coat to your floors or cabinets.

3. Size Matters

Choosing the right brush is important for your project, just like picking the right tool for a work. It’s all about the size of the brush. If you’re working on a big area, like painting a huge wall in your house, go for a wide brush.

A wide brush can paint a big space in one go, making your work faster and simpler. But when you’re dealing with smaller tasks, like fixing up little things or doing crafts, grab a narrower brush. A narrow brush lets you be accurate. Think about painting a short picture frame or adding little details. A narrow brush helps you do it carefully and without mistakes.

So, match your brush size with your project size. If you do that, you’ll get awesome results. Whether you’re taking on a big painting work or doing some fine detail work, choosing the best brush for polyurethane can make a big difference in how well you do.

4. Quality Matters

If you want your art or projects to look awesome, using fantastic brushes is important. The best brushes for polyurethane are built to last because they’re made strong with handles and bristles that won’t come off.

When you use them, they don’t just work for a long time; they also make your work look much better. By picking high-quality brushes, you save money because they stay with you for a long while. They make your work stand out wonderfully.

It’s like a double win for your art or any project requiring brushes. Don’t underestimate how much good brushes can improve your work. So, if you want to create amazing art or projects and save money in the long run, investing in top-notch brushes is the way to go.

Best Brushes for Polyurethane

Best Brushes for Polyurethane

1. Purdy White Bristle Series

Purdy is a famous brand known for making amazing brushes. They’ve got a particular set of brushes called the White Bristle Series, which are superb for applying polyurethane.

What’s awesome is that these brushes come in different sizes and shapes, so you can pick the one that works best for your project. This best brush for polyurethane has natural bristles that are excellent at picking up paint and spreading it evenly.

Whether you’re a DIY person or a pro, using Purdy’s White Bristle Series brushes makes painting easier, and you’ll always get a fantastic finish. So, if you want top-quality brushes, choose Purdy.

They simplify painting, and your results will look amazing every time. When you use Purdy brushes, your painting projects become much easier, and the result will impress you every single time you paint.

2. Wooster Alpha Brushes

Meet the awesome Wooster Alpha Brushes. These brushes are specially made for use with water-based polyurethane coatings. They’re strong, plain to clean, and will stay in perfect shape for a long time. What makes these brushes unique is that they’re designed to work well with water-based polyurethane. Unlike other brushes, they won’t fall apart or lose their shape when they get wet.

You can count on them to last, so you won’t have to keep buying new ones. Cleaning up after your project is a breeze with Wooster Alpha Brushes. Their synthetic bristles make them easy to clean, so they’ll be all set for your next project in no time.

Say goodbye to the hassle of cleaning up brushes that don’t cooperate. To sum it up, if you want the best brush for polyurethane that is tough, simple to maintain, and rare for a smooth, streak-free finish with water-based polyurethane, go for Wooster Alpha Brushes.

3. Benjamin Moore Ultra Spec

Benjamin Moore’s Ultra Spec brushes are the best for precise and effortless painting. These brushes work well with polyurethane and other finishes. What’s rare about them is their slanted shape, which helps you control your painting, especially when you’re doing detailed work. Thinking about using these brushes feels like a walk in the park, whether you’re doing short details or covering a big area.

Their secret is their clever design. The slanted bristles help you get into tight spots and handle tricky edges without a hassle—no need to worry about messy spots or uneven coverage. So, whether you’re a pro painter or just doing some DIY, Benjamin Moore’s Ultra Spec best brush for polyurethane will make your painting projects a breeze. Enjoy painting with precision, and make your finishing touches stand out with these amazing brushes.

4. Wooster Silver Tip

The Wooster Silver Tip brushes are pretty amazing. What makes them unique? Well, it’s all about their bristles. These brushes have a mix of white and silver nylon bristles that work well together. Think about it like this: When you use these brushes to paint, it’s smooth.

The bristles are magnets for paint, so it’s effortless to spread it evenly. This means your paintwork looks great, with no weird spots or unevenness. The secret is in those singular bristles. The white and silver nylon bristles are a superb team, making sure your paint goes on smoothly without any mess. So, why pick the Wooster Silver Tip brushes? Because they make painting clear, and you get a pro-quality finish every time.

No more struggling with uneven paint or messy work. With these brushes, your projects will be simpler, and your results will be fantastic. Try the Wooster Silver Tip, the best brush for polyurethane, and enjoy the easy, professional paint work they bring to your projects. Painting perfection is just a brush away.

5. Zibra Round Brush

Zibra’s Round Brush is unique for small work and detailed work. It’s a handy tool because it’s short and round, which means you can control it easily and be precise. It’s fantastic for getting into tight spots and corners, so it’s just what you need when you want to be extra careful and get things exactly right.

Whether you’re fixing up a piece of furniture, adding a protective layer to trim, or doing any work that needs close attention, Zibra’s Round Brush is a top pick. With this brush, you won’t have difficulty reaching tricky spots or accidentally using too much polyurethane.

The best part is that Zibra’s Round Brush helps you make smooth and careful strokes so your work looks neat and professional. You won’t have to worry about making it uneven when you use Zibra’s Round Brush. It’s the best brush for polyurethane for the work when you want things to look wonderful without any worry.

6. Purdy XL Elite Monarch

Purdy’s XL Elite Monarch brushes are famous for being good. They’re made with a mix of real bristles and man-made things, giving you the best of both paintings. These brushes are perfect for painting because they let out paint like a pro and make your project look smooth.

They’re fabulous for polyurethane projects. When you use XL Elite Monarch brushes, you get the benefit of real bristles for being accurate and man-made fibers for being tough. It’s a winning combo that makes your painting tasks a breeze.

So, whether you’re a DIY enthusiast or a professional painter, this is the best brush for polyurethane. When it’s time to paint, reach for XL Elite Monarch brushes and watch your projects shine.

7. Wooster Pro Nylon/Polyester

Let’s talk about Wooster’s Pro Nylon/Polyester brushes, the go-to tools for all your polyurethane projects. These brushes are flexible because they work with both oil-based and water-based coatings. They’re tough and can be cleaned up without a fuss, so they stay in fantastic shape.

What’s cool about these brushes is that no matter how much you use them, they keep their shape. Whether your project is small or big, Wooster has different sizes to pick from, so you always have the right brush. Whether you’re a pro or just like doing things yourself, you’ll like using Wooster’s Pro Nylon/Polyester brushes.

They make putting on polyurethane effortless and make your work look professional every time. You won’t have to worry about the best brush for polyurethane getting old and tired. These brushes will be your reliable helpers for all your polyurethane work. With Wooster’s Pro Nylon/Polyester brushes, you’ll easily get a fantastic finish on your polyurethane projects.

8. Purdy Nylox Glide

Purdy’s Nylox Glide brushes are a special type of paintbrush made from a mix of nylon and polyester bristles. These brushes are great for use with different kinds of paint, even polyurethane. What makes them rare is how well you can control them, and they make your paintwork look smooth and nice. The mix of nylon and polyester in these brushes makes them strong and wonderful at spreading paint evenly.

When you use them, you’ll find them easy to handle, which helps you paint just the way you want. Whether you’re a professional painter or enjoy DIY projects, these brushes are made to make your painting tasks easier and more fun. Then you pick Purdy’s Nylox Glide brushes; you’re choosing brushes that work well and are clear to use. They’re the top choice for making your painting projects look professional and make your surfaces look their best brush for polyurethane without too much effort.

9. Wooster Shortcut Angle Sash

Meet the Wooster Shortcut Angle Sash brush, your handy helper for slight work at home. This little brush is designed to make a painting or adding a clear coat called polyurethane in tight spots clear. Think about whether you’re fixing up a little piece of furniture or giving a cramped corner a fresh coat of paint. His best brush for polyurethane is your perfect companion.

It’s short and angled, so it’s good for getting into tricky spots and making sure your work looks neat. What’s cool about it is that it can reach places where big brushes can’t go. It’s like having a unique tool for those little pieces of work that needs a gentle touch. Whether you’re a DIY pro or just like doing short projects around the house, the Wooster Shortcut Angle Sash brush is to make things simple and leave your projects looking amazing. It’s the little tool that packs a big punch.

Conclusion

Finding the best brush for polyurethane doesn’t have to be tough work. We’ve learned a few things to help you make the right choice. First and foremost, it’s important to pick a brush with the right bristles. For polyurethane, synthetic bristles are perfect because they won’t wet up the finish, making your work smoother and less drippy—next, the brush size matters. Smaller brushes work great for small projects, while bigger ones are handy for larger surfaces.

Don’t forget the handle. A comfortable handle makes your painting experience more enjoyable and reduces hand strain. Look for one that suits your grip. Lastly, clean-up is important. After you finish using the brush, give it a good wash with the suggested cleaning liquid. This will help your brush last longer.

Don’t forget that with the right brush, your polyurethane projects will be smoother than ever.

October 17, 2023 0 comments
0 FacebookTwitterPinterestEmail
How to Distress Furniture With Chalk Paint
FireplacePaints

A Complete Guide to Distressing Furniture with Chalk Paint

by David Parker October 17, 2023
written by David Parker

Chalk paint is a fantastic way to change your furniture into stylish, old, attractive pieces that will give a new look to your home. Whether you have an old wooden chair that’s seen better days or a dull dresser that needs a makeover, Chalk paint can work easily.

You’ll learn what materials you need, how to prepare your furniture for painting, and the clear techniques to achieve that beautifully distressed appearance. We’ll keep it simple and effortless to follow so anyone can give their furniture a simple, vintage beauty. We’ll explain the steps in easy-to-follow instructions with which you can give your furniture a vintage look. So, grab your chalk paint, and let’s start distressing your furniture.

Be ready to change your home one piece of furniture at a time and find out about distressing furniture with chalk paint.

What is Distressing?

What is Distressing?

Making old-looking furniture is a trendy thing in home design. It’s a fun way to give your home a special, comfy feel. So, how does it work? Well, it’s about making furniture appear older and worn on purpose. First, you might sand it down or use tools to give it little bumps and scratches. You know how old things can have dents, scrapes, and paint coming off? We’re copying that.

Once it seems just right, you can give it a new coat of paint, stain, or a clear finish to keep it strong. The result? Distressing furniture with chalk-style paint seems to have been around for a while. It has many different styles, like that comfy farmhouse view or the cool industrial vibe.

What is Chalk Paint?

What is Chalk Paint? .jpg

Chalk paint is a special kind of paint made by Annie Sloan in the 1990s. It’s different from regular paint because it’s really easy to use. You don’t have to do hard things like sanding or satin finish priming before you use it. Think about how you want to make your furniture better without doing a lot of work. It’s a quick and easy way to change your furniture appearance.

It’s great for people who like DIY projects or want to make their homes nicer. You can use it on tables, chairs, and dressers. It dries to a pretty matte finish, making your things look classic and cool. So, if you want paint that’s clear to use and perfect for making your distressing furniture with chalk paint awesome, give chalk paint a try. It saves you time and effort, and the results are amazing.

The Unique Qualities of Chalk Paint

The Unique Qualities of Chalk Paint

1. Matte Finish

It dries in a soft, non-shiny way, making your furniture look comfy and classy. Think about your old wooden chair or table getting a nice new spot without any fancy things. What’s neat about chalk paint is that it’s not glossy at all. When you use it, your furniture won’t be all bright and reflective. Instead, it will have a smooth and plain finish. Do you know how velvet feels soft when you touch it? Chalk paint makes your furniture view soft. This kind of paint is great if you want your furniture to seem classic and fancy. It’s like adding a touch of fancy to your home things. So, if you want to make your distressing furniture with chalk paint look stylish with no worry, try chalk paint. And the best part? It’s effortless to use, so you’ll be a DIY pro in no time.

2. Excellent Coverage

Chalk paint is perfect for painting. It’s good at hiding flaws, and most times, you only need to use it once or twice to make things look awesome. Think about you have an old, scratched-up chair that doesn’t seem so good anymore. You can grab some chalk paint and put it on the chair. It hides all those scratches and makes the chair view fantastic. No need to keep painting it again and again. That’s what makes chalk paint great. It’s easy to use and saves you time and effort because you don’t have to do lots of coats like with some other paints. So, if you want to give your things a fresh new spot without all the worry, chalk paint is your top choice.

3. Minimal Brush Marks

Chalk paint is amazing for your distressing furniture with chalk paint. When you use it, those annoying brush marks pretty much vanish, leaving your piece looking smooth and even. Think about painting your favorite chair. Regular paint sometimes leaves streaks or brush marks that make it uneven and messy. But chalk paint is different. It’s specially made to make those brush marks almost disappear. So, when you finish painting, your chair (or whatever you’re sprucing up) will be incredibly smooth and fancy-free. It’s almost like the paint knows how to hide the flaws and create a perfect finish. So, whether you’re a DIY pro or just trying to paint for the first time, chalk paint is your go-to choice for a beautiful, brush-mark-free spot. Your furniture will love you for it.

4. Distressing Capabilities

Chalk paint is like a beauty wand for making things look old and cool. It’s perfect for giving things a vintage, worn-out style, like a shabby attraction. Consider whether you have a piece of distressing furniture with chalk paint or something you want to change. Chalk paint is the way to go. It sticks well to all sorts of things, and it’s simple to use. After you paint your things with chalk paint, you can make it look even better. You can use multi-purpose sandpaper or special tricks to make it seem like it’s been around for ages. That’s how you get that awesome, weathered look that’s popular in shabby, attractive style. Give it a shot, and you’ll be amazed at the cool change.

5. Adherence to Various Surfaces

Chalk paint sticks well to different things like wood, metal, plastic, and even fabric. It’s like a perfect paint that can make old things seem cool again. Consider whether you have an old wooden chair, a metal lamp, or a plastic flower pot. Chalk paint can make them all look nice without any trouble. What’s great about chalk paint is that it sticks really well and won’t easily chip or peel off. It’s effortless to use, so you can have fun fixing up your things. So, if you want to make your things new and fancy, grab some chalk paint and start painting.

Materials You’ll Need for Distressing Furniture

Materials You'll Need for Distressing Furniture 

Before you get started, gather the following materials

  • Furniture piece of your choice
  • Chalk paint (various colors, if desired)
  • Paintbrushes (round or flat)
  • Sandpaper (medium and fine grit)
  • Wax or topcoat (optional)
  • Clean cloth or rags
  • Drop cloth or newspapers to protect your workspace
  • Gloves and a mask (for safety)

Step 1: Choose the Right Furniture Piece

Choose the Right Furniture Piece

Pick a piece of wooden furniture like a table, chair, dresser, or cabinet. Chalk paint works great on these, but it also sticks well to metal and plastic. Now, let’s have some fun. Get the furniture ready by giving it a light sanding. Next, choose your favorite chalk paint color and start painting. Don’t stress about making it perfect; little flaws make it seem cool. After the paint dries, take some sandpaper and gently rub the edges and corners to make it look old-fashioned. You can also try using a damp cloth or wax to make it more antique. Before you know it, your distressing furniture with chalk paint will turn into a stylish, vintage-looking piece that everyone will admire.

Step 2: Prepare Your Workspace

Prepare Your Workspace

Cover your work area with an old cloth or newspaper to protect it from paint spills. It’s important to have fresh air in the room for the paint to dry correctly. You can open a window or use a fan if you need to. This distressing furniture with chalk paint will help keep your project clean and the room smelling nice. Painting can be messy, and paint drops might fall on your work surface. To avoid this, lay down a cloth or some old newspapers. This will catch any stray paint and keep your space clean. Also, make sure there’s good airflow in the room. This means having fresh air moving around. If your room feels thingsy, open a window or turn on a fan. This will help the paint dry properly and prevent any strong paint smells from building up. By doing these simple things, you can enjoy your painting project while keeping your workspace neat and the air in the room fresh and pleasant.

Step 3: Clean the Furniture

Clean the Furniture

Before you get into painting, it’s important to prep your furniture. Start by making sure it’s really clean, with no dirt, dust, or grease. Just use a damp cloth to wipe it down gently and eliminate any yucky things. Then, let it sit and air dry completely. This distressing furniture with chalk paint is important because it helps the paint stick better and gives you a nice, smooth finish that looks good. So, don’t rush. Be patient and let your furniture dry well before you begin painting. Doing this will ensure that your painting project turns out great, and you’ll be proud of your results. It might seem small, but taking these simple steps can make a big difference in how your furniture looks when you’re done. So, take your time, follow these easy steps, and enjoy the process of changing your furniture with a fresh coat of paint.

Step 4: Apply Chalk Paint

Apply Chalk Paint

Let’s give your furniture a fresh spot. Start by dipping your paintbrush into the chalk paint. Then, paint a thin and even coat all over the furniture. You can use one color or get creative by adding different colors for a cool, worn-out style. Let each coat of paint dry completely before adding the next one. This distressing furniture with chalk paint ensures your furniture makeover view is great. You don’t want the colors to mix or smudge while they’re still wet. While you wait for each coat to dry, you’ll see your furniture change right before your eyes. So, enjoy the process, and soon, you’ll have a fantastic, refreshed piece of furniture that’ll brighten up your space.

Step 5: Sand the Edges

Sand the Edges

Once your paint is dry, it’s time to give your furniture a unique, worn view. Get some sandpaper with a medium level of grit, and let’s begin. Focus on the edges, corners, and any fancy parts of your furniture. These are the areas that naturally get worn out over time. Now, Gently rub the sandpaper in small circles. This distressing furniture with chalk paint will make the paint look aged and weathered. As you do this, you’ll see the wood or old layers of paint underneath starting to peek through, giving your piece a cool, simple vibe. Don’t forget to take your time and not sand too hard. You don’t want to remove too much paint all at once. Step back occasionally to see how it’s progressing and ensure you get the vintage spot you want.

Step 6: Add More Distressing

Add More Distressing .jpg

If you want your furniture to look older, you can do it easily. All you need is some sandpaper. Look for the parts of your furniture that get used often, like the top and the front of the drawers. Now, take the sandpaper and gently rub it on those spots. Don’t push too hard. Just let the sandpaper do its thing. As you keep going, you’ll start to see the wood underneath showing through, giving your distressing furniture with chalk paint that older appearance. But don’t forget, don’t rush it. You can always do more later if you want. Once you’re happy with how it seems, you’re all set. It’s an easy way to give your furniture that vintage view. No need for fancy tools or complicated techniques, just some sandpaper, a little patience, and your creativity. You’ll be amazed at the change you can achieve with such a simple trick.

Step 7: Protect Your Finish

Protect Your Finish

To keep your paint looking nice and shiny, you can use wax or a topcoat, but you don’t have to if you don’t want to. These things make your paint stronger and shinier. First, choose either wax or a topcoat. You can get them at the store. Then, read the instructions on the product. It’ll tell you how to use it, so do what it says. Use a brush or cloth to put the wax or topcoat on your paint. Ensure you cover everything, and try to make it thin and even. Now, the most important part is to let it dry. The instructions will tell you how long it takes. This distressing furniture with chalk paint makes sure it works right. Once it’s dry, observe at your work. Your paint should be stronger, and it should be spot-shiny. That’s all there is to it. These simple steps help protect your paint so it stays nice for a long time.

Step 8: Finish and Reassemble

Finish and Reassemble

Once your furniture is all dry and has that nice, worn appearance. It’s time to put it back together. If you took off any pieces like drawers or knobs during the process. First, check that everything is dry and clean. Get your basic tools like a screwdriver or a hammer, depending on how your distressing furniture with chalk paint is held together. If you have instructions, follow them. If not, use your common sight. Look for the holes or spots where the pieces fit, and gently attach them so you don’t mess up the distressed finish. Make sure everything is clean and in place. Finally, spot over your reassembled furniture to make sure it looks the way you want it to. Fix anything that’s not right. Following these steps, you’ll have your nicely worn furniture all put together and ready to use in no time.

Conclusion

Distressing furniture with chalk paint is a simple and creative way to give your old pieces a new and minimal look. All you need are some basic supplies like chalk paint, sandpaper, and a few brushes. First, clean your furniture thoroughly and apply a coat of chalk paint in the color of your choice. After it dries, use sandpaper to gently rub away some of the paint in areas that would naturally wear over time.

There are no strict rules when distressing with chalk paint. You can choose to distress just a little or a lot, depending on how you want it to appear. You can get creative with different paint colors and finishes to match your style. So, don’t be afraid to give it a try.

It’s a budget-friendly and fun way to improve your home decor while preserving the comfy, aged view that many of us love.

October 17, 2023 0 comments
0 FacebookTwitterPinterestEmail
Paint for Veneer Furniture: How To and Tips and Tricks for A Smooth & Durable Finish
FurniturePaints

Best Paint for Veneer Furniture: Expert Tips for The Perfect Finish

by Marco Bianchi October 17, 2023
written by Marco Bianchi

Veneer furniture is popular because it’s affordable and flexible, but with time, it can begin to seem down and damaged. Veneer furniture, often made with a thin layer of wood glued onto a strong base, can be a little difficult to paint if you don’t know the right steps. But worry not; we learn to make it as easy as possible.

Find the simple and plain process of painting veneer furniture to achieve a smooth and long-lasting finish. We’ll find all the basics, from choosing the right paint and tools to preparing your furniture for painting. We share some handy tips and tricks to ensure your paintwork looks professional and lasts for years to come. We’ll find everything you need to know about painting veneer furniture. Be ready to create a fresh, durable look with your furniture shining like new.
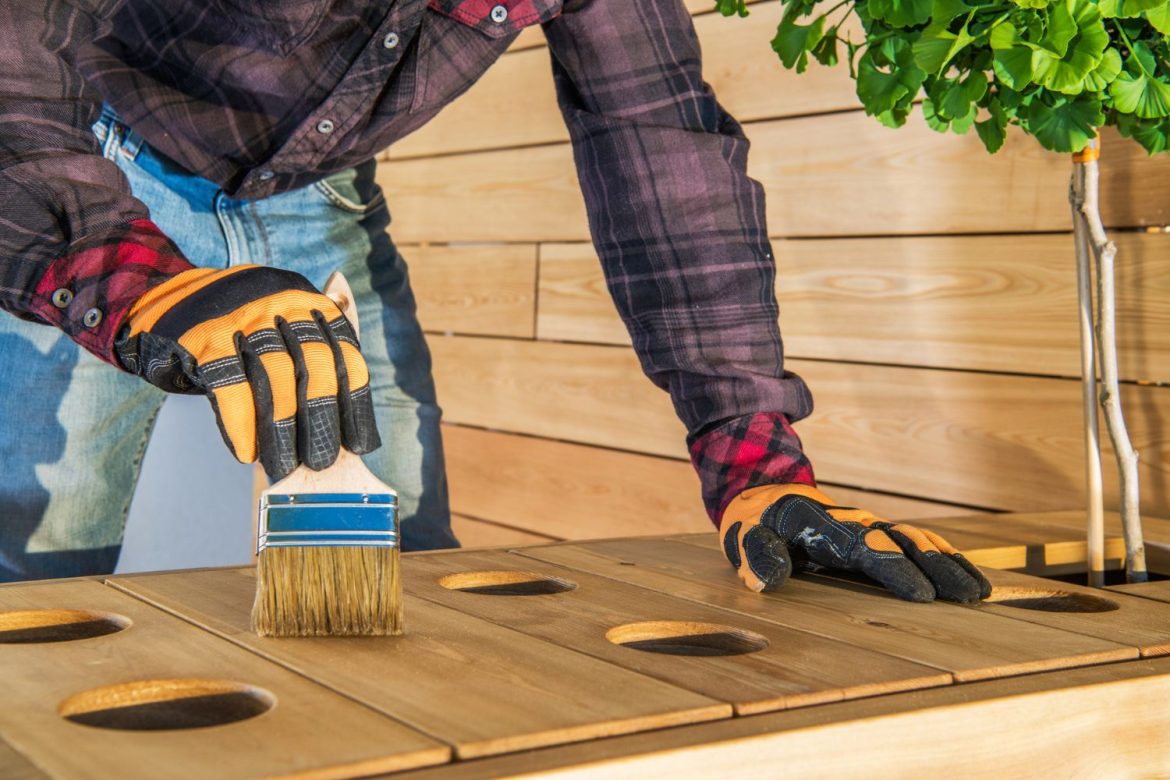
Let’s get started and find paint for veneer furniture.

Preparing Your Veneer Furniture

Preparing Your Veneer Furniture .jpg

1. Clean Thoroughly

Before you start painting, it’s important to make your furniture nice and clean. Get clear of all the dust, dirt, and any gross things you might find. First, mix some mild soap with water. Then, use that soapy mix to wipe your furniture all over gently. Following that, wash it with fresh water. Now, it’s time for the waiting phase. Leave your furniture to dry completely. This step is really important because it helps the paint stick better. Once your furniture is clean and dry, it’s all set for a fresh coat of paint for veneer furniture. Doing this cleaning work will make sure your project spot is amazing when you’re all done. So, go and enjoy your painting project. Make your furniture view fantastic.

2. Sanding

Before you start painting on the veneer, give it a good sanding. This step is important to help the paint stick well. You only need some fine sandpaper, preferably around 150-220 grit. Then, gently sand the whole piece. This makes the surface a little rough so the paint can grab onto it. But be careful not to sand too hard. You don’t want to damage the veneer. So, take it easy, and your paint for veneer furniture will stay put nicely. Taking your time and being gentle during the sanding process ensures that your paintwork will stick securely, just like glue. So, remember that a little sanding before painting can make a big difference in the final result. It gives your veneer project a polished and long-lasting finish that seems great.

3. Fill Imperfections

If you want to make your furniture seem better, follow these effortless steps. First, check your furniture for bumps, scrapes, or holes. If you find any, don’t worry; we can fix them. Use something called wood filler. Put it in the bumps, scrapes, or holes to fill them up. Then, wait for it to dry. It might take a few hours, but it’s worth it. When the wood filler is dry, it’s time to make it shiny. Get some sandpaper and gently rub it on the fixed spots. Keep rubbing until they’re nice and even with the rest of your furniture. That’s it. Your furniture will seem new, and everyone will be impressed. It’s a clear way to make your furniture better and more beautiful.

4. Prime the Surface

If you want your veneer furniture to look fantastic when you paint it, follow these simple steps. Start by getting a good wood primer. Think of it as a special base coat that helps the paint stick and hides the lines in the wood. You can apply it with a brush or use a spray can. It’s easy. Just follow the instructions on the label, especially how long it takes to dry. Using the right primer is important. It ensures your paintwork stays put for a long time without chipping or coming off, so when you’re painting veneer wood, don’t forget that the first coat of primer is important.

Choosing the Right Paint

Choosing the Right Paint

1. Latex or Oil-Based Paint

When you’re choosing paint for veneer furniture, it’s important to understand the differences. Latex paint is like water-based paint. It’s clear to clean with water, and it’s not very harmful. It dries quickly and doesn’t smell bad, so it’s amazing for indoor projects. On the other hand, oil-based paint sticks better and lasts longer. It’s amazing for furniture that gets a lot of use, and it makes the surface polished. But, you need special liquids to clean it, which has a stronger smell. Think about where you’re painting, how good you are at painting, and how you want to clean up when you’re deciding between the two types of paint.

2. Acrylic Paint

Acrylic paint is a perfect pick for sprucing up veneer furniture. It’s similar to water-based paint but sticks well and lasts a long time. You can find acrylic paint in many colors, and it’s effortless to use and dries quickly. You can even mix it with water or special acrylic things to make it seem old or worn on purpose. It’s important to put a clear coat on top of your acrylic-painted furniture to keep it safe and looking wonderful for a long time. So, go and use acrylic paint for veneer furniture to give your furniture a fresh, cool appearance.

3. Spray Paint

Spray painting veneer furniture can be useful for small projects and fancy designs. If you do it right, it’ll be nice and pro. To start, make sure you get the surface ready by sanding it and putting on some primer. This helps the paint stick well. When you’re spray painting, be careful and work in a place with fresh air. This way, you won’t make a mess, and you’ll stay safe. With the right preparation and care, spray painting can be a great way to make your veneer furniture seem awesome. Whether you want to give a new view to an old piece or add your personal touch, spray paint can help you do it. So, grab your gear, pick a perfect spot, and get creative as you change your veneer furniture with a fresh coat of paint for veneer furniture. It’s easy and fun.

4. Quality Matters

If you want your veneer furniture to seem amazing, don’t be stingy with your paint and primer. Get the best paint for veneer furniture and primer. That’s the trick. The good things stick well, won’t chip or peel, and leave a smooth finish. You’ll be fixing it or redoing it way too much. So, pick brands that people trust for being strong and having cool colors. When you do that, your veneer furniture will seem perfect and stay that way for a long time.

Applying the Paint

Applying the Paint .jpg

1. Use Thin Coats

When you paint, using thin layers of paint is better than using thick ones. Using thin layers is great because they dry fast, so you won’t have to wait long. They’re less likely to create those annoying drips and streaks that can mess up your project. If you use several thin layers, your paint for veneer furniture work will look polished and shiny. Thin layers are a wonderful choice: they dry fast so that you can move on with your project sooner. Thick layers, on the other hand, take longer to dry and can test your patience. Thin layers also give you better control over your brush or roller, making it easier to avoid those frustrating drips that can ruin a shiny surface when you put on several thin layers, fixing imperfections and giving it a professional appearance.

2. Proper Brushing Technique

For the best painting results, you want to make sure you’ve got the right brush. If you’re using latex paint, grab a synthetic brush. If you’re using oil-based paint, go with a natural brush. When you’re painting, try to follow the wood’s lines, you know, those lines you see on the wood. Now, another thing to keep in mind is don’t overdo it with the brush strokes. If you use too many, your surface will be bumpy and uneven. Instead, keep it simple and steady for a nice, smooth finish. So, these two things, the type of brush you need depends on your paint for veneer furniture, and always paint in the same direction as the wood lines. With these basics in mind, you’ll be ready for a successful painting project.

3. Sand Between Coats

Once your paint is dry, you can make it shiny for the next coat. Just get some fine sandpaper and gently rub the painted area. This gets clear of any little problems and makes it nice and even. But the important part is that before you put on more paint for veneer furniture, use a clean cloth or paper towel to wipe away all the dust from sanding. This way, your new coat will go on smoothly and won’t have any bumps or specks. It’s all about the small things that make your paintwork view great. So, sand, wipe, and do it again until you like how it is viewed. Your walls will be nice and polished.

4. Topcoat for Protection

To make your furniture stronger and protect it from everyday use, follow this clear step. After your paint for veneer furniture dries completely, add a clear top layer like polyurethane or polyacrylic. It’s see-through and tough, guarding your painted surface from scratches, spills, and regular accidents. Using the topcoat is effortless. Once your paint is all dry, paint on a thin, even layer of the clear topcoat. Let it dry, and you’re finished. Now, your furniture can handle all the bumps and scrapes of daily life. So, this simple trick to keep furniture seems perfect for a long time. Put on that clear topcoat and give your furniture the safety it needs.

Final Tips and Tricks

Final Tips and Tricks

1. Prime

If you want to make your veneer furniture view wonderful with new paintwork, do these easy steps. First, get some primer, which is special wood paint. You have the option to apply it either with a brush or by using a spray. Make sure you spread it evenly, not too thick or too thin. Now, be patient and let the primer dry. Typically, it requires about one to two hours. This step is important because it makes the paint for veneer furniture ready for painting. Once the primer is completely dry, have fun and paint your furniture in any color you like. It can be a bright color or a soft one, your choice. Follow these clear steps, and you’ll turn your veneer furniture into something fantastic in no time. Getting it ready and waiting for things to dry is the key to making your furniture spot amazing with new paintwork. Enjoy your freshly painted furniture.

2. Thin Coats

When you’re painting veneer furniture, keep it plain and use thin layers of paint. Don’t go for thick coats. They cause messy drips and make your finish all uneven. Instead, follow this clear plan: put on one thin coat, let it dry completely, and do another. It may take a little longer, but the benefits are definitely worth the wait. You’ll have a shiny, pro-looking finish with no clumps or bumps. Your paint for veneer furniture work will last longer and stay looking great. When you’re cleaning up your veneer furniture, go slow and steady with those thin coats. Your furniture will seem awesome, and everyone will be impressed.

3. Dry Times

To make your veneer furniture view good, take it slow and follow these easy steps. First, put on a coat of primer or paint that’s made for veneer furniture. After that, don’t rush. Let it dry completely. This might take around 2 to 4 hours, but you can always check the paint can for the exact time. If you try to hurry, you won’t get a nice finish. It might end up feeling sticky or have smudges. So, be patient, let it dry well, and your furniture will turn out awesome. It’s worth waiting for a beautiful finish that makes your furniture shine like it’s new. Therefore, feel free to proceed at your own pace and savor the experience.

4. Sanding

Sand between layers of paint or finish. After you’ve put on a coat of paint, let it dry completely. Then, get some sandpaper that says 220 on it. It’s not hard to find; it seems the number 220 on the sandpaper. Now, take that sandpaper and gently rub it on the painted surface. Don’t press too hard; just let the sandpaper do its work. This paint for veneer furniture will make the surface polished and clear of any bumps or drips. Don’t forget to be gentle while doing this. You don’t want to damage the surface under the paint. After you’ve sanded, use a clean cloth or a special tack cloth to wipe away the dust. This gets clear of the sanding things so that the next coat of paint or finish goes on nicely. Keep doing this after each coat dries, and your project will be awesome when you’re done. So, always remember to sand between coats to make your project spot its best.

5. Protect

If you’ve painted your veneer furniture and want it to last, wait about a day after painting, then put on a clear coat. This clear coat protects your furniture from getting scratched, stained, or worn from everyday use. You can choose between a not-shiny (matte) or shiny finish, depending on your way. It’s all about what you like. By doing this simple step, you’ll make sure your painted veneer furniture stays nice and safe. This paint is for veneer furniture. You can enjoy it for a long time without any worries. It’s an easy way to care for your furniture and observe it well.

Conclusion

Painting veneer furniture can be a simple and rewarding project if you follow some plain tips and tricks. By getting the surface ready, picking the right paint for veneer furniture, and putting it on with care, you can make your furniture smooth and strong. This will totally change your furniture and make it brand new.

First, don’t forget to clean and sand the veneer surface to create a shiny surface for your paint. Use a primer to help the paint stick better and prevent it from chipping or peeling. When it comes to choosing paint, select a high-quality water-based or oil-based paint that suits your needs. Apply the paint evenly in thin coats, allowing each coat to dry completely before adding another. Lastly, consider adding a clear topcoat for extra protection and a polished appearance.

Follow these effortless steps, and you’ll have your veneer furniture looking brand new in no time.

October 17, 2023 0 comments
0 FacebookTwitterPinterestEmail
Can You Really Spray Paint Glass? +10 Best Spray Paint for Glass
Paints

Can You Really Spray Paint Glass? +10 Best Spray Paint for Glass

by Marco Bianchi August 22, 2023
written by Marco Bianchi

Have you ever tried spray paint for glass? If not, then get stressed. There are a few things you should keep in mind to ensure that the paint adheres properly and doesn’t chip or peel off. First, make sure to thoroughly clean the glass with rubbing alcohol or vinegar to remove any dirt, dust, or fingerprints.

Then, lightly sand the surface of the glass with fine-grit sandpaper to create a rough texture that the paint can grip onto. Finally, use a spray paint specifically designed for glass or ceramic surfaces, and apply several thin coats, allowing each coat to dry completely before applying the next one.

With these tips in mind, you should be able to achieve beautiful and long-lasting painted glass!

Steps to Follow to Spray Paint Your Glass Properly

Steps to Follow to Spray Paint Your Glass Properly

Step 1: Cleaning Your Glass Properly

When it comes to spraying paint onto glass, the process can be a bit tricky. However, with a few simple steps, you can achieve a beautiful and long-lasting painted glass piece. Firstly, it’s important to clean the glass surface thoroughly with rubbing alcohol or vinegar. This is necessary to remove any dirt, dust, or fingerprints that can interfere with the paint’s adhesion.

Step 2: Removal of Residue

Once the glass surface is clean, you should proceed to sand the surface with a ne-grit sandpaper lightly. This will create a rough texture that the paint can grip onto, which is essential for proper adhesion. After sanding, it’s important to wipe the glass with a damp cloth to remove any sanding residue.

Step 3: Preparation of Paint

To prepare your paint for spray painting a glass, you will need to follow a few simple steps. First, choose a paint that is designed for use on glass surfaces. Next, mix the paint thoroughly to ensure that it is evenly blended and free of any lumps or clumps. Then, pour the paint into your spray gun or airbrush and adjust the settings according to the manufacturer’s instructions. Finally, test the paint on a small, inconspicuous area of the glass to ensure that it adheres properly and dries evenly. With these steps completed, you should be ready to begin your spray painting project with confidence.

Step 4: Apply the Paint

Now comes the fun part – applying the paint! It’s important to use spray paint that is specifically designed for glass or ceramic surfaces. This type of paint is formulated to bond with glass surfaces and will provide a long-lasting finish. When applying the paint, it’s best to apply several thin coats, allowing each coat to dry completely before applying the next one. This will help to prevent the paint from dripping or running. It’s also important to remember that temperature and humidity can affect the paint’s drying time.

Step 5: Final Touches

Make sure you are painting in a well-ventilated area and follow the manufacturer’s instructions for optimal drying time. Once the paint has dried completely, you can add any additional details or designs with a paint marker or brush.

Step 6: Summing Up

In summary, spray painting glass is definitely possible and can result in a beautiful and unique piece of art. However, it’s important to follow the proper steps to ensure proper adhesion and a long-lasting finish. With a little patience and attention to detail, you can create a stunning painted glass piece that you can enjoy for years to come.

Precautions to Take While Spray Painting Your Glass

Precautions to Take While Spray Painting Your Glass

When spray painting glass, it’s important to take several precautions to ensure that the process is safe and successful.

Here are five important precautions to take:

  • First, make sure to work in a well-ventilated area to avoid inhaling any fumes. It’s also important to wear gloves and a mask to protect your skin and lungs.
  • Before spraying, clean the glass thoroughly to ensure that the paint adheres properly.
  • Additionally, avoid spraying too close to the glass to prevent drips and uneven coverage.
  • Finally, allow the paint to fully dry and cure before handling the glass to avoid any smudging or damage.
  • By taking these precautions, you can achieve a beautiful and lasting finish on your glass projects.

Problems that Can Occur While Painting Your Glass

Problems that Can Occur While Painting Your Glass

When painting glass, it’s important to be aware of some of the common problems that can arise.

  • An issue that many people encounter is streaks or smudges on the surface of the glass. This can be caused by a variety of factors, including using the wrong type of paint or not properly preparing the surface of the glass before painting.
  • Another issue that can arise is paint that chips or peels off over time. To avoid this problem, it’s important to use high-quality paint and apply it evenly and in thin layers.
  • It is important to be aware of the potential for the paint to run or drip, which can be particularly problematic if you’re working on a vertical surface. To avoid this problem, be sure to use a steady hand and work slowly and carefully.

With a little bit of care and attention, however, it’s possible to create beautiful, long-lasting painted glass pieces that you can enjoy for years to come.

How to Choose a Spray Paint for Your Glass?

How to Choose a Spray Paint for Your Glass

When choosing spray paint for your glass, there are a few things to consider.

  • Make sure you choose a spray paint that is specifically designed for glass surfaces. This will ensure that the paint adheres properly and doesn’t peel or chip off. Look for paint that is labeled as “glass paint” or “glass enamel.”
  • Next, consider the color and finish you want for your glass. Some spray paints come in a variety of colors and finishes, from matte to glossy. Think about the overall look and feel you want to achieve and choose a paint that matches your vision. It’s also important to consider the durability of the spray paint. If you’re painting a glass surface that will be exposed to the elements or handled frequently, you’ll want to choose a paint that is designed to withstand wear and tear.
  • Finally, make sure to read the instructions on the spray paint can carefully before using it. Some paints require multiple coats or specific drying times, so be sure to follow the instructions to ensure the best results.

By keeping these factors in mind, you can choose the right spray paint for your glass and achieve a worthy viewing glass for your home!

Types of Paint that Can Be Used for Spray Painting Your Glass

Types of Paint that Can Be Used for Spray Painting Your Glass

When it comes to spray painting glass, there are a variety of options available. Some popular choices include using:

  • Frosted glass spray paint for a subtle, opaque finish
  • Metallic spray paint for a bold, shiny look
  • Stained glass spray paint for a colorful, translucent effect
  • You can also choose between glossy or matte finishes, depending on your preference. Before you begin, make sure to thoroughly clean and prepare your glass surface for the best results by following the steps given above.

Awesome Spray Paint Suggestions for Your Glass

1. Krylon K09055007 Sea Glass Paint

Krylon K09055007 Sea Glass Paint

The Krylon spray paint comes in sea foam color with seven other color options. It has a gloss finish. This item comes with a volume of 12 quarts. This product is recommended to be used on indoor glasses for the best results. With this sea glass spray paint, your indoor glass is going to have a beautiful frosted look. This seafoam paint will give your glass a semi-translucent look and the sea glass finish that brings the beach indoors. You can spray this sea green foam on vases, glasses, platters, and more for an absolute dreamy powdery look. This spray paint takes 15 minutes to dry and can cover a surface of 25 square feet.

2. Door and Window Shading Frosted Glass Paint

Door and Window Shading Frosted Glass Paint

The hazy frosted glass spray paint is waterproof and UV resistant. The specialty of this spray paint is that it is a window privacy spray for all smooth and flat glass surfaces. This spray paint comes with a glass finish. The shading frosted glass paint by Poiu comes with five major benefits. First, Privacy is protected as the frosted glass paint can not clearly see the indoor situation on the surface, giving a very vague feeling. Second, UV Protection, this paint effectively reduces annoying glares by up to 80% and blocks out UV rays by up to 96%. Third, it can be applied to both smooth and flat glass surfaces. Fourth, it is best for DIY glass decoration activities. Fifth, it reduces renovation costs as it helps you to decorate your glasses at home at lower costs rather than hiring any professionals for that.

3. Rust-Oleum 331171 Painter’s Touch 2 X Ultra Cover Spray Paint

Rust-Oleum 331171 Painter’s Touch 2 X Ultra Cover Spray Paint

This spray paint comes in 127 color options, 13 size options, and 8 style options for you to choose from, whichever one looks perfect for your glass type, size, and color. This spray paint by Rust-Oleum that you can see above is of High gloss white color. The finish type of this spray paint is glossy. The special features of this spray paint are that it has a low odor and it is chip resistant. The surface recommendations for this spray paint are metal, ceramic, plastic, and wood. It comes with an oil-based formula which makes it low in odor, chip resistant, and long-lasting protection. It dries to touch in 20 minutes and can cover up to 12 sq. feet per can. This durable formula provides excellent hide and goes on smoothly on the surface.

4. Rust-Oleum 7701830 Stops Rust Spray Paint

Rust-Oleum 7701830 Stops Rust Spray Paint

Rust-Oleum’s Spray paint comes in 70 color options, 9 size options, and 4 style options. This one shade of Rust-Oleum spray paint is of gloss crystal clear color. The paint type of this paint is enamel. It can be painted on the glass surface and also on metal and wood surfaces. This spray paint has weather and corrosion coating that protects exterior and interior surfaces like wood, metal, concrete, etc. It has an oil-based formula that provides a durable protective coating with excellent rust prevention. It dries to touch in 2 to 4 hours and covers up to 15 sq. ft. It has excellent resistance to abrasion, fading, and chipping. It has a glossy finish that provides fresh shine to the surfaces.

5. Krylon K09028000 Stained Glass Paint

Krylon K09028000 Stained Glass Paint

As someone who enjoys adding unique touches to my home decor, we recently discovered Krylon K09028000 stained glass paint. This paint is perfect for creating a stained glass effect on glass surfaces. We were impressed with how easy it was to use, and the finished product looked stunning. The paint provides a translucent finish that lets light shine through, creating a beautiful and colorful effect. We also appreciate that it’s durable and long-lasting, so we don’t have to worry about it fading or peeling over time. Overall, we highly recommend Krylon K09028000 stained glass paint to anyone looking to add a creative touch to their home decor.

6. Rust-Oleum 245221 Universal All-Surface Metallic Spray Paint

Rust-Oleum 245221 Universal All-Surface Metallic Spray Paint

Rust-Oleum 245221 universal all-surface metallic spray paint is a great choice for anyone looking to add a metallic touch to any surface, including glass, metal, wood, concrete, masonry, and more. With its advanced formula, it provides superior coverage and durability, ensuring that your project will look great and last for a long time. The paint dries quickly, and the metallic finish is smooth and shiny, helping your project stand out from the crowd. Rust-Oleum 245221 universal all-surface metallic spray paint is also versatile and can be used for indoor and outdoor projects. It’s a great option for adding a touch of glam to furniture, decor, or even outdoor fixtures like mailboxes or planters.

7. Seymour 16-083 Good GripSlip Resistant Coating Spray

Seymour 16-083 Good GripSlip Resistant Coating Spray

Seymour 16-083 Good Grip Slip Resistant Coating Spray is perfect for anyone looking to add slip resistance to surfaces like ramps, stairs, and floors. Its advanced formula makes it easy to apply and provides a long-lasting, durable finish that will help prevent slips and falls. The coating dries quickly, and the surface is smooth and slip-resistant, making it safe for people to walk on even when it’s wet. Seymour 16-083 Good Grip Slip Resistant Coating Spray is also versatile and can be used for indoor and outdoor projects. It’s an excellent option for anyone looking to improve the safety of their home or workspace.

8. Krylon K03104777 Lemon Yellow Fluorescent Paint

Krylon K03104777 Lemon Yellow Fluorescent Paint

Krylon Lemon Yellow Fluorescent Paint is perfect for adding a pop of bright color to any project. It has a fluorescent finish that really stands out in natural light. The fast-drying formula makes it easy to apply and provides excellent coverage on a variety of surfaces, including wood, metal, and plastic. The Krylon Lemon Yellow Fluorescent Paint is also durable, providing long-lasting color that won’t fade or chip easily. It’s great for use on both indoor and outdoor projects. Overall, if you’re looking to add a vibrant touch to your next project, the Krylon Lemon Yellow Fluorescent Paint is a great choice.

9. Krylon K05223000 Chalkboard Brush-On Paint Black

Krylon Chalkboard Brush-On Paint Black is a high-quality paint that is perfect for creating a chalkboard surface on a variety of indoor surfaces. This versatile paint dries to a smooth, hard finish that is perfect for writing and drawing on chalk. It is easy to apply, and the fast-drying formula makes it perfect for use on a variety of surfaces, including wood, metal, and plastic. This paint is long-lasting and durable, providing a surface that is easy to clean and maintain. It is also water-resistant, making it an excellent choice for use in kitchens, classrooms, and other high-traffic areas. Overall, if you’re looking for reliable and easy-to-use chalkboard paint, Krylon K05223000 Chalkboard Brush-On Paint Black is an excellent choice.

10. Brilliant Spray Paint Krylon Metallic Copper

Brilliant Spray Paint Krylon Metallic Copper

Looking for a high-quality spray paint that will add a touch of brilliance to your next project? Look no further than Krylon General Purpose Spray Paint in Metallic Copper. This versatile paint is perfect for use on a wide range of surfaces, including metal, wood, plastic, and more. With a smooth, even finish and long-lasting formula, this spray paint is sure to provide the durable and reliable coverage that you need. Plus, with its eye-catching metallic copper color, it’s sure to add a touch of elegance and sophistication to any project. So why wait? Choose Krylon Document Number 1 General Purpose Spray Paint in Metallic Copper today and take your projects to the next level!

Wrapping It Up

Last but not least, spraying paint on glass is a great way to add some color and creativity to your home decor. However, it’s important to choose the right spray paint for the job. After researching and testing various options, we’ve determined that the best spray paint for glass is Rust-Oleum Specialty Frosted Glass Spray Paint. This paint is specifically designed for glass surfaces and creates a frosted effect that looks beautiful and unique.

It’s also easy to use and dries quickly, making it a great option for both novice and experienced DIYers. With the right spray paint, you can transform any glass surface into a work of art that will impress your guests and add a personal touch to your space.

So, go ahead and give it a try – you might just discover a new hobby or passion!

August 22, 2023 0 comments
0 FacebookTwitterPinterestEmail
Accessible Beige Sherwin Williams Paint Color (Review)
Paints

Accessible Beige Sherwin Williams Paint Color (Review)

by Marco Bianchi August 17, 2023
written by Marco Bianchi

Accessible Beige Sherwin Williams paint color is a beautiful warm-toned versatile paint color. It is one of the best paint colors for people who want something modern and subtle for their house. Well, color is one of the most preferred colors when it comes to interior design.

This versatile color has its own texture and can be used in various parts of the house. One can use it in the kitchen, living room, bedroom, or even for house exteriors. It can be complemented with other elements in the house.

Therefore, if you want to know more about Accessible Beige Sherwin Williams Paint Colour, then keep on reading.

What is Accessible Beige Sherwin Williams Paint Colour?

What is Accessible Beige Sherwin Williams Paint Colour

One might think that understanding the concept behind accessible beige paint color is quite simple because, unlike other neutral colors, it is just basic beige. However, it is a light-toned, warm, greige color that is often seen in markets for interiors. This color has a little tint of grey in it, and if you sum it up, then you can see more beige tones in this color. It might appear different depending on the exposure it gets. The facing of the room and lighting can change the accessible beige paint color slightly. If you are someone who wants a grey-toned paint color with warm beige tones, then this one is for you.

Is It a Warm-Toned or Cool-Toned Colour?

Is It a Warm-Toned or Cool-Toned Colour

Accessible Beige Sherwin William paint color is a neutral warm-toned paint color. It falls under the warm tone category and appears to be more yellow than other grey and green paint colors. However, it does not have complete tones of yellow color, so you cannot consider it a complete beige color.

Accessible Beige is perfect for people looking for earthy tones. Usually, it can easily be predicted if a color is warm-toned or cool-toned by looking at it. At the same time, there are certain shades that are not so easy to figure out. You can simply compare Accessible Beige Sherwin Williams with agreeable green as it is greyer in color and cool-toned.

What Are the Undertones of Accessible Beige Paint Colour?

What Are the Undertones of Accessible Beige Paint Colour

Each and every paint color has its own hue family. In similar words, every color has its own respective space on the color wheel. These colors get their place on the color wheel as per their dominant light ways. Accessible Beige Sherwin Williams has an LCh hue angle of 88.052. With this degree, it falls under the yellow hue family. However, it does not mean it is a complete yellow color.

Every color on the color wheel has undertones; some of them have similar undertones, whereas some are quite complex to understand. Accessible Beige has quite noticeable yellow undertones. Additionally, it also has a sneaky undertone that is green in color. If a room has a southern exposure, then one can see clear green undertones of Accessible Beige Sherwin Williams.

What is the LRV Value of Accessible Beige?

What is the LRV Value of Accessible Beige

LRV, also known as Light Reflectance Value, means how much light color can reflect back. Colors with 100 LRV are the most reflective colors, whereas 0 is the least reflective. In other words, pure white has an LRV of 100, whereas black has 0. Accessible Beige Sherwin Willaims has an LRV of 58.

With a Value of 58, it can be said that it reflects the average amount of light in the room. When you look at the LRV number, you will suspect that it is more of a light color which ranks high on the scale. When the paint color gets bright sunlight, unlike other shades, it starts to wash out.

How Does Accessible Beige Affect the Room Exposure?

How Does Accessible Beige Affect the Room Exposure

Basically, exposure means how the color appears when the light comes from various directions in a room. Accessible Beige is a less colorful paint color due to which it appears grey in north-facing rooms or east-facing morning light. However, in a southern-facing or west-facing room, it looks subtle beige. To know about the exposure of Accessible Beige Sherwin Williams, read the below-mentioned classification.

  • Accessible Beige and South-Facing Room: If you have a south-facing room, then accessible beige appears to be soft and neutral beige color. It is no little grey tones to it. Moreover, it will not become very warm, which will hurt your eyes.
  • Accessible Beige and North-Facing Room: In a north-facing room, you can expect accessible beige to appear more in grey tones. It is perfect for people who want a warm grey-toned color that looks beautiful.

Colors that Complement Accessible Beige Sherwin Wiliams

Colors that Complement Accessible Beige Sherwin Wiliams

Just like any neutral color, Accessible Beige Sherwin Williams can also be complemented with many different colors. One can find many colors that will look stunning with them. The best tip one can look into while learning about complementing colors in similar tones and LRVs.

If you ask, then some of the best combinations of Accessible Beige Sherwin Williams are either with other earth-toned shades or bright colors. Some of the best earth-toned colors that work perfectly are browns and greys. However, brighter shades with green and blue in them also look beautiful.

Some of the other colors to mention for your reference are SW Sea Salt, SW Alabaster, SW Dovetail, and SW Urbane Breeze. You can simply pair these colors with each other, or you can add little elements in your room with similar tones. They can be easily paired with each other for living rooms, bedrooms, and kitchens.

Where Accessible Beige Sherwin Williams Colour Be Used?

Where Accessible Beige Sherwin Williams Colour Be Used

Accessible Beige Sherwin Williams Paint Colour can be used in various places in the house. It is a versatile shade, and you can use it anywhere in your house, be it your kitchen, living room, or bedroom.

Here are some examples of how you can use Accessible Beige paint color in your house.

  • Living Room: Living Rooms are one of the most used areas in the house. One spends most of their time in living rooms while watching movies or when guests come. If you want to keep your living room minimal and subtle, then you can use AB as your living room color. Pair it with different color and texture elements like browns and dark green shades for more visibility.
  • Kitchen: Getting a light-colored and neutral-toned kitchen is on most people’s lists these days. It is classic and appears to be bigger and spacious when you get your kitchen walls painted with Accessible Beige paint color. You can even get cabinets and countertops with matching or dark colors.
  • Bedroom: When it comes to bedrooms, they should have a more cozy and comfortable vibe. It should be something that keeps you happy and positive. You can do so by getting a neutral palette in your room. Complement other colors as well with this for a more modern vibe.

Comparison of Accessible Beige with Other Paint Colors

Accessible Beige is a neutral beige color that is often compared with other shades that have similar shade patterns. Some of the comparisons are quite common and compared widely.

Hence, keeping the same in mind, here are a few popular comparisons you must know today.

1. Accessible Beige Sherwin Williams and Benjamin Morre Revere Pewter

 Accessible Beige Sherwin Williams and Benjamin Morre Revere Pewter

People often say that Accessible Beige and Revere Pewter are almost similar, and there is no difference between them. Both of the colors have their own element and color. However, if you see both of them side by side, you will see they are different from each other. It is difficult to say which one is better. If you want some with more warm tones, then choose AB.

Some of the differences between the two of them are mentioned below.

  • Accessible Beige Sherwin Williams is warmer than Revere Pewter.
  • The LRV of Accessible Beige is higher than the other one, with 58 and 55.51, respectively.
  • Accessible Beige has more grey undertones and Beige colors than others.

2. Accessible Beige Sherwin Williams and Balanced Beige

Accessible Beige Sherwin Williams and Balanced Beige

One of the most popular and often compared colors are Balanced Beige and Accessible Beige. Both of the paint colors are on the same color strip and look nothing but stunning. Balanced Beige is a slightly darker version of Accessible Beige Sherwin Willaims.

Below are some of the differences between both of them are mentioned.

  • Accessible Beige has a slightly higher LRV of 58, whereas Balanced Beige has 46.
  • Both of the colors are light colors and fall in the medium range.
  • The undertones of both colors are grey.
  • Balanced Beige has little undertones of taupe in it.

How to Get the Most Accessible Beige Sherwin Williams?

How to Get the Most Accessible Beige Sherwin Williams

Imagine buying a beautiful paint color and not getting the most out of it. You paint it across your house, and it turns out to be a waste. No one wants to land in such kind of situation. Hence, it is important to know about the paint color deeply and then choose the setting for it that turns out to be beautiful and perfect.

Here are some key points you can keep considering in mind.

  • Choose Your Paint Colour: The first step is to choose the right paint color. The neutral color palette is very wide, and one might get overwhelmed. Due to the wide concept, it is best advised to study deeply about your paint color.
  • Decide Upon the Area: You might want to know where you want the color to get painted. Decide upon that first. It can be a bedroom, kitchen, living room, or washroom.
  • Choose the Right Interiors: Moving forward, once you have the paint color in your mind. It is important to learn about other interiors and how you want to keep other elements and textures.
  • Add Decorative Materials: As you all know, you have chosen a very subtle and neutral color so you can play it well with other decorative items. You can go for some color while choosing art, hangings, rugs, and cushions.
  • Get Sampling: Once everything is decided, you can purchase the color. Go for a sampling of the color. Go to the nearby paint shop and test the color. If you like it, then only go ahead.

Summing It Up

All in all, Accessible Beige Sherwin Williams is nothing but a stunning shade to consider. It is a perfect neutral greige paint color to choose from and incorporate into your house. You can easily play with this paint color with various decorative formats, interiors, and styles.

The paint color is also known as builders’ beige, which means it is chosen by many interior designers and it is buildable. There is a whole more texture and statement to this color, and one should understand it generously. It is worth trying out and incorporating in your house.

Don’t think much; just grab your paint color and start painting your house with Accessible Beige Sherwin WIlliams paint color.

August 17, 2023 0 comments
0 FacebookTwitterPinterestEmail
The 8 WHITEST White Paint Colours
Paints

8 Whitest White Paint to Sparkle Up Your Space

by Marco Bianchi August 17, 2023
written by Marco Bianchi

Are you planning to renovate your space? Want to give it a new and refreshed look? Trust me; the white color should be your first pick. While this shade of pallet has pros and cons, the look it gives to your place is worth it all.

Although you have an ensuite of color choices for your space, white is a feel-safe pick. Whether it is your bathroom, bedroom, or living room, white color easily harmonizes with the theme and decor.

Moreover, adding the whitest white hue on the walls and ceiling gives it a fresh canvas appeal, which gives you the leverage to play around with the decor. Even the whitest white color comes with so many nuances and undertones that it becomes challenging to make the best pick.

Hence, we have covered 8 whitish-white paint color options that will guide you in making the best purchase decision.

Discovering the Best Whitest White Paint

1. Benjamin Moore Atrium White OC-145

Benjamin Moore Atrium White OC-145

Want to create a calm and serene ambiance in your home? Consider Benjamin Moore Atrium White OC-145 shade. Its highly versatile color makes it preferable to create a clean and inviting ambiance. You can use this paint to create a neutral backdrop and later accentuate it with the right accessories and decor to make it look more appealing. You can consider this paint for trim, walls, and ceilings. It makes the room look more spacious and classy.

Before you plan to go ahead and use this paint, it is imperative to get a sample testing done, which makes it easier for you to decide if this is the right color you want for your room.

2. Dunn Edwards Cool December DEW 383

Dunn Edwards Cool December DEW 383

The Cool December shade from Dunn Edwards’s white color segment exhibits light and cool-tone. For those willing to create crisp and clean aesthetics, this can be the right color choice for them. Chratceriszed by its unique hue, this shade will easily match the interior and exterior of your home.

The blue and gray undertone of this shade adds a touch of modernity. If you are looking to create a minimalist and sophisticated look, then this shade will be perfect for you. The lighting condition and other colors in the surroundings can also impact the overall look of the color. Make sure to get the sample test done before making the final call. Dunn Edwards Cool December is a great choice for anyone who is willing to create a unique look in their space.

3. Farrow and Ball Slipper Satin Estate Emulsion

Farrow and Ball Slipper Satin Estate Emulsion

The paint derives its name from the silk color used in traditional ballet. It has a unique texture and appeal, which makes it look classy. This color is perfect for a north-facing room. The Slipper Satin Estate Emulsion instantly adds warmth and character to the room. It is a chalky off-white shade that exhibits a cool blue undertone. To make the most of this color, pair it up with conventional neutral shades that give it a more sophisticated look.

For those who want to create a timeless elegance that instantly adds character to your space, consider adding this shade. It is low in VOC, thus making it an environment-friendly paint. It is one of the high-quality white paint that takes the aesthetics of your room a notch above.

4. Sherwin Williams Alabaster SW 7008

Sherwin Williams Alabaster SW 7008

Looking for a perfect white color to glam up your room? Consider adding Sherwin William Alabaster SW7008 to your room. White is a perfect color that creates a canvas giving you ample scope to add the elements that bring forth your personality. Its soft and warm hue will make your space a pleasantry sight. It adds a sense of peacefulness and calmness to your room. This shade of white by Sherwin Willams is known for its subtleness, class, and timeless appeal.

Sherwin Williams is known for its quality paint. However, while using it, you should focus on preparing the surface before applying the coat. This will help you get the best finishing.

5. Farrow and Ball School House White No. 291

Farrow and Ball School House White No. 291

Add the touch of soft white hues by Farrow and Ball to your house. This shade by Farrow and Ball highlights the soft tone and makes your room look classy. It has a strong-colored undertone, giving it shine and texture. This paint is known for its rich pigmentation and texture that adds richness to the paint. You can use this paint for interiors. If not for painting the entire wall, consider adding it to highlight trims, doors, and hinges.

Again, preparation of the surface before starting to paint is essential. It gives a nice finish to your room.

6. Behr Polar Bear 75

Behr Polar Bear 75

It has a fresh and brightening effect, making it an ultimate choice for your interiors. It is a warm white color, making it perfect for rooms where you want more character. Polar Bear 75 by Behr is known for its neutral and crisp texture. Its clean and fresh appearance makes it a suitable choice for interior design. Behr is known for its quality paint, and the highly pigmented texture of Polar Bear 75 gives it a classy finish.

Don’t miss getting the sample testing done before finally placing the order. You can ask for the patch test and check if the paint suits your space.

7. Mylands of Londo Pure White Marble Matt Emulsion

Mylands of Londo Pure White Marble Matt Emulsion

A pure white shade is perfect for those looking for a contemporary and modern house. Since color plays a significant role in highlighting the room’s look, the choice of color becomes instrumental. White color easily blends with any kind of home interior. Thus giving you ample opportunity to experiment with the final look of the space.

It has a lovely chalky finish which gives a highly pigmented texture, thus adding more class and elegance to your room.

8. Farrow and Ball Wimborne White No 239

Farrow and Ball Wimborne White No 239

Are you looking for the perfect paint for your space? This is the right choice for your space. The right kind of color will give it more depth and texture.

It is a warm white paint that can be easily blended with other colors, thus giving you leverage to create a beautiful-looking room. It has a subtle warm undertone, but it doesn’t veer to a yellow shade but gives it a creamy texture.

Unfolding the Undertones and Hues of White

While most of us naively discuss the white color, the experts hold a different same. There can be as many as 122 shades of white with different LRVs. The latter can go up to 100. This variation in the shade of white is because of the undertone.

Here we have brought together the 5 most common types of white colors that you can add to your place.

1. Bright White

It is bright and luminous that reflects light, thus adding a vibrant and refreshed look to your space. If you have a smaller room and want to make it look more spacious, this is the right choice. The unique proposition of this shade is that it opens up the space, thus making it more roomy. The LRV of bright white shade ranges between 87 -90.

2. Soft White

Soft white has a soothing and calming effect. Unlike bright white, soft white’s undertone is subdued and offers a more relaxed appeal. It reflects light, thus, generating luminosity. And so it adds more brightness to the room. This shade of white has an undertone of beige, cream, and gray that adds warmth to the color. It has an LRV of 82, which goes up to 86.

3. Warm White

This shade of white has an undertone of yellow or red. If you are looking for a white paint that can add a touch of warmth to your room, then warm white shades are the best. It’s inviting full stops and natural materials, adding more character to your home. It has an LRV of more than 90.

4. Cool White

The next shade is also known as the icy white. As you can figure out from the name, this shade oozes a sense of calmness and serenity. With the undertones of blue, green, and purple, this color is perfect for those who want to add a tint of tranquillity to their space. This shade works well in areas that receive ample light. It has an LRV of 87.

5. True White

And the last whitest white that you can have in your room is true white. These are the most authentic white and come with a higher LRV. Its brilliant illuminance will instantly catch your eyes. It is the color closest to pure white and is untinted. There are no undertones in it. Its LRV can go up to 94.

Things to Consider When Choosing the Whitest White Paint

Painting the house is daunting, especially if you have to play with white color. While a number of options are available, the right white color will add more depth and character to your space.

Hence, we have cumulated certain pointers that will help make the best pick.

1. Type of White Color

When you start looking for the white color, you will come across different shades. This is because of the different LRVs (Light Reflectance Value) and their undertones. As discussed above, there are different shades of white, like bright white, true white, warm white, cool white, and others. Each of these has a different LRV. This impacts its brightness and illuminance. So, look at this aspect when choosing the shade of white.

2. Check the Undertones

Undertones can dramatically impact the appearance of white shade. You would not want to add a shade that is too bright or too icy; it has to be an exact match. One of the ways to achieve this is by taking the white printer paper and adding a tint of white you are considering for your space. You will be instantly able to spot the undertone and choose the one that mimics your preference.

3. Natural Light Conditions

Yet another important aspect you should consider is the room’s lighting condition. A room not receiving enough natural light may reflect on the white shade. For example, a cool white shade in such an area will appear drab and warm white will appear dingy. Natural light adds more illuminance to the paint and highlights the undertone. Eventually, it will bring out the best texture of the paint.

4. Quality of Paint

The quality of the paint is equally significant. Do not compromise on paint quality; it impacts the overall look and appearance. Always look for reputable brands. Get sample testing done. This will give you a glimpse of what the final color would look like.

Wrapping It Up

All in all, not all white colors are the same, but you can find the best match with the right approach and understanding of what you are looking for. You need to factor in the quality of paint, type, and texture. The area where you will use it also impacts the choice of paint.

Additionally, you should also get the sample testing. This will help in making the right call. Most people don’t consider adding white to the entire space; they prefer white trim, baseboards, hinges, and others. White can also be used to highlight specific areas of the room. Irrespective of the choices, the type of white color will create a remarkable difference.

There are different types of whitest white shades. Only some shades will suit your requirement, so you need to pick the one that is the best match for your space.

So, choose wisely!

Frequently Asked Questions

Which Brand Offers the Whitest White Paint?

If you want the whitest white paint for your space, consider brands like Sherwin Williams, Benjamin Moore, Farrow, and Ball. There are other brands, but it’s imperative to compare and check the LRV before making the final call.

What is the LRV Value of White?

LRV or Light Reflective Value showcases the reflective capability of the paint. In the case of white paint, it reaches a mark of 100. The lesser the LRV, the lesser it will reflect. The paint’s LRV number tells you how light or dark it will be. For example, LRV 0 means pure black, and LRV 100 means pure white.

What Makes Whitest White Look So?

Well, the chemical composition of white paint gives it color and texture. Barium Sulfate that goes into the making of photo paper and cosmetics gives the whitest white its color. The higher concentration of this compound gives it a more intense white color.

August 17, 2023 0 comments
0 FacebookTwitterPinterestEmail
Newer Posts
Older Posts

Recent Posts

  • A Complete Chalked Paint Review fo Better Selection 
  • A Guide to Painting Furniture without Sanding
  • 15 Steps to Create Faux Shiplap DIY Wall in Budget
  • How to Paint Furniture without Sanding or Priming
  • A Guide to Achieving Texture with Saltwash Paint Techniques

Recent Comments

No comments to show.

Recent Posts

  • A Complete Chalked Paint Review fo Better Selection 

    October 18, 2023
  • A Guide to Painting Furniture without Sanding

    October 18, 2023
  • 15 Steps to Create Faux Shiplap DIY Wall in Budget

    October 18, 2023
  • How to Paint Furniture without Sanding or Priming

    October 18, 2023
  • A Guide to Achieving Texture with Saltwash Paint Techniques

    October 18, 2023

Categories

  • Bathroom (15)
  • Bedroom (4)
  • Brush (3)
  • Decor & Design (15)
  • Decorating (1)
  • Dining Room (3)
  • DIY (2)
  • DIY Projects (11)
  • Door (5)
  • Fireplace (3)
  • Flooring (2)
  • Furniture (9)
  • Gardening (1)
  • Guide (11)
  • Home Crafts (1)
  • Home Decor (7)
  • Home Improvement (9)
  • Ideas (63)
  • Kitchen (16)
  • Outdoor Living (1)
  • Paints (18)
  • Review (1)
  • Room Ideas (3)
  • Tutorial (1)
  • Uncategorized (2)
  • Wall (6)

Instagram

About Us

Maecenas nec odio et ante tincidunt tempus. Donec vitae sapien ut libero venenatis faucibus, nullam quis.

01 Central Park, US, New York City
Phone: (012) 345 6789
Fax: (012) 345 6789

  • Facebook
  • Twitter

@2021 - All Right Reserved. Designed and Developed by PenciDesign


Back To Top
DormyHome
  • Decor & Design
  • DIY
  • Guide
  • Home Improvement
  • Smart Home