• Decor & Design
  • DIY
  • Guide
  • Home Improvement
  • Smart Home
DormyHome
keep your memories alive
Home » Home Decor
Category:

Home Decor

Rustoleum Chalked
DIY ProjectsHome Decor

A Complete Chalked Paint Review fo Better Selection 

by Marco Bianchi October 18, 2023
written by Marco Bianchi

Many paint colors in the world make our lives colorful. But there are some colors that we don’t know about, or if we know, we know a little. One such color is Rustoleum Chalked Paint. We’ll see a quick chalked paint review on the same, and we will get to know what is so special about that, how it makes our furniture look amazing, and many more.

Rustoleum Chalked paint review is a type of paint that lots of people are talking about. It’s not like your regular paint, which makes it special. It can help you make old furniture look brand new, and it does it in a pretty cool way. So, to give your furniture the best look and color it deserves or how you want it to, you should know all of this. It is the kind of paint color that is not so hard to understand.

So, understand all about this amazing paint color and give your furniture a look that they never had.

1. About Rust-Oleum and Chalked

About Rust-Oleum and Chalked

Rust-Oleum, a company with a rich history dating back to its founding in 1921, has become a trusted name in the fields of paint and coatings. Initially inspired by a sea captain’s observation regarding the protective properties of fish oil on metal surfaces, the company started many innovations in rust-preventive solutions. Over the decades, Rust-Oleum has evolved to offer various products catering to various surfaces and applications.

Within their extensive product line, Rust-Oleum introduced Chalked, their take on chalk-style paint. This paint, named Chalked, shows the company’s commitment to providing high-quality, user-friendly solutions for DIY projects. With the help of chalked paint review, it is connected to Rust-Oleum’s legacy of innovation and excellence, offering consumers a flexible and accessible option for achieving the desired finish on their furniture and decor.

2. Chalk Paint History and Annie Sloan

Chalk Paint History and Annie Sloan.jpg

The history of chalk-style paint traces back to Annie Sloan, an expert in decorative painting. In the 1990s, Annie Sloan introduced her version of chalk-style paint, aptly named Chalk Paint. Notably, this term was trademarked by her company, resulting in other paint manufacturers using alternative names for their versions of chalk-style paint. This trademark proves the impact of Annie Sloan’s innovation and the popularity of chalk-style paint.

Annie Sloan’s creation changed the painting industry by offering paint that required less preparation, allowing users to remove unwanted sanding or priming processes. This breakthrough made decorative painting accessible to a wider audience, empowering both amateurs and professionals to change furniture and decor with ease.

3. Background of This Amazing Color

Background of This Amazing Color

Rust-Oleum’s origins were created in the deep observation of a sea captain named Robert Fergusson, whose encounter with fish oil’s rust-preventing properties gave him an awesome idea. This important moment led to the developing of one of the world’s earliest rust-preventive paints. Established in 1921, Rust-Oleum quickly gained recognition as a leading innovator in protective coatings for metal surfaces. The company’s dedication to quality and effectiveness enabled it to the forefront of the industry.

Over the past decades, Rust-Oleum expanded its product offerings to have a diverse range of solutions for various surfaces and applications. The company’s commitment to innovation and excellence remained exceptional, ensuring that Rust-Oleum products continue to meet the evolving needs of consumers across the globe. Among their many product lines, Rust-Oleum introduced Chalked, a chalk-style paint designed to provide users with a flexible and user-friendly option for achieving desired finishes on furniture and decor.

4. Benefits of Chalk-style Paint

Benefits of Chalk-style Paint

Chalk-style paint, like Rustoleum Chalked, offers many advantages that make it a popular choice among fans and professional furniture refinishers.

  • Its flexibility is a unique feature, allowing it to be used on various surfaces, from wood to metal, glass, and even ceramic. This adaptability makes it a go-to option for various projects, providing a user-friendly experience regardless of the material.
  • One of the best qualities of chalk-style paint is its matte finish. This finish has a different vintage or country aesthetic to furniture and decor, adding character and beauty to each piece. It’s this unique characteristic that draws many to choose chalk-style paint over traditional options.
  • Also, the matte finish has a subtle beauty that complements various interior design styles, from simple to farmhouse style, offering an amazing look that everyone loves.
  • And chalk-style paint simplifies the painting process by removing the need for extensive prep work. Unlike some other types of paint, which may require sanding or priming before application, chalk-style paint adheres well to surfaces with less preparation.

5. Using Chalk Paint on Furniture

Using Chalk Paint on Furniture

Applying chalk paint to furniture is a simple process that requires very little preparation. After ensuring that the surface is clean and free of dust or debris, you can begin painting directly. Unlike some other types of paint, which may demand large sanding or priming, chalk-style paint sticks well to surfaces with a smooth finish. For furniture with glossy or particularly smooth surfaces, light sanding is recommended to improve paint adhesion. This step provides a slightly simpler surface for the paint to grip, ensuring a better overall finish and coverage.

While the additional sanding step may be necessary in certain cases, it doesn’t complicate the application process, making chalk-style paint a convenient choice for projects. It’s worth noting that chalk-style paint is known for its awesome nature, as mentioned in this chalked paint review. Even if you make a mistake or apply the paint unevenly, it can be easily corrected. Simply add more paint to the affected area, allow it to dry, and continue with the painting process.

6. Picking the Right Chalk Paint

Picking the Right Chalk Paint

Choosing the best chalk paint for your project involves considering several factors to ensure the best results. Factors such as color, availability, and coverage should be considered. Different brands offer varying options, and conducting research to determine which paint aligns with your project’s requirements is important. For instance, some paint companies may not offer chalk paint in a spray can format. If you want to use chalk paint for projects that require a spray application, this consideration will be important.

7. Cost of Rustoleum Chalked

Cost of Rustoleum Chalked

Rustoleum Chalked is an affordable option among chalk-style paints, making it an excellent choice for budget-conscious people. The price range is accessible, allowing individuals to start their creative projects without exceeding their budget constraints. This affordability extends across various sizes and colors, ensuring that Rustoleum Chalked caters to various project scopes and preferences.

By using chalked paint review, it does not matter if you’re working on a small craft project or tackling a larger furniture restoration; Rustoleum Chalked provides a cost-effective solution without compromising on quality.

8. Why People Like Chalk Paint

Why People Like Chalk Paint

The popularity of chalk-style paint, including Rustoleum Chalked, is underpinned by its exceptional user-friendliness and flexibility. Unlike some other types of paint, which may necessitate extensive preparation such as sanding or priming, chalk-style paint minimizes the pre-painting process. This simplicity makes it accessible to both beginners and experienced painters, offering an easy way to renovate furniture and decor. Also, chalk-style paint has a remarkable ability to hide minor imperfections in surfaces. This quality is highly valued by those working with older or well-loved pieces of furniture, as it not only adds to the beauty but also makes the painting process easier.

Some imperfections in the surface can contribute to the overall beauty of the finished piece, particularly for individuals looking for a shabby chic, vintage, farmhouse, or country aesthetic. By using ideas from chalked paint reviews, the matte finish achieved with chalk-style paint is another key factor in its amazing look. This finish has a different and awesome to furniture and decor. It complements various interior design styles, ensuring that pieces painted with chalk-style paint can easily mix into diverse home settings. The matte finish shows a subtle beauty that includes passing trends, contributing to its enduring popularity in the world of decorative painting. You should use wax sealers to seal the paint.

9. How Well Does Chalked Paint Cover?

How Well Does Chalked Paint Cover?.jpg

Rustoleum Chalked paint offers a decent level of coverage, which is necessary for achieving a smooth and even finish on your projects. However, it’s important to note that the thickness of this paint may differ from some other chalk-style options. As a result, in most cases, you’ll find that applying at least two coats is necessary to achieve the desired coverage.

Allowing enough drying time between coats is important for the best results. This step ensures that each layer properly sticks to the surface and dries to a consistent finish. When you use chalked paint review while applying multiple coats, it may require more time. The result is well worth the effort, as Rustoleum Chalked then provides a beautiful matte finish that is better than other brands in terms of quality and appearance.

10. Chalked Paint Works on Many Surfaces

Chalked Paint Works on Many Surfaces.jpg

One of the remarkable characteristics of Rustoleum Chalked paint is its exceptional quality of adaptation. It mixes effectively with any type of surface, including wood, metal, glass, ceramic, and more. This wide-ranging compatibility makes it a go-to option for various projects, as it can be applied to different materials without sacrificing quality or performance. While chalk-style paints typically offer excellent quality, it’s important to note that some surfaces may benefit from light sanding according to application.

This step helps create a slightly rougher texture, giving the paint a better grip. By following this simple preparation process with the help of chalked paint review, you can ensure that Rustoleum Chalked paint achieves better results on your chosen surface.

11. Adding Protection for Long-lasting Results

Adding Protection for Long-lasting Results

To improve the durability and long life of your chalked paint project, applying a sealant is an important final step. Rustoleum recommends their Ultra Matte Top Coat for this purpose. This top coat adds a protective layer that safeguards your painted items from wear and tear, ensuring that they maintain their beautiful finish over time.

It’s important to note that when applying the top coat, a light touch is recommended. Applying thin coats helps prevent any uneven feel in the finish. By taking this extra step to protect your project, you can enjoy the lasting beauty and quality that Rustoleum Chalked paint provides. You should use a sponge paintbrush for more convenience.

12. Pros and Cons Rustoleum Chalked Paint

Pros and Cons Rustoleum Chalked Paint

Pros

Rustoleum Chalked paint has several notable advantages that make it a favored choice among DIY people and professional painters.

  • One of its main strengths lies in its affordability. Among chalk-style paints, Rustoleum chalk stands out as one of the most economical options available on the market. This accessibility ensures that people with different budgets can start on their creative projects without compromising on quality.
  • In addition to affordability, Rustoleum Chalked paint is widely available. It can be found in various retail and hardware stores, including popular destinations like Lowes, Walmart, and Amazon. This widespread availability ensures that consumers have convenient access to this amazing paint, allowing them to start their projects with ease.
  • And Rustoleum Chalked offers an impressive selection of colors. While it comes in pre-mixed shades, the 30-ounce can of Rustoleum Chalked Ultra Matte Paint Tint Base opens up the possibility for custom color creation.

Cons

While Rustoleum Chalked paint offers many benefits, it’s important to consider some of its limitations and factors to keep in mind.

  • One consideration is the paint’s thinner consistency compared to certain other chalk-style options. As a result, achieving full coverage may require applying multiple coats. This aspect should be taken into account when planning your project timeline.
  • Another consideration is the necessity of applying a sealant to ensure the longevity of your finished piece. Like many chalk paints, Rustoleum chalk benefits from the additional protection provided by a sealant.
  • Following this step is important for preventing degraded quality or wear over time and ensuring that your painted items maintain their beauty and quality.
  • Finally, color availability may vary depending on your location and the retail stores in your area. If you’re looking for a specific color or shade, you should check with local retailers or inquire about custom color mixing services.

13. Colors in Rustoleum Chalked Paint

Colors in Rustoleum Chalked Paint

One of the standout features of Rustoleum Chalked Paint is its vast color range, offering a wide selection of options to suit diverse tastes and preferences. Whether you’re looking for soft, neutral tones or bright, dark shades, you will likely find the perfect color to complement your project. This variety allows for creative expression and ensures that you can achieve the exact look that you want.

In addition to pre-mixed colors, Rustoleum Chalked also provides the option to create custom shades. This service is available at select retail locations, allowing you to make the paint to your specific project requirements. The ability to access many colors helps you to bring your creative ideas into your work, making Rustoleum Chalked a good choice for a wide range of projects.

14. Where to Find

Where to Find

Rustoleum Chalked paint is always available at various retail and hardware stores, making it easily accessible to consumers. You can find it at well-known retailers like Lowes, Walmart, and Amazon, providing convenient options for purchasing this awesome paint. Also, some local hardware stores may carry Rustoleum Chalked, though availability may vary by location. By finding these options, you can get the paint you need for your creative projects and enjoy the exceptional benefits it offers. So, finding is not a hard thing; what matters the most is that you should choose the best color according to your needs.

Conclusion

Rustoleum Chalked paint is a standout choice for many projects and furniture restoration. Its affordability, widespread availability, and vast color selection make it a flexible option for various creative ideas. The matte finish achieved after two coats shows an amazing beauty to furniture and decor, improving their looks.

Rustoleum Chalked fast-drying nature ensures that projects can be completed efficiently, allowing you to enjoy the results of your efforts sooner. The paint’s excellent capabilities open up chances to create the best of the best according to your ideas, and hence, you get better results by using the chalked paint review.

With Rustoleum Chalked, you have the tools you need to turn your creative ideas into reality and improve the beauty of your living spaces.

October 18, 2023 0 comments
0 FacebookTwitterPinterestEmail
How to Create Faux DIY Shiplap Wall for Less
DIY ProjectsHome Decor

15 Steps to Create Faux Shiplap DIY Wall in Budget

by Ethan Tremblay October 18, 2023
written by Ethan Tremblay

Everyone loves to make their houses beautiful, but sometimes it might need more money than expected. Creating a faux shiplap wall within your budget is easier than you might think, and it can add a beautiful vibe to any room in your home. There are many things that you should take care of while creating a shiplap wall for your home.

If you miss any of these single steps, then you might not get a perfect shiplap wall. It is best to apply these tips while using the shiplap wall properly. So, to get the best out of it, you should know what to do and how to do it. No one wants a dull look for their houses, and this shiplap wall will make your house exceptional and different from others.

So, let’s see how you can create the best shiplap wall for your house that will work as a complement.

1. Affordable Shiplap Walls

Affordable Shiplap Walls.jpg

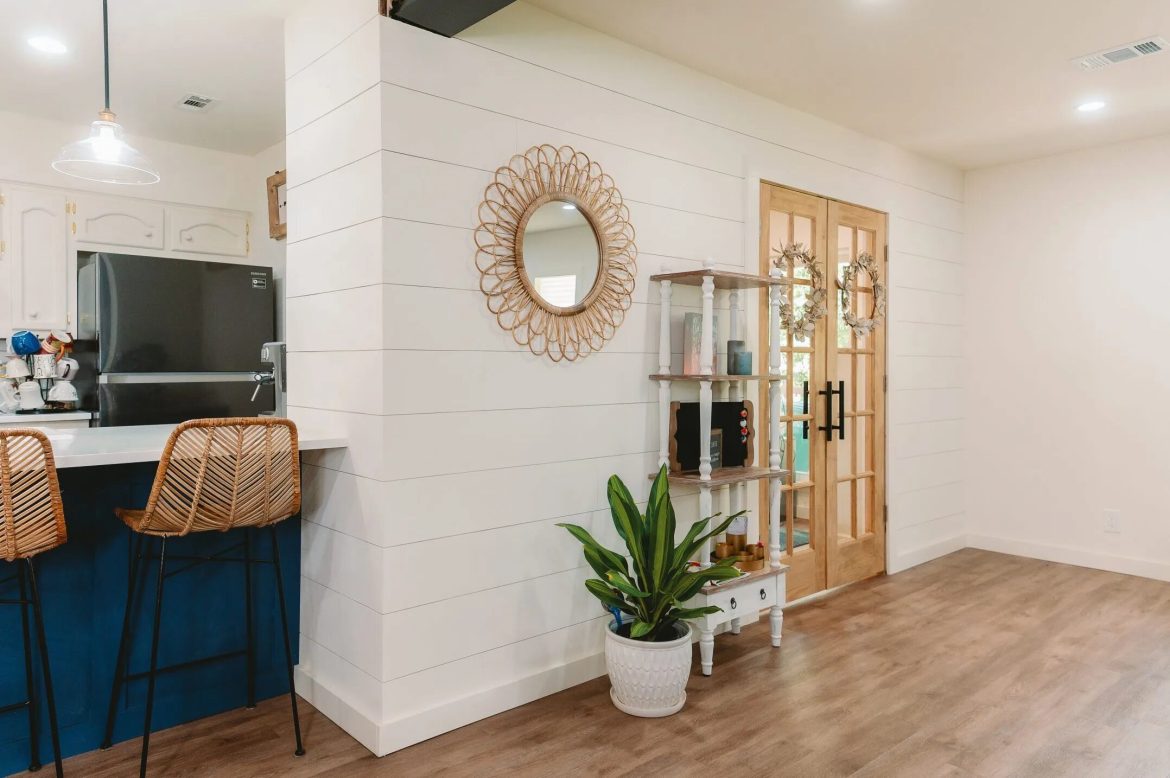
Creating shiplap walls on a budget is not only easy but also a smart way to improve the looks of your living space within your budget. Shiplap, known for its different look and amazing beauty, has been a popular choice for interior wall coverings. But, traditional shiplap materials and installation methods can be quite expensive. There’s a cost-effective way to achieve the same stunning look. The key to affordability in faux shiplap wall installation is your choice of materials. Instead of choosing costly wood planks, consider using plywood.

Plywood is not only easily available but also much cheaper than traditional shiplap wood. To further save on costs, select a plywood thickness that suits your preferences and budget. By choosing the right plywood and thickness, you can create a beautiful shiplap wall without compromising quality. When you take on the task of installing shiplap yourself, you also save on labor costs. Use faux wooden panels while designing your house for an even better look.

2. Cutting Top Shiplap Piece

Cutting Top Shiplap Piece

When beginning a shiplap wall project, one of the important steps that might require extra attention is cutting the top shiplap piece. This piece plays a major role in ensuring a smooth and polished finish to your shiplap installation. The top shiplap piece is the final board that sits just below the ceiling or crown molding. It works as the finishing touch to your shiplap wall and should align perfectly with the upper edge. Achieving this alignment requires precision.

First, you’ll need to measure the space between the last wood strip and the ceiling. This measurement is important for determining the width of the top shiplap piece. Accuracy is key here, as even a slight misalignment can be noticeable. Once you have the measurement, use a saw, preferably a circular saw, to cut the last piece of plywood to the best width.

3. Paint & Measure

Paint & Measure

Before getting into the process of installing shiplap on your walls, it’s important to consider an important aspect that can impact the final result: paint and measurement. First, selecting the right paint color is necessary. The choice of paint can influence the overall aesthetic of your shiplap wall. To achieve a simple and clean look, it’s recommended to paint the walls the same color you plan to paint the faux shiplap.

This ensures that if there are any gaps between the boards, the underlying wall color won’t stand out. This small but thoughtful detail can make a notable difference in the final appearance of your shiplap wall. And when it comes to painting, preparation is important. Before applying any paint, it’s essential to make the surface ready for it properly. This includes cleaning the walls to remove any dust and ensuring they are smooth and free from imperfections.

4. Watch Out for Center Saws

Watch Out for Center Saws

When it comes to creating a shiplap wall, one aspect that requires careful attention is the use of saws at home improvement centers. These saws, often available for customer use, are primarily designed for rough cuts and may not provide the clean and precise edges needed for a polished shiplap installation. Saws at home improvement centers, such as those found in stores like Lowes or Home Depot, are typically made for basic cutting tasks. They are useful for customers who may require rough cuts for various projects. While these saws can be convenient for certain applications, they may not be the best choice for cutting shiplap boards.

The primary concern when using center saws for shiplap projects is the quality of the cuts. Shiplap boards require clean and precise edges to fit together easily. Any uneven edges can result in gaps between the boards, making the overall look of the shiplap wall weird. You should have a faux wallpaper that also looks amazing.

5. Nailing & Filling Tips

Nailing & Filling Tips.jpg

As you begin on your faux shiplap wall project, paying careful attention to the nailing and filling process is important for achieving a polished and professional finish. When it comes to nailing the shiplap boards to the wall, choosing the right type of nails is necessary. Choose nails that are specially designed for woodworking and suitable for your chosen material, whether it’s plywood or another type of wood.

Consider the length of the nails to ensure they provide secure anchoring without protruding through the boards. Using a nail gun can make the nailing process easy, more efficient, and precise. A nail gun allows for consistent nail placement and depth, resulting in a uniform and perfect shiplap installation. Be sure to adjust the nail gun settings according to the thickness of the boards to avoid over-penetration. Spacing between the nails is another important aspect to consider. While it’s necessary to secure the boards firmly, overcrowding with nails can lead to an unsightly appearance.

6. Consistent Spacing with Nickels

Consistent Spacing with Nickels

Creating a faux shiplap wall involves placing wooden planks in a manner that they form a perfect-looking pattern. One important aspect is maintaining consistent gaps, or spaces, between these planks. This not only contributes to the overall look but also ensures a balanced and better look.

To achieve this, a simple yet effective technique involves using nickels. These small, round coins act as spacers between the planks. By inserting a nickel at regular intervals as you install the planks, you can achieve equal spacing throughout the entire wall. This easy method guarantees that each plank is positioned at an equal distance from its neighboring plank, resulting in a better and well-proportioned shiplap pattern.

7. Smooth Seams with Filler

Smooth Seams with Filler.jpg

Once the wooden planks are in place, it’s important to address any gaps or seams that may exist between them. These spaces can disrupt the proper continuity of the shiplap pattern. To correct this, a basic yet highly effective solution is to use a filler, such as wood putty. This substance is good at filling in small gaps and seams.

Applying it along the edges and joints of the planks ensures that any irregularities are smoothed out. Using a putty knife, the excess filler is leveled, resulting in a smooth surface. This uncomplicated process makes a shiplap wall appear amazing and well-finished, with no visible gaps or interruptions.

8. Use Vacuum, Caulk, Paint

Use Vacuum, Caulk, Paint

Before proceeding with the final step of painting the faux shiplap wall, it’s important to make the surface smooth perfectly. This involves a perfect process that includes three key steps – vacuuming, caulking, and painting. To begin, a vacuum cleaner is used to remove any dust that may have been left in the gaps between the planks or on the surface of the wall. This ensures a clean and smooth look for the correct steps.

Following this, caulk is applied along the edges and corners of the wall. Caulk is a flexible material that seals any remaining gaps or joints, providing a smooth finish. Once the caulk has dried, the wall is ready for painting. The choice of paint color is a personal preference, with options ranging from muted neutrals to vibrant shades. Applying the paint evenly and consistently across the surface results in a fresh, clean look, bringing the shiplap wall to its final, polished state.

9. Adding More Rows

Adding More Rows

Expanding your faux shiplap wall is an easy process that allows you to customize the look to suit your space. To begin, measure the area you want to cover with precision. This ensures that the additional rows of planks will fit easily alongside the existing ones. Next, using a saw, carefully cut the planks to the required length. Position them against the wall, ensuring they align evenly with the existing rows.

To secure them in place, use nails or a nail gun, ensuring they are firmly attached. This uncomplicated method enables you to increase the height or width of your shiplap wall to your desired dimensions. Whether you’re looking to create a perfect feature wall or to cover an entire room, this process offers flexibility and practicality.

10. Dealing with Outlets

Dealing with Outlets

When installing a shiplap wall, you may face electrical outlets that must be put easily into the design. It’s important to complete this task with care and precision. Begin by turning off the power to the outlets to ensure safety during the installation process. Next, measure and mark the locations of the outlets on the planks. Using a jigsaw, carefully cut out the necessary openings to locate the outlets. Take your time with this step to ensure accuracy and precision.

Once the outlets are positioned securely within the perfect openings, you can continue installing the remaining planks around them. This simple process allows you to fix electrical outlets easily into the shiplap wall, ensuring both practicality and making it look good forever.

11. Finish One Wall First

Finish One Wall First.jpg

When starting your faux shiplap project, it’s a wise approach to begin by finishing one wall before proceeding to others. This method includes several valuable purposes. Firstly, it lets you become familiar with the process and techniques involved in shiplap installation, giving you the confidence to be familiar with larger areas later. Secondly, it helps you manage your time and resources effectively. Focusing on one wall at a time ensures that you’re not overwhelmed by the sheer scale of the project. Also, it provides you with an opportunity to estimate the impact of shiplap on your space before using more large renovations.

By starting from small and gradually expanding, you can create the project to your preferences and make any necessary adjustments along the way. This step-by-step approach ensures that each wall is finished with care and attention to detail.

12. Tools for Your Shiplap Project

Tools for Your Shiplap Project

Equipping yourself with the right tools is important when undertaking a shiplap project. These tools are the building blocks of your shiplap, enabling you to change a plain wall into a beautiful shiplap showcase. Among the necessary tools are a saw, which allows you to cut shiplap boards to the desired size accurately, and a hammer, which is important for securing the boards in place. A measuring tape ensures precise dimensions, ensuring a perfect fit for each board.

Also, nails are necessary for fastening the shiplap securely, while sandpaper helps smooth any rough edges or surfaces. Together, these tools form the backbone of your shiplap project, enabling you to achieve a professional-looking result.

13. Painting Your Shiplap Wall

Painting Your Shiplap Wall

Once your faux shiplap boards are securely installed, the creative painting process begins. This step offers an amazing chance to mix your style into the project. Choosing the right paint color is important, setting the tone for your entire room. Prefer to choose a paint shade that complements your existing decor or creates a look that should not be very different from other items, depending on your design goals.

The beauty of shiplap is that it provides a flexible chance for your creativity. It does not matter if you prefer a crisp, white finish for a classic, clean look or something different and colorful choice to make an amazing look; the choice is yours. Painting your shiplap wall is an enjoyable and changing part of the process, where you can see how you have used your ideas to make your shiplap awesome. You can use shiplap stencils instead of using wallpapers.

14. Supplies for DIY Shiplap

Supplies for DIY Shiplap.jpeg

In addition to the core tools, gathering the necessary supplies is important for a successful DIY shiplap project. Shiplap boards themselves are, of course, a major requirement. These boards typically come in various lengths and widths, allowing you to customize the appearance of your shiplap wall.

Sandpaper, while mentioned earlier as a tool, is equally important as a supply. It’s important for achieving a smooth finish on the shiplap boards, ensuring that your painted surface looks flawless. Paintbrushes are another necessary supply, as they enable you to apply the paint evenly and precisely, giving your shiplap wall the best shade with your chosen color. With the right tools and supplies in hand, you will face no problems in making the best shiplap for yourself.

15. Why Choose Faux Shiplap

Why Choose Faux Shiplap

Faux shiplap is an attractive choice for those searching for a cost-effective yet amazing-looking alternative to traditional shiplap. One of its primary advantages is its affordability. Genuine shiplap, crafted from solid wood, can be quite expensive. Faux shiplap, on the other hand, provides the same beautiful look at a fraction of the cost. This affordability makes it an excellent option for budget-conscious people who want the best option for themselves and do not want to spend that much money. Also, the shiplap is very easy to install.

Unlike traditional shiplap, which requires precise measurements, cuts, and complex fitting, shiplap often comes in interlocking panels or sheets, simplifying the installation process. Even those with limited DIY experience can achieve professional-looking results. This shiplap offers a wide range of styles and finishes, allowing you to choose the one that best suits your aesthetic preferences. Whether you aim for a clean, farmhouse-inspired look or a more modern, classic appearance, you can find faux shiplap options that fulfill your designs. Its flexibility makes it an overall choice for various design themes and preferences.

Conclusion

Making a faux shiplap wall is not hard or expensive. With some basic tools and supplies, you can change your space and give it a comfortable and new feel. It’s all about taking it one step at a time. First, finish one wall before moving on to the next. Use simple tools like a saw, level, hammer, and nails to get the job done.

Choose your materials wisely, ensuring they align with your idea for the project. With the right tools and some patience, you’ll change your wall into an amazing wall. Level up the overall look of faux shiplap and enjoy the beauty it brings to your home. If you want to add colors, painting your shiplap is easy. Just pick a color you like, and with a few shades, you can make your space feel brighter, depending on your preference.

It’s a fun and easy way to give your space a beautiful and new look within the budget.

October 18, 2023 0 comments
0 FacebookTwitterPinterestEmail
How to Get Texture With a Saltwash Paint Technique
DIY ProjectsHome Decor

A Guide to Achieving Texture with Saltwash Paint Techniques

by David Parker October 18, 2023
written by David Parker

Saltwash paint is a technique that makes your dull-looking house and furniture look more amazing by giving them a different look. But it requires perfection to apply all those awesome textures that are the main thing in the Salt wash technique. It’s a fun and easy way to add texture, giving a unique touch to your projects.

There is no such thing that you have to be very good at applying these textures; stay focused on these techniques and how to do that, and you’ll have a house that everyone will appreciate. The salt wash technique is one of the ways by which you can make your regular-looking house look more awesome, but for that, you should know how to do all this. For that purpose, we are here. From getting the supplies to putting on the final touches, you’ll have all that knowledge that you might need for this.

So, let’s get started and look into how you can get the best textures with the amazing salt wash technique.

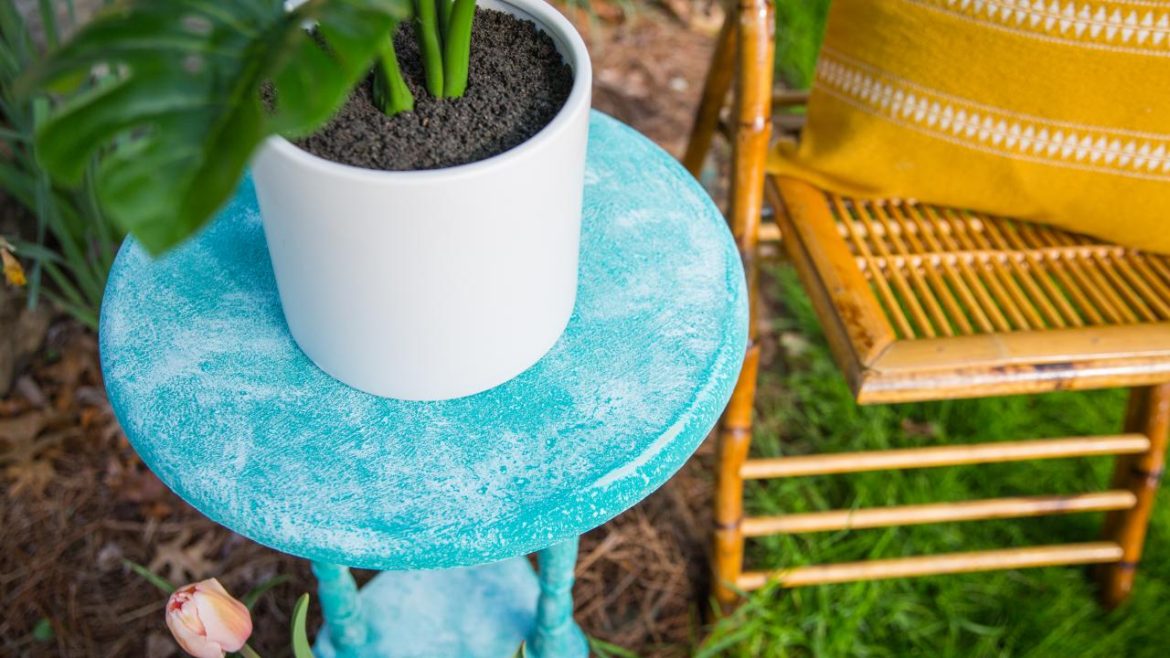
1. Apply First Salt wash Layer

Apply First Salt wash Layer

The first step in achieving an amazing textured paint finish using Saltwash is to apply the initial layer. This stage is both exciting and simple, making it accessible to both new and experienced painters. You’ll want to start with a piece of furniture or decor item you chose for this project. The beauty of the Salt wash technique is that it makes imperfections more unique, so there’s no need to worry about creating an awesome surface.

To begin, select a reliable paintbrush that you’re comfortable with. This will be your tool for applying the Salt wash mixture. It’s important to begin this step with a calm mindset; don’t worry about perfection at this stage. Instead, dip your brush into the Salt wash mixture and apply it to your chosen surface. You’ll notice that the texture begins to take shape as the mixture dries. You should use a good double-thick paintbrush while applying the first layer.

2. What You Need for Salt Wash Painting

What You Need for Salt Wash Painting.jpg

Before beginning your Saltwash painting adventure, it’s necessary to gather all the tools and materials. Having the right supplies at your disposal will make the process smoother and more enjoyable. First and most important, consider your choice of brushes. Zibra and Cling brushes are highly recommended for their soft bristles and user-friendly design. These brushes are perfect at working with the Salt wash mixture, allowing you to achieve the desired texture easily.

The main component of this is undoubtedly the Salt Wash paint additive. This special ingredient is the secret behind Salt wash’s amazing texture. Make sure you have plenty of it on hand to complete your project successfully. Also, having sandpaper available for smoothing purposes is important. A sanding block or standard sandpaper with a grit of 220 works perfectly. To maintain a clean workspace, a Shop-Vac is useful for quick cleanup.

3. Easy and Affordable Vintage Look

Easy and Affordable Vintage Look

One of the most remarkable aspects of the Saltwash painting technique is its ability to transform ordinary pieces into exquisite vintage-style treasures easily. What’s even more impressive is that this stunning effect can be achieved without going over the budget. Salt wash offers an affordable alternative to purchasing expensive vintage furniture or decor items. It enables you to mix your living space with quality and beauty without the high price tag.

This technique is proof of the idea that creating an amazing look doesn’t have to be complex or costly. Instead, it invites creativity and resourcefulness, allowing you to breathe new life into your surroundings. If you’re a DIY fan or want the best of home decor projects, Salt Wash comes with many possibilities, all within a budget-friendly framework.

4. Smooth Finish with Sanding

Smooth Finish with Sanding

As your Saltwash project progresses, achieving a smooth finish becomes an important step. This phase is necessary to ensure these designs mix properly, producing a polished and smooth surface. While the initial Salt wash layer adds texture and character, the outcome relies on creating an even and consistent base for the subsequent layers of paint.

To have this, you’ll need to use a sanding block or sandpaper. A grit of 220 is suitable for this purpose. Take your time with this step, as it is important for the foundation of a beautifully finished piece. The objective is not to completely remove the texture created by the Salt wash but rather to create a balanced and melodic surface. Gently sand the surface, paying attention to any irregularities, until you achieve the desired level of smoothness.

5. Add a Second Coat of Paint

Add a Second Coat of Paint

With the textured foundation in place, it’s the best time to get the best result by using the Saltwash project and adding the second coat of paint. This is where you can use your ideas, allowing you to introduce additional colors and different designs to your place. The second layer of paint works best for your creativity, enabling you to customize and improve the overall aesthetic.

As you start this stage, take care to preserve the unique texture created by the Salt wash. This texture is an important element of the Salt wash technique’s beauty, and it adds character to your piece. Choosing colors is entirely up to you; it’s an opportunity to mix your style and creativity into the project. Once the second coat of paint is applied, it’s important to allow it to dry properly. This ensures that the colors and textures settle beautifully, resulting in the best results that you can get.

6. Choose and Mix Paint Colors

Choose and Mix Paint Colors.jpeg.jpg

When you are on a saltwash paint project, one of the most important decisions you’ll make is selecting and mixing your paint colors. This step sets the tone for the entire piece. The colors you pick can directly affect the final look and feel of your furniture. For a special and amazing result, you might go for a high-contrast approach. Start with a light base coat, such as a creamy white, and then apply a darker top coat over it. This creates a contrast that highlights the textured effect created by the salt wash.

On the other hand, if you prefer a cleaner appearance, selecting colors within the same range can work wonders. These shades will blend easily, producing a gentler texture while still adding a unique vibe to your furniture’s appearance. Once you’ve decided on your paint colors, it’s time to mix them with the salt wash additive.

7. Updating Knobs & Handles

Updating Knobs & Handles

In furniture makeovers, it’s often the little details that make a big difference. One such detail is the knobs and handles leveling up your place. These small elements can majorly impact the overall aesthetic and feel of your furniture. When you’re looking for a vintage appearance using the salt wash technique, it’s important to ensure that even the hardware contributes to the desired look. If your furniture currently has outdated or mismatched knobs and handles, consider giving them a refreshed look.

Go for hardware that matches the vintage theme you’re looking for. Clear crystal knobs, for example, can be an excellent choice for achieving that classic, amazing look. They work as a different addition to your spot while maintaining simplicity. Does not matter if you’re renovating an old dresser, nightstand, or cabinet; these knobs can make the furniture more awesome looking.

8. Tools for Salt Wash Painting

Tools for Salt Wash Painting

Before you dive into your salt wash paint project, it’s essential to gather the right tools and materials. Having the required equipment on hand ensures that the process goes smoothly, allowing you to achieve the desired textured effect with ease. First and most important, invest in quality paintbrushes. The type of brushes you choose can impact the final texture, so go for those with soft bristles that are easy to work with and clean. Next, you’ll need the saltwash paint additive. This is the key ingredient that will create the textured finish you’re aiming for.

Make sure you have enough salt wash powder on hand for your entire project. Other important tools include furniture tri-wheelies, sandpaper around 150 grit suitable for prepping the surface, a roller gear screwdriver, a shop vac for cleaning up dust and debris, and lint-free cloths for wiping down surfaces. Having containers for mixing your paint and salt wash is important to ensure proper blending. A stir stick will help you achieve the right consistency for your paint mixture.

9. Simple Process for a Vintage Appearance

Simple Process for a Vintage Appearance.jpg

The look of the salt wash paint technique lies in its simplicity. While it produces stunning vintage effects, you don’t need to be a professional to get them. This simple process allows people of all skill levels to change their furniture into beautiful, perfect pieces. The simplicity begins with finding the piece of furniture you want to change. It could be an old wooden table, a vintage chair, or even a plain dresser.

The main thing is to select a piece that you want to mix with the outstanding beauty of that. Once you have your chosen furniture, the process involves a series of easy steps, which will help you to get the texture that you want. It does not require any hard steps to do that. You’ll be easily able to do all those things.

10. Letting It Dry

Letting It Dry

Allowing the Salt wash paint to dry is an important phase in the Saltwash paint technique, as it is the process by which the different and awesome texture is formed. When you initially apply Salt wash paint to your chosen surface, it contains moisture within its composition. This moisture needs sufficient time to evaporate into the surrounding air. As this moisture evaporates, it leaves behind the unique textured appearance that is the quality of this paint technique.

However, the drying time can fluctuate, primarily depending on environmental conditions such as temperature and humidity. In warmer and drier atmospheres, the Salt wash paint can dry relatively easily, sometimes in just a few hours. On the other hand, in cooler or more humid environments, the drying process might extend to up to a full day. Patience during this phase is important, as attempting to disturb the drying process can negatively affect the outcome. A reliable indicator that the Salt wash paint has reached the desired dryness level is when it no longer feels sticky or weird to the touch.

11. Cleaning Up

Cleaning Up.jpg

The cleanup process after applying Saltwash paint is not that complicated. Water works as the best component for this process. The primary focus during cleanup is ensuring that the tools used, such as brushes and any other implements, are thoroughly rinsed with clean water. It’s advisable to initiate this cleaning just after completing your Salt wash project. Allowing the paint to dry on your tools can make cleanup significantly more challenging. Also, suppose any unwanted splatters or spills occur on your clothing or the surrounding surfaces during the painting process. In that case, a soft cloth is generally all that’s required to remove them effectively.

To further improve the cleanup experience and prevent other messes, it’s a wise precaution to lay down newspaper or a plastic sheet on your workspace before starting your Salt wash project. This simple measure not only facilitates the tidying process but also helps in maintaining the cleanliness of your workspace. With just some water and a few basic precautions, you can be assured that your work area remains clean and free from unwanted paint residue.

12. Fixing Mistakes

Fixing Mistakes

Even the most experienced painters occasionally encounter moments where adjustments are necessary to achieve the desired outcome. Correcting mistakes in your Saltwash project is an issue-free process because of the amazing nature of the Salt wash paint technique. If you happen to identify areas on your textured surface where the texture didn’t quite match your vision, you have the creative chance to reapply the Salt wash paint to those specific spots.

To correct any inconsistencies or imperfections, use either a paintbrush or a sponge to reapply the paint smoothly. It’s important to ensure that the newly applied paint blends easily with the existing texture. Following this reapplication, allow the paint to dry once more. This awesome aspect of the Salt wash technique enables you to experiment and make adjustments until you achieve the desired texture and appearance. Don’t hesitate to revisit and refine your work, as it’s all part of the artistic process.

13. Customizing

Customizing

A unique and highly fantastic feature of working with Saltwash paint is the vast chance for customization it offers. This means you have the creative freedom to make your project to your exact specifications and preferences. You can begin this customization by finding many colors. Salt wash paint is exceptionally amazing for color mixing and improvements throughout this process. Also, you can use a truly one-of-a-kind palette, reflecting your unique style and artistic vision.

The thickness of the Salt wash paint mixture can be adjusted to achieve a collection of textured effects. This level of flexibility allows you to experiment with various levels of texture, from simple to complex and enables you to express your creativity in many ways. Use this opportunity to mix your personal touch into every piece you paint with Salt wash. By doing so, you can create textured masterpieces that will not only look amazing but also be different from other regular textures.

14. Sealing & Protecting Paint

Sealing & Protecting Paint

Ensuring the long life and flexibility of your textured creation requires the important step of sealing and protecting the Saltwash paint. This protective measure has a dual purpose: it protects the textured finish from any wear and tear while at the same time improving its overall look. There exist multiple options for sealers, with clear wax sealers and matte sealers being among the most common choices. These sealers, when properly applied, create a protective barrier over the textured surface, effectively protecting it from everyday usage and environmental factors.

To start this step with precision, apply the selected sealer evenly over the entire painted surface. It’s important to listen to the manufacturer’s instructions regarding application and drying times. Once the sealer has dried, it does more than protect your creation; it gives a polished finish that makes the overall appearance of your textured a masterpiece.

Conclusion

Making cool textures with Saltwash paint is easy and fun. You learned the important steps like letting it dry, cleaning up, fixing mistakes, customizing your colors, and sealing your creation. These steps might look difficult at first, but with practice, they become super simple.

Remember, patience is most important when waiting for the paint to dry. No need to rush; wait until it’s not sticky. Cleaning up is also easy; dip your brushes and wipe away any unwanted spots. And if you make a mistake, you can fix it by adding more paint and letting it dry again. Making it more amazing with fancy colors is a nice choice. Mix and match to create your special shades. You can make your project as unique as you want.

Now that you know these easy steps, you can create amazing textured things with this amazing paint. Practice makes perfect.

October 18, 2023 0 comments
0 FacebookTwitterPinterestEmail
How to Make Your Own Stunning Macrame Wall Hanging
DIY ProjectsHome Decor

7 Easy Steps to Make Your Own Macrame Wall Art

by Ingrid Svensson October 18, 2023
written by Ingrid Svensson

Macrame is a classic craft that involves knotting cords together to create beautiful patterns and designs. It’s a fantastic way to add a touch of boho style to your home decor within budget. You don’t need any special skills or fancy tools to get started, just a little patience and a want to get creative. We’ll learn the process in simple, easy-to-follow instructions.

We’ll find the basic knots you’ll need to know and the materials you’ll require and provide tips and tricks along the way to ensure your success. We’ve learned how to create your very own macrame wall hanging, and we find it much easier than it looks. So, gather your materials, find a comfy spot, and we’ll find out how to make your very own stunning macrame wall hanging.

Let’s start with macrame and learn just how to make a macrame wall hanging that will leave everyone to think.

What is Macrame?

What is Macrame

Macrame is an old craft that started over 700 years ago. But now, it’s making a comeback and getting popular again. It’s all about making cool things by tying knots in cords and threads. At first, people used it for practical things like holding things together and making fabrics. But now, it’s all about being creative. What’s great about macrame is that it’s effortless and can be used in many ways.

With just a few basic knots, you can make things like pretty wall decorations, plant holders, or even fancy jewelry and accessories. People love it because it has a boho style and fits in with the trend of using handmade and eco-friendly things at home. Whether you’re really good at it or just starting, macrame is a fun way to show your creativity and make your home look nice. Give it a try, and you’ll learn how to make macrame wall hangings and beautifully present them.

Steps to Make a Macrame DIY Wall Hanging

Steps to Make a Macrame DIY Wall Hanging

Materials You’ll Need

Before you begin, gather the following materials

  • Macrame Cord: Choose a high-quality macrame cord made of cotton, jute, or a blend of natural fibers. The thickness of the cord can be huge depending on your design, but 3-4mm is a good starting point.
  • Wooden Dowel or Metal Ring: You’ll need strong support for your wall hanging. Wooden dowels and metal rings are common choices. The size depends on the width you want for your wall hanging.
  • Scissors: A sharp pair of scissors is important for cutting the cord cleanly.
  • Tape Measure or Ruler: To ensure precision in your measurements.
  • Combs or Brushes: These will help you comb out the fringes for a neat finish.

Steps to Get Started

1. Cut the Cord

Start by using a ruler or a piece of tape to measure how to make a macrame wall hanging. Then, just cut it into pieces that are all the same size. You’ll need several of these same-size cords to make different knots and patterns for your design. This easy step makes getting ready for your project clear and makes sure everything looks nice in the end. It doesn’t matter if you’re making jewelry, doing macramé art, or anything else with cords. This way, you stay organized and ready to make your design just the way you want it. Having cords that are all the same size is like having the right tools for the work, making the whole process go smoothly. So, measure and cut those cords for a successful project.

2. Attach the Cords to The Dowel

To make things look tidy, follow these effortless steps: Take each cord and fold it in half, then put it over the stick. Now, pull the loose ends through the folded part to tie the cord to the stick. Keep doing this for all your cords, making sure they’re evenly spread out along the stick. This basic method not only helps you organize your cords but also makes them look neat and in order. Keeping your cords tidy is great for preventing tangles and confusion. Whether you’re sorting out computer cables or hanging up decorations, this technique is handy and clear to follow. So, don’t let messy cords mess up your space. Fold and tie, and you’re good to know how to make a macrame wall hanging.

3. Create Your Knots

To begin your macrame project, you’ll want to start with three basic knots: the square knot, half-square knot, and spiral knot. These knots are like the building blocks for your macrame wall hanging. They are the important knots you need to learn to make your beautiful macrame creation. These knots are the key to crafting your amazing macrame artwork. Let’s take one step at a time. The square knot is your first knot, the half-square knot is similar, and the spiral knot adds a neat twist to your design. Once you’ve got these knots down, you’ll have the skills you need to create your very own macrame wall hanging. So, let’s start with these simple knots, and you’ll be on your way to making macrame art!

4. Build Your Design

Once you’ve learned the basic knots, it’s time to have some fun. Mix them to create your special designs. Try out different patterns, spaces between knots, and cord colors until you get the look you like. Knot-tying is all about experimenting and enjoying yourself. You’ll be surprised at the beautiful things you can make when you start combining them. So, jump in and enjoy turning plain knots into something amazing. Changing basic knots into unique creations is an exciting move. Whether you’re making jewelry, decorations, or useful items, don’t forget that you can do whatever you want with your knots. So, go on, find how to make a macrame wall hanging, and turn those basic knots into something truly fantastic.

5. Add Embellishments

Make your wall hanging special by adding beads, feathers, or other decorations. These little things can make your wall hanging unique. Wooden Beads can add a bit of sparkle, and feathers can make it look more natural. You can use different colors, shapes, and textures to create a design that fits your style. Whether you like wooden beads or colorful feathers, these decorations will make your wall hanging stand out. Use your creation and see how to make a macrame wall hanging.

6. Finishing Touches

After you’ve finished making your nice macrame wall decoration, make it look tidy by cutting off any extra string. Then, find a good spot on your wall to hang it up. You can use ultra-grip heavy hooks, nails, or whatever works best for your wall. Make sure it’s firmly attached so it won’t fall. Now, take a step back and enjoy what you’ve created. It’s not just a decoration. You make it with your hands, which adds a special touch to your home. Whenever you look at it, you’ll feel proud of how to make a macrame wall hanging and the comfort it brings to your space. It’s a unique addition that shows off your style and creativity. So, pat yourself on the back and enjoy your macrame wall decoration. It’s a simple way to make your home feel even more comfortable and inviting.

7. Hang It Up

Take a piece of string or thin rope. Make a loop to hang your beautiful art. Find a strong wall hook or nail, and hang your macramé securely. This way, you can enjoy your art and make your space look cool and comfy without any issues. Hanging art is effortless. Use some string and a strong hook, and you’re ready. Your room will instantly look better with your art up. This easy method means you won’t have to worry about your art falling or causing any problems. It’s an effortless way to clean up your space and make it feel just how you want it to to make a macrame wall hanging.

Different Types of Knots

1. Clove Hitch

Clove Hitch

The clove hitch is a useful knot because it keeps things firmly in place without any slipping. You create it by putting a rope over something, like a post or through a loop, and then crossing the rope over itself and tucking it underneath the first part. This knot comes in handy for securing your boat to a dock, beginning to tie things together, or even making a fast and temporary knot when you need it. So, whether you’re out on the water, working on a project, or need a quick fix, the clove hitch has got you how to make a macrame wall hanging with its strong and reliable hold.

2. Square Knot (Reef Knot)

Square Knot (Reef Knot).jpg

The square knot, also known as the reef knot, is a really basic way to tie two ropes of the same size together. Cross the ends of the ropes, then pass each end over and under the other rope. This knot is handy for keeping bandages in place during first aid, but be careful when using it with different-sized ropes because it might not hold well. The great thing about the square knot is that it’s easy to learn. You can use it for everyday things like tying packages, bundling things together, or even tying your shoe laces. But don’t forget, it works best with ropes of the same thickness. If you’re dealing with ropes of different sizes or materials, it’s smarter to use a different knot that’s made to be tough and more secure. So, while the square knot is handy, it’s not always the best choice for how to make macrame wall hanging.

3. Bowline Knot

Bowline Knot

The bowline knot is known as the king of knots because it’s really hard and won’t let you down when you need it. Tying a bowline is effortless. Start by making a small loop near the end of your rope. Then, take the loose end of the rope and pass it up through the loop, wrap it around the rest of the rope, and finally, tuck it back down through the loop. When you want to create a loop at the end of a rope, whether you’re climbing rocks, securing a boat, or helping someone in a tough spot. What makes the bowline knot special is that it won’t slip or come undone unexpectedly. That’s why it’s a favorite among outdoor supporters, sailors, and rescue teams. Whether you’re looking for how to make a macrame wall hanging or lending a hand in emergencies, the bowline knot is the go-to choice, strong and dependable.

4. Sheet Bend

Sheet Bend

The sheet bend is a handy knot for connecting two ropes, even if they’re not the same size or made from different materials. Take one of the ropes and make it into a U shape. Then, take the other rope and pass it through the U, wrap it around both sides of the U, and tuck it under itself. This knot is useful when you’re out camping or boating and need to make your ropes longer. Maybe you’ve got a thick rope and a thin one, or one’s made of nylon while the other is natural fiber, no problem. The sheet bend will help you join them securely. It’s a simple solution for when you’re in the great outdoors and need to extend your ropes, making sure you’re ready, big or small. So, don’t forget the sheet bend your go-to knot for joining ropes.

5. Taut Line Hitch

Taut Line Hitch

The taut line hitch is a handy knot, especially when you want to make a rope tight, like when you’re setting up a tent. First, wrap the rope around something tough, like a peg for your tent. Then, wrap the rope around the part you just wrapped, like making an extra loop around itself. Next, make a small loop right above the first wrap. This loop helps you adjust the knot easily and find out how to make a macrame wall hanging. The cool part is that you can slide this knot up or down the rope to make it tighter or looser. So, if your tent needs to be more stable, tighten the knot, and if you need some slack, loosen it up. That’s why it’s great for keeping your tent steady. You can always tweak it to fit your camping needs perfectly. So, don’t forget the taut line hitch next time you’re out camping.

6. Figure Eight Knot

Figure Eight Knot

The figure eight knot is a useful knot that helps ropes stay put and not slip through holes or pulleys. Making it is simple. Just make a loop, pass one end through it, and then thread it back down the same hole. It’s like a rope stopper. Climbers are a special version called the Figure Eight follow-through. It’s a safe way for them to tie themselves to their harnesses when they go climbing. So, whether you’re keeping things secure or getting ready to climb, the figure eight knot and its follow-through buddy have got you how to make a macrame wall hanging.

7. Double Fisherman’s Knot

Double Fisherman's Knot

The double fisherman’s knot, also known as the grapevine knot, is an important knot for joining two pieces of rope securely. To tie it, make a regular knot with one end of the rope. Then, pass the other end through the knot twice, wrapping it around. This creates a strong connection between the two ropes. This knot is important for climbers because it helps make hard loops in the rope. These loops are important for tasks like belaying and rappelling, ensuring you stay safe while climbing tough spots. So, learning how to make a macrame wall hanging is a must for anyone into climbing and outdoors.

8. Trucker’s Hitch

Trucker's Hitch

The trucker’s hitch is a great knot for making things tight. Make a circle with one end of the rope, push the other end through the circle, wrap it around what you want to tighten, and tie it up with a simple knot. People use this knot when they’re driving trucks, camping, or need to hold heavy things in place. It’s like a tough tool for keeping things secure. Truckers like it for keeping their cargo steady during long trips. Campers use it to keep their tents and tarps from flying away in the wind. When you’re moving big things, the trucker’s hitch stops it from wobbling around, so it’s safer. It’s easy to learn how to make a macrame wall hanging and handy for keeping things just where you want them.

Conclusion

Creating your amazing macrame wall hanging is an enjoyable and rewarding DIY project that anyone can gear. By following the step-by-step instructions provided, you can craft a beautiful piece of art to adorn your home. Don’t forget, it’s all about taking it one knot at a time and being patient with yourself as you learn. Start with the basics.

Your first step can be mastering the square knot and lark’s head knot. Before moving on to more twisted patterns. Experiment with different types of cords and colors to personalize your creation and match your decor. Don’t forget to gather the important tools and materials to make your macrame smooth and without difficulty. Your efforts will be rewarded with an amazing macrame wall hanging that adds a touch of style and personality to your living space.

So, grab your cords, get knotting, and enjoy the creativity of how to make macrame wall hanging.

October 18, 2023 0 comments
0 FacebookTwitterPinterestEmail
Best Decorating from Thrift Stores to Liven up your Home Decor
DecoratingHome DecorIdeas

30 Affordable Thrift Store Decorating Ideas for Your Home

by Ingrid Svensson October 17, 2023
written by Ingrid Svensson

You don’t need to spend much money to decorate your home, and thrift stores are like a special tool for smart decorators. These thrift stores are filled with decor items waiting to change your living room, bedroom, or kitchen. We’ll find out how to change your living space into a comfy and stylish shelter all on a budget.

From finding the perfect vintage furniture pieces to finding unique decorations that speak to your personality. We’ll find everything. We’ll also share creative ideas for upcycling and repurposing thrift store finds so you can give old items a fresh and trendy view. Whether you’re a DIY enthusiast or just looking for some quick and affordable home decor solutions, be ready to create a home that reflects your style, personality, and budget.

Let’s start the thrift store home decor and turn your house into a space you’ll love coming home to.

1. Suitcases

Suitcases

Turn old suitcases into cool storage solutions to add an adventurous vibe to your home. Just stack them in a corner for a quick dose of beauty and wanderlust in your decor. These thrift store home decor are more than just storage. They’re both useful and stylish. You can also use them as a unique coffee table to make your living space more exciting. These flexible pieces don’t just keep things tidy. They also share the story of your travels and dreams, giving your home a personal touch.

2. Books

Books

Old books aren’t just for reading. They’re great for decorating, too. Arrange them on your shelves by color or size to make your room seem nice and tidy. Vintage hardcovers can be a rare centerpiece on your coffee table. This thrift store home decor can make your home view lovely and fantastic. So, use them to make your space more inviting and good-looking.

3. Dishes

Dishes

Adding old dishes to your dining area gives it a classic attraction. Try mixing different designs to make your table look fun and unique. Vintage china can be both useful for serving food and pretty for decorating. So, you get both trends and use decor when you choose to use these old dishes. Make your meals more particular with the beauty and history of vintage dishes, a more wonderful place.

4. Coffee Tables

Coffee Tables

Want to freshen up your living room? Try making impressive coffee tables from things lying around. Take an old door or a wooden crate and turn it into a simple coffee table. Give it a new coat of paint for a fun splash of color. These upcycled tables make your room singular and help the planet, too. Thrift store home decor is a fun and eco-friendly project that’ll make your living space look awesome while showing off your creativity.

5. End Tables

End Tables

Vintage end tables are a perfect choice for showing off your favorite small things. These tables have a classic appearance that goes well with any room mode. If you want to make them look even fancier, find decor with special wooden patterns. Whether you want to put your favorite things on them or need an enjoyable place for your tea, vintage end tables work well. They’re useful and make your room seem good, so they’re a good thing to have in your home.

6. Baskets

Baskets

Old-style baskets make your home look restful and attractive. You can hang them on the wall, use them for blankets, or put your plants in them. They don’t just be lovely. They make your home warm and interesting. These thrift store home decor add character to your decor and remind you of the past. So, whether you want a farmhouse sight or a comfy cottage way, vintage baskets are a simple and stylish way to do it.

7. Toys

Toys

Use old toys as decorations. Just place them on shelves or in boxes. These toys make you not forget when you were a kid and make your home more enjoyable. They look pleasant and bring back good memories. Whether it’s a favorite teddy bear or an old toy car, they make your home comfy and interesting. These toys are inviting and make your place unique. So, don’t keep them hidden away; let thrift store home decor be part of your home’s story and make it a fun and relaxed place to be.

8. Table Linens

Table Linens

Vintage tablecloths and napkins give your dining table a classy, old-fashioned. They often have pretty designs like embroidery or fine lace, making your meals look rare. They’re not just practical but also make your table seem pretty and fancy. So, whether you’re having a homey family dinner or a fun meal with friends, these tablecloths and napkins make your dining table view fabulous and outstanding, like something from the past.

9. Jars and Canisters

Jars and Canisters

Give your kitchen storage a fun twist by reusing old glass jars and containers. Make your pantry view cool by sticking labels on them for a vintage vibe. This thrift store home decor not only makes it easy to find things but also adds a neat spot to your shelves. So, grab those old jars, slap on some labels, and watch your pantry become a stylish, organized space. It’s a simple way to make your kitchen both practical and good-looking. Get started now and enjoy the benefits of a spiffy pantry with a dash of old-school beauty.

10. Rugs

Rugs

Vintage rugs are old-style and colorful. They’re strong and have pretty designs. Put them in thrift store home decor where people walk a lot, and they’ll look pleasant and be useful. Vintage rugs last a long time and are great for busy areas like hallways or the family room. They give your home a friendly vibe and make it homely for everyone.

11. Calendars and Sheet Music

Calendars and Sheet Music

Decorate your home nostalgically and creatively by putting old calendars and sheet music in frames as wall art. These special pieces not only remind you of the past but also make your home refreshing. Changing old calendars and music into nice decorations is simple and inexpensive. So, don’t throw away those old calendars and sheet music. Put them, and let your home show a wonderful story while adding a touch of creativity.

12. Headboards

Headboards

Old-fashioned bed frames from the past can make your bedroom sight more romantic. They have pretty designs that grab attention in your sleep spot. You can make your bed extra comfy by using soft, classic-style sheets and blankets. When you combine these, your room becomes warm and welcoming, the best place to relax and have dreams. The thrift store home decor on the bed frames makes your room seem classy, making it a lovely spot for rest and dreaming. So, if you want your bedroom to be more romantic, add one of these old-pattern bed frames and some vintage-mode sheets and blankets.

13. Dressers

Dressers

Old dressers do two fresh things: they help you store things, and they make your place look pretty. You can do two fun things with them: paint them or keep them as they are. If you want to change them, you can paint, stain, or make them seem fresh. In this thrift store home decor, you get something that works and views how you like. Or, you can keep them old and cool, which makes your place marked and classic.

14. Lamps

Lamps

Old-style lamps give off a nice, soft light. Their pretty bottoms and particular lampshades often grab people’s attention and start fun conversations. When you put them in the right places at home, you make comfy spots that are comfortable. These decorations not only light up your room but also make it cool and interesting. So, whether you’re reading a book or having friends over, these old-pattern lamps make your home just right.

15. Seasonal Decor

Seasonal Decor

Look in thrift stores for cheap seasonal decorations. You can find cute Easter bunnies and spooky Halloween witches to make your home spot fun for unique times. These not only add attraction but also help you save money while making your place extraordinary. So, why spend a lot when you can enjoy looking for unique decorations that make your home happy all year round? Give your home a seasonal makeover without much effort or spending lots of money by checking out the wide things you can find in thrift stores.

16. Candlesticks

Candlesticks

Make your table view extraordinary with old-mode candle holders. These thrift store home decor make your meal setup more fancy. You can have fun by using different kinds and sizes to make it seem interesting. Light them up when you want a welcoming dinner with someone you love, or put them in the middle of the table when you have a festive event. They bring a secure, old-fashioned beauty to your dinners and make them important.

17. Servingware

Servingware

Make your meals extra special with old-fashioned serving platters and bowls. These thrift store home decor bring a bit of the past to your table, making mealtime even better. Whether you’re having a family gathering or a nice dinner with friends, these rare dishes add a classy touch. They have designs that remind you of the old days, giving your table a sight of history. So, when you set the table, consider using these vintage treasures to make mealtime memorable for everyone.

18. Light Fixtures

Light Fixtures

Make your room singular with impressive old lights. These aren’t just for light but also to make your room spot large. You can pick from fancy lights that hang down, big fancy ones, or wall lights. They give you the light you need and also make your room amazing.

19. Picture Frames

Picture Frames

Old-fashioned picture frames add a particular view to your favorite photos, making them even more inviting. You can have fun mixing and matching different ways to create a beautiful wall of photos that tell your story. These frames have a wonderful way of making your treasured memories even more marked and unforgettable. Whether it’s a black-and-white photo from years ago or a colorful picture from a recent adventure, vintage frames turn your photos into lasting keepsakes that warm your heart and make your space comfortable and more personal. Take the past and display your memories with thrift store home decor.

20. Mirrors

Mirrors

Old mirrors are amazing. They bounce light and make your room look bigger. Hang them in the right spots to let sunlight in. Fancy frames add an important touch of manner. These vintage mirrors don’t just show your reflection; they capture a piece of history and form. Thrift store home decor makes your room rare and safe.

21. Christmas Decorations

Christmas Decorations

Thrift stores have cool old Christmas things that can make your home restful and festive every year. You can find unique decorations from the past and use them to decorate your tree. These thrift store home decor make your holiday decorations warm and notable. So, if you want vintage holiday cheer, look into thrift stores for Christmas goodies.

22. Figurines

Figurines

Clean up your home with old figurines. They’re great for giving your place an artsy view. Just put them on your shelves or mantels. These little decorations have many small details and come in various ways, making them fun to spot. You can collect different ones to make your home seem fabulous. Whether you’re a pro collector or just getting started, these awesome pieces will add attraction to your home. Start your collection today and let your home show off your type with this decor.

23. Trays

Trays

Vintage trays are perfect for decorating your home. You can use them to tidy up your coffee table or make drinks view large. Look for trays with fantastic designs and different materials to make your home seem pretty and lovely. So, have fun decorating and enjoy making your home outstanding with these thrift store home decor.

24. Vases

Vases

Old-style vases make your flower bunches nice. They come in many different shapes and colors that fit any room mode. Put them on tables or shelves, making your space even prettier. These cute vases add something notable and a sight of history to your decoration. They’re not just containers; they’re things people will talk about. So, when you have fresh flowers, use an old-style vase and see how your room gets a classic, pleasant appearance that views a vintage.

25. Pitchers

Pitchers

Old pitchers can be used for flowers or water. They look enjoyable in your kitchen or dining room. They are pretty and can fit anyway. You can put flowers or water in them. They will make your place pleasant and old-fashioned. So, use thrift store home decor to make your home seem festive and vintage.

26. Desks

Desks

Vintage desks make your workspace seem lovely. These desks are made from strong wood and have a classic trend that makes you want to work. If you add a vintage chair that matches, it will be even better. This combo doesn’t just be good but also helps you work better. So, whether you’re doing tasks or being creative, using a thrift store home decor and chair is a great way to make your workspace both useful and nice.

27. Cigar Boxes

Cigar Boxes

Turn old cigar boxes into storage. They seem fresh and add a classic touch to your space. Use them for jewelry, small things, or office things. These boxes make your place view rare and help you stay organized. Don’t throw away those old cigar boxes that make decor into useful storage for your home or office.

28. Dining Tables

Dining Tables

Old-style dining tables become the star of your dining room. They’re well-made and have a unique beauty that makes every meal unique. You can mix thrift store home decor with modern chairs for a fantastic and trendy spot.

29. Cutting Boards

Cutting Boards

Add a homey, plain touch to your kitchen by using old cutting boards as pretty serving trays. The aged wood makes your kitchen seem warm and interesting. These boards are best for making nice displays with cheese and meats to impress your guests. You’re not just reusing them and reducing waste, but you’re also giving your food presentations a cool, vintage appearance. So, clean up those old cutting boards and use them as special serving trays with a story behind thrift store home decor, making your entertaining view even better.

30. Wreaths

Wreaths

Traditional wreaths give your front door a secure, nostalgic view. They have long-lasting designs that make your home’s exterior feel friendly and stylish, making guests feel welcome and at home. These decorations are a lasting symbol of hospitality and can be decorated with classic greenery, festive ornaments, or seasonal flowers. They’re a great choice for those who love the attraction of vintage decor and want to create a warm and inviting atmosphere at their doorstep.

Conclusion

Decorating your home with thrift store finds is a fantastic way to bring life and personality to your living space within budget. We’ve seen how easy it is to find decorative items in these budget-friendly stores, from unique furniture pieces to attractive decorations. By using the easy ideas we talked about, such as staying open to new things, staying calm, and playing around with different things. You can make your home comfy and stylish.

Reusing and upcycling items from thrift stores helps reduce waste and supports sustainability. Don’t forget to consider your budget and only buy what you truly love and need with some creativity and a small investment. You can change your living space into a place that reflects your personality and makes you feel at ease.

So, go and find your local thrift stores. Release your creativity and have fun decorating your home on a thrift store home decor.

October 17, 2023 0 comments
0 FacebookTwitterPinterestEmail
DIY ProjectsHome Decor

How to Paint a Rainbow on a Wall: Complete Guide

by Marco Bianchi October 17, 2023
written by Marco Bianchi

If you are thinking about how to Paint a rainbow on a wall, then there are some ways and things you can do. We’ll help you how to paint a rainbow on a wall with many steps. Painting a rainbow on a wall is a colorful and fun way to bring a touch of happiness and creativity to any room.

If you’re decorating a child’s bedroom or just adding some energy to your space, this simple DIY project can brighten up your day. You don’t need to be an artist to do this; all you need are some basic painting supplies and a little bit of patience. We will talk about choosing the right colors, preparing your wall, and creating those beautiful arches of color. You’ll be amazed at how a few strokes of paint can change a plain wall into a work of art.

So, get your brushes ready, and let’s check how to paint a rainbow on a wall and start painting the rainbow.

Materials You’ll Need to Paint a Rainbow on a Wall

Materials You'll Need to Paint a Rainbow on a Wall

Before you start painting your rainbow, you’ll need to gather the necessary materials. Here’s a list of what you’ll require:

1. Paint: Acrylic paints are an excellent choice for this project. They offer bright colors and are easy to work with. You’ll need the primary rainbow colors: red, orange, yellow, green, blue, indigo, and violet.

2. Paintbrushes: A variety of brush sizes will be helpful. You’ll need larger brushes for the broad strokes and smaller ones for the finer details.

3. Painter’s Tape: This will help you make clean, straight lines for your rainbow.

4. Drop Cloths or Plastic Sheets: To protect your floor and furniture from paint splatters.

5. Pencil and Eraser: To sketch the outline of your rainbow.

6. Ruler or Straight Edge: For creating precise lines.

7. Palette: Mix and blend colors.

8. Water and Containers: For cleaning brushes and diluting paint if needed.

9. Paper Towels or Cloth Rags: To wipe excess paint and clean brushes.

10. A Step Ladder: To reach higher areas if necessary.

Gather Your Colors

Gather Your Colors

When Gathering your Colors, think about how to paint a rainbow on a wall. The paint you need to make a rainbow. So, what colors do you need? That stands for Red, Orange, Yellow, Green, Blue, Indigo, and Violet. Think about these colors in your mind, and make sure you have enough paint for each. Before you start painting, you want it to be as smooth as possible, clean it up, and make it nice, and even this helps your rainbow shine and look its best. It’s time to plan where your rainbow will go. How to paint a rainbow on a wall: first steps to gather your colors. Sketch the Rainbow means drawing a gentle outline with a pencil.

Prepare the Wall

Prepare the Wall

This is an important step to prepare the wall before you add the lively colors of your rainbow. Preparing the wall is close to setting the perfect for an artwork that attracts. Begin by analyzing your wall, ensuring it’s free from any dust, dirt, or imperfections. How to paint a rainbow on a wall smooth surface is key to achieving a perfect finish for your rainbow masterpiece. Take the time to wipe down the wall, addressing any irregularities, so your colors can shine without any scratches. Consider the type of paint you’re working with. Select high-quality, water-based paints that not only confirm a loaded and long-term color but also make the application process smoother. This choice increases the overall beauty and long life of your rainbow creation. As you get ready to start this artistic way, try it, where the arch of your rainbow will show in an attractive way.

Sketch the Rainbow

Sketch the Rainbow

When you think about how to Paint a rainbow on a wall, the rainbow helps to complete your thinking. Sketching the Rainbow, a Playful opening to Colorful Creativity. Let’s talk about sketching the rainbow on your wall. This step is like creating a vision for your colors when you’re about to start. Think about your wall as a palette awaiting the rainbow. Before you pick up a paintbrush, take a moment to look at the graceful shape your rainbow will follow. Don’t worry about perfection. This is a gentle test outline, such as the first strokes of a storyteller’s pen. Use a pencil, the quiet conductor of your creative band. With its lead, decorate the initial art of your rainbow, letting your thinking guide the way. The placement is a forming display. As your pencil side, you’re not just outlining, you’re mapping out a route for the shade to follow, ensuring each color finds its place in the multicolored combination.

Painting Order Matters

Painting Order Matters.jpg

Painting order when creating your showing rainbow. Thinking about how to paint a rainbow on a wall? You’ve got your method, art your wall ready for an upgrade. Now, why does the sequence of colors matter so much? Think of a rainbow, and each color is important for making this. To bring out the best in your rainbow, you start with the brightest color at the top, red. As you move down the wall, transitioning through orange, yellow, green, blue, indigo, and finally, violet. You’re making an attractive masterpiece. This specific order isn’t just a random choice; it’s the part of that iconic rainbow look we all appreciate.

Blend and Overlap

Blend and Overlap

Making balance in Rainbow Colors is important. Let’s talk about the interesting Blend and Overlap and how to paint a rainbow on a wall in the context of painting a rainbow on your wall. This step ensures your rainbow transitions easily from one color to the next, giving it that thrilling and blended effect.

1. Blending

When discussing blending, consider it the gentle dance between colors and how to paint a rainbow on a wall. As you paint your rainbow, especially where two colors meet, use your brush to mix them slightly. This blending softens the transition and removes any distinct lines between colors. It’s similar to a gentle grade, allowing each color to flow smoothly into the next. where the colors in the sky meld together easily. Similarly, in your rainbow, blending makes that attractive, almost pleasing environment, making your wall art feel more fine.

2. Overlap

How to paint a rainbow on a wall overlap. Overlap pictures of the colors of your rainbow as a partner. As you paint, let them walk hand in hand, sometimes crossing paths. Overlapping involves allowing one color to cover another at the point where they meet slightly. This overlapping technique ensures that your rainbow doesn’t look like disconnected lines. Instead, it forms a family and balanced whole. Think of a Venn diagram where the colors share a little space, symbolizing unity and collaboration. In your rainbow, this makes a continuous flow and shows pleasant vibes.

Add Clouds for Beauty

How to paint a rainbow on a wall helps with adding clouds for beauty. Let’s give beauty to your rainbow masterpiece by introducing some fluffy clouds. Think about a rainbow extending from one end to the other, and at each end, beautifully paint playful clouds. These clouds aren’t just any clouds. They’re the part that adds a fairytale vibe to your creation.

1. Creating Cloud decorative

How to Paint a Rainbow on a Wall: you can choose creative cloud decorative ideas. Let me tell you what you can do with cloud decorates. Choose a light white or soft gray paint to craft clouds that seem to twirl with the colors of the rainbow. These clouds aren’t just there for show. They provide a wonderful difference and support the overall environment.

2. Brush Technique Matters

How to paint a rainbow on a wall helps with Brush Technique Matters. As you start on cloud creation, adjust your brush technique. Think light strokes, gentle curves, and a vibe of artistic skill. These clouds are the supporting part of your rainbow’s role, so make them soft and inviting.

3. Positioning for Balance

How to paint a rainbow on a wall with the help of positioning your clouds. Placing them at each end of your rainbow not only adds amazing balance but also makes a fascinating narrative. It’s as if your rainbow is peeking out from behind these clouds, ready to brighten anyone’s day.

4. Tailor Cloud Size

Clouds come in all shapes and sizes. Make the size of your clouds to complement the scale of your rainbow. It’s too big, and they might steal the show. They are too small, and they could get lost in the colorful display. Efforts for that perfectly balanced clouds.

5. Blend with The Rainbow

Blend the sides of your clouds slightly with the surrounding rainbow colors. How to paint a rainbow on a wall: the fine blending ensures a smooth transition between the clouds and the rainbow, improving the overall sight request.

6. Step Back and Compliment

Once your cloud is in place, take a step back and compliment the modification of the wall. Those added clouds aren’t just a decorative vibe. They’re the satisfying detail that takes your rainbow from lovely to completely unreal.

Let It Dry

Let It Dry

After you’ve painted your rainbow on the wall with all those awesome colors, you need to give it some time to dry. When you finish painting your rainbow if you want to add more colors right away. Let the paint do its thing and dry out completely. This way, your rainbow stays bright, and you won’t accidentally mess up the colors.

Finishing Touches

Finishing Touches.jpg

After the paint has dried and you’ve made any necessary touch-ups, step back and admire your handiwork. A rainbow on your wall can instantly boost the environment of your room, creating a cheerful and inviting atmosphere. Here are some additional tips for finishing touches.

1. Furniture and Decor

Arrange furniture and decor items that complement the rainbow theme. Colorful cushions, artwork, or curtains can improve the overall look.

2. Lighting

Consider installing soft, warm lighting to highlight your rainbow wall, especially if it’s in a bedroom or nursery. This can create a warm atmosphere.

3. Personalization

If you’re painting a rainbow in a child’s room, you can add their name or a meaningful quote using stencils or freehand painting.

4. Maintenance

To keep your rainbow looking fresh, periodically wipe it down with a damp cloth to remove dust and dirt.

Seal the Deal

Seal the Deal

Seal the Deal means taking a final step to confirm the long life and protection of your artwork. After you’ve successfully painted the rainbow and allowed it to dry, applying a clear Protector is like adding a protective shield. This clear Protector is a barrier, safeguarding your colorful creation from potential damage or wear over time. Think of it as a finishing touch that not only maintains the brilliance of your artwork but also makes it easier to clean if needed. So, sealing the deal is the last action you take to secure and increase the beauty of your painted rainbow. So, it stays delightful for a long time.

Enjoy Your Colorful Creation

Enjoy Your Colorful Creation

In the final step, take a moment to show the beauty of what you’ve made. Stand back, drown in the lively colors, and appreciate the feeling that your masterpiece brings to the space. This is the time to enjoy the bright atmosphere you’ve added to your surroundings.

Conclusion

Now, you know, how to paint a rainbow on a wall. Painting a rainbow on a wall is a fun and creative project that anyone can try. It’s not just about colors; it’s about spreading positivity in your space. Start by gathering your materials, such as paint, brushes, and tape. Plan your rainbow carefully, choosing the right order of colors, red, orange, yellow, green, blue, and purple. Prepare your wall by cleaning and priming it. Apply the paint in even strokes, letting each color dry before adding the next one. Take your time to make it look pretty.

If you make a mistake, don’t worry; you can always fix it. Once your rainbow is complete, step back and praise your work. It symbolizes hope and happiness that can brighten up any room. Painting a rainbow on your wall is a wonderful way to express your creativity and bring a smile to your face. So, grab your paintbrushes and start spreading those colorful vibes.

Enjoy the process and the beautiful rainbow you’ll make.

Frequently Asked Questions

How Do I Prepare the Wall Before Painting?

Start by cleaning the wall to remove any dust or dirt. Then, apply a primer to make a smooth surface for the paint to adhere to.

What Is the Best Way to Make a Rainbow Shape on The Wall?

You can use a pencil and a measuring tape to mark the center point of your rainbow arch. Then, use a level to draw a curved line connecting the two ends of the rainbow.

In What Order Should I Paint the Colors of The Rainbow?

Start with the outermost color, which is typically red, and work your way inward—following the order of the rainbow: red, orange, yellow, green, blue, indigo, and violet.

How Many Coats of Paint Should I Apply for Each Color?

Depending on the quality of your paint and the color you’re working with, two coats of paint are usually enough. However, you may need more coats for better coverage.

How Do I Ensure the Colors Blend Smoothly?

To achieve smooth transitions between colors, blend the edges while the paint is still wet. This can be done by gently feathering the edges with a clean brush.

October 17, 2023 0 comments
0 FacebookTwitterPinterestEmail
How to Hang a Wreath on Brick Wall
Decor & DesignDIY ProjectsHome Decor

How to Hang a Wreath on Brick Wall: Complete Guide

by James October 17, 2023
written by James

Hanging a wreath on a brick wall might seem difficult, but it’s a quick and fun DIY project that can bring seasonal beauty to your home. If it’s for a special occasion or to add a welcoming touch to your entryway, we’ll find out about everything. We’ll provide you with a list of easily accessible materials and a step-by-step process that anyone can follow.

From selecting the right wreath and location to gathering the basic supplies, we’ll find everything into clear, manageable steps. We’ll find exactly how to hang a wreath on a brick wall. We’ll share some tips to ensure your wreath hangs securely and looks fantastic. So, grab your wreath, gather your supplies, and let’s get started.

We’ll find out how to change your brick wall into a beautiful wall for the holiday or year-round decoration. It’s easier than you think, and we’ll find every step of the hanging wreath on brick.

What is a Wreath?

What is a Wreath.jpg

A wreath is a symbol that lots of people like. It’s simple and pretty, and you can make it from leaves, flowers, sticks, or ribbons. Wreaths are usually round and can go on doors, walls, or tables. A long time ago, in Greece and Rome, wreaths meant winning and being respected. In Christianity, they stand for life that never ends because they are round. During the holidays, you see wreaths everywhere with holly, pine, and red bows. They make homes feel comfy. People enjoy making wreaths. They use their creativity to make all kinds, like for spring, Christmas, or not to forget someone special. Wreaths show how people feel, welcome different times of the year, and old traditions. Whether it’s a pretty spring, a happy holiday, or a respectful memorial, wreaths let us express feelings and hang them on brick walls traditionally.

Materials You’ll Need for Hanging Wreath on Brick

Materials You'll Need for Hanging Wreath on Brick

Before you start, gather the following materials.

  • Wreath: Choose the wreath that fits the event and your taste. If you want to put it on your outside brick wall, make sure it’s okay to use it outdoors.
  • Wreath hanger or hook: Find a tough hook or hanger to hold up your wreath. You can pick from different types, like hooks that go over the door and sticky hooks.
  • Drill with a masonry bit: You’ll need this tool to poke holes in the brick wall for anchors.
  • Wall anchors: Pick wall anchors designed for brick walls. These will give your wreath the support it needs.
  • Screwdriver or wrench: You’ll need a tool to keep the wall anchors in place.
  • Level: This will make sure your wreath hangs flat and looks good.

Step-by-step Guide for Hanging Wreath on Brick

Step 1: Choose the Right Location

Choose the Right Location

To find the best spot for your wreath, consider how it looks and where people can see it easily. Many people like to put wreaths near their front doors, over their fireplaces, or on the walls outside their houses. These places not only make your wreath seem great but also make it easy for others to enjoy it. Hanging your wreath near the front door is a classic choice. It’s the first thing guests see when they arrive, adding a warm, welcoming touch to your home. Above the fireplace is another great spot. It becomes the center of attention in your living room, especially in the warm winter months. Outdoors on your walls is also a fantastic option. It can brighten up your yard or garden, creating a cheerful feeling for everyone passing by. So, if you choose the front door, the fireplace, or an outdoor wall, make sure your wreath is easy to see and adds a mark of beauty to your surroundings. With these clear tips, you can easily find the perfect spot to hang a wreath on a brick and spread some seasonal happiness.

Step 2: Mark Your Spot

Mark Your Spot

A simple way to hang up your wreath exactly where you want it. All you need is a pencil or a piece of chalk, something you probably already have lying around the house. First, stand back and view the spot where you want your wreath to go. You know, it’s just the place that feels perfect to you—got it in your mind? Great. Now, use that pencil or chalk to make a little mark right there. But wait, before you make the mark, ensure it’s not too high or too low. You want it to be just the right height so it seems nice. And check if it’s in the middle of your space. If it is, awesome. You’re all set. By doing this, you’ll have your wreath hanging up exactly where you want it. It’ll add a lovely touch to your space without any difficulty. So, have fun decorating, and enjoy your hanging wreath on brick.

Step 3: Drill Holes

Drill Holes.jpg

Let’s make sure we’re safe first. Put on your safety gear, like goggles, to protect your eyes. Now, use your drill with the particular to make holes where you marked the wall. Ensure these holes are deep enough for the wall anchors to fit securely. Grab your drill with the singular bit attached. This hanging wreath on brick is made for drilling into hard things like brick or concrete. Position your drill over the marks on the wall and gently press the trigger. Don’t push too hard. Just let the drill do the work. Pay attention to how deep you’re going. You want the holes to be deep enough for the wall anchors. Once you reach the right depth, let go of the trigger and carefully pull the drill out of the hole. You’ll have nice, ready holes to put your wall anchors in. These holes will help your wall anchors grab tight and keep your things securely on the wall. Stay safe, and take your time with this job.

Step 4: Insert Wall Anchors

Insert Wall Anchors.jpg

Stick those wall anchors into the holes you made. Use a screwdriver or wrench to make them secure. They work by getting bigger inside the brick, keeping things in place. Think about you’re hanging wreath on a brick or a shelf. You’ve already drilled holes in the wall. Now, it’s time to use those wall anchors. Gently push the wall anchors into the holes. They may be viewed as small, but they have a rare power. This growth locks them securely into the brick. Why is this important? Well, without wall anchors, your shelf or picture frame might wobble or even fall. But with these trusty anchors, your things stay in place, ready to show off. So, the next time you work around the house, your secret allies are the wall anchors. They may be small, but they’re great at keeping things steady and safe.

Step 5: Attach the Wreath Hanger

Attach the Wreath Hanger

Okay, people, let’s make hanging a wreath easy. If you have a wreath hanger or a hook, just put it on the wall. But make sure it’s not crooked. Keep it straight. We all know how holiday decorations can get difficult, but don’t turn hanging a wreath into a circus act. Think of your wreath as the star and the wall hook as its helper, keeping it up for everyone to see. There is no need for fancy moves, just a simple and neat display that’ll make your neighbors jealous of your wreath. So, if you’re new to wreath hanging or an old pro, one thing: keep it straight. Your wreath will thank you, and your wall hook will be the hanging wreath on brick decor.

Step 6: Hang the Wreath

Hang the Wreath

Let’s make sure your wreath looks just the way you like it. First, gently hang it on the hook. Check if it’s straight; if not, adjust it until it seems good. Be careful when touching the wreath to avoid any damage. Once it’s on the hook, step back and see if it’s hanging how you want it to. If not, don’t worry. You can easily change it. Hold the wreath and move it a bit until it’s straight. You might need to tilt it a little to the left or right. Keep adjusting until it seems perfect to you. It’s your wreath, so you can decide how it should hang. Take your time and enjoy hanging wreaths on brick. Your wreath reflects your unique style, so have fun decorating it how you like. Whether it’s for a festive occasion or to add a touch of beauty to your space, this wreath is your chance to show your creativity. So, take your time, relax, and make it look amazing.

Step 7: Test Stability

Test Stability

To make sure your wreath is hanging on tight, give it a little shake. If it moves around or feels like it might fall, take a look at the hook on the wall. Make sure it’s screwed in nice and tight. If it’s not, you can use a screwdriver to tighten it up. If you want to be extra sure your wreath stays put, you can also think about using some more hooks or hardware for extra support. This hanging wreath on brick will help keep your wreath in place and looking good all season long. So, remember these simple steps: shake your wreath to check, tighten the wall hook if needed, and consider adding some extra support. That way, your wreath will hang safely and stay beautiful throughout the season.

Step 8: Enjoy Your Wreath

Enjoy Your Wreath

Now, step back a little and enjoy what you’ve done. Your wreath looks great on your brick wall, and you’re all set to say hello to your guests or join in the fun of the season. It’s a nice feeling, isn’t it? You worked hard to make something special, and now it’s there for everyone to see. When you see your wreath, it makes you feel good because you did a great job. This hanging wreath on brick is more than just decoration. It’s a friendly greeting. It tells your friends and family that they’re welcome when they come to your house. It also adds some of the season’s attractions, whether it’s a festive holiday or a beautiful time of year. So, the next time you walk by your brick wall, take a moment to smile at what you’ve made. Your wreath shows your creativity and friendliness, ready to make every visitor feel happy. It’s a small thing that brings happiness and comfort to your place, reminding you that sometimes, the plain things can mean the most.

Maintenance Tips for Hanging Wreaths on Brick

Maintenance Tips for Hanging Wreaths on Brick

1. Weatherproof Your Wreath

If you have a wreath hanging outside, you can make it last longer and keep it looking nice by doing something clear using a clear protective spray. Why it’s important: Wreaths are often made of fine things like flowers or leaves. When they’re out in the weather, like when it rains, or the sun shines bright, these fine things can start to fade or break. That’s where the protective spray helps. When you spray it on, it makes an invisible cover that stops the weather from hurting your wreath. So, if you want your wreath to stay pretty and not get damaged by the weather, get some clear protective spray. Give your wreath a little extra love, and hanging wreath on brick will be good for a longer time.

2. Swap Out Wreaths

Change your wreath with the seasons or for rare events to make your home look welcoming all year. For spring, pick a wreath with colorful flowers. In summer, go for something bright and beachy. Fall needs warm and comfy wreaths with leaves. For winter, choose festive wreaths with red and green. Don’t forget to change your wreath for birthdays, holidays, or just a different appearance. Hanging a wreath on brick makes your home unique and friendly. So, have fun switching your wreath; it’s a simple and affordable way to keep your home looking great.

3. Regular Cleaning

Over time, your wreath can get dirty, especially if it’s outside. First, take down your wreath gently. Then, give it a little shake or use a soft brush to remove any dirt or junk on it. If you still see some dust that won’t budge, use a hairdryer on the cool setting. Just hold it a bit away from the wreath and let the gentle breeze blow away the remaining dust. Don’t forget to keep it in a cool setting so you don’t harm your wreath. Following these easy steps, you will hang a wreath on a brick that looks nice and fresh, no matter what the weather throws at it.

4. Inspect for Pests

Carefully look at your wreath for any bugs or pests that might like natural things. If you see any of these unwanted guests, gently take them off the wreath. You can also consider using a safe bug spray for people and pets to keep the bugs away. This is important because bugs and pests can make your wreath view bad and even harm it over time. By doing these simple things, you can ensure your wreath stays nice and bug-free when you put it up. Natural wreaths can be interesting to bugs, especially if they have leaves, flowers, or other natural things. So, a quick check and some bug spray can help keep your hanging wreath on brick looking great.

Store Properly

When you’re not using your wreath, make sure to keep it safe in a cool, dry place. You can use a unique wreath storage box or just a big plastic bag to shield it from dust and moisture. It’s important because dust and dampness can make your wreath spot not so nice over time, and we don’t want that. Try not to squish or bend your wreath when you put it away. Wreaths are fine, and if you squeeze or twist them, they might lose their pretty shape. So, be gentle and kind to your wreath by storing it correctly. This hanging wreath on brick will ensure it’s all set to bring holiday happiness when you want to display it again.

Conclusion

Hanging a wreath on a brick wall is an easy task that anyone can do with a few basic tools and some simple steps. First, gather your materials: a wreath, a strong hook or hanger, a hammer, and a masonry drill bit if needed. Next, decide where you want to hang your wreath.

Make sure it’s at eye level and in a spot that’s visible and inviting. Use a pencil to mark the spot. If your wreath is light, you can use sticky hooks that stick to the brick. If it’s heavier, drill a hole using the masonry drill bit and insert a wall anchor. Then, screw in a hook or hanger securely. Hang your wreath on the hook or hanger, ensuring it’s centered and looks level. Adjust as needed. That’s it. You’ve successfully hung a wreath on a brick wall.

Now you can enjoy the festive and welcoming touch your hanging wreath on brick adds to your brick wall.

October 17, 2023 0 comments
0 FacebookTwitterPinterestEmail

Recent Posts

  • A Complete Chalked Paint Review fo Better Selection 
  • A Guide to Painting Furniture without Sanding
  • 15 Steps to Create Faux Shiplap DIY Wall in Budget
  • How to Paint Furniture without Sanding or Priming
  • A Guide to Achieving Texture with Saltwash Paint Techniques

Recent Comments

No comments to show.

Recent Posts

  • A Complete Chalked Paint Review fo Better Selection 

    October 18, 2023
  • A Guide to Painting Furniture without Sanding

    October 18, 2023
  • 15 Steps to Create Faux Shiplap DIY Wall in Budget

    October 18, 2023
  • How to Paint Furniture without Sanding or Priming

    October 18, 2023
  • A Guide to Achieving Texture with Saltwash Paint Techniques

    October 18, 2023

Categories

  • Bathroom (15)
  • Bedroom (4)
  • Brush (3)
  • Decor & Design (15)
  • Decorating (1)
  • Dining Room (3)
  • DIY (2)
  • DIY Projects (11)
  • Door (5)
  • Fireplace (3)
  • Flooring (2)
  • Furniture (9)
  • Gardening (1)
  • Guide (11)
  • Home Crafts (1)
  • Home Decor (7)
  • Home Improvement (9)
  • Ideas (63)
  • Kitchen (16)
  • Outdoor Living (1)
  • Paints (18)
  • Review (1)
  • Room Ideas (3)
  • Tutorial (1)
  • Uncategorized (2)
  • Wall (6)

Instagram

About Us

Maecenas nec odio et ante tincidunt tempus. Donec vitae sapien ut libero venenatis faucibus, nullam quis.

01 Central Park, US, New York City
Phone: (012) 345 6789
Fax: (012) 345 6789

  • Facebook
  • Twitter

@2021 - All Right Reserved. Designed and Developed by PenciDesign


Back To Top
DormyHome
  • Decor & Design
  • DIY
  • Guide
  • Home Improvement
  • Smart Home