• Decor & Design
  • DIY
  • Guide
  • Home Improvement
  • Smart Home
DormyHome
keep your memories alive
Home » Kitchen
Category:

Kitchen

Affordable Kitchen Drawer Organizers - Custom Look for Less
DIY ProjectsHome ImprovementKitchen

A Complete Guide on Custom Drawer Organizers in Budget 

by Jonathan Tremblay October 17, 2023
written by Jonathan Tremblay

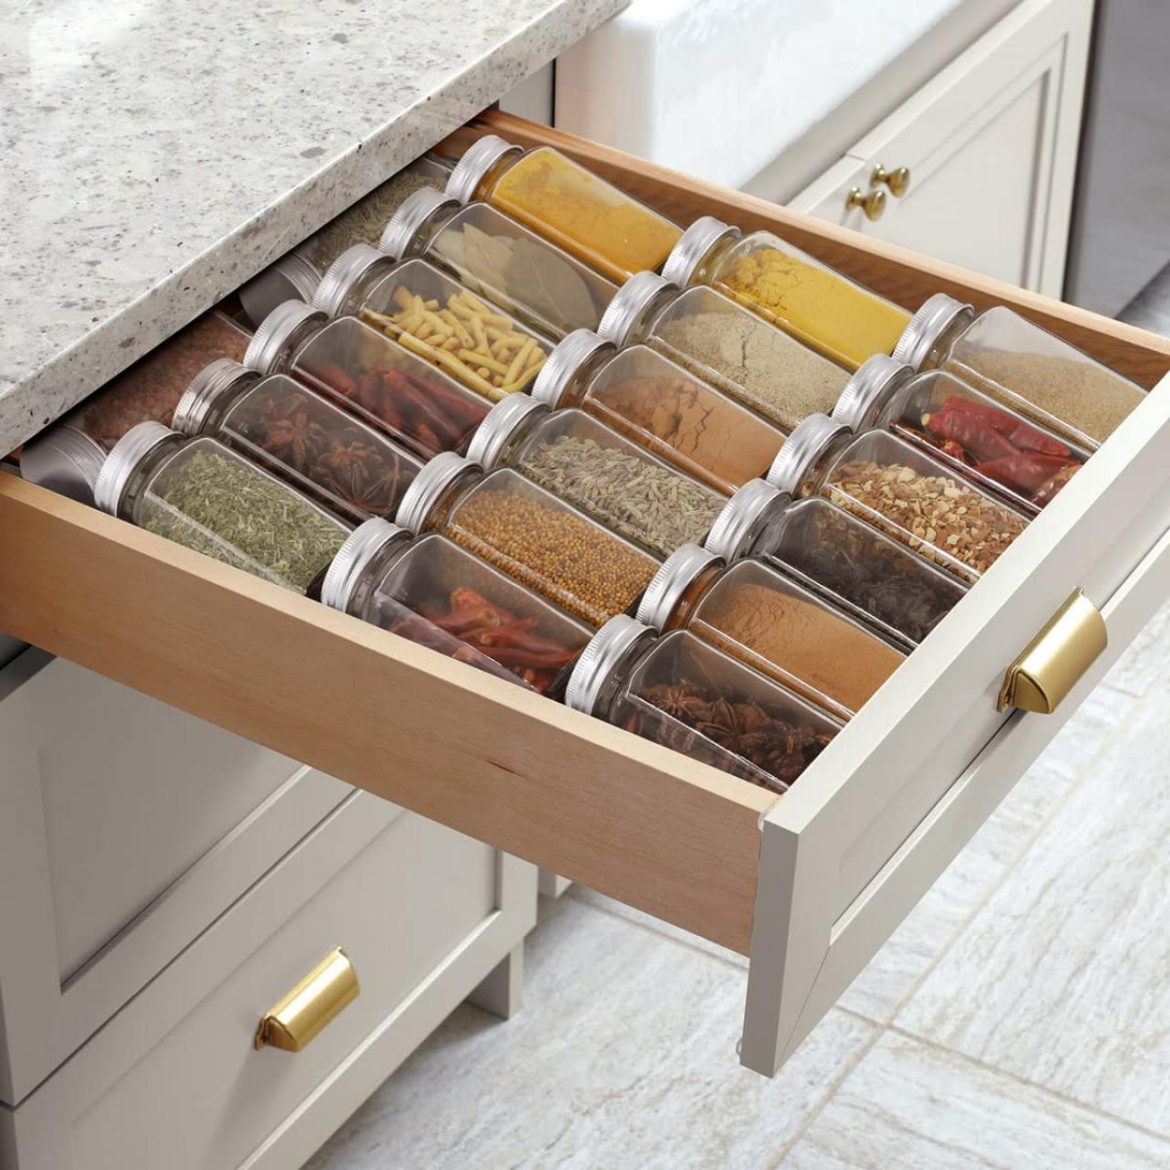
If you are tired of your messy kitchen drawers, a kitchen custom drawer organizer is what you need. We’ll show you different affordable kitchen drawer organizers that can give your kitchen a custom look for less. Kitchen drawers often become cluttered with utensils, gadgets, and various odds and ends, making it difficult to find what you need.

Affordable kitchen drawer organizers are here to rescue you from confusion. These smart solutions are designed to fit your drawers perfectly, creating a small space for all your kitchen essentials. What’s even better is that you don’t have to spend too much money to achieve a custom look. With these budget-friendly organizers, you can change your kitchen into an organized place if you want a cleaner kitchen.

These organizers offer a simple yet effective way to upgrade your space. So, let’s learn how to create a customized look affordably.

1. Trimmable Kitchen Drawer Organizers

Trimmable Kitchen Drawer Organizers

Trimmable kitchen custom drawer organizers are a cost-effective solution for achieving a customized look in your kitchen drawers without spending too much money. These organizers are versatile and designed to fit your unique storage needs. They are available in various sizes, making them suitable for various drawer dimensions.

How to Make It

  1. Start by measuring the dimensions of your kitchen drawer. Note both the width and length accurately.
  2. Choose a trimmable kitchen drawer organizer that matches your drawer’s width. These organizers often come in a roll or sheet, and you can cut them to fit your drawer’s length perfectly.
  3. Using a pair of ultra-sharp scissors or a utility knife, carefully cut the organizer material to match the length of your drawer. Be accurate to make sure it is a secure fit.
  4. Place the trimmed organizer into your drawer. Arrange it to provide your kitchen utensils, cutlery, or other items as needed.
  5. Your DIY trimmable kitchen drawer organizer is ready to use. It not only keeps your utensils and tools in order but also improves the aesthetics of your kitchen drawers.

2. Knife Rack DIY Drawer Organizer

Knife Rack DIY Drawer Organizer

A DIY knife rack custom drawer organizer is a fantastic way to store your knives safely and stylishly. It ensures easy access to your knives while keeping them out of sight, making your kitchen both organized and safe.

How to Make It

  1. You’ll need a wooden board, wooden dowels, a saw, sandpaper, a ruler, and wood glue.
  2. Measure the length and width of your drawer and cut the wooden board to fit securely inside it.
  3. Cut the wooden dowels into pieces of equal length, about 1.5 inches each. These will serve as the slots for your knives.
  4. Using a ruler and pencil, mark where you want to place the dowels on the wooden board. Space them evenly to set your knives.
  5. Carefully cut slots into the wooden board where you marked using a saw, making sure they are deep enough to hold your knives securely.
  6. Sand the edges of the board and dowels to smooth any rough surfaces. Then, apply wood glue to the slots and insert the dowels.
  7. Allow the glue to dry thoroughly.
  8. Once dry, place your DIY knife rack organizer into your kitchen drawer and arrange your knives in the slots.

3. Utensil Drawer Organizers

Utensil Drawer Organizers

Utensil custom drawer organizers are essential for maintaining order in your kitchen. They come in various shapes and sizes, allowing you to neatly separate and store your cooking utensils, flatware, and more.

How to Make It

  1. Begin by measuring the dimensions of your utensil drawer to determine the size of the organizer you’ll need.
  2. Choose a utensil drawer organizer that fits the width and deepness of your drawer. These organizers often feature compartments of different sizes for various utensils.
  3. Simply insert the utensil drawer organizer into your kitchen drawer. You can further customize it by arranging your utensils within the compartments to suit your needs.
  4. With your utensil drawer organizer in place, you’ll have a clean kitchen drawer where everything has its designated spot; making meal preparation and clean-up is an easy task.

4. Modular Kitchen Drawer Organizer

Modular Kitchen Drawer Organizer

A modular kitchen custom drawer organizer is a flexible and adaptable solution for creating a highly customized storage space in your kitchen. It allows you to design your drawer organization according to your specific needs, making it easy to set various items efficiently.

How to Make It

  1. Start by measuring the dimensions of your kitchen drawer, including width, length, and deepness.
  2. Purchase modular drawer organizer components such as dividers, trays, and bins that can be mixed and matched to make the layout.
  3. Think of the items you want to store in the drawer and plan the layout accordingly. For example, you might want sections for cutlery, utensils, and kitchen tools.
  4. Lay out the modular components within the drawer to ensure they fit well and make the organizational scheme you think.
  5. Use the provided clips, adhesive, or other fastening methods to secure the modular components in place. Ensure they are stable and won’t shift during regular drawer usage.
  6. Once the modular kitchen custom drawer organizer is securely in place, fill it with your utensils, kitchen gadgets, or other items. Adjust the layout as needed to set different sizes and shapes.
  7. With your modular organizer in place, you’ll have a neatly organized kitchen drawer that perfectly suits your storage needs.

5. Dish Drawer Organizers

Dish Drawer Organizers

Dish drawer organizers are designed to keep your dishes, plates, and bowls neatly stacked and easily accessible. They provide a clean and efficient storage solution for your dining essentials.

How to Make It

  1. Measure the dimensions of your drawer to determine the size of the dish drawer organizer you’ll need.
  2. Choose a dish drawer organizer that fits the width and deepness of your drawer. These organizers often have grooves or slots to hold dishes securely.
  3. Simply insert the dish custom drawer organizer into your kitchen drawer. Ensure that the slots or grooves align with the size of your dishes.
  4. Carefully place your dishes, plates, and bowls into the slots or grooves of the organizer. Stack them neatly to maximize space. With your dish drawer organizer in place, your tableware will be well-organized and protected from chipping or scratching.

6. Pots and Lids Drawer Organizer

Pots and Lids Drawer Organizer

A pots and lids drawer organizer is a practical solution for storing your pots, pans, and their lids. It keeps your cookware neatly arranged, making it easy to find the right pot or pan when cooking.

How to Make It

  1. Start by measuring the dimensions of your kitchen drawer, considering its width, length, and deepness.
  2. Choose a pots and lids custom drawer organizer that fits the width and deepness of your drawer. These organizers often feature dividers and compartments for pots and lids.
  3. Insert the pots and lid drawer organizer into your kitchen drawer, positioning it so that it sets your cookware.
  4. Place your pots and pans into the designated compartments of the organizer. Stack pots of similar sizes together and store lids vertically to save space.
  5. With your pots and lids drawer organizer in place, you’ll have a clean drawer where you can quickly access the cookware you need for your cooking.

7. DIY Wooden Drawer Organizer

DIY Wooden Drawer Organizer

A DIY wooden custom drawer organizer lets you make a personalized storage solution for your kitchen or any other space. Using wood, you can craft a durable and attractive organizer for your specific needs.

How to Make It

  1. Collect wood boards, a saw, sandpaper, measuring tape, wood glue, and clamps.
  2. Measure the dimensions of your drawer to determine the size of the organizer you’ll need.
  3. Plan the layout of your organizer. Decide how many compartments you want and their sizes. Sketch a design if needed.
  4. Use the saw to cut the wood pieces according to your design. These pieces will become the dividers and bottom of each compartment.
  5. Sand the edges of the cut wood pieces to smooth them and prevent splinters.
  6. Apply wood glue to the edges of the dividers and attach them to the bottom piece to make compartments.
  7. Sand the entire organizer to ensure a smooth finish. Apply a wood finish or paint if you want a polished look.
  8. Once the organizer is dry and finished, insert it into your drawer. It’s now ready to help you keep your items neatly organized.
  9. Your DIY wooden drawer organizer not only provides useful storage but also adds a touch of artistry to your space.

8. Flatware Drawer Organizer

Flatware Drawer Organizer

A flatware drawer organizer is essential for keeping your cutlery neatly arranged and easily accessible. It streamlines meal preparation and table setting while maintaining a tidy kitchen.

How to Make It

  1. Measure the width and length of your drawer to determine the size of the flatware drawer organizer you need.
  2. Choose a flatware custom drawer organizer that fits the dimensions of your drawer. These organizers typically have compartments designed for various types of forks.
  3. Simply insert the flatware drawer organizer into your kitchen drawer. Ensure that the compartments align with your knife needs.
  4. Organize your flatware within the designated compartments of the organizer. Place forks, knives, spoons, and other utensils in their respective slots.

9. Desk Drawer Organizer

Desk Drawer Organizer

A desk drawer organizer is a practical addition to your workspace, helping you keep pens, paper, stationery, and other office supplies in order. It increases productivity and reduces clutter.

How to Make It

  1. Measure the dimensions of your desk drawer to decide the size of the organizer you need.
  2. Choose a desk drawer organizer that fits the width and deepness of your drawer. These organizers often feature compartments and dividers for various office supplies.
  3. Insert the desk custom drawer organizer into your desk drawer. Ensure that the compartments align with the items you plan to store.
  4. Arrange your office supplies within the designated compartments. Use smaller compartments for items such as pens, paper clips, and sticky notes and larger sections for notebooks or files.

10. Adjustable Kitchen Drawer Organizers

Adjustable Kitchen Drawer Organizers

Adjustable kitchen drawer organizers provide flexibility and customization for your kitchen storage needs. They allow you to adapt the compartments to fit various utensils and kitchen tools, making them a practical addition to any kitchen.

How to Make It

  1. Start by measuring the dimensions of your kitchen drawer, including width, length, and deepness.
  2. Purchase an adjustable kitchen custom drawer organizer that fits the width of your drawer. These organizers often include movable dividers and compartments.
  3. Adjust the dividers within the organizer to make compartments of the desired size. You can set different utensils and tools by simply sliding the dividers.
  4. Insert the adjustable organizer into your kitchen drawer, ensuring that the shade compartments align with your storage needs.
  5. Organize your utensils, cutlery, or kitchen gadgets within the adjustable compartments. Customize the layout as needed to maximize space and keep items readily accessible.

11. Baking Supplies DIY Drawer Organizer

Baking Supplies DIY Drawer Organizer

A DIY custom drawer organizer for baking supplies is a practical solution for keeping your baking tools, measuring cups, and rolling pins organized and within easy reach. It smooths your baking process and ensures all your supplies are neatly stored.

How to Make It

  1. Collect a wooden board, dowels, a saw, measuring tape, wood glue, and clamps.
  2. Measure the dimensions of your drawer to determine the size of the organizer you’ll need for your baking supplies.
  3. Design the layout of your custom drawer organizer. Think about compartments for items like rolling pins, measuring cups, spatulas, and cookie cutters.
  4. Use the saw to cut the wooden board into the size of the base of the organizer. Cut dowels into pieces of appropriate length to serve as dividers.
  5. Apply wood glue to the ends of the dowels and attach them vertically to the base to make compartments. Use clamps to secure them in place while the glue dries.
  6. Sand the entire organizer to make a smooth finish. Apply a wood finish or paint for a polished appearance.

12. Ziplock Bag Organizer

Ziplock Bag Organizer

A ziplock bag organizer and wrap dispenser help you maintain an organized kitchen by keeping plastic wraps, aluminum foils, and ziplock bags easily accessible. These organizers reduce clutter and make food storage more convenient.

How to Make It

  1. Measure the dimensions of your kitchen drawer to determine the size of the organizer you’ll need.
  2. You can either purchase a ready-made ziplock bag organizer and wrap dispenser or make one yourself. If making it yourself, consider using a wooden board and dowels.
  3. Insert the ziplock bag organizer and wrap dispenser into your kitchen drawer, ensuring it fits securely.
  4. Store your plastic wraps, aluminum foils, and ziplock bags within the designated slots or compartments of the organizer.

13. Cardboard Drawer Organizer

Cardboard Drawer Organizer

A cardboard custom drawer organizer is a cost-effective way to make customized storage in your drawers. It’s a simple yet practical solution for organizing small items.

How to Make It

  1. Collect cardboard sheets, a ruler, a pencil, a utility knife or scissors, and glue.
  2. Measure the dimensions of your drawer to determine the size of the organizer you’ll need.
  3. Plan the layout of your cardboard organizer, including the number and size of compartments. You can make various-sized compartments by adjusting the height and width of cardboard pieces.
  4. Using the ruler and pencil, mark the measurements for your compartments on the cardboard sheets. Carefully cut out the cardboard pieces using a utility knife or scissors.
  5. Fold the cardboard pieces along the marked lines to make the sides and dividers of your compartments. Apply glue along the edges and corners to secure them together. Use clips or heavy books to hold the pieces in place while the glue dries.
  6. Once the compartments are dry and secure, place the cardboard drawer organizer in your drawer.

Conclusion

Affordable kitchen custom drawer organizers are a great way to keep your kitchen clean and efficient. These smart organizers can give your kitchen a personalized touch without a high cost. By investing in these budget-friendly options, you can tidy up your drawers, easily locate your utensils and tools, and create a more organized kitchen space. They’re easy to set up and come in various sizes and styles to match your specific needs.

No more searching through messy drawers or struggling to find the right kitchen tool when needed. These organizers increase your cooking experience. It’s surprising how such a simple addition can make a remarkable impact on your kitchen. So, if you want an organized kitchen, affordable kitchen custom drawer organizers are the way to go.

Don’t hesitate to start decluttering your kitchen.

October 17, 2023 0 comments
0 FacebookTwitterPinterestEmail
How to Turn a Closet into a Pantry
Home ImprovementKitchen

Turning a Closet Into a Pantry: Complete Guide

by Jonathan Tremblay October 17, 2023
written by Jonathan Tremblay

Many of us have faced the challenge of limited storage in our homes. But worry not. We’ll show you how to change that used closet into a useful pantry. Do you also have a closet that’s full of clothes or just collecting dust? Turning a closet into a pantry is an easy and cost-effective way to create additional storage space for your kitchen items.

We’ll find step-by-step how to turn a simple closet into a handy pantry. Whether you live in a small apartment or a large house, this is adaptable to your needs. We’ll learn everything from clearing out the closet and planning your pantry layout to installing shelves and organizing your new pantry space. By the end, you’ll have a useful pantry that will make your kitchen more organized and efficient.

So, let’s get started turning your closet into a pantry.

Steps to Turn a Closet Into a Pantry

Step 1: Clear and Empty the Closet

Clear and Empty the Closet

To start turning your closet into a pantry, the first thing to do is empty it. Take everything out and see what you have. Turning a closet into a pantry is the time to clean up and get rid of things you don’t need anymore. If something’s old or useless, try giving it away or throwing it out. After your empty closet, think about how you want your pantry to spot and work. Choose shelves, hooks, or bins that will help keep things organized. Measure the space to make sure your storage items will fit. Now, give the closet a good clean. Wipe down shelves, walls, and floors to make it nice and clean for your new pantry. Once it’s clean and dry, you can start making it into a useful pantry. With a little planning and work, you can change that unused closet into a pantry that’s clear to use for all your food storage needs.

Step 2: Assess the Closet Space

Assess the Closet Space

After you’ve emptied the closet, it’s time to check it out. Use a tape measure to see how tall, wide, and deep it is. Also, view any shelves or rods inside. You might need to move or take them out to make room for your pantry material. Take your time with this step. Planning and measuring now will save you trouble later. It’s fun to try turning a closet into a pantry. So, grab that tape measure, select your shelves, and be ready to turn that closet into an organized pantry.

Step 3: Plan the Pantry Layout

Plan the Pantry Layout

Before you start arranging your pantry, think about what you’ll keep there items like canned foods, pasta, spices, and kitchen tools. Knowing what you’ll store will help you pick the right shelves or containers. Cans can go on sturdy shelves, and dry foods can be in clear boxes or bins. Spices can sit on a spice rack or in a drawer. For kitchen gadgets, find them in a good spot, maybe on hooks or special racks. Try using baskets or bins to keep things orderly. Hooks are great for hanging aprons or cups. If space is tight, wall racks, then by planning and organizing based on what you have, your pantry can be useful and plan to use. So, select your ideal pantry and set it up to turn a closet into a pantry.

Step 4: Install Shelving

Install Shelving

Shelves in your pantry are important. You can go for fixed ones or ones you can adjust, depending on what works best for your space and what you want to store. Adjustable shelves are cool because they can handle things of all sizes. But make sure you attach them well so they don’t fall. They keep your food organized and clear to find. So, choose carefully and set them upright. When your shelves are strong and just the right size, your pantry becomes a clean, plain place to turn a closet into a pantry.

Step 5: Add Lighting

Add Lighting

Good lighting is important in your pantry. It helps you find items easily and ensures nothing hides in the dark. There are two simple ways to make your pantry brighter

First, you can use battery-powered LED lights. These lights are a breeze to install. Just stick them wherever you need more light. There is no need for fancy wiring because they run on batteries. When you open your pantry door, these lights turn on automatically so you can see everything. They don’t use up too much energy, so you won’t have to change the batteries all the time. Another option is overhead lighting. If your pantry has an electrical plug, try installing lights on the ceiling. This turning a closet into a pantry gives you good, even light across the whole pantry. You can pick from different types of lights to match how your pantry looks. With the right lighting in your pantry, finding things becomes easy, and you’ll never have to deal with dark corners again.

Step 6: Organize and Label

Organize and Label.jpg

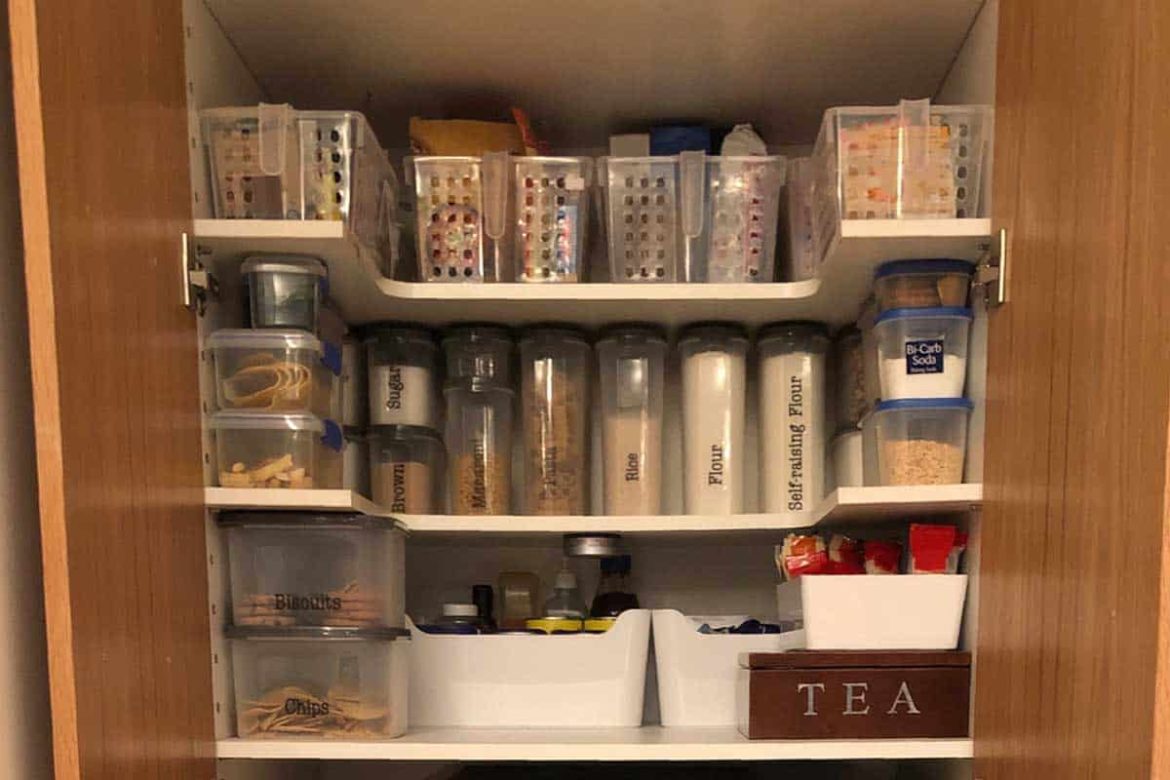
Once you’ve got your shelves and lights all set up. Let’s get your pantry organized and looking great. First, use baskets, bins, and containers to group similar items together. This turns a closet into a pantry so you can find things quickly, and it saves space, too. You can use a label maker for a fancy touch or use chalkboard labels for a cute appearance. With labels, your pantry will be in order, and you won’t have to hunt for things. So, grab those baskets and labels, and make your pantry a clean, organized, and easy-to-use space.

Step 7: Stock the Pantry

Stock the Pantry

Now that your pantry is all organized and labeled. It’s time to fill it with your favorite kitchen items. Put the things you use a lot where it’s clear to see and reach like at your eye level. Items like pasta, canned food, and snacks should go there. For the things you don’t use as much, put them up high or down low on the shelves. This turns a closet into a pantry. You use all the space in your pantry. By setting up your pantry like this, you’ll save time and make cooking less stressful. You won’t have to search for your spices or snacks anymore. Everything will be in the right place, ready when you need it. Enjoy your cooking.

Step 8: Maintain and Update

Maintain and Update

To keep your pantry working smoothly, get used to checking for old things and buying what you need. Keeping your pantry orderly might take some time, but it’s worth it because it saves you time and stops food from going bad. First, look at the dates on your pantry items. Throw away anything too old. Eating expired food isn’t good for you, and it doesn’t taste great. After throwing out old things, see what you’re running out of and make a shopping list. It’s helpful always to have basics like pasta, canned goods, and spices in your pantry so you don’t have to rush to the store when you’re cooking. Arrange your pantry so things you use a lot are plain to reach, and group similar things together. You can also put labels on shelves or containers to help you find things quickly. Following these effortless steps will make your pantry work better and make cooking and planning meals easier for you.

How to Maintain a Pantry

How to Maintain a Pantry

1. Declutter Regularly

To keep your pantry well-ordered, the first thing to do is clean it up. Look at what’s on your pantry shelves. If something is too old and unhealthy to eat, throw it away. If you have food that won’t go bad and you won’t use it, give it to someone who needs it. Throw away anything that’s broken or open to keep things fresh and safe. Cleaning up your pantry has two benefits. First, it makes more space and makes your pantry better. Second, it helps you see what you need to buy again. When you get rid of old or unwanted food, you can list what you’re missing. This turns a closet into a pantry. When you go shopping, you’ll know exactly what to get. Think of cleaning your pantry like giving it a fresh start. It’s like making your kitchen cleaner and more organized. Your pantry and your future self will be happy you did it.

2. Organize with Zones

Keeping your pantry organized is as simple as ABC. Just group your items by what they are, like grains, canned goods, baking things, snacks, and condiments. You can use clear boxes, baskets, or shelves in each group. And the easy part is to put labels on everything. Labels are like name tags that tell you what’s inside. No more searching high and low for your favorite snacks or spices. So, make your pantry orderly by sorting your food, using clear containers, and adding labels. You’ll be a pantry pro in no time, and cooking or snacking will be a breeze when turning a closet into a pantry.

3. Invest in Storage Solutions

Getting your pantry in order is a big deal for keeping your kitchen well-ordered. To simplify, Consider adjustable shelves that move up or down to fit different-sized items. This way, you can use all the space and easily access your things. Try pull-out drawers, which are great for keeping your snacks, spices, and canned goods organized—no more searching for things at the back of the pantry. Use spinning trays, like Lazy Susans, for those tricky corner cabinets. They make it a breeze to reach items hiding in the corners. For items like flour, sugar, pasta, and cereals, go for clear containers, either plastic boxes or glass jars. Turning a closet into a pantry not only keeps your pantry looking organized but also lets you see when you’re running low on supplies. These simple pantry storage ideas can change your kitchen into an organized, efficient space, saving you time and reducing food waste.

4. First In, First Out

To stop food from going to waste, Use the first in, first out (FIFO) method. Just put the newer food behind the older things in your pantry or fridge. This turns a closet into a pantry. You’ll grab the older items first when you’re cooking or snacking. Why is this a good idea? Well, it means you won’t forget about food hidden at the back, which might go bad before you use it. By using the older items first, you make sure nothing gets wasted. Think of your pantry as a lineup of groceries waiting for their turn. When you always pick from the front, you’ll see less food going to waste. It’s a clear trick that saves money and helps the planet by reducing food waste. So, give first in, first out a go, and you’ll see less food ending up in the trash.

5. Regularly Check Expiration Dates

Make it a regular thing to look at the dates on the items in your pantry when you do your pantry organizing. Doing this simple job not only keeps you from eating old food but also helps you plan your meals with items that need to be used soon. By checking those dates often, you’ll easily find items that are about to go bad. Turning a closet into a pantry lets you use them before they spoil, which means less wasted food and money saved. You’ll be eating fresher, safer food. This habit also makes your grocery shopping easier. When you know what’s getting close to its end date, you can focus on using those items and get replacements for your pantry basics on your next shopping trip. It’s a small thing to do that can give you big benefits like healthier eating and better money management. So, start checking your pantry today.

6. Rotate Stock

When you fill-up your pantry with groceries, keep things fresh and stop food from going bad. It’s called stock rotation, and it’s effortless how it works. When you buy new groceries, put them in the back of your pantry. That’s the spot for the new things. Then, take the older items you already have and move them to the front. Now, the older items are right in front, ready to be used first. Why do this? Well, it makes sure you use the food that’s been in your pantry the longest before it goes bad. By turning a closet into a pantry, nothing gets left behind and wasted in the hidden corners of your shelves. It helps you save money by cutting down on food that gets thrown away. So, when you fill your pantry, give your groceries a little shuffle, new at the back, old at the front. It’s an easy way to keep your pantry organized and your food from spoiling.

7. Regular Cleaning

Apart from your usual cleaning, it’s really important to keep your pantry nice and clean. Just wipe the shelves, watch out for spills or crumbs, and be sure to sweep or vacuum the floor often. A clean pantry not only looks better but also stops bugs from getting into your food. Think of turning a closet into a pantry as a safe place for your food. When it’s clean, bugs and mice won’t find anything to eat, so they’ll stay away. A clean pantry helps you find what you need, so you waste less food and save money. So, make cleaning your pantry part of your routine. It’s a clear way to keep your food safe and your wallet happy.

8. Inventory Management

Make a list of what’s in your pantry, whether you use paper or your computer in your kitchen. Turning a closet into a pantry helps you stay organized and makes cooking and shopping easier. Consider writing down everything you have in your pantry, like pasta, canned tomatoes, and spices. It helps you know what you have so you don’t buy the same things again or forget something important for your recipes. But that’s not all. With your pantry list, planning meals is simple. You can look at your list and decide what to cook without going to the store. And when you do go shopping, you know exactly what to buy, so you save time and shop smarter. It makes sure you’re ready to cook, whether you’re making a big meal or just a quick snack

Conclusion

Changing a closet into a pantry is simpler than you might think. With a few basic steps and some handy tools, you can create a useful and organized space to store your kitchen needs. Start by clearing out the closet and measuring the space to plan your shelves and storage bins accordingly. Next, install strong shelves or wire racks to maximize storage capacity.

Don’t forget to add hooks or racks inside the closet door to hang small items like aprons or kitchen utensils. To keep things nice, use clear containers or baskets to store items like pasta, canned goods, and snacks. It’s important to keep your pantry orderly by regularly checking for expired items and restocking as needed, whether you have a small closet or a larger one.

Turning a closet into a pantry is an achievable project that can make a big difference in your kitchen.

October 17, 2023 0 comments
0 FacebookTwitterPinterestEmail
honed marble countertops
IdeasKitchen

Best Honed Marble Countertops 

by Freja Johansson October 17, 2023
written by Freja Johansson

If you are bored of normal countertops and want a classic countertop for your kitchen, then Honed marble countertops are a beautiful and popular choice for you. These countertops are made from a special type of rock called marble, which is known for its natural appearance. If you appreciate the natural vibe of marble, these marble countertops are best for you. What makes these marble countertops unique?

Well, Marble countertops have a fine look. We’ll check what exactly is honed marble. We’ll see some advantages and disadvantages of marble countertops. We will find the many aspects of marble countertops, including their benefits, maintenance, and how to add them to your home design if you take them for a new kitchen renovation or bathroom upgrade.

Let’s check how honed marble countertops can add a touch of lasting beauty to your living space.

What is Honed Marble?

carrara_Leonid_Furmansky_904b888e-b397-4a74-be44-2db46dc0022b_2048x.jpg

Honed marble is a stunning natural stone that has been thoroughly polished to a matte or satin finish. It’s a marble variant renowned for its graceful appearance and classic attraction. Unlike its glossy counterpart, polished marble, honed marble undergoes a different finishing process that creates a smooth, non-reflective surface. You need to know that this is a unique material. This marble is then cut into slabs, which are later honed to perfection during the honing process. The surface of the marble is ground down, removing any imperfections and leaving behind a silky, matte finish. This finish not only upgrades the natural vibe of the stone but also offers some different advantages.

What are Countertops?

Honed Marble Countertop Characteristics

Countertops are horizontal surfaces in your kitchen or bathroom designed for various tasks, including food preparation, cooking, and general utility. They are essential components of any living space, offering both usefulness and aesthetic appearance. Honed marble countertops can be made from various materials, including natural stones such as marble, granite, and quartz, or synthetic materials like laminate and solid surfaces. They play an important role in defining the overall look and feel of your kitchen or bathroom.

Honed Marble Countertop Characteristics

Honed Marble Countertop Characteristics

1. Looks

These marble countertops have a lasting attraction. They don’t have a shiny finish but instead show off the stone’s veins and soft color differences, giving a classy look to any room. If your style is modern, these countertops fit right in. Their gentle, calm appearance can make your kitchen or bathroom feel peaceful and welcoming.

2. Feel

Honed marble countertops stand out because they feel really nice to touch. When you glide your hand over them, you’ll feel a smooth, warm, and welcoming texture. Unlike polished marble, which can be chilly and a bit slippery, honed marble gives you a safer grip. This touch-friendly feature makes using your countertop a delightful experience.

3. Durability

These marble countertops may not be as tough against stains and scratches as polished ones, but they are still pretty strong. Marble is naturally tough and can handle heat, which makes it great for kitchen countertops where you do a lot of cooking. If you take good care of them by sealing them properly and doing regular maintenance, your marble countertops can handle everyday use and stay beautiful for a long time.

4. Maintenance

Taking care of honed marble countertops is quite simple. To keep them looking great and strong, you should use a good sealer every so often to shield them from stains and soak up moisture. Regularly cleaning them with a gentle stone cleanerthat has the right pH balance will stop dirt from piling up and will keep their matte appearance. Over time, honed marble may develop a natural shine that some homeowners find adds charm to the stone.

What is the Difference Between Honed and Polished Marble?

What is the Difference Between Honed and Polished Marble?

1. Staining

Honed marble can stain more easily than polished marble because its surface is not as smooth. This means it’s more likely to absorb liquids such as red wine, coffee, or citrus juices. To keep honed marble looking nice, it’s important to clean up spills quickly and use a good sealer regularly. On the other hand, polished marble is less likely to stain because its smooth and shiny surface acts as a barrier against liquids. However, it’s still important to clean up spills promptly to be safe.

2. Scratching

Honed marble countertops are a smart pick for places that get a lot of use, like kitchen countertops. It has no shiny surface, so small scratches are not as easy to spot, keeping it looking good over time. On the other hand, polished marble, with its glossy finish, can make scratches stand out more because they reflect light. To keep your marble looking great, use cutting boards and be gentle when moving heavy things across it.

3. Etching

Marble is mostly made of calcium carbonate, and it can get damaged when it meets acidic stuff. This damage shows up as dull, light spots on the surface, a bit like faded areas. So, to stop this from happening, you need to be careful with acidic foods and drinks and clean up spills right away. Both honed marble and polished marble can suffer from this acid damage. Shiny marble can make the damage look even worse because it’s like a bright light shining on a dark spot. So, preventing this damage means being careful around acidic things and cleaning up quickly.

Benefits of Using Marble Countertops

Benefits of Using Marble Countertops

Honed Marble countertops are a common pick for people who want to bring a classy and elegant feel to their kitchens and bathrooms. Let’s check the advantages of choosing marble countertops:

1. Classic Beauty

Honed marble is a beautiful choice that never goes out of style. It has a smooth, non-shiny surface that adds a fine and lasting attraction to any room, if your interior design is traditional or modern.

2. Natural Variation

Every slab of honed marble is unique, featuring its distinct veining and coloring. This natural variation adds character and deepness to your honed marble countertops, ensuring that no two countertops are alike.

3. Cool Temperature

Marble is great in the kitchen because it can handle heat really well. It stays cool, so you can use it for making dough and working with pastries. It won’t change color or get messed up when you put hot pots and pans on it.

4. Increased Home Value

Adding honed marble countertops to your home can greatly increase its resale value. Many potential buyers consider marble to be a high-quality material, and its attractive appearance can make your home more inviting. This can help you sell your home more easily and at a better price.

How to Add Marble Countertops to Your Home

How to Add Marble Countertops to Your Home

  • Visit a stone supplier or showroom to handpick the honed marble countertops that best suit your design vision and color preferences. Think about the size and layout of your kitchen to ensure the slab fits easily.
  • Hiring an experienced stone fabricator and installer is important for a successful project. They will measure, cut, and shape the slab to fit your countertop space accurately.
  • These marble countertops require regular sealing to protect against stains and moisture. Clean spills promptly with a mild, pH-balanced cleaner to maintain their appearance.
  • Coordinate the rest of your kitchen or bathroom design elements to complement the marble countertops. Consider steel cabinet colors, backsplash choices, and lighting to create a pleasing space.

Downsides of Marble Countertops

Downsides of Marble Countertops

While honed marble countertops offer many advantages, they also come with some drawbacks that you should know.

1. Susceptibility to Stains

The marble that’s been honed has more tiny holes in it than polished marble, which makes it easier for things such as red wine, citrus juices, and oils to leave stains. To prevent this, it’s important to apply a protective sealant regularly.

2. Maintenance

Proper care is essential to keep honed marble looking its best. It requires regular sealing, gentle cleaning with pH-neutral products, and immediate attention to spills to prevent etching and staining.

3. Cost

Honed marble, even when polished to perfection, is quite expensive. For some homeowners, the cost can be too high to afford. So, it’s important to remember the high initial price when considering getting honed marble countertops.

4. Limited Color Options

Compared to other countertop materials, honed marble offers a more limited range of color options. If you want a specific color scheme, you may need to find alternative materials.

How to Clean and Seal Your Honed Marble Countertops

How to Clean and Seal Your Honed Marble Countertops

Cleaning and sealing these marble countertops is essential to maintain their beauty and protect against stains. Here’s a simple guide.

1. Daily Cleaning

Use a soft cloth or cleaning sponge and a mixture of warm water and mild dish soap to wipe down your honed marble countertops. Avoid harsh chemicals and abrasive scrubbers.

2. Preventive Measures

Use coasters under glasses and dishes to prevent potential stains from beverages. Always use cutting boards and trivets to protect the surface from scratches and heat.

3. Sealing

Apply a quality marble sealer following the manufacturer’s instructions. Sealing frequency depends on usage, but a general rule is every 6-12 months. Be sure to clean the surface thoroughly before applying the sealer.

4. Spill Cleanup

Promptly blot up any spills to prevent staining. For tougher stains, use a paste made from baking soda and water, applied gently with a soft cloth.

5. Avoid Acidic Cleaners

Avoid acidic cleaners such as vinegar or lemon juice, as they can damage the marble’s surface over time.

Conclusion

Honed marble countertops offer a pleasing choice for your kitchen or bathroom. They bring a touch of luxury and a natural appearance to your home. With their matte finish, they hide minor scratches and stains better than polished marble.

However, it’s important to remember that honed marble requires regular sealing to protect against spills and stains. It’s a bit more sensitive to acidic substances, so you should be cautious with things such as lemon juice and vinegar. Suppose you choose honed marble or another type of countertop material; it’s essential to pick what suits your style and needs best. If you are willing to put in a little extra care, honed marble countertops can be an excellent choice that brings lasting style to your living space.

Honed marble is not recommended for outdoor use because exposure to the elements and UV radiation can cause it to deteriorate over time. It’s best suited for indoor applications. These marble countertops are a durable and stunning option that can last for many years with proper care, adding value to your home and creating a classic look.

Frequently Asked Questions

Are Marble Countertops More or Less Durable than Polished Ones?

Honed marble countertops are generally considered to be more durable in terms of hiding minor scratches and etching. However, they may require more frequent sealing to prevent staining compared to polished marble.

How Do I Clean and Maintain Marble Countertops?

To clean marble countertops, use a mild, pH-neutral stone cleaner and a soft cloth or sponge. Avoid acidic or abrasive cleaners, as they can damage the surface. Regularly seal the marble to prevent staining.

Can Marble Countertops Be Used in The Kitchen?

Yes, these marble countertops can be used in the kitchen. However, they are more susceptible to staining from acidic substances such as lemon juice and red wine than polished marble. Proper sealing and care are essential in kitchen applications.

What Should I Do if My Honed Marble Countertop Gets Stained?

If your honed marble countertop gets stained, use a poultice made of baking soda and water or a specialized marble stain remover. Follow the manufacturer’s instructions and consult a professional if the stain persists.

Are Marble Countertops Suitable for Bathrooms?

Yes, honed marble countertops are a popular choice for bathroom vanities. They provide a pleasant look. However, be cautious about using them in areas with hard water, as mineral deposits can etch the surface.

Is Honed Marble More Expensive than Polished Marble?

The cost of honed marble countertops is generally comparable to polished marble. However, the overall cost may vary based on factors such as the type of marble, thickness, and installation requirements.

October 17, 2023 0 comments
0 FacebookTwitterPinterestEmail
15 White Kitchens Cabinet Painting Tips
Kitchen

15 White Kitchens Cabinet Painting Tips

by Marco Bianchi August 22, 2023
written by Marco Bianchi

Are you thinking about transforming your kitchen? The idea of painting kitchen cabinets with white is exciting. It brings a peaceful charm and refreshing brightness to any kitchen. Painting kitchen cabinets is a significant decor project that requires careful consideration.

So, before painting your kitchen cabinets, you need to ask yourself some questions. It will help you make better decisions. That is why we have compiled 15 important questions that you should consider before you take up this task.

Asking yourself these questions will provide valuable insights. It will help you make an informed decision about painting your white cabinet kitchens. Conscious thoughts and planning are necessary to achieve the kitchen of your dreams.

Considerations Before Painting Your Kitchen Cabinets White

Considerations Before Painting Your Kitchen Cabinets White

  • No one can deny the beauty of white kitchen cabinets. They are trending in the world of decor. But before you get white cabinets for your kitchen, you need to consider your personal style and preferences. Does the clean and classic look of the white cabinets resonate with you? Will they match your kitchen’s overall aesthetic and complement your home’s decor? To answer these questions, it is crucial to assess your style preferences and existing color palette. This will help determine if the cabinets are the right fit.
  • You also need to check the condition of your cabinets. You need to evaluate if their structure needs any repairs or not. Depending on their condition, you can decide if they only need painting or refinishing or a replacement altogether.
  • The most important factor that you should consider is budget. You must have an amount in mind that you are willing to invest in this project. Depending on your budget, you can consider hiring professional help. In case your budget is low, you can also take up the painting process yourself. Understanding your budget will help you define the project’s scope and any necessary compromises.

To help you make this decision, go through the questions enlisted below.

1. Why Should You Paint Your Kitchen Cabinets?

Why Should You Paint Your Kitchen Cabinets

This is the first question that you need to ask yourself. You know what difference a new coat of paint can make to a space or worn-out furniture. You might have fallen in love with the dark wood of your kitchen, and it still might be in good condition. But color trends change over time. You might be seeing white and light colors in the more modern home designs every day. This is because white inspires a fresh and bright environment. If you want to imitate this aesthetic, then painting cabinets can be a good money-saving option as it costs only a few hundred dollars.

2. What Types of Cabinets Do You Have?

What Types of Cabinets Do You Have

One of the first steps while revamping cabinets is to discover what sort of cabinets you have. This will help you decide whether or not to paint your cabinets. This will also help you know what kind of preparation they might need. The following are some of the most typical cabinet materials:

  • If you see any repeating patterns or seams around the edges of the doors of the cabinets, you can conclude that they are not made of solid wood. You have to sand solid wood only if it is unfinished or if its surface is extremely smooth.
  • Doors that were previously waxed or varnished with Jolie Piants or any other paint products are complete. Generally, the cabinets that have already been completed don’t need to be sanded.
  • If your cabinets have a flat appearance or plastic finish, they might be made of laminate or Melamine. Such cabinets require quick sanding and 48 hours to cure after the first layer of paint is applied.
  • Thermofoil is frequently mistaken for laminate and melamine. A thin coating of vinyl is pressed onto the cabinet doors of thermofoil cabinets. Thermofoil often doesn’t accept paint over the long term; thus, it is not advised to paint it.
  • If you have metal doors, we will advise you not to paint them with powder coated finish.

3. Which Type of White Will Suit Your Kitchen?

 Which Type of White Will Suit Your Kitchen

Ideally, your kitchen surface should be cohesive and complement one specific white. The whites in your kitchen should match each other and be of the same kind. It’s also crucial that their undertones complement one another. You can choose the perfect shade for your cabinets depending on the color of your kitchen countertop. If your countertop is white, you should choose clean white paint with little to no undertone. You should consider warm white paint colors for your cabinets if your white countertop has a tent of orange or red in it.

4. What is the Best Paint for My Cabinets?

 What is the Best Paint for My Cabinets

When deciding on paint for your cabinets, it is essential to invest in good paint. This is an important factor to take into account as it determines the durability. There are specialized cabinet paints that offer a smooth surface. However, any high-quality paint should also work. Just make sure that the paint is acrylic and not vinyl. Paint with an acrylic latex base is long-lasting and simple to clean. Stick to the manufacturer’s recommendations to know the cure time of latex paint. Cure time is the period before the painted surface can tolerate daily use.

After painting, you will have to choose the type of finish you want, matte or glossy. A matte finish produces a low-gloss, flatter surface. On the other hand, a high gloss finish offers a high sheen and reflecting surface. If you want to achieve a look that is somewhere in between, you can go for a satin finish. You can find the detailed directions on the label of the paint can. While your cabinets will shine under a gloss finish, it can make dents and faults more visible. Besides, a flat finish can get challenging to clean. That is why kitchens frequently embrace semi-gloss or satin finish.

5. Should I Use Varnish or Finishing Wax as a Topcoat?

Should I Use Varnish or Finishing Wax as a Topcoat

The answer to this question depends on personal choice. However, Finishing Wax can be the more convenient of the two options. It is excellent at concealing breaststrokes and other floors because of its matte appearance. It simply replaces any scratches or scuffs. Additionally, it comes in a range of colors that may be used to create a variety of finishes. On the other hand, Varnish can be a fantastic option if you want a little extra longitude or a great gloss.

6. Should I Try Tester Pots for The Right Color?

 Should I Try Tester Pots for The Right Color

There are many variations of each shade of color available in the market. Therefore you might get indecisive while choosing the perfect color. You may think you have already chosen the base color as white. So choosing a shade of white won’t be difficult. But we assure you it won’t be easy either. Deciding to paint the cabinets white is half of the work done. Different shades of white might look the same from far away. But they may appear completely different when applied on various surfaces. Even the lighting has a huge impact on how paint appears on the wall or cabinet. To avoid any confusion, it is better to try tester pots on a small part of the get the best idea.

7. Do I Have All the Supplies I Need?

Do I Have All the Supplies I Need

After starting the job, you might not want to waste your time going to the Home Centre to pick up supplies. So it is better to keep the required tools handy in advance. These tools include a Ladder, Painter’s tape, Drop cloths, a Drill or screwdriver, Sandpaper (of various grits), a shop vacuum, a degreasing agent, sponges, wood filler, putty knives, primer, paint, paint trays, liners, applicators (sprayer or brush and roller), etc.

According to the most recent paint tests conducted by Good Housekeeping, experts suggest Benjamin Moore’s Advance as the best paint for the kitchen. This paint is specially formulated for kitchen cabinets. It applies easily and smoothly and hardens to a furniture-grade gloss that can withstand even the busiest kitchens.

8. How Should I Plan My Prep Work?

How Should I Plan My Prep Work

The biggest error that you can make while undertaking any project is failing to know the requirements before starting. Painting kitchen cabinets might appear to be simple. However, it is a time-consuming DIY activity. Most cabinets require sanding the surface, followed by the application of wood filler to any gaps or uneven surfaces, and drying time. Use a moist towel or a lint-free tack cloth to wipe up all of the dust and debris after sanding. Uncleaned tiny particles might float into the paint and tarnish the cabinet’s smooth surface.

9. Can I Just Paint Over My Old Cabinets?

Can I Just Paint Over My Old Cabinets

You should not take any shortcuts while renovating your cabinets. If you paint over your old cabinet, then they may get excessively thick. This will make the doors difficult to open and close. Also, if your old cabinets are not clean, their oil might ruin the freshly painted surface. So it is better to take out all the hardware. Unhinge the cabinet doors, sand and prime them, and then paint. This might seem like a lot of work to do, but it will be worth it. It’s normal for kitchen cabinets and drawers to be flat. So if you organize before starting the process, it will become simpler.

10. How Do I Sand the Surface?

How Do I Sand the Surface

Every surface should be gently sanded. The lacquer, varnish, or even a coat of prior paint can make the surface too smooth. The surface needs to be etched so that the paint can stick to it. It is common for DIY-painted cabinets to chip. Paints done by nonprofessionals can start peeling off if the surface is not sanded properly. Chipping is most likely to happen there if the area is not adequately prepared. So you need to keep in mind that you may sand cabinets between each and every layer of paint, not just the first one. Additionally, you should be sure to sand every corner and edges and crevices thoroughly.

You should sand the difficult portions, like cabinet door edges, manually. Otherwise, you can use an orbital sander, as advised by experts, to produce better and faster results. If the cabinets haven’t been painted or strained before, you should start with medium-grit sandpaper and then move to a finer one. You should consider stripping if it has an excessive amount of paint or a surface that is noticeably rough.

11. Is Rolling on Paint Better than Brushing?

Is Rolling on Paint Better than Brushing

Both rollers and brushes have different qualities. You should try to use them both for specific purposes. A brush can be effective for getting into small spaces, like the inside border of a traditional Shaker door. At the same time, you can use a foam roller while painting bigger uniform areas. This will speed up the procedure and make it easier to apply paint.

12. Do I Need to Remove Doors and Drawer Fronts?

You might have seen cabinets where the paints were slopped over the drawers’ inside and applied to hinges and hardware. As you start painting kitchen cabinets, it may seem convenient to leave the doors in place for painting. However, doing so will not result in a neat and polished outcome. Instead, you can use masking tape to cover the drawer sides and bottom if you don’t want to paint them.

13. How Do I Remember What Goes Where?

How Do I Remember What Goes Where

To paint the cabinets, you will have to take drawers out of their slots and cabinet doors off of their hinges. Then you’ll need to devise a method to remember where everything goes. Create a little schematic and mark each piece appropriately. This will help you reassemble each piece after they are dry. Additionally, you’ll need tape to cover hinges, fasteners, and edges properly. You’ll also need rosin paper or brown builder’s paper to cover the counters. Otherwise, it will add another unnecessary task of scrubbing the paint off the counter after you are done painting the cabinets.

14. How Much Will It Cost to Paint?

 How Much Will It Cost to Paint

Taking up the task of painting is the least expensive way to transform into white kitchen cabinets. However, it is the most labor-intensive choice. You will spend less money but a lot more time if you do a DIY job. However, in DIY painting, you will have to invest in a range of supply tools and equipment. You should not attempt to refinish your kitchen cabinets if you don’t have the right equipment. You might have to redo all your hard work if you do so. The size of the kitchen and the type of paint used will also affect the budget for this kitchen transformation.

A DIY project will typically cost between $200 and $600. You need to keep in mind that painting is only a short-term solution. Depending on the quality of the job, you will have to again busy fresh paint and repaint the cabinets eventually. That is why we will advise you to give this task all the time it needs. With patience, you can get the best ROI.

15. How Should I Finish the Project?

How Should I Finish the Project

After the painting is done, you will have to reassemble the hardware and cabinets. You can make sure the doors and drawers are placed in the right places with the help of labels. After you’ve finished painting your cabinets, you can upgrade them by putting a new backsplash or under cabinet lighting.

Summing It Up

All in all, by addressing these questions, you’ll be well-equipped to make informed decisions and achieve a successful transformation of your kitchen cabinets. With the right answers, you will be able to get the best results as well. It is evident from this article that it is not necessary to spend loads of money to give your kitchen a makeover.

Just remember to analyze the conditions of your old cabinets and make the necessary amendments.

Comment if you have any more questions. We will be happy to answer.

August 22, 2023 0 comments
0 FacebookTwitterPinterestEmail
21 Navy Blue Cabinet Ideas for Your Kitchen
KitchenIdeas

21 Navy Blue Cabinet Ideas for Your Kitchen

by Freja Johansson August 17, 2023
written by Freja Johansson

Cabinets are one of the most useful components people add to their kitchens. Nowadays, people also add cabinets to their laundry and shower rooms. A cabinet has numerous uses and benefits. Thus, choosing a proper color tone can give the cabinets a more long-lasting look. For instance, the navy blue paint. There are several shades of navy blue available on the market.

If you want to give your cabinet a simple look, then go for the minimum requirements. You can choose Naval Blue, Hague Blue, or charcoal navy blue for darker shades. If you want to give your cabinet a lighter look, choose iceberg, windy sky, and other shades. A few navy blue paints have gray or green undertones. Just make sure the color matches the vibe of your interiors, countertops, and wall designs.

In this blog, you’ll discover 21 unique navy blue cabinet ideas for your kitchen.

1. Sherwin William’s Naval Blue

Sherwin William's Naval Blue

Sherwin Williams Naval Blue is popular for its darkest shades. They are a unique and gorgeous adaptation for your navy blue cabinet ideas. If you add this color shade to your cabinets, then it may convey an artistic vibe. The darkest shade is a perfect match for your bright walls. If your kitchen has bright walls or interiors, don’t hesitate to add Sherwin Williams Naval Blue shade to your cabinets. Even if you don’t have enough interior or have a limited budget, this navy blue shade is useful. It can provide your kitchen with a long-lasting and elegant look.

2. Benjamin Moore Navy Blue

Benjamin Moore Navy Blue

Benjamin Moore Navy Blue is also a perfect choice for your kitchen cabinets. Don’t miss to apply this color shade if you have a small space in your cooking area. They are also popular for their darker shades and can give your cabinets a vibrant look. A Benjamin Moore navy blue cabinet can create a significant environment in your small kitchen. Not only a darker shade, but this navy blue color also consists of a gray tone. Apart from the kitchen, this color combination can convey an aesthetic vibe throughout your apartment. This navy blue color goes perfectly with neutral interior designs and wall colors.

3. Spectral Blue

Spectral Blue

Spectral blue is a basic color that people add to their walls or ceilings frequently. What about adding the same color shade to your kitchen cabinets? A spectral navy blue cabinet is a perfect choice for your kitchen decoration. They may give your cooking area a more long-lasting look. In addition, they are affordable and are a brilliant adaptation for your small-size kitchen. Just add this color to your cabinets, as they might furnish your kitchen with a delightful glance. If you’re trying to establish a simple kitchen cabinet, this color is a perfect choice. It can convey a significant vibe throughout your home.

4. Mongolia Under the Stars

Mongolia Under the Stars

If you want to go more luxurious, then Mongolia Under the Stars is an amazing choice. This color shade can give your cabinets a more attractive look. Apart from that, it may establish a significant aura in your kitchen. Not only the kitchen, but you can also add this navy blue cabinet to your laundry room. This color shade is famous for its brighter tone and unique glow. This color adaptation goes perfectly with your neutral interior and wall designs. Mongolia Under the Stars is a bright and delightful addition to your kitchen cabinet ideas. It may also assist you in impressing your guests.

5. Farrow and Ball Hague Blue

Farrow and Ball Hague Blue

Farrow and Ball Hague Blue are also famous for their darkest shades. It has darker shades than the Sherwin-Williams Naval Blue and Benjamin Moore Navy Blue. Their rich blue color tones make them a unique choice for your cabinets. A Hague navy blue cabinet can give your kitchen a luxurious glance. Besides these, it may help you to create an optimistic impression in front of your guests. This navy blue color shade consists of a few green undertones. If you have marble or tiles on your walls, countertops, and interiors, don’t rethink putting this color on your cabinets.

6. Van Deusen Blue

Van Deusen Blue

Van Deusen Blue is also a unique choice for your kitchen cabinet ideas. They are darker but create a vibrant look in your kitchen. You should try Van Deusen’s navy blue cabinet for your cooking area. It may not only establish a beautiful look in your kitchen but also convey an aesthetic vibe. Van Deusen Blue may not be as darker as Sherwin-Williams Naval Blue, Benjamin Moore Navy Blue, and Hague Blue. It has a few brighter undertone that makes it indifferent to other deep navy blue colors. They also have a few gray tones and can give your cabinets an aesthetic look.

7. Royal Navy

 Royal Navy

The Royal navy blue color doesn’t require more descriptions. They are a traditional approach to your navy blue cabinet ideas. The royal navy blue cabinets can influence the decoration of your kitchen. Apart from that, it may convey a transitional vibe throughout your cooking area. In addition, royal navy blue kitchen cabinets can also create a pleasing vibe in your home. Royal navy blue color consists of a few dark and gray accents. It may help you to establish a cool atmosphere in your kitchen. It goes perfectly with neutral and bold interior designs and wall patterns. Choose this color if you want to set up a luxury kitchen with a limited budget.

8. Charcoal Blue

Charcoal Blue

Charcoal blue almost shares the same traits as the Sherwin-Williams Naval Blue, Benjamin Moore Navy Blue, and Hague Blue. A charcoal navy blue cabinet is an ideal choice for your kitchen decoration. The color is popular for its darker shades and bold color tones. Thus, charcoal cabinets can establish a significant vibe in your apartment. Charcoal blue has a few gray accents that make it more vibrant. If you have marble floor designs, interiors, or countertops in the kitchen, then charcoal blue cabinets are the best choice.

9. Sherwin William’s Honorable Blue

Sherwin William's Honorable Blue

Sherwin William’s Honorable Blue is an innovative color adaptation for your kitchen cabinets. An honorable navy blue cabinet can establish a significant environment in your cooking area. The honorable blue color is a combination of navy and medium blue. It conveys a cool arena throughout your kitchen. If you want, you can also apply this color to your laundry room cabinets. Honorable blue may give your kitchen cabinets a more energetic look. If you have floral wallpaper, bold wall patterns, and bright walls or interiors in your kitchen, you should try this.

10. Stormy Skies

Stormy Skies

A stormy sky navy blue is a perfect adaptation for your kitchen cabinets if you have limited space. You should add a stormy skies navy blue cabinet for your simple kitchen decoration ideas. This color shade is a combination of gray and navy blue paints. It has a few gray undertones that make it more vibrant and unique. They are affordable and suitable for any space. If you have a bright wall design, interiors, and patterns, add this color tone; you won’t regret it. It may assist you in creating an elegant vibe in your kitchen area. Apart from that, you can impress your guests in a lively manner.

11. Iceberg

Iceberg

Iceberg navy blue paint is popular for its lighter tone. They consist of a few gray undertones that make them more vibrant. An iceberg navy blue cabinet can create a significant and cool aura in your cooking area. If you have a neutral wallpaper, wall pattern, or interior in your kitchen, then don’t hesitate to apply this color shade to your cabinets. The iceberg blue cabinets can give your kitchen a more interesting look. In addition, it may establish a significant vibe in your room. At present, this color shade is trendy across the globe. Thus, choosing this color shade for your cabinets isn’t a bad idea.

12. Windy Sky

 Windy Sky

The windy sky color may share almost the same characteristics as the iceberg navy blue. However, the windy navy blue sky has a darker shade. A windy sky navy blue cabinet is a unified choice for your kitchen decoration. Apart from that, it may establish a cool and tranquil atmosphere in your cooking area. The windy sky color consists of a few gray undertones, such as bright gray and cheerful gray. It makes them more unique and consistent. Not only a cool vibe, but windy sky cabinets can also convey a warm and elegant vibe in your kitchen. It may also guide you to create an optimistic impact.

13. Brittany Blue

Brittany Blue

Brittany blue is also a cool choice for your kitchen cabinet ideas. It may convey a crisp and lukewarm aura throughout your cooking area. It almost shares the same features as the windy sky and iceberg navy blue. A Brittany navy blue cabinet is a gorgeous adaptation for your kitchen decoration. This color shade has a few icy gray undertones that make them more innovative. The gray undertones of Brittany blue can give your cabinets a more glowing look. In addition, it may provide a long-lasting impression on your kitchen.

14. Icy Navy Blue

Icy Navy Blue

An icy navy blue may almost have the same traits as an iceberg blue. However, icy navy blue has a darker shade. An icy navy blue cabinet can create a cool environment in your kitchen. In addition, it may give your cooking area a more elegant and vibrant look. The icy navy blue paint is popular for its gray or silver undertones. It makes them an innovative choice for your kitchen decoration. If you have a white or simple background or walls in the kitchen, don’t hesitate to put icy navy blue cabinets. It can give your interiors a more elegant glow.

15. Bluebird

Bluebird

Blue Bird is another adaptive choice for your kitchen cabinet ideas. If you have a tall cabinet in your cooking area, this color shade is an ideal adaptation. A Bluebird navy blue cabinet can give your kitchen a more appealing look. In addition, it may convey a significant and cool vibe throughout your house. Apart from the kitchen, you can also add this color to your laundry or shower room cabinets. Not only a cool vibe, but this navy blue color shade can also bear a breezy vibe in your kitchen. It goes perfectly with neutral interiors, wall patterns, and countertops.

16. Boutique Blue

Boutique Blue

Boutique blue, also known as glass blue, is a unique pick for your home. Generally, boutique navy blue cabinets are found in hotels. However, you can create a similar vibe at your home. Picking this color shade for your kitchen cabinets can assist you in creating a supreme impression in front of your guests. Along with that, it may convey a luxurious vibe throughout your apartment. Boutique navy blue has a few gray undertones that make the color more vibrant. Thus, this color shade can give your interiors and countertops a more delightful and elegant glaze.

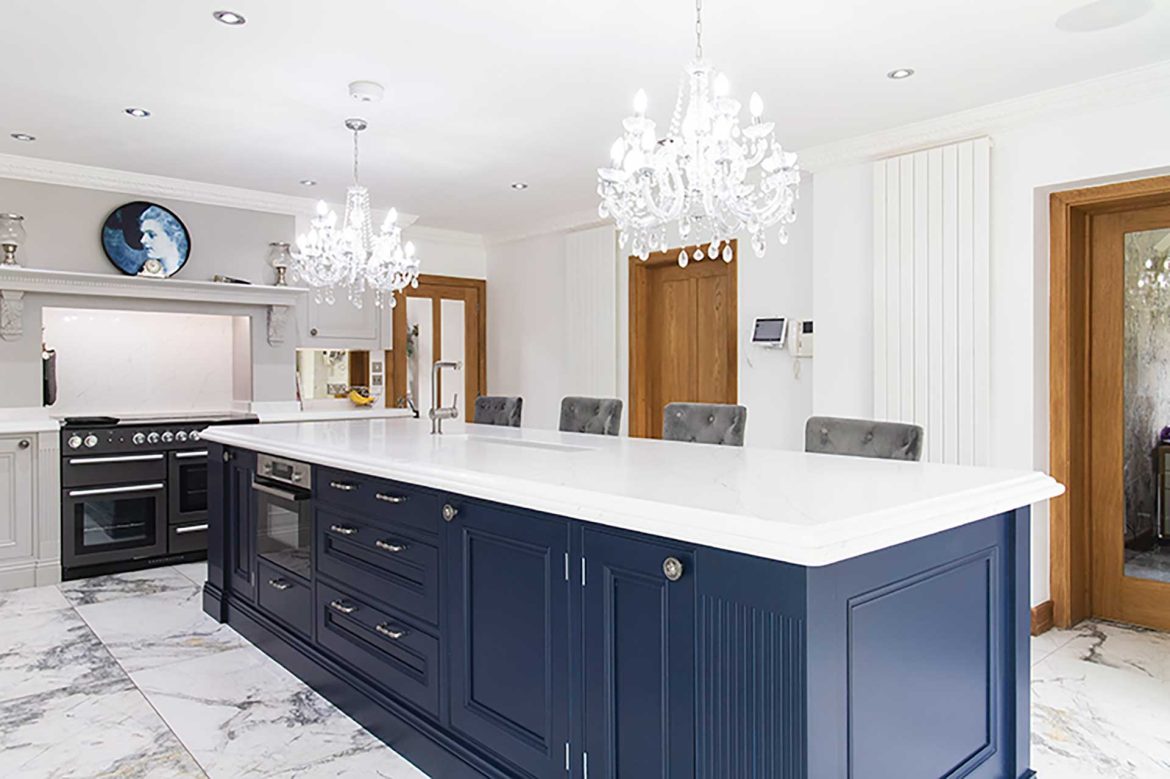
17. Gray Blue

Gray Blue

Gray-blue is a common choice for your kitchen cabinets. However, it may give your cooking area a long-run look. Thus, choosing this color shade for your kitchen cabinets isn’t a bad approach. A gray-navy blue cabinet can also give your interiors a more rich and more luxurious glaze. In addition, it may help you create a positive impression in front of your guests. It may have similar traits as the boutique, icy, and bluebird color shades. Although gray-blue has darker shades and undertones. Apply this color to your cabinets, especially if you have a bright wall color, patterns, or wallpapers in your kitchen.
18. Tropical Navy Blue

Tropical Navy Blue

Tropical navy blue shares almost the same traits as royal navy blue paint. However, tropical blue has a brighter color shade. Thus, it is an innovative choice for your kitchen cabinet ideas. Besides these, it can also establish a significant aura in your apartment. Tropical navy blue cabinets will furnish your interior designs and countertops with a delightful look. Additionally, it can help you to create a positive impact in front of your friends and guests.

19. Grounding Blue

Grounding Blue

Grounding navy blue color shade is popular for its green undertones. Apart from that, it also has a few gray undertones. The combination of blue, green, and gray makes this color a unique choice for your kitchen cabinet ideas. A grounding navy blue cabinet can give your kitchen interiors a more alluring look. If you’ve got a center kitchen set up, don’t hesitate to pick this color shade for your cabinets. Besides the kitchen, you can also apply this color to your dining area cabinets.

20. English Navy Blue

English Navy Blue

English navy blue is a common but elegant choice for your kitchen cabinets. The roots of this color are derived from England, UK. This color shade is popular for its rich and delightful tone. An English navy blue cabinet can give your kitchen a more aesthetic touch. It can help you to create a luxurious vibe in your kitchen. Aside from that, the English navy blue color shade will help you establish an optimistic impression on your guests.

21. Stained Glass Blue

Stained Glass Blue

Stained Glass blue is famous for its brighter shades. It is an innovative and brilliant choice for your kitchen cabinet ideas. It can overwhelm the atmosphere in your kitchen. At night, it can brighten up the entire space or area. This color shade consists of a few gray undertones that make them more elegant. If you want to create a cozy and aesthetic atmosphere, then you should try this navy blue shade for your cabinets.

Summing It Up

All in all, there are several navy blue shades exists that you can pick for your cabinets. A navy blue color tone can convey a tranquil and overwhelming aura in your kitchen. This color establishes a bold texture on your cabinets. That’s why people are adding different shades of navy blue to their kitchen cabinets. It’s a trend in the current generation.

If you want to make it simple, then you can go for lighter navy blue cabinets. It includes icebergs, icy, windy skies, and others. If you want to make it more luxurious, you can choose a darker shade. Royal and Tropical navy blue can give your interior designs, wall patterns, and countertops a vibrant and elegant look.

In this blog, you’ve discovered fascinating navy blue cabinet ideas for your kitchen. Which one do you find more interesting? Let us know in the comments.

Frequently Asked Questions

Why Should We Add Navy Blue Colors to Our Kitchen Cabinets?

The navy blue color shade can give your kitchen cabinets an eye-catching look. In addition, the navy blue color represents enthusiasm, compassion, tranquility, and idealism. Thus, a navy blue cabinet can help you to create an optimistic impact in front of your guests.

What Types of Navy Blue Shades Are Appropriate for The Cabinets?

There are several navy blue shades available on the market. If you want to give your cabinets a luxurious or deeper look, then choose Hague Blue, Van Deusen Blue, and English navy blue. If you want to make it simple, choose iceberg, icy, windy sky, and stormy sky navy blue. For neutral cabinets, you can pick royal or tropical navy blue.

Do Navy Blue Cabinets Add Value to Your Kitchen Room?

Navy blue cabinets are prevalent across the globe, as the majority of people add navy blue cabinets in their kitchen room. It may not add direct value to your kitchen room. However, the navy blue cabinets can establish a vibrant, aesthetic, and elegant look to your cooking area.

August 17, 2023 0 comments
0 FacebookTwitterPinterestEmail
21 Decorating Ideas with White Appliances & Painted Cabinets
KitchenIdeas

21 Stylish Ideas for Kitchens with White Appliances

by Freja Johansson August 17, 2023
written by Freja Johansson

How about an open and airy kitchen which is having the vibe of any classic warm white? Well, the daily duties of a healthy lifestyle revolve mostly around cooking. It thus becomes crucial to have a clean, organized, and stylish kitchen all the time.

If you are a non-believer in the magic of classic white kitchens, here is a sign to reevaluate that idea. Here are some fun, trendy, and stylish ideas for your curvy corner that will elevate the overall decor of your home.

Starting with modern designs, textures, colors, and highlighted details for chic kitchen cabinets. Here are the top 21 ideas to help transform your kitchen with white appliances.

Let these ideas inspire you to sprinkle some kitchen magic in your home.

Modern Ideas for Kitchen with White Appliances

Would you like an artistic touch in your kitchen or keep it all rustic? How about a pop of bright pink with contrasting white cabinets? Or would you like to keep the vibe minimalist and warm? Oh! So you fancy a kitchen with white appliances? Well, these countless kitchen decoration ideas on the internet are certainly overwhelming.

Therefore, here are the top 21 kitchen ideas with white appliances to help you choose the best style that suits your taster

1. Sleek Symmetry

Sleek Symmetry

The first step towards creating an organized, clean, and bright kitchen is to use sleek symmetry in the space. The sleek lines of your kitchen countertop, cabinets, tables, and seating bring out the grace of a fuss-free interior decoration. Style your kitchen with modern, minimalist white appliances to create harmony and balance in your theme. If you love spending time around your kitchen cooking, entertaining friends, or experimenting with mocktails, accessorize the interiors with sleek cutlery. Different shades of white amplify the seamless look of the symmetrical kitchen that you aspire for. Incorporate closed storage and simple designs to achieve the preferred look.

2. Bold and Beautiful

Bold and Beautiful

We understand your love for a classic white kitchen. However, a boost of boldness would only make it better and more unique. Style your kitchen with white appliances and bright yellow cabinets. Yellow is a cheerful color that exudes a light ambiance, happy vibes, and a bold personality all at the same time. The white walls, ceiling, and floor provide a light background for the bright yellow to amplify its joy and warmth in the kitchen. The closed cabinets with black details on the handles bring out the cleanliness of the yellow and create a more playful yet organized curly corner. A hint of nature with a fresh plant will only make your kitchen look better.

3. Rustic Retro

Rustic Retro

A rustic-retro kitchen with white appliances takes you back on a nostalgic trip to the past. A rough wooden center table with seating creates an inviting ambiance. The white-painted sideboards and traditional chimney complete the warm white-washed beam ceiling and walls. Ample natural light brings out the brightness. The earthy-toned floor tiles, wooden kitchen table, and countertop add a rustic essence to this curvy corner. An open cabinet, copper utensils, and some fresh flowers evoke crustiness at its best. This style blends the retro vibe and rustic essence, using appropriate kitchen essentials, designs, and appliances. Recreate this style in your kitchen to travel back in time with a mischievousness of paints and textures.

4. Soft Symphony

Soft Symphony

Create a soft, soothing feminine atmosphere in your kitchen with pastel shades of pink. This style is a striking practice to exude harmony and elegance in any kitchen. Different tints of pink will amplify the delicate ambiance. A kitchen with white appliances further plays contrast with the pink. Wooden sitting around the white kitchen table with an unpolished table top feels rustic and inviting yet, keeps the overall look crisp and clean. Simple white-washed cabinets hide the kitchen appliances seamlessly, amplifying the minimalist approach of this space. Open windows allow natural light into the kitchen, which makes your culinary corner look bigger, brighter, and softer.

5. Minimalist Mind

Minimalist Mind

A white-washed kitchen looks pale. But a bold pop of color does not resonate with your personality either. Well, you have the freedom to choose from countless warm-neutral shades to break the monotony of a kitchen with white appliances. A coat of warm grey on the lower cabinets and an earthy stone table top balance the cool-toned white on the top compartments. The patterned black and white tiles bring everything together in a harmonious balance. Select from a spectrum of muted shades to create this perfect minimalist, neutral color play. The color palette creates a soothing atmosphere in your kitchen, amplifying the cleanliness of the sleek cabinets.

6. Stone Stage

Stone Stage

Incorporating a polished stone tabletop for a kitchen island is a fantastic way to infuse elegance into your kitchen space. The natural and clean patterns found on the stone break the monotony of an all-white kitchen while still adding to its sleekness. The combination of stylish seating and minimalist pendant lamps seamlessly blends with the overall aesthetic of this all-white culinary interior. The white-on-white kitchen with the grand stone island top exudes sophistication and serenity. The dark wooden flooring provides a balanced contrast to the crisp whites, along with the brass details on the cabinets and lamps. This idea is a perfect example of how to style a kitchen with white appliances, creating a harmonious and visually stunning space.

7. Custom Cabinets

Custom Cabinets

Customizing a kitchen with cabinets, complementing paints, accessories, and appliances can cost us a hefty sum. However, achieving the desired customized look is not challenging without burning a hole in your pocket. Custom cabinets are famous for the convenience they bring by maximizing your space with appropriate utilization, designer styling, and defined sophistication. However, all these are easily achievable by adding details to your plain white kitchen cupboards. Be creative with your selection of designer hardware for your basic white cabinets. Design your kitchen with white appliances to add one extra layer of classiness to your culinary space.

8. Classic Black and White

Classic Black and White

Black and white color play tops the list of classic interior decoration themes. While styling a kitchen space, visualize a balance of light and dark. A light background with accentuated, darker details creates a harmonious visual. The above kitchen decoration inspires you to create a mid-century modern theme with all-white wall-mounted cabinets. A patterned marble table top amplifies the light aspect, making the kitchen space look bigger. Regardless, to balance the color scheme of a kitchen with white appliances, black island cabinets play a crucial role. You can add black furniture or cabinet ornaments for a further defined classic black-and-white look. A captivating, timeless kitchen interior is ready to leave a lasting impact.

9. Wooden Coven

Wooden Coven

The magic of wooden accents is truly timeless. The warm, earthy shades create an inviting and rich atmosphere in any space. If your love for wooden furniture has no limits, here is an idea to elevate your kitchen with a timeless touch. Opt for all wooden cabinets, kitchen island, dining table, and built-in storage. Now, to incorporate the sleek, contemporary, and sophisticated touch, use white stone table tops, cutlery, warm-white paint on the walls, and designer fuss-free seating. Hang pendant lamps to bring more warmth into this beautiful kitchen space. The clean lines of the wooden furniture successfully add an organized and elegant hint to the overall impression of this theme.

10. Marble Miracle

 Marble Miracle

Create an exquisite miracle in your kitchen with white appliances and breathtaking marble. The grandeur of a beautiful patterned white marble will add every ounce of elegance to any kitchen space. When you intend to create an all-white theme in your contemporary kitchen space, marbles are a must-have. The beauty of natural veins, imprints, and dots on the polished marble breaks the monotony of white with natural patterns. A kitchen with white appliances, cabinets, and clear-glass pendant lights amalgamates luxury and refinement, creating a bright, happy aura.

11. Crisp and Colorful

 Crisp and Colorful

Do you love the crispness of warm white kitchens? But a splash of color keeps missing. Here is a beautiful kitchen interior idea to suit your taste. A stylish interior with crisp white appliances, cabinets, and a white table balanced with bright color play is just what you need. The fresh blue-green paint with fish-scale details reminds us of the sea. The wooden flooring and a fine-knitted rug add more color to break the monotony of white. A brass pendant light elevates this kitchen space into a mix-and-match interior. This example inspires you to reserve a wall to create themes that resonate with your taste.

12. Let the Air In

Let the Air In

Do you have large windows that bring in ample natural light? It is time to style an open, airy kitchen that complements this natural feature of your house. A shiplap-patterned white kitchen island with an intricate stone countertop and white cabinets make the overall theme lighter. This kitchen with white appliances successfully reflects ample light and keeps your kitchen airy.

13. Dainty Details

Dainty Details

Elevate your kitchen by adding dainty details to your cabinets and white appliances. Golden details create a beautiful contrast with the white color and add a touch of grandeur. Opt for brass faucets, knobs, cabinet handles, and sleek gold-painted chandeliers to accentuate the details of an all-white kitchen. Copper cutlery and terracotta decorations will also work well against the crispness of white paint. These details add charm to the overall decor of your culinary corner.

14. Scandinavian Style

 Scandinavian Style

The vibe of a Scandinavian kitchen is one of elegance. Defined lines, natural textures, a clean white backdrop, and a neutral color palette blend everything to exude timeless elegance. The contemporary, stylish furniture complements a fuss-free living space, making the kitchen warm and inviting. This idea of a kitchen with white appliances is a fusion theme you can incorporate into your home. Geometric patterns and designs also complement the scandi-style kitchen. You can find inspiration in the geometric pattern rug, which matches the straight lines of the cabinets.

15. Complementing Grey

Complementing Grey

Paint your kitchen in all grey tones to create a monochrome effect on the cabinets, drawers, and island. The versatility plays a part when you balance the grey shades with white kitchen appliances. The sleek wooden chairs add a touch of modern style to your space. Everything looks picture-perfect with the right shades of grey. It is crucial to pick warm grey paint for your kitchen cabinets to keep the warmth of the style intact. The golden details on the knob and the handles of the cabinets define the storage space with a cleaner look.

16. White It Up

White It Up

Design your kitchen with a traditional stone wall and paint it all white. A kitchen with white appliances will complement the stone walls, creating a monochrome culinary space. The main attraction is the playfulness of different textures and materials like marble tops, wooden cabinets, stone walls, and ceramic cutlery. Incorporate as many textures of your choice to bring out the visual opulence of this white-washed theme kitchen. Stick to a rather unpolished wooden kitchen table and chairs to maintain a traditional nostalgia. A hit of micro-greens brings the much-needed freshness to this kitchen theme.

17. Midcentury Modern

Midcentury Modern

Neutral pinks, off-whites, and browns play with the white cabinets in this mid-century modern kitchen. Clean lines on the patterned tiles, chairs, and grand marble island create a visually sophisticated kitchen. The vintage aesthetic and functionality of the modern kitchen appliances make a perfect blend to maintain the theme of your culinary indoors. A deep shade used on the arch door and the pendant lamp shade brings in a contemporary aesthetic vibe against the overall neutral color palette.

18. Farmhouse Fresh

Farmhouse Fresh

A farmhouse-inspired kitchen is just what you need to live your countryside dream. The warm white cabinets and appliances blend with light, warm wooden accents to amplify the natural light in any kitchen space. The unpolished feel of the wooden flooring, cabinets, and chairs brings into play the rustic vibe of countryside living. The kitchen with white appliances and traditional barnwood details adds life to your farmhouse-inspired theme while still keeping it contemporary. Seek inspiration from this idea to live a laid-back, cozy lifestyle after long, busy days at work.

19. Warm Invitation

Warm Invitation

A warm, inviting kitchen will always feel like a warm hug after a tiring week at work. Use earthy shades to paint your kitchen cabinets and walls. A muted grey stone tabletop, wooden cutlery, and a rustic pendant lamp blend to exude the natural beauty of earthy shades. Another way to include earthy shades to create a warm, inviting culinary space is by using muted green seating around a marble kitchen island. To honor the crispness in your space, pick warm-toned white paint for your cabinets. Painted knobs and handles will help you add further details to accentuate this warm kitchen idea.

20. Artist Accents

Artist Accents

Art is an expression of one’s personality and creative craze. What better than adding artistic accents to your kitchen to add an impersonal touch? The cleanliness of the kitchen, with white appliances and cabinets, creates a clean and crisp backdrop for the artistic accents to stand out. You can pick from geometric patterns, abstract art, hand paintings, and colorful culinary items to showcase an enchantment and aesthetic appeal of a decorative art piece. Let practicality and personal expression coexist in your kitchen with this top-notch idea of adding artistic accents to your contemporary kitchen.

21. Natural Touch

Natural Touch

Design an outdoor kitchen with white appliances and incorporate nature’s touch with a vertical kitchen garden. Devote a wall to growing microgreens and witness the magical effects on your lifestyle. Adding freshness, beauty, and aroma to these plant babies is the best way to uplift the overall vibe of your kitchen. The kitchen with white appliances and fresh green picks will make your lifestyle healthy and ambiance better. White appliances create a clean visual contrast to the lush greenery on your vertical wall garden.

Summing It Up

All in all, how amazingly do the above ideas transform a plain white, uninviting curly corner into a bright, stylish, practical kitchen with white appliances? Be it the traditional rustic look that resonates with your kitchen decoration demands or the mid-century modern aesthetic, this list has got you covered.

Play with warm, earthy colors for an inviting aura, or break the monotony with a pop of bold color. Use different textures and materials, seek inspiration from mother nature, and explore unimaginable options to amp up your kitchen with white appliances.

Allow space for your creativity to flow, then pick a design that honors the overall theme of your stylish home. Convert your kitchen into a timeless and versatile space with the help of these ideas.

Do not forget to comment down which style calls you for a white kitchen makeover.

August 17, 2023 0 comments
0 FacebookTwitterPinterestEmail
18 Over Kitchen Sink Lighting Ideas
KitchenIdeas

18 Above Kitchen Sink Lighting Ideas to Go For

by Mark White August 16, 2023
written by Mark White

Don’t you think lighting plays a crucial role in determining the entire appearance of your space? Proper lighting is essential for any kitchen, and the area over the kitchen often goes unnoticed when it comes to illuminating the space. Above the kitchen sink, lighting adds a touch of style and personality to your space. However, you need the right lighting fixtures to transform this place into a focal point, thereby enhancing its functionality and appearance.

Over-sink lighting not only provides the required task lighting for washing dishes and other kitchen chores but also amplifies the overall look of your space. These over-sink lights will not make doing dishes a delightful experience but will liven up the vibe of your space. You can complement these light fixtures with the rest of the kitchen lighting to illuminate your space.

We have compiled the 18 Best Over Kitchen Sink Lighting Ideas, which will work out well for your interiors.

1. Pendant Lights

Pendant lights are one of the most preferred options for over-sink lighting. They are available in different styles, sizes, and designs. These lights feature the versatility to match any kitchen decor. You can go for a single pendant light or form clusters of the same for a dramatic effect.

Pendant Lights

2. Ceiling Flush Mounts

No one would want their head to touch their above kitchen sink lighting. Flush mounts are an ideal choice for low-heightened ceilings or kitchens with limited space above the sink. These lighting fixtures are an excellent choice as they provide a seamless look, thereby providing ample lighting.

Ceiling Flush Mounts

3. Track Lighting

Incorporate a luxe feel into your kitchen with the help of track lighting. These lights offer you the flexibility to direct light where you need it the most. By installing a track above your sink, you can adjust the direction of these lights as per your preference. This provides the freedom to utilize the lighting fixture to liven up the sink area, along with additional illumination for your kitchen.

Track Lighting

4. Under Cabinet Lights

Create a dreamy and opulent look with under cabinet lights. Installing these lights under the cabinets can illuminate your sink area. These LED strip lights are mounted underneath the upper cabinets, thereby casting a beam of light onto the sink. You can choose the LED colors for these lights depending on the color scheme of your kitchen. The most popular are warm white and cool white.

Under Cabinet Lights

5. Recessed Lights

Also known as can lights, recessed lights are used popularly for kitchens. When installed strategically above the sink, these lights offer ample illumination without taking up space and obstructing the view. Opt for adjustable trims to direct light where it is needed the most. These are placed against the ceiling, and they are a great alternative if you are looking for a brighter look for your kitchen.

6. Chandeliers

Leave a lasting impression on your guests as you install a luxurious chandelier in your kitchen. Make the space over your kitchen sink a focal point as you go for a chandelier. They are available in a wide array of options, from traditional crystal designs to modern and eclectic ones. You can choose the ones which suit your personal preference and style.

Recessed Lights

7. Industrial Lighting

These lighting fixtures have become popular for a notable period of time. Industrial-style lighting solutions such as metal pendant lights or cage lights lend an edgy and trendy look to your kitchen. These work amazingly well with modular kitchens having cabinets in hues like white, grey, black, powder blue, and navy blue. These lights add a touch of raw charm to your space.

Industrial Lighting

8. Rustic Lanterns

Add a cozy and rustic ambiance to your kitchen as you install lantern-style hanging lights above your kitchen sink. You can go for the ones made in jute or rattan for a touch of vintage and inviting feel to your space. These lights will provide the required illumination, thereby adding warmth.

Rustic Lanterns

9. Artistic Sconces

Sconces are a unique lighting solution to illuminate your kitchen sink area. Whether you choose to go for sleek and minimal sconces or aesthetic and decorative ones, they’ll surely offer ample task lighting for your kitchen tasks.

<Artistic Sconces

10. Glass Pendant Lights

If you are looking for lighting fixtures that’ll let your kitchen shine bright, glass pendant lights are surely the answer. They provide a beautiful play of light and shadow, thereby allowing the rest of your kitchen to steal your attention. They will add a luxe vibe to your space.

Glass Pendant Lights

11. Oversized Statement Lights

Make a bold statement by installing an oversized light fixture above your kitchen sink. Whether it is a large drum pendant, a cluster of ceiling lights, or any avant-garde design, these lights will be an eye-catching element for your overall kitchen decor.

Oversized Statement Lights

12. Vintage Edison (LED) Bulbs

Create a warm and inviting atmosphere with vintage Edison-style bulbs. You can incorporate these lights through pendant lights, chandeliers, or a flush mount fixture to embrace the vintage charm and nostalgic glow of Edison bulbs. However, these bulbs emit a lot of heat, and thus, we have many iterations of LED bulbs in these Edison-style designs today.

Vintage Edison (LED) Bulbs

13. String Lights

If you are looking for a versatile and fail-proof lighting solution for illuminating the area over your kitchen sink, you can never go wrong with rope lighting. These flexible LED lights can be placed underneath your kitchen cabinets to add a subtle glow to your kitchen.

String Lights

14. Lights with Adjustable Brightness

Installing dimmable lights above your kitchen sink allows you to adjust the brightness according to your needs and mood. These dimming lights offer you the advantage of aesthetics and functionality. They allow you to create a cozy ambiance for entertaining or bright task lighting for cooking.

Lights with Adjustable Brightness

15. Smart Lighting

Integrate smart lighting technology into your kitchen sink area to maximize convenience and efficiency. You can control the lighting remotely with smart bulbs and compatible devices. You can adjust the brightness, color temperatures and even set up schedules to automate lighting.

Smart Lighting

16. Colorful Accents

Add a pop of color to your kitchen sink lighting as you go for light fixtures that serve as a statement decor element. They feature the perfect blend of style, practicality and functionality. You can go for ceiling pendants or lanterns with a vibrant-hued shade. Alternatively, you can go for smart bulbs with color-changing technology to choose the color as per your preference and accent lighting.

Colorful Accents

17. A Cosy Lantern Kitchen Light

Enhance the cozy vibe of your kitchen with a lantern that features a gingham pull-down shade. This will bring the joy of the Holiday season all year round. If you have your sink area near the window, this will be the cherry on the cake. You can place a wreath during Christmas to spread the festive cheer.

A Cosy Lantern Kitchen Light

18. Kitchen Island Lighting

If you have a spacious kitchen with an island, chandeliers, and pendant lights will just be the right choice. If you are looking for a rustic vibe, you can go for some industrial-style pendant lights. Alternatively, for a coastal vibe, having an oversized lantern with a rattan shade will make an ideal pick.

Kitchen Island Lighting

Factors to Consider for Over Kitchen Sink Lighting

1. Height

Always be mindful of the height at which the lighting fixture should be placed above the sink. A general guideline is to place pendant lights and other lighting fixtures 30-36 inches above the sink surface. This prevents taller individuals from any obstructions while working near the sink area.

2. Wall Distance

The distance between the lighting fixture and the wall behind the sink should be considered. The ideal placement is 4-6 inches away from the wall to avoid shadows on the workspace and allow even light distribution.

3. Sink Size and Configuration

The sink size and configuration play a key role in determining the placement of the above kitchen sink lights. For a single bowl sink, the light fixtures should be centrally positioned. Whereas for a double-bowl sink, consider placing two individual light fixtures above each unit.

4. Kitchen Layout and Overall Decor

Consider the layout of your kitchen and the overall color scheme and decor of the space. You can then make the right choice of the perfect lighting fixtures that will work well in terms of functionality and aesthetics.

5. Alignment with Other Lighting Solutions

You can choose the ideal lighting fixtures for your over-sink area by aligning them with other light solutions in the space. To ensure maximum impact and cohesive space, go for fixtures that are relative in terms of material, color, and style.

Pros and Cons of Having Above Kitchen Sink Lighting

Pros

  • Installing lighting fixtures above the sink area provides focused and adequate lighting for tasks like washing dishes, preparing meals, cleaning vegetables, and much more. It ensures that you have proper visibility.
  • The right lighting fixture above the sink area serves as a decorative element, along with being highly functional. It can become a focal point, thereby adding visual appeal and personality to the space.
  • Kitchen sink lights are available in a magnitude of varieties, like ceiling lights, pendant lights, flush mounts, lanterns, chandeliers, and much more. You can choose the ones which work well for your kitchen decor.

Cons

  • You will consider choosing the light fixtures depending on your ceiling height and space layout. This will restrict your choices when it comes to going for large and elaborate lighting solutions.
  • Improperly positioned lighting fixtures and excessively bright ones can create a potential glare and shadow, thereby making it difficult to work near the sink area.
  • Lighting fixtures above the sink area are more prone to splashes, grease, and moisture. Regular cleaning and maintenance are necessary to keep the fixtures looking their best.

Final Thoughts

All in all, by carefully selecting appropriate fixtures and considering your specific needs along with the kitchen layout, you can maximize the benefits of the above kitchen sink lighting, thereby minimizing any drawbacks.

Styling the light above your kitchen sink offers you the opportunity to enhance the functionality and aesthetics of your kitchen. There are vivid lighting solutions to suit every style preference that can transform your space into a visually appealing focal point.

With the right lighting, you can create a welcoming and classy ambiance without compromising on practicality.

Frequently Asked Questions

Why is Over Kitchen Sink Lighting Important?

Over the kitchen sink, lighting is important because it provides ample task lighting for chores like washing dishes, cleaning vegetables, food preparation, and other activities. Additionally, it adds a touch of personality to the space making it a focal point.

What Types of Lighting Fixtures Work Well for Above Kitchen Sink Space?

There is a wide array of lighting fixtures that work well for different kitchen layouts and decor. You can choose from a comprehensive range of chandeliers, track lighting, flush mounts, pendant lights, lanterns, and much more.

Should I Go for Warm White or Cool White for Over Sink Lighting?

The choice between warm and cool white depends upon your personal preference. Cool white offers a brighter and more energizing feel, while warm white provides a warm and cozy ambiance.

August 16, 2023 0 comments
0 FacebookTwitterPinterestEmail
17 Small Kitchen Living Room Combo Ideas
IdeasKitchen

17 Kitchen Living Room Open Concept for a Cohesive Space

by Freja Johansson August 16, 2023
written by Freja Johansson

Well, small kitchens and living rooms have been combined extensively in recent times. While the kitchen living room open concept has been gaining popularity, it is equally difficult to design the space creatively for efficient use. And when it comes to contemporary houses and studio apartments where the space is confined, it is a greater challenge.

After this concept is adopted, it is now time to develop a strategic approach to make sure that every bit of the space is used well, especially if it’s a small space. As a final step, the design ideas for the kitchen living room open concept are endless; from color schemes to complementing color palettes to functional furniture pieces to aesthetic ones, it is important to imbibe something that makes you feel at peace in your space.

To help you make this possible, this article can be your guide to exploring the design ideas, narrowing down the list, and selecting the one for you.

1. Install Room Divider

Install Room Divider

Room dividers are a great and easy way to blend in your kitchen and living room open concept and yet elevate the look and feel of both spaces. The room dividers can be as simple or as aesthetic as you please or vibe with. These room dividers will act as the separation between both the kitchen and living room while also being a decorative piece. You can even get creative with your room dividers and find the ones with functionality that helps them to act as a gallery wall, bookshelf, etc.

If you get ample sunlight in any of these rooms, make sure to use room dividers that allow sunlight to make the most of natural light for both rooms. There are a number of options that you can use for room dividers, such as curtains, screens, shelving units, or plain ones. With the wide range of options available, finding the one that suits your theme might not be an issue.

2. Separate Using the Dining Table

Separate Using the Dining Table

This is perhaps the most popular way used for open-concept kitchen living room spaces for ages now. This method doesn’t require much creativity or space and also requires no additional decor pieces, furniture, etc. By using a functional dining table at the end of your kitchen space that connects to your living room, you’re separating your living space from the kitchen and setting the perfect layout.

This method is also economical as your regular dining table can be placed for the partition, and this requires no additional space, nor is there any wastage of space. This will allow an open feel while maintaining boundaries that are highly functional yet stylish, especially for modern lifestyles in confined spaces, studio apartments, etc.

3. Use No Partition

 Use No Partition

In this kitchen living room open concept, we can use the approach of presenting both the spaces as a whole with no furniture or decorative pieces used to separate the rooms. This method is quickly becoming popular in the contemporary setting for obvious reasons. This requires no additional furniture or pieces, making it economical, not occupying any more space, leaving ample space so the place doesn’t feel cluttered, highly functional, etc.

You can make this method a hit by blending the theme of both places by adding similar color tones and consistently similar furniture that makes the place look as a whole and spacious.

4. Kitchen Island Divider

Kitchen Island Divider

A kitchen island is quite important and very useful in the kitchen for cleaning, organizing, cutting, and preparing your food and setting up your groceries. Since this is a highly functional furniture piece in the kitchen, it is present in most households and can creatively be used to divide both the kitchen and living space.

If you worry about privacy when the guests visit, you can place your sofa and seating area opposite the direction of the kitchen island so the guests won’t be able to see what you do continuously. This method is also helpful when you don’t have a lot of space, and this requires no additional furniture piece that isn’t useful for you in any way. Make sure to place them in a way that you won’t feel that the place is cluttered.

5. Color the Places the Same

Color the Places the Same

In this kitchen living room open concept, you need no partition or additional effort and creativity to elevate the feel of the spaces. You can simply try and blend in both spaces and make them look continuous. This can be achieved by using similar color tones in both places.

You can either go for clean and light tones or earthy tones or experiment with bright colors. Instead, to make sure that the place isn’t boring, you can even use complementary colors that blend in together and make your place look complete. This will enhance the sense of unity and de-clutter the space.

6. Define Two Vibes

Define Two Vibes

If you have been researching how to partition your kitchen and living room, then this is an approach for you. This experimental method is helpful when you don’t want to invest in any extra furniture or decorative pieces and yet would want to feel the partition of your kitchen living room open concept. Try and find two completely different themes or vibes that can be blended together to give you a sense of two different worlds.

This will make sure that you feel the separation of the spaces while retaining the space to use it more functionally. This can include finding different tiles, patterned rugs, and color tones for walls, furniture, etc.

7. Use a Decor Shelf

 Use a Decor Shelf

Blending a kitchen living room open concept can be a daunting task and requires tedious efforts if you wish for some aesthetics. However, using this one piece of furniture can make this transition of the partition smooth and easy without much effort. Try and find a wood decor shelf that blends in well with the theme and aesthetics of both your kitchen and living room.

Now, fill the space with all the decor items that you like, from pieces from travels, books, clocks, etc. This can even be two-sided if you have more space and can be functional for you to organize even your kitchen essentials in it.

8. Set the Lighting Tones

Set the Lighting Tones

We have discussed using different partition products and even discussed creating two different aesthetics for both spaces so you don’t have to worry about finding the right partitions. However, both of these can be expensive ideas yet still be something you don’t wish to follow. At this point, you can play with the lighting at your place.

Try and find two or more sets of different lighting tones and different sources of light that look quite different from each other. This will help you to separate the place from each other while also making sure that they stay united with no extra space consumed.

9. Set Boundaries

 Set Boundaries

One of the most common and major issues with having a kitchen living room open concept is that the space will soon be cluttered. The items from both sections will be all over the place in no time, even though the place is organized from time to time. To make sure that this isn’t an issue for you, it is important to make sections and set boundaries.

You can perhaps have your kitchen items to the extreme left while leaving room for living space on the right side of the place or vice-versa. This will also make sure that the place isn’t too crowded, at least on one right and one left side, since it isn’t used to create boundaries. This must be planned strategically for better usage of the space.

10. Flexible Table

Flexible Table

One thing about a highly functional kitchen living room open concept is that you need to keep it minimal and super flexible. It is important to suit your changing needs. Perhaps, a flexible table can be of big help in this area. If you are working with limited space, perhaps find a table that can be used both as a kitchen island or dining table and for working or reading and writing.

This can be achieved by going for a table for wheels where the size can be adjusted according to the preference. This will help keep ample open space to maintain your peace, even in combo rooms.

11. Breakfast Table Partition

 Breakfast Table Partition

Breakfast tables have become a necessary thing in contemporary households, it consumes less space and is used for all meals throughout the day. However, you can get creative and use this breakfast table to create a partition in your kitchen living room open concept.

These breakfast tables are usually taller than regular dining tables, and even the chairs that complement these tables have high seating. This alone creates a great look for the place, and you don’t have to limit this to kitchen use. These tables can be used throughout the day to work and prep your meals.

12. Statement Floor Pieces

Statement Floor Pieces

Floor pieces for the home can include flooring, tiles, carpets, etc. All of these pieces can be used to complement the theme well as well as to make a statement using bold and creative patterns. Now, you can even use these pieces to create a partition in your kitchen living room concept visually. You can choose two different patterned floor pieces of the same color or find two different colors.

This will automatically create a distinction between the spaces. However, this method can easily make the place feel confined. So, be sure to use floor pieces that are distinct from each other yet complement well.

13. Aesthetic Divider Furniture

Aesthetic Divider Furniture

If you feel that you need a break from your kitchen living room open concept and want a partition that almost makes both places look like different rooms, then this is the right option for you. You can opt for aesthetic furniture that is style and designed to blend in with your theme while also acting as a wall and divider for the room.

The beauty of this is that you can shape it as you like, from a full wall to half wall and decor shelves. These are becoming increasingly popular in modern households because of their multi-purpose uses as walls, shelves, interior pieces, etc., and due to their ability to secure privacy between both spaces.

14. Go All White

Go All White

Going for an all-white tone for your house is a great idea that yields great aesthetics, and there’s no doubt about the capabilities of this color. In this method of kitchen living room open concept, you can go for an all-white color tone in both your kitchen and living room that can extend to color on walls, furniture, decor pieces, floor pieces, etc.

This all-white color will create a visual that your place is more spacious and bright and allows all the light it can get. This will make the place look as a whole and white, a perfect way to use and blend in the style while also keeping the place neutral.

15. SideBoard Storage Unit

SideBoard Storage Unit

These days, it’s super important that your place is super functional, even with limited space and confined rooms. While the kitchen living room open concept is already a great way for the usage the space, you can go the extra mile with this one piece of furniture. Get a simple sideboard storage unit that acts as a partition space between your kitchen and living room.

This is also a good way to store your things to grab easily, and again; this can even be used to stand large TVs on it with a few decorative pieces. This can be your statement piece while also acting as a way of providing you privacy for working in the kitchen.

16. Transparent Glass

Transparent Glass

While having a kitchen living room open concept is great for the space, the drawback of privacy has always been a reason for people to hold back too. In this method, you can try and overcome the issue of privacy by adding a transparent glass wall while leaving open space for only a door for people to pass in. You can leave the space without a door or add a statement-colored door to it.

To now cover the transparent glass, you can be as creative as you can. Opt for using lightweight paintings to make it a gallery wall or add stickers, and magnets, to it to transform this place into a wall of memories of your travels, milestones, etc.

17. High and Low Ceiling

High and Low Ceiling

While walls, floor, and furniture can be some of the ways to create a partition in your kitchen living room open concept, the ceilings can help too. If you wish to show a difference between the both, then you can have a high ceiling for your living room and a very low ceiling in the kitchen area.

This will help create a sense of partition between the open concept of the living room and kitchen. Moreover, you can still keep the color tones and furniture similar in both spaces to make sure that you still feel a sense of unity.

Summing It Up

All in all, the kitchen living room open concept can be your idea because you love the approach, or that was a must because of your limited space and light issues. Whatever the reason may be, the design ideas will not disappoint you with any outlook that you have in mind.

While the whole process may look overwhelming, sticking to a plan and focusing on the basics will get you through it and assist you in making both your spaces highly functional and aesthetic. The primary importance should be given to the layout of where to place your major pieces of furniture and how to separate the spaces.

Then, on the focal point about lightning, fireplaces, and finally on the designs and patterns that you choose and how you use them, consistently or unique for all.

August 16, 2023 0 comments
0 FacebookTwitterPinterestEmail
18 Ideas for Memorable Backsplash Behind Stove
IdeasKitchen

18 Amazing Behind The Stove Backsplash Ideas 

by Freja Johansson August 15, 2023
written by Freja Johansson

Do you feel your kitchen is missing out on something? Or want to upgrade the look? Then search no further. You have come to the right place. A memorable backsplash behind your stove can change the whole game and add a new dimension to your cooking space.

Backsplash behind the stove is practical and stylish; however, it is also a neglected zone in most kitchens. But the stove is the hero of every kitchen, and giving it a suitable companion is justified. Also, adding an appropriate backsplash behind your kitchen stove can make it look more attractive. Pairing a good backsplash tile with your stove can help you make it the center of your kitchen’s attraction and enhance the space’s aesthetics.

Let’s check out some memorable behind-the-stove backsplash ideas that are stylish and functional.

Best Ideas for Memorable Behind The Stove Backsplash

If you are searching for behind-the-stove backsplash ideas, you can have endless options, from brick backsplash to stainless steel, marble, herringbone tile, and much more.

1. Subway Tile Backsplash

Subway Tile Backsplash

Subway tiles are a popular choice for kitchen backsplash, and many people love to use them in their kitchens. It can also make a good pair for the backsplash behind the stove. The subway-style tiles still dominate wall decor and look great with modern architecture. However, these days people use them to elaborate the design and make the space more attractive. For example, you can add a section of a pattern to make it look unique. You can also opt for contrasting shades around to highlight your backsplash. You can also try STICKGOO White Subway Tiles Peel And Stick.

2. Herringbone Tile Backsplash

Herringbone Tile Backsplash

The herringbone tile backsplash is also a popular one. Also, herringbone tiling helps to create an expensive look for your kitchen. Rectangular tiles laid on a 45° angle to create a fishbone pattern is called herringbone tiling. It looks exciting and easily grabs the attention of any passer. You can do a 4′ inch herringbone tiling for your backsplash or install a frame of herringbone tile at the center and cover the surrounding with subway tiles. The best part of herringbone tile backsplash is they can go well with various interiors from modern, minimalist to vintage kitchen setups.

3. Black and White Patterned Backsplash

Black and White Patterned Backsplash

Love black and white color palette? Well, it reflects your taste in your backsplash behind the stove. Also, black and white is a timeless combination that looks stunning behind your stove. The black and white patterned backsplash gives a classy touch to the interior and makes it look elegant. It looks great with modern architecture and creates a minimalist environment for your kitchen. Try incorporating it into your kitchen.

4. White Tile Backsplash

White Tile Backsplash

If you want a soft and bright vibe for your kitchen, go for an all-white backsplash instead of black and white. White is a versatile color and can blend with almost every style and design making it an easy and accessible option for the backsplash behind the stove. For example, you can install a whole wall white tile backsplash that will cover the entire black space behind the stove and work great for white themed modern farmhouse setup. Also, a 4′ inch white backsplash will look amazing in modern kitchens. Try Yipscazo Peel And Stick White Tile Kitchen Backsplash for an elegant looking behind the stove backsplash.

5. Neutral Stone Backsplash

Neutral Stone Backsplash

A neutral stone backsplash for the kitchen stove is also an exciting option. These natural stone squares with a mosaic stone frame create a unique backdrop for your kitchen stove. Also, installing a neutral stone backsplash behind the stove will give a natural vibe with the soft tones of the stones. They create a perfect ambiance for vintage or boho kitchen decor. However, pairing them with wood accents can also be used in cottage or farmhouse-style kitchens.

6. Picture Frame Backsplash

Picture Frame Backsplash

Picture frame backsplash behind the stove is an excellent option to highlight the stove section in your kitchen. A picture frame backsplash helps to distinguish the section from the rest of the kitchen wall tiles. You can easily highlight the cooking area of your kitchen and help your kitchen stove section stand out. For example, you can install a herringbone tiling frame or gray-white patterned frame backsplash against a subway tile kitchen wall to get a classy look.

7. Marble Slab Backsplash

Marble Slab Backsplash

The marble slab backsplash behind the stove is an unbeatable solution for a modern minimalist kitchen. Marble backsplashes look great in the kitchen environment and look stylish. Marble slabs are highly durable and resist stains and marks. Also, it is easy to clean and keeps your kitchen space shining bright all the time. The marble stove backsplash can work great if you want to add a new dimension to your kitchen. For example, if you have white kitchen furniture and wall paint, you can install a black marble slab behind the stove as a backsplash. Crystals Marble Peel And Stick Backsplash look colorful and elegant.

8. Brick Backsplash

Brick Backsplash

The brick backsplash is becoming popular, creating a perfect setup for modern farmhouses or city apartment kitchens. They look exciting and aesthetically appealing. However, creating a brick backsplash behind the stove during the construction of your kitchen is easier than remodeling it with the theme later. You can install a brick backsplash and pair some wood or metal accents (in the form of lights, cabinets, or furniture) to get a perfect modern style or farmhouse kitchen look.

9. Mosaic Tile Backsplash

 Mosaic Tile Backsplash

If you want to upgrade your kitchen with a beautiful and vibrant design, you can use a mosaic stone backsplash behind your stove. Mosaic tile backsplashes are versatile and go well with different interior designs. Also, they bring life to your dull kitchen and make it more attractive. You can incorporate a mosaic backsplash in various ways, such as creating a section of mosaic tile with the subway tile to create a behind stove backsplash. You can even make a framed niche over your cooktop and fill it with a vibrant mosaic design.

10. Patterned Tile Backsplash

Patterned Tile Backsplash

The patterned tile backsplash looks excellent in various home areas, including kitchens and bathrooms. They add texture to your interior design and make it look more attractive. Adding a patterned backsplash behind the stove is a great way to introduce a new color to the interior and separate the section from the rest of your kitchen. Also, the patterned backsplash looks fantastic and enhances the beauty of your kitchen space. Depending on your kitchen interior, you can choose different shades for your patterned backsplash.

11. White Hex Tile Backsplash

White Hex Tile Backsplash

White hex tile backsplash gives a modern touch to your kitchen interior; they look simple yet elegant and help you create a casual look. You will love this if you are looking for a classy but sober style for your backsplash behind the stove. The white hexagonal shaped tiles create a beautiful backsplash for your kitchen stove background. Also, that makes a perfect fit for various interior designs, including boho, modern, and beach-style home interiors.

12. Neutral Marble Kitchen Backsplash

Neutral Marble Kitchen Backsplash

Another incredible option for your kitchen stove backdrop is the neutral marble kitchen backsplash behind the stove. Neutral marbles look great and give a natural touch to the interior. They create a beautiful background for your cooktop and highlight the features of your stove. You can also install some green plants and wood accents to create a picture-perfect backsplash with neutral marbles. Neutral marble backsplash goes well with a modern, minimalist, and natural-themed kitchen interior. Natural Stone Stick And Peel Backsplash Behind Stove by Art3d can create a fantastic effect in your kitchen.

13. Herringbone and Subway Tile Backsplash

Herringbone and Subway Tile Backsplash

Herringbone and subway-style tiles both are famous for use in kitchen backsplash. So, when you combine them, you can get a magical look for your kitchen. This combo looks stunning behind your stove and fills the gap between the hood and cooktop stylishly. You can create a herringbone tile section between subway tile panels or opt for a 50-50 theme to get a creative look. Also, this combination of herringbone and subway-style tiles looks chic and can blend with various interior designs/house architecture.

14. Porcelain Tile Backsplash

Porcelain Tile Backsplash

Want a classy touch for your kitchen backsplash? Our next backsplash behind the stove idea will amaze you. Porcelain is a bright and glossy material that gives off an expensive look. So, if you want a classy and luxurious look, nothing can do better than the porcelain tile backsplash. The best part of porcelain tiles is that they look but are also sustainable. They are dense and durable and resist chipping, cracking, and staining. Also, they are the ideal option if you have cats or naughty kids at home.

15. Stainless Steel Backsplash

Stainless Steel Backsplash

Stainless steel is also an excellent option for your kitchen backsplash. They are strong, durable, and stylish. If you are searching for something simple yet stylish, you must try the stainless steel backsplash behind your stove. Stainless steel backsplash is highly durable and can resist heat, water, moisture, stain, and scratches. Also, you do not need to worry about getting them stained with cooking splatters and greases, as stainless steel panels are easy to clean and do not require much maintenance. Try Peel And Stick Stainless Steel Backsplash by Art3d for a hassle-free installation.

16. Lime-Colored Tile Backsplash

Lime-Colored Tile Backsplash

You must try the lime-colored tile backsplash to add a light and breezy touch to your kitchen interior. Introducing a lime-colored backsplash behind the stove helps bring a lively and bright look to the space. It also enhances the aesthetics of your kitchen and highlights the cooktop zone. If you have white, orange, or blue kitchen cabinets and walls, a lime-colored backsplash will add a new charm to the room and make it more beautiful. You can also try installing some wood accents or contrasting shades of furniture in your kitchen cooktop to compliment the lime-colored backsplash.

17. Organic Pattern Backsplash

Organic Pattern Backsplash

The organic patterned backsplash is one of the most exciting and innovative ideas for your kitchen. They look fabulous behind the metallic stove and cooktop and help the area standard out from the rest of your kitchen. You can get a natural or lookalike stone, such as quartz or marble, to display the natural veining or organic patterns behind your stove. They look aesthetically pleasing and bring an artistic touch to the interior. If you are looking for some bold or dynamic backsplash for your cooktop, you must try them.

18. Ceramic Tile Backsplash

Ceramic Tile Backsplash

Lastly, ceramic tiles can make an ideal choice for your behind-the-stove backsplash. They look simple but classy and durable enough to use as a backsplash behind the stove. Ceramic tiles are excellent for resisting scratches and dents and have a strong surface. If you have pets at home who love to give autographs on your walls and furniture, ceramic tile backsplash will be a safe and sustainable option for your kitchen.

Summing It Up

All in all, adding a backsplash behind the stove has multiple benefits. It is a practical solution that looks great in your kitchen and keeps it clean and neat. Also, installing a backsplash behind the cooktop helps to fill the blank space between the cooktop, cabinet, and hood. And it helps to highlight the cooking zone and makes it look more attractive.

You can also install a backsplash behind your cooktop as a part of a kitchen upgrade and enhance the beauty of your kitchen. The best part of backsplash is that they come in various styles, designs, and materials.

So are you ready to upgrade your kitchen cooktop with a memorable backsplash? Try any of the ideas mentioned above, please.

Frequently Asked Questions

What is Timeless Behind the Stove Backsplash?

Several behind-the-stove backsplash materials look timeless, such as marble, ceramic, subway tile, mosaic, and porcelain tiles. They are also popular among people who want to create a classy backsplash for their kitchen. However, you must remember that all these materials may look timeless, but each has unique features and durability.

What is the Most Durable Backsplash Behind the Stove?

You can get several options if you are looking for the most durable backsplash materials to install behind your stove. For example, stainless steel is a metal base material with high heat and moisture resistance and lasts longer. Also, porcelain tiles are an excellent choice for high durability, resisting heat and moisture, and preventing creaking, chipping, stains, etc.

Is Using Peel and Stick Backsplash Behind the Stove Ok?

Yes, of course! You can peel and stick the backsplash behind the stove if you wish. However, you must remember that peel-and-stick backsplash are less durable than the original material. Also, you must check whether the peel and stick are heat and moisture-resistant. Some peel-and-stick backsplash may be heat resistant but not fireproof. So, if you have an open oven, consider this factor as well.

August 15, 2023 0 comments
0 FacebookTwitterPinterestEmail
21 Elegant Ideas for a White and Gold Kitchen
IdeasKitchen

21 Stunning White and Gold Kitchen Design Concepts

by Tyler Hernandez August 15, 2023
written by Tyler Hernandez

Don’t you think an aesthetic kitchen is something that most people want? Then, how about choosing the right color scheme? Well, for that, gold and white are a must-go. A combination that you would never give up because of its soothing nature and elegance.

There is so much possibility for white and gold in home decor, especially in the kitchen. The former provides a flexible foundation that makes it simple to coordinate with other pieces, while golden accents will provide a chic and opulent look that will make your kitchen stand out.

White may be made more opulent and elegant by the addition of gold which you can use every day of the year. There are various ways to use this abundant color, from golden lightning to brass knobs to glistening black splashes.

So, let us roll into the article to find out the best 21 ideas for white and gold kitchens.

1. Appliances with Golden Hardware

Appliances with Golden Hardware

With wooden floors, a beach floor runner, and a white kitchen island, the kitchen has a nautical theme. The ceiling of the kitchen is covered with glass pendant lights that have a gold accent. Cabinet hardware and kitchen faucet, among other brass accents, add a stylish touch to this kitchen. There is something old-school about the cabinets with flat fronts and open glass panels.

2. White and Gold Accents

White and Gold Accents

This color has a very useful superpower that makes tiny rooms and kitchens look bigger than they are by creating an airy, light feeling when utilizing large numbers. Therefore if huge white kitchens are contemporary and beautiful, choosing this color for a smaller space would be a particularly good decision.

3. Vintage Lighting

 Vintage Lighting

The kitchen has a vintage glass pendant lighting setup which is going well with a white island. The walls of this kitchen are covered in white subway tiling, and the shaker cabinets are contemporary. This room is finished with a farmhouse sink and black hardware. The kitchen looks more minimal and inclines towards the royal touch. The stools add up as a charming factor which is intriguing.

4. Keeping It Minimal

Keeping It Minimal

Include clean white worktops, cabinets, and tiles to give the space a bright, area atmosphere. In addition to grounding the room, dark wood flooring creates a contrast. All that’s required to get an exquisite and refined appearance after a few very little touches of gold. For a light and area appearance, paint your walls white and choose white flat panel cabinets, white table tops, and stainless steel equipment.

5. Create a Depth

Create a Depth

Next to plain white cabinets, using multi-tonal or textured tiles is a great way to create depth. These subdued white and Gray marble tiles give the walls a beautiful tactile effect and act as a transition between the white units and the black floors. The room is brought to life with energizing yellow-gold pendants and a golden tap in the middle.

6. Use Marble

Use Marble

Include marble in your ambitious concept as another approach to enhance your white and gold kitchen. If you want to project a porch or redefined vibe, it is a highly advisable approach. You might consider installing marble on the top surfaces of the kitchen, island, and backsplash. It will raise the bar and increase the appeal of your kitchen.

7. Herringbone Tile

Herringbone Tile

Over the stainless steel oven in this kitchen is a good that is dark gray with gold fittings. The wall behind the white cabinets is covered with white herringbone telling. The lower cabinets are equipped with sizable flat gold knobs. On the light wood floor, there is a white rug. The white and gray marbled countertop has two plants in each corner. On the edge, a black of knives is placed.

8. A Colorful Touch

A Colorful Touch

When choosing your palette, most interior designers are advised to keep three primary colors. Like there’s lustration mentioned above with a multicolor rug in a white, black, and golden kitchen. Also, you may consider adding a more diversified splash of colors. This will turn your kitchen into an eclectic Hollywood Regency or bohemian look, for instance.

9. Play with Lighting

Play with Lighting

It is a bright, airy area with full-height windows, tall white glossy cabinets, white counters, and a glamorous feel thanks to the golden accents. The lofty ceilings are highlighted by the contemporary gold pendant lighting, which also draws the eyes upward. Lighting is sometimes an afterthought, yet it can completely change the look of your room. Consider golden chandeliers for a truly opulent look or golden geometric angles to add edge to your room. Hanging gold lighting overhead will draw attention to a highlight in your kitchen, such as an island or peninsula.

10. White Wall Tiles are a Great Choice

White Wall Tiles are a Great Choice

White cabinets and walls are common in white kitchens, but you could make yours even more distinctive by adding white wall tiles. Not just for backsplash necessarily, but also if you have white cabinets, tiles will add a visually appealing pattern that can help you avoid an overpowering or plain feeling. This is an elegant way of styling your kitchen; it will also make your kitchen look more aesthetic and will cause more comfort to your eyes.

11. Golden and Silver Accent

Golden and Silver Accent

This is a lovely technique that, depending on how the actual pieces are designed, will offer even more of a glam, modern or sleek white. When designing the remainder of your kitchen, start with white as the dominant color and think about incorporating both golden and metallic accents (such as silver or chrome). For instance, you may have stools with chrome legs and golden drawer handles. With this styling approach, you may elevate your sense of elegance and make your kitchen stand out dramatically.

12. Use Some Light Woods

 Use Some Light Woods

Although the color scheme of white and gold is typically associated with opulent and elegant rooms, you may still go for a cozier or more rustic feel. Natural, even-aged, or distressed wood treatments are perfect if that’s the case. You may emphasize the airy atmosphere of your white cabinets by using lighter-colored ones in particular. This concept is much more understated and also provides a kitchen with a regal appearance that will capture people’s attention.

13. Backsplash with Patterns and a Vertical Shiplap Wall

Backsplash with Patterns and a Vertical Shiplap Wall

What about a kitchen island with a white marble surface, a pendant light in flat white gold hanging under the island, is a tall chair with a white cushion? The cozy wood floor is covered with a beautiful beige rug. Underneath a large white hood with wood trim is a gorgeous backsplash made of tile. White cabinets with gold pulls and knobs may be found in the kitchen. You may accomplish a style that will transform your kitchen experience and offer you a cozier look by taking this design into your mind.

14. Use an Antique Brass

Use an Antique Brass

Antiques are always fantastic, especially when they are used as brass decor! Kitchen gear made of antique grass is ideal for people who wish to give their houses a vintage feel. Here, weathered brass looks lovely in contrast to the white cabinetry and marble accents. A kitchen open shelf unit made of vintage brass and gold houses elegance. However, the porcelain cookware, the butcher block countertop, and the dark brown island lend both aesthetic appeal and practicality.

15. Look on Champagnes

Look on Champagnes

The hardware used above is champagne copper blended with a pinkish variant of traditional gold. Thus, champagne should be given priority. Champagne copper cabinet hardware has a golden appearance with less brassiness and is ideal for classic or modern kitchens. With white shaker cabinet with extra long bar pulls and tiny knobs provide a modern and practical look. That design feels quaint and retro, thanks to the copper solitary handle.

16. Why Not a Gold-Finished Dome Pendant

Why Not a Gold-Finished Dome Pendant

The dome pendant is one of the lighting designs that may actively aid in your introduction of a more obvious golden accent. Offering a broader surface than smaller alternatives, it aids in your display of the golden finish. These lights are perfect for job lighting over your Thailand because of their different lens. It also pairs with a wide range of decor styles, including a Scandinavian farmhouse, modern and industrial.

17. Raw and Industrial Shiny Glam

Raw and Industrial Shiny Glam

These decor styles couldn’t seem more unlike one another, but that’s precisely what makes them a brilliant mix. Get raw industrial and shining lamp interiors! Then go nuts with bras and other glistening metallic embellishments. Watch out for glitzy pipe-style decor surrounding this kitchen island! Keep the industrial minimalism, use white as your main color, and go for open shelving and lighting fixtures that provide a warehouse sense.

18. Black Stove with White Cabinet

Black Stove with White Cabinet

Watch out for this kitchen which has a black stove beneath a white hood, white cabinets with gold hardware, and irregular white brick walls. Over a white island white table top, two black and white pendant lights hang. Under the island are three wooden bar stools. There is a beach rug on the cozy wood floor, making it more subtle to look at.

19. Gold Backsplash

Gold Backsplash

If you want to use dramatic design elements in your kitchen, think about using a polished copper backsplash. Polished copper will cost less than other gold-colored metals while having a comparable appearance to gold. Reflecting backsplash vibrant sheen may transform a dated kitchen and serve as the space’s aesthetic focal point. A sizable dark wood island and white shaker kitchen cabinets were combined by this designer.

20. Add Up to Your Living Space

Add Up to Your Living Space

The decor in the living area flows naturally into the white and gold kitchen. A wall-length row of white cabinets with art shelves. White-shaped pendant lights hang over a wooden kitchen island with a wide surface. Cold stools are placed next to the island. The overall look and style of this kitchen make it soothing and eye-catching, which might intrigue anyone at any point.

21. All Eyes on Stools

All Eyes on Stools

Another must-use area to display some golden touches is on the stools surrounding your kitchen island. Then you might cover them with upholstery in one of your primary colors to maintain the consistency of your color scheme. They look stunning against both white and black backgrounds, as you can see in this fashionable kitchen.

Summing It Up

All in all, these ideas are those simple thoughts that you can put into practicality and personify your kitchen. A kitchen style that is here to stay is white and gold. White has been a popular color for many years because it is bright and airy, but right now, matte countertops and textured tiles are taking the place of glossy finishes in favor of depth and character.

The alternatives in your kitchen are far more limited than they are in spaces like your bedroom, workplace, or living room. You must take your appliances, countertops, cabinets, islands, etc., into consideration whether you’re remodeling an existing kitchen or creating one from scratch. White and gold go together well, adding a touch of warmth and glitz to everyday activities.

We hope that this article will help you in designing your kitchen with a white and gold theme.

August 15, 2023 0 comments
0 FacebookTwitterPinterestEmail
Newer Posts
Older Posts

Recent Posts

  • A Complete Chalked Paint Review fo Better Selection 
  • A Guide to Painting Furniture without Sanding
  • 15 Steps to Create Faux Shiplap DIY Wall in Budget
  • How to Paint Furniture without Sanding or Priming
  • A Guide to Achieving Texture with Saltwash Paint Techniques

Recent Comments

No comments to show.

Recent Posts

  • A Complete Chalked Paint Review fo Better Selection 

    October 18, 2023
  • A Guide to Painting Furniture without Sanding

    October 18, 2023
  • 15 Steps to Create Faux Shiplap DIY Wall in Budget

    October 18, 2023
  • How to Paint Furniture without Sanding or Priming

    October 18, 2023
  • A Guide to Achieving Texture with Saltwash Paint Techniques

    October 18, 2023

Categories

  • Bathroom (15)
  • Bedroom (4)
  • Brush (3)
  • Decor & Design (15)
  • Decorating (1)
  • Dining Room (3)
  • DIY (2)
  • DIY Projects (11)
  • Door (5)
  • Fireplace (3)
  • Flooring (2)
  • Furniture (9)
  • Gardening (1)
  • Guide (11)
  • Home Crafts (1)
  • Home Decor (7)
  • Home Improvement (9)
  • Ideas (63)
  • Kitchen (16)
  • Outdoor Living (1)
  • Paints (18)
  • Review (1)
  • Room Ideas (3)
  • Tutorial (1)
  • Uncategorized (2)
  • Wall (6)

Instagram

About Us

Maecenas nec odio et ante tincidunt tempus. Donec vitae sapien ut libero venenatis faucibus, nullam quis.

01 Central Park, US, New York City
Phone: (012) 345 6789
Fax: (012) 345 6789

  • Facebook
  • Twitter

@2021 - All Right Reserved. Designed and Developed by PenciDesign


Back To Top
DormyHome
  • Decor & Design
  • DIY
  • Guide
  • Home Improvement
  • Smart Home