• Decor & Design
  • DIY
  • Guide
  • Home Improvement
  • Smart Home
DormyHome
keep your memories alive
Home » Paint for furniture
Tag:

Paint for furniture

Best Paint Brushes For Polyurethane
FurniturePaints

The Best Paint Brushes for Applying Polyurethane

by Marco Bianchi October 17, 2023
written by Marco Bianchi

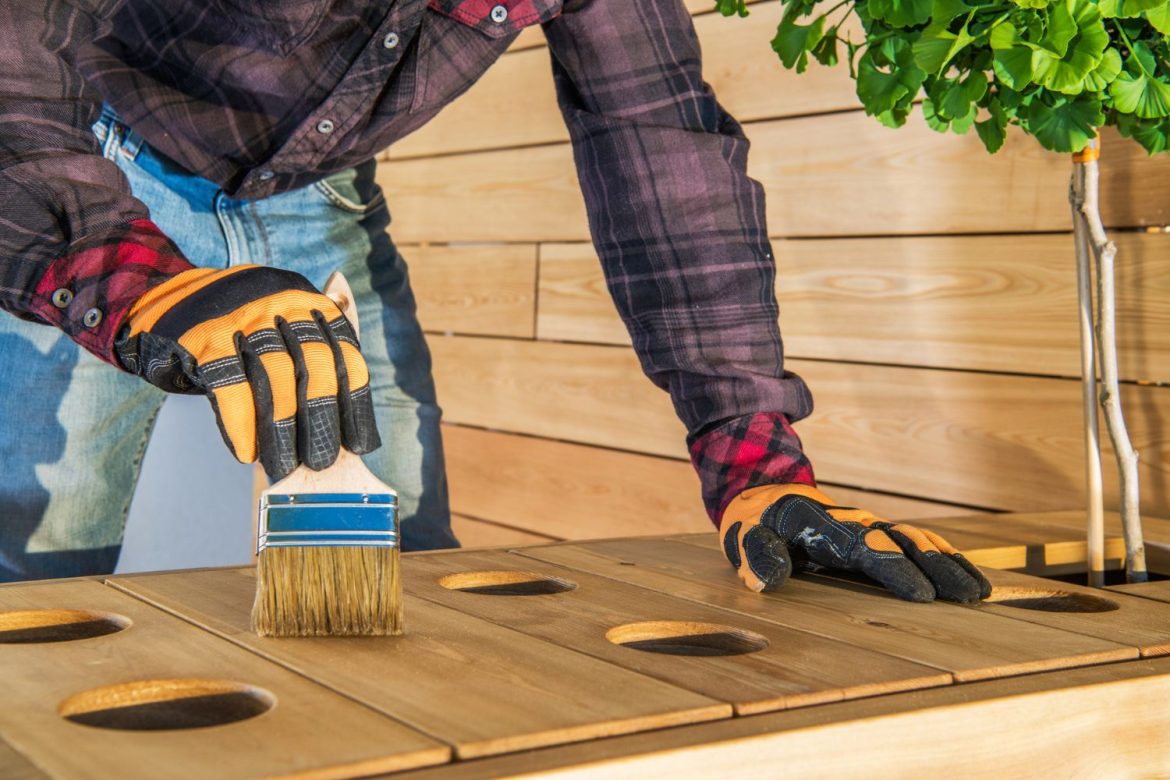
Polyurethane is a durable coating that can add beauty and longevity to your projects, but using the right paint brush is important to achieve a smooth and even application. We’ll help you choose the best brush for polyurethane needs.

We’ll find everything for you to pick the perfect brush without any confusion.

We’ll find various types of brushes, including bristle brushes and foam brushes, and discuss their pros and cons. You’ll also learn about the important factors to consider when selecting a paintbrush, such as brush size and shape.

We’ll provide practical tips to ensure that your polyurethane projects turn out beautifully. So, whether you’re refinishing your kitchen cabinets, restoring a wooden table, or working on any polyurethane project, let’s make your work easier by finding the best paint brush for the work.

Let’s start and make your projects the best.

Understanding Polyurethane

Understanding Polyurethane

Think about polyurethane as a tough shield for your wood and metal belongings. It’s like a coat that makes things look great and keeps them safe. You can use it on furniture, metal storage cabinets, and floors to stop water, scratches, and damage.

To use the best brush for polyurethane the right way, you need the right tools, like brushes. If you don’t have the right tools, it can be a bit tricky. So, ensure you have the right gear to make your wood and metal things look awesome and stay protected. With the right tools, you can be the hero your furniture and floors need.

So, be ready to release the power of polyurethane and keep your valuable things safe and looking fantastic. For DIY and home improvement, polyurethane is your handy helper. With the right tools, you can be the hero your furniture and floors deserve.

So, ensure you’ve got the gear to change your items into showstoppers while providing them with the tough protection they need. Take the power of polyurethane and safeguard your cherished belongings in style.

Characteristics of the Best Brushes for Polyurethane

Characteristics of the Best Brushes for Polyurethane

1. Bristle Material

Choosing the right brush bristles is important when you’re working with polyurethane. For polyurethane projects, go for brushes with natural bristles like those made from hog hair. But why, you ask? Well, These best brushes for polyurethane are special.

They can grab onto the polyurethane and spread it out evenly. Think about that. With the right brush, you can make it all smooth and nice. Natural bristle brushes do the same thing for polyurethane. They help you get a perfect, smooth finish that looks good.

So, when you’re getting ready to use polyurethane, don’t forget to pick a brush with hog hair or other natural bristles. It’s not just about making your work easier. It’s about getting a fantastic result. When you use the right brush, applying polyurethane becomes a breeze, and your project turns out awesome.

2. Brush Shape

The brush you pick matters when you’re working with polyurethane. For polyurethane, it’s best to use a flat or angled brush. These brushes are like the pros’ secret tools because they make it easy to apply polyurethane just the way you want, especially when you’re working on flat surfaces.

A flat best brush for polyurethane has a wide, flat surface that’s ideal for covering big areas smoothly. It’s a bit like using a paint roller for polyurethane. Now, an angled brush has slanted bristles that make it clear to get into corners and tight spots so you can be precise.

So, if you want your polyurethane work to look nice and even, don’t forget to grab a flat or angled brush. They make it plain to do top-notch work, whether you’re sprucing up furniture or adding a protective coat to your floors or cabinets.

3. Size Matters

Choosing the right brush is important for your project, just like picking the right tool for a work. It’s all about the size of the brush. If you’re working on a big area, like painting a huge wall in your house, go for a wide brush.

A wide brush can paint a big space in one go, making your work faster and simpler. But when you’re dealing with smaller tasks, like fixing up little things or doing crafts, grab a narrower brush. A narrow brush lets you be accurate. Think about painting a short picture frame or adding little details. A narrow brush helps you do it carefully and without mistakes.

So, match your brush size with your project size. If you do that, you’ll get awesome results. Whether you’re taking on a big painting work or doing some fine detail work, choosing the best brush for polyurethane can make a big difference in how well you do.

4. Quality Matters

If you want your art or projects to look awesome, using fantastic brushes is important. The best brushes for polyurethane are built to last because they’re made strong with handles and bristles that won’t come off.

When you use them, they don’t just work for a long time; they also make your work look much better. By picking high-quality brushes, you save money because they stay with you for a long while. They make your work stand out wonderfully.

It’s like a double win for your art or any project requiring brushes. Don’t underestimate how much good brushes can improve your work. So, if you want to create amazing art or projects and save money in the long run, investing in top-notch brushes is the way to go.

Best Brushes for Polyurethane

Best Brushes for Polyurethane

1. Purdy White Bristle Series

Purdy is a famous brand known for making amazing brushes. They’ve got a particular set of brushes called the White Bristle Series, which are superb for applying polyurethane.

What’s awesome is that these brushes come in different sizes and shapes, so you can pick the one that works best for your project. This best brush for polyurethane has natural bristles that are excellent at picking up paint and spreading it evenly.

Whether you’re a DIY person or a pro, using Purdy’s White Bristle Series brushes makes painting easier, and you’ll always get a fantastic finish. So, if you want top-quality brushes, choose Purdy.

They simplify painting, and your results will look amazing every time. When you use Purdy brushes, your painting projects become much easier, and the result will impress you every single time you paint.

2. Wooster Alpha Brushes

Meet the awesome Wooster Alpha Brushes. These brushes are specially made for use with water-based polyurethane coatings. They’re strong, plain to clean, and will stay in perfect shape for a long time. What makes these brushes unique is that they’re designed to work well with water-based polyurethane. Unlike other brushes, they won’t fall apart or lose their shape when they get wet.

You can count on them to last, so you won’t have to keep buying new ones. Cleaning up after your project is a breeze with Wooster Alpha Brushes. Their synthetic bristles make them easy to clean, so they’ll be all set for your next project in no time.

Say goodbye to the hassle of cleaning up brushes that don’t cooperate. To sum it up, if you want the best brush for polyurethane that is tough, simple to maintain, and rare for a smooth, streak-free finish with water-based polyurethane, go for Wooster Alpha Brushes.

3. Benjamin Moore Ultra Spec

Benjamin Moore’s Ultra Spec brushes are the best for precise and effortless painting. These brushes work well with polyurethane and other finishes. What’s rare about them is their slanted shape, which helps you control your painting, especially when you’re doing detailed work. Thinking about using these brushes feels like a walk in the park, whether you’re doing short details or covering a big area.

Their secret is their clever design. The slanted bristles help you get into tight spots and handle tricky edges without a hassle—no need to worry about messy spots or uneven coverage. So, whether you’re a pro painter or just doing some DIY, Benjamin Moore’s Ultra Spec best brush for polyurethane will make your painting projects a breeze. Enjoy painting with precision, and make your finishing touches stand out with these amazing brushes.

4. Wooster Silver Tip

The Wooster Silver Tip brushes are pretty amazing. What makes them unique? Well, it’s all about their bristles. These brushes have a mix of white and silver nylon bristles that work well together. Think about it like this: When you use these brushes to paint, it’s smooth.

The bristles are magnets for paint, so it’s effortless to spread it evenly. This means your paintwork looks great, with no weird spots or unevenness. The secret is in those singular bristles. The white and silver nylon bristles are a superb team, making sure your paint goes on smoothly without any mess. So, why pick the Wooster Silver Tip brushes? Because they make painting clear, and you get a pro-quality finish every time.

No more struggling with uneven paint or messy work. With these brushes, your projects will be simpler, and your results will be fantastic. Try the Wooster Silver Tip, the best brush for polyurethane, and enjoy the easy, professional paint work they bring to your projects. Painting perfection is just a brush away.

5. Zibra Round Brush

Zibra’s Round Brush is unique for small work and detailed work. It’s a handy tool because it’s short and round, which means you can control it easily and be precise. It’s fantastic for getting into tight spots and corners, so it’s just what you need when you want to be extra careful and get things exactly right.

Whether you’re fixing up a piece of furniture, adding a protective layer to trim, or doing any work that needs close attention, Zibra’s Round Brush is a top pick. With this brush, you won’t have difficulty reaching tricky spots or accidentally using too much polyurethane.

The best part is that Zibra’s Round Brush helps you make smooth and careful strokes so your work looks neat and professional. You won’t have to worry about making it uneven when you use Zibra’s Round Brush. It’s the best brush for polyurethane for the work when you want things to look wonderful without any worry.

6. Purdy XL Elite Monarch

Purdy’s XL Elite Monarch brushes are famous for being good. They’re made with a mix of real bristles and man-made things, giving you the best of both paintings. These brushes are perfect for painting because they let out paint like a pro and make your project look smooth.

They’re fabulous for polyurethane projects. When you use XL Elite Monarch brushes, you get the benefit of real bristles for being accurate and man-made fibers for being tough. It’s a winning combo that makes your painting tasks a breeze.

So, whether you’re a DIY enthusiast or a professional painter, this is the best brush for polyurethane. When it’s time to paint, reach for XL Elite Monarch brushes and watch your projects shine.

7. Wooster Pro Nylon/Polyester

Let’s talk about Wooster’s Pro Nylon/Polyester brushes, the go-to tools for all your polyurethane projects. These brushes are flexible because they work with both oil-based and water-based coatings. They’re tough and can be cleaned up without a fuss, so they stay in fantastic shape.

What’s cool about these brushes is that no matter how much you use them, they keep their shape. Whether your project is small or big, Wooster has different sizes to pick from, so you always have the right brush. Whether you’re a pro or just like doing things yourself, you’ll like using Wooster’s Pro Nylon/Polyester brushes.

They make putting on polyurethane effortless and make your work look professional every time. You won’t have to worry about the best brush for polyurethane getting old and tired. These brushes will be your reliable helpers for all your polyurethane work. With Wooster’s Pro Nylon/Polyester brushes, you’ll easily get a fantastic finish on your polyurethane projects.

8. Purdy Nylox Glide

Purdy’s Nylox Glide brushes are a special type of paintbrush made from a mix of nylon and polyester bristles. These brushes are great for use with different kinds of paint, even polyurethane. What makes them rare is how well you can control them, and they make your paintwork look smooth and nice. The mix of nylon and polyester in these brushes makes them strong and wonderful at spreading paint evenly.

When you use them, you’ll find them easy to handle, which helps you paint just the way you want. Whether you’re a professional painter or enjoy DIY projects, these brushes are made to make your painting tasks easier and more fun. Then you pick Purdy’s Nylox Glide brushes; you’re choosing brushes that work well and are clear to use. They’re the top choice for making your painting projects look professional and make your surfaces look their best brush for polyurethane without too much effort.

9. Wooster Shortcut Angle Sash

Meet the Wooster Shortcut Angle Sash brush, your handy helper for slight work at home. This little brush is designed to make a painting or adding a clear coat called polyurethane in tight spots clear. Think about whether you’re fixing up a little piece of furniture or giving a cramped corner a fresh coat of paint. His best brush for polyurethane is your perfect companion.

It’s short and angled, so it’s good for getting into tricky spots and making sure your work looks neat. What’s cool about it is that it can reach places where big brushes can’t go. It’s like having a unique tool for those little pieces of work that needs a gentle touch. Whether you’re a DIY pro or just like doing short projects around the house, the Wooster Shortcut Angle Sash brush is to make things simple and leave your projects looking amazing. It’s the little tool that packs a big punch.

Conclusion

Finding the best brush for polyurethane doesn’t have to be tough work. We’ve learned a few things to help you make the right choice. First and foremost, it’s important to pick a brush with the right bristles. For polyurethane, synthetic bristles are perfect because they won’t wet up the finish, making your work smoother and less drippy—next, the brush size matters. Smaller brushes work great for small projects, while bigger ones are handy for larger surfaces.

Don’t forget the handle. A comfortable handle makes your painting experience more enjoyable and reduces hand strain. Look for one that suits your grip. Lastly, clean-up is important. After you finish using the brush, give it a good wash with the suggested cleaning liquid. This will help your brush last longer.

Don’t forget that with the right brush, your polyurethane projects will be smoother than ever.

October 17, 2023 0 comments
0 FacebookTwitterPinterestEmail
How to Distress Furniture With Chalk Paint
FireplacePaints

A Complete Guide to Distressing Furniture with Chalk Paint

by David Parker October 17, 2023
written by David Parker

Chalk paint is a fantastic way to change your furniture into stylish, old, attractive pieces that will give a new look to your home. Whether you have an old wooden chair that’s seen better days or a dull dresser that needs a makeover, Chalk paint can work easily.

You’ll learn what materials you need, how to prepare your furniture for painting, and the clear techniques to achieve that beautifully distressed appearance. We’ll keep it simple and effortless to follow so anyone can give their furniture a simple, vintage beauty. We’ll explain the steps in easy-to-follow instructions with which you can give your furniture a vintage look. So, grab your chalk paint, and let’s start distressing your furniture.

Be ready to change your home one piece of furniture at a time and find out about distressing furniture with chalk paint.

What is Distressing?

What is Distressing?

Making old-looking furniture is a trendy thing in home design. It’s a fun way to give your home a special, comfy feel. So, how does it work? Well, it’s about making furniture appear older and worn on purpose. First, you might sand it down or use tools to give it little bumps and scratches. You know how old things can have dents, scrapes, and paint coming off? We’re copying that.

Once it seems just right, you can give it a new coat of paint, stain, or a clear finish to keep it strong. The result? Distressing furniture with chalk-style paint seems to have been around for a while. It has many different styles, like that comfy farmhouse view or the cool industrial vibe.

What is Chalk Paint?

What is Chalk Paint? .jpg

Chalk paint is a special kind of paint made by Annie Sloan in the 1990s. It’s different from regular paint because it’s really easy to use. You don’t have to do hard things like sanding or satin finish priming before you use it. Think about how you want to make your furniture better without doing a lot of work. It’s a quick and easy way to change your furniture appearance.

It’s great for people who like DIY projects or want to make their homes nicer. You can use it on tables, chairs, and dressers. It dries to a pretty matte finish, making your things look classic and cool. So, if you want paint that’s clear to use and perfect for making your distressing furniture with chalk paint awesome, give chalk paint a try. It saves you time and effort, and the results are amazing.

The Unique Qualities of Chalk Paint

The Unique Qualities of Chalk Paint

1. Matte Finish

It dries in a soft, non-shiny way, making your furniture look comfy and classy. Think about your old wooden chair or table getting a nice new spot without any fancy things. What’s neat about chalk paint is that it’s not glossy at all. When you use it, your furniture won’t be all bright and reflective. Instead, it will have a smooth and plain finish. Do you know how velvet feels soft when you touch it? Chalk paint makes your furniture view soft. This kind of paint is great if you want your furniture to seem classic and fancy. It’s like adding a touch of fancy to your home things. So, if you want to make your distressing furniture with chalk paint look stylish with no worry, try chalk paint. And the best part? It’s effortless to use, so you’ll be a DIY pro in no time.

2. Excellent Coverage

Chalk paint is perfect for painting. It’s good at hiding flaws, and most times, you only need to use it once or twice to make things look awesome. Think about you have an old, scratched-up chair that doesn’t seem so good anymore. You can grab some chalk paint and put it on the chair. It hides all those scratches and makes the chair view fantastic. No need to keep painting it again and again. That’s what makes chalk paint great. It’s easy to use and saves you time and effort because you don’t have to do lots of coats like with some other paints. So, if you want to give your things a fresh new spot without all the worry, chalk paint is your top choice.

3. Minimal Brush Marks

Chalk paint is amazing for your distressing furniture with chalk paint. When you use it, those annoying brush marks pretty much vanish, leaving your piece looking smooth and even. Think about painting your favorite chair. Regular paint sometimes leaves streaks or brush marks that make it uneven and messy. But chalk paint is different. It’s specially made to make those brush marks almost disappear. So, when you finish painting, your chair (or whatever you’re sprucing up) will be incredibly smooth and fancy-free. It’s almost like the paint knows how to hide the flaws and create a perfect finish. So, whether you’re a DIY pro or just trying to paint for the first time, chalk paint is your go-to choice for a beautiful, brush-mark-free spot. Your furniture will love you for it.

4. Distressing Capabilities

Chalk paint is like a beauty wand for making things look old and cool. It’s perfect for giving things a vintage, worn-out style, like a shabby attraction. Consider whether you have a piece of distressing furniture with chalk paint or something you want to change. Chalk paint is the way to go. It sticks well to all sorts of things, and it’s simple to use. After you paint your things with chalk paint, you can make it look even better. You can use multi-purpose sandpaper or special tricks to make it seem like it’s been around for ages. That’s how you get that awesome, weathered look that’s popular in shabby, attractive style. Give it a shot, and you’ll be amazed at the cool change.

5. Adherence to Various Surfaces

Chalk paint sticks well to different things like wood, metal, plastic, and even fabric. It’s like a perfect paint that can make old things seem cool again. Consider whether you have an old wooden chair, a metal lamp, or a plastic flower pot. Chalk paint can make them all look nice without any trouble. What’s great about chalk paint is that it sticks really well and won’t easily chip or peel off. It’s effortless to use, so you can have fun fixing up your things. So, if you want to make your things new and fancy, grab some chalk paint and start painting.

Materials You’ll Need for Distressing Furniture

Materials You'll Need for Distressing Furniture 

Before you get started, gather the following materials

  • Furniture piece of your choice
  • Chalk paint (various colors, if desired)
  • Paintbrushes (round or flat)
  • Sandpaper (medium and fine grit)
  • Wax or topcoat (optional)
  • Clean cloth or rags
  • Drop cloth or newspapers to protect your workspace
  • Gloves and a mask (for safety)

Step 1: Choose the Right Furniture Piece

Choose the Right Furniture Piece

Pick a piece of wooden furniture like a table, chair, dresser, or cabinet. Chalk paint works great on these, but it also sticks well to metal and plastic. Now, let’s have some fun. Get the furniture ready by giving it a light sanding. Next, choose your favorite chalk paint color and start painting. Don’t stress about making it perfect; little flaws make it seem cool. After the paint dries, take some sandpaper and gently rub the edges and corners to make it look old-fashioned. You can also try using a damp cloth or wax to make it more antique. Before you know it, your distressing furniture with chalk paint will turn into a stylish, vintage-looking piece that everyone will admire.

Step 2: Prepare Your Workspace

Prepare Your Workspace

Cover your work area with an old cloth or newspaper to protect it from paint spills. It’s important to have fresh air in the room for the paint to dry correctly. You can open a window or use a fan if you need to. This distressing furniture with chalk paint will help keep your project clean and the room smelling nice. Painting can be messy, and paint drops might fall on your work surface. To avoid this, lay down a cloth or some old newspapers. This will catch any stray paint and keep your space clean. Also, make sure there’s good airflow in the room. This means having fresh air moving around. If your room feels thingsy, open a window or turn on a fan. This will help the paint dry properly and prevent any strong paint smells from building up. By doing these simple things, you can enjoy your painting project while keeping your workspace neat and the air in the room fresh and pleasant.

Step 3: Clean the Furniture

Clean the Furniture

Before you get into painting, it’s important to prep your furniture. Start by making sure it’s really clean, with no dirt, dust, or grease. Just use a damp cloth to wipe it down gently and eliminate any yucky things. Then, let it sit and air dry completely. This distressing furniture with chalk paint is important because it helps the paint stick better and gives you a nice, smooth finish that looks good. So, don’t rush. Be patient and let your furniture dry well before you begin painting. Doing this will ensure that your painting project turns out great, and you’ll be proud of your results. It might seem small, but taking these simple steps can make a big difference in how your furniture looks when you’re done. So, take your time, follow these easy steps, and enjoy the process of changing your furniture with a fresh coat of paint.

Step 4: Apply Chalk Paint

Apply Chalk Paint

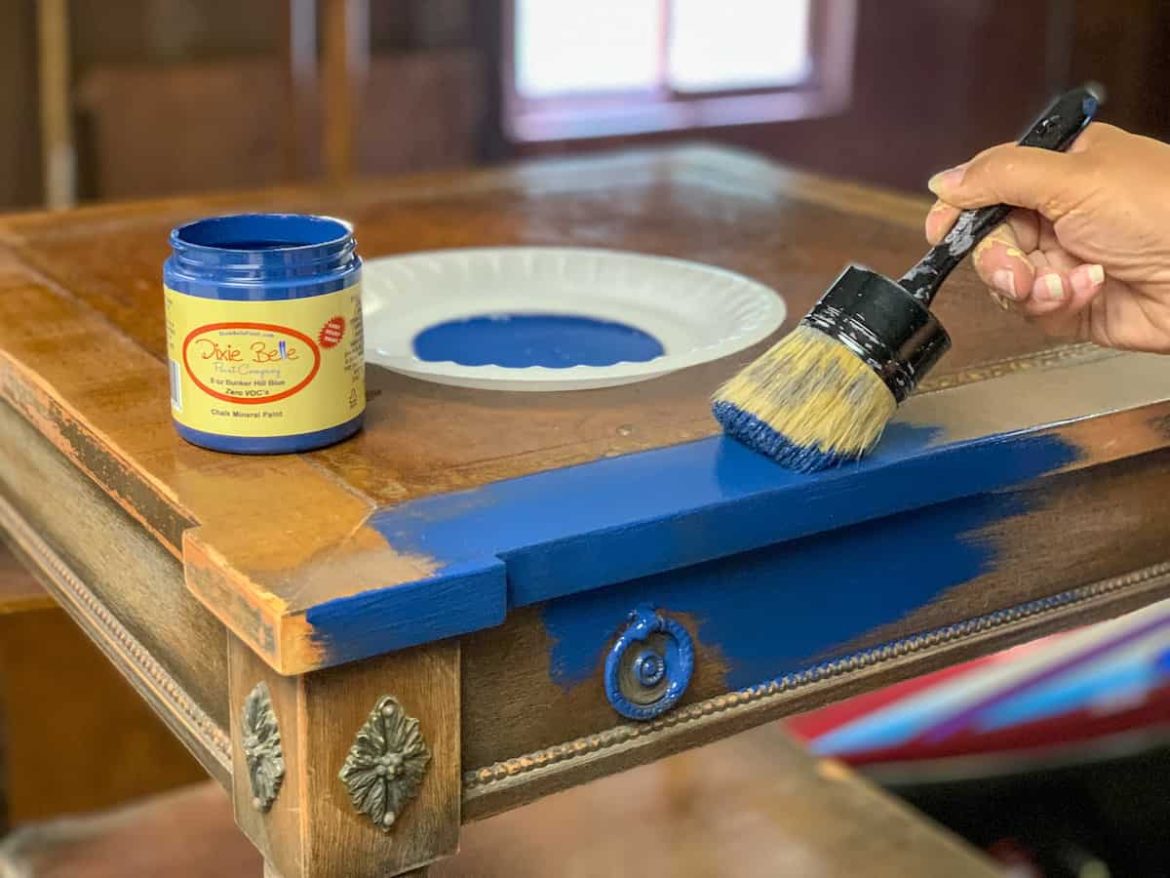
Let’s give your furniture a fresh spot. Start by dipping your paintbrush into the chalk paint. Then, paint a thin and even coat all over the furniture. You can use one color or get creative by adding different colors for a cool, worn-out style. Let each coat of paint dry completely before adding the next one. This distressing furniture with chalk paint ensures your furniture makeover view is great. You don’t want the colors to mix or smudge while they’re still wet. While you wait for each coat to dry, you’ll see your furniture change right before your eyes. So, enjoy the process, and soon, you’ll have a fantastic, refreshed piece of furniture that’ll brighten up your space.

Step 5: Sand the Edges

Sand the Edges

Once your paint is dry, it’s time to give your furniture a unique, worn view. Get some sandpaper with a medium level of grit, and let’s begin. Focus on the edges, corners, and any fancy parts of your furniture. These are the areas that naturally get worn out over time. Now, Gently rub the sandpaper in small circles. This distressing furniture with chalk paint will make the paint look aged and weathered. As you do this, you’ll see the wood or old layers of paint underneath starting to peek through, giving your piece a cool, simple vibe. Don’t forget to take your time and not sand too hard. You don’t want to remove too much paint all at once. Step back occasionally to see how it’s progressing and ensure you get the vintage spot you want.

Step 6: Add More Distressing

Add More Distressing .jpg

If you want your furniture to look older, you can do it easily. All you need is some sandpaper. Look for the parts of your furniture that get used often, like the top and the front of the drawers. Now, take the sandpaper and gently rub it on those spots. Don’t push too hard. Just let the sandpaper do its thing. As you keep going, you’ll start to see the wood underneath showing through, giving your distressing furniture with chalk paint that older appearance. But don’t forget, don’t rush it. You can always do more later if you want. Once you’re happy with how it seems, you’re all set. It’s an easy way to give your furniture that vintage view. No need for fancy tools or complicated techniques, just some sandpaper, a little patience, and your creativity. You’ll be amazed at the change you can achieve with such a simple trick.

Step 7: Protect Your Finish

Protect Your Finish

To keep your paint looking nice and shiny, you can use wax or a topcoat, but you don’t have to if you don’t want to. These things make your paint stronger and shinier. First, choose either wax or a topcoat. You can get them at the store. Then, read the instructions on the product. It’ll tell you how to use it, so do what it says. Use a brush or cloth to put the wax or topcoat on your paint. Ensure you cover everything, and try to make it thin and even. Now, the most important part is to let it dry. The instructions will tell you how long it takes. This distressing furniture with chalk paint makes sure it works right. Once it’s dry, observe at your work. Your paint should be stronger, and it should be spot-shiny. That’s all there is to it. These simple steps help protect your paint so it stays nice for a long time.

Step 8: Finish and Reassemble

Finish and Reassemble

Once your furniture is all dry and has that nice, worn appearance. It’s time to put it back together. If you took off any pieces like drawers or knobs during the process. First, check that everything is dry and clean. Get your basic tools like a screwdriver or a hammer, depending on how your distressing furniture with chalk paint is held together. If you have instructions, follow them. If not, use your common sight. Look for the holes or spots where the pieces fit, and gently attach them so you don’t mess up the distressed finish. Make sure everything is clean and in place. Finally, spot over your reassembled furniture to make sure it looks the way you want it to. Fix anything that’s not right. Following these steps, you’ll have your nicely worn furniture all put together and ready to use in no time.

Conclusion

Distressing furniture with chalk paint is a simple and creative way to give your old pieces a new and minimal look. All you need are some basic supplies like chalk paint, sandpaper, and a few brushes. First, clean your furniture thoroughly and apply a coat of chalk paint in the color of your choice. After it dries, use sandpaper to gently rub away some of the paint in areas that would naturally wear over time.

There are no strict rules when distressing with chalk paint. You can choose to distress just a little or a lot, depending on how you want it to appear. You can get creative with different paint colors and finishes to match your style. So, don’t be afraid to give it a try.

It’s a budget-friendly and fun way to improve your home decor while preserving the comfy, aged view that many of us love.

October 17, 2023 0 comments
0 FacebookTwitterPinterestEmail
Paint for Veneer Furniture: How To and Tips and Tricks for A Smooth & Durable Finish
FurniturePaints

Best Paint for Veneer Furniture: Expert Tips for The Perfect Finish

by Marco Bianchi October 17, 2023
written by Marco Bianchi

Veneer furniture is popular because it’s affordable and flexible, but with time, it can begin to seem down and damaged. Veneer furniture, often made with a thin layer of wood glued onto a strong base, can be a little difficult to paint if you don’t know the right steps. But worry not; we learn to make it as easy as possible.

Find the simple and plain process of painting veneer furniture to achieve a smooth and long-lasting finish. We’ll find all the basics, from choosing the right paint and tools to preparing your furniture for painting. We share some handy tips and tricks to ensure your paintwork looks professional and lasts for years to come. We’ll find everything you need to know about painting veneer furniture. Be ready to create a fresh, durable look with your furniture shining like new.

Let’s get started and find paint for veneer furniture.

Preparing Your Veneer Furniture

Preparing Your Veneer Furniture .jpg

1. Clean Thoroughly

Before you start painting, it’s important to make your furniture nice and clean. Get clear of all the dust, dirt, and any gross things you might find. First, mix some mild soap with water. Then, use that soapy mix to wipe your furniture all over gently. Following that, wash it with fresh water. Now, it’s time for the waiting phase. Leave your furniture to dry completely. This step is really important because it helps the paint stick better. Once your furniture is clean and dry, it’s all set for a fresh coat of paint for veneer furniture. Doing this cleaning work will make sure your project spot is amazing when you’re all done. So, go and enjoy your painting project. Make your furniture view fantastic.

2. Sanding

Before you start painting on the veneer, give it a good sanding. This step is important to help the paint stick well. You only need some fine sandpaper, preferably around 150-220 grit. Then, gently sand the whole piece. This makes the surface a little rough so the paint can grab onto it. But be careful not to sand too hard. You don’t want to damage the veneer. So, take it easy, and your paint for veneer furniture will stay put nicely. Taking your time and being gentle during the sanding process ensures that your paintwork will stick securely, just like glue. So, remember that a little sanding before painting can make a big difference in the final result. It gives your veneer project a polished and long-lasting finish that seems great.

3. Fill Imperfections

If you want to make your furniture seem better, follow these effortless steps. First, check your furniture for bumps, scrapes, or holes. If you find any, don’t worry; we can fix them. Use something called wood filler. Put it in the bumps, scrapes, or holes to fill them up. Then, wait for it to dry. It might take a few hours, but it’s worth it. When the wood filler is dry, it’s time to make it shiny. Get some sandpaper and gently rub it on the fixed spots. Keep rubbing until they’re nice and even with the rest of your furniture. That’s it. Your furniture will seem new, and everyone will be impressed. It’s a clear way to make your furniture better and more beautiful.

4. Prime the Surface

If you want your veneer furniture to look fantastic when you paint it, follow these simple steps. Start by getting a good wood primer. Think of it as a special base coat that helps the paint stick and hides the lines in the wood. You can apply it with a brush or use a spray can. It’s easy. Just follow the instructions on the label, especially how long it takes to dry. Using the right primer is important. It ensures your paintwork stays put for a long time without chipping or coming off, so when you’re painting veneer wood, don’t forget that the first coat of primer is important.

Choosing the Right Paint

Choosing the Right Paint

1. Latex or Oil-Based Paint

When you’re choosing paint for veneer furniture, it’s important to understand the differences. Latex paint is like water-based paint. It’s clear to clean with water, and it’s not very harmful. It dries quickly and doesn’t smell bad, so it’s amazing for indoor projects. On the other hand, oil-based paint sticks better and lasts longer. It’s amazing for furniture that gets a lot of use, and it makes the surface polished. But, you need special liquids to clean it, which has a stronger smell. Think about where you’re painting, how good you are at painting, and how you want to clean up when you’re deciding between the two types of paint.

2. Acrylic Paint

Acrylic paint is a perfect pick for sprucing up veneer furniture. It’s similar to water-based paint but sticks well and lasts a long time. You can find acrylic paint in many colors, and it’s effortless to use and dries quickly. You can even mix it with water or special acrylic things to make it seem old or worn on purpose. It’s important to put a clear coat on top of your acrylic-painted furniture to keep it safe and looking wonderful for a long time. So, go and use acrylic paint for veneer furniture to give your furniture a fresh, cool appearance.

3. Spray Paint

Spray painting veneer furniture can be useful for small projects and fancy designs. If you do it right, it’ll be nice and pro. To start, make sure you get the surface ready by sanding it and putting on some primer. This helps the paint stick well. When you’re spray painting, be careful and work in a place with fresh air. This way, you won’t make a mess, and you’ll stay safe. With the right preparation and care, spray painting can be a great way to make your veneer furniture seem awesome. Whether you want to give a new view to an old piece or add your personal touch, spray paint can help you do it. So, grab your gear, pick a perfect spot, and get creative as you change your veneer furniture with a fresh coat of paint for veneer furniture. It’s easy and fun.

4. Quality Matters

If you want your veneer furniture to seem amazing, don’t be stingy with your paint and primer. Get the best paint for veneer furniture and primer. That’s the trick. The good things stick well, won’t chip or peel, and leave a smooth finish. You’ll be fixing it or redoing it way too much. So, pick brands that people trust for being strong and having cool colors. When you do that, your veneer furniture will seem perfect and stay that way for a long time.

Applying the Paint

Applying the Paint .jpg

1. Use Thin Coats

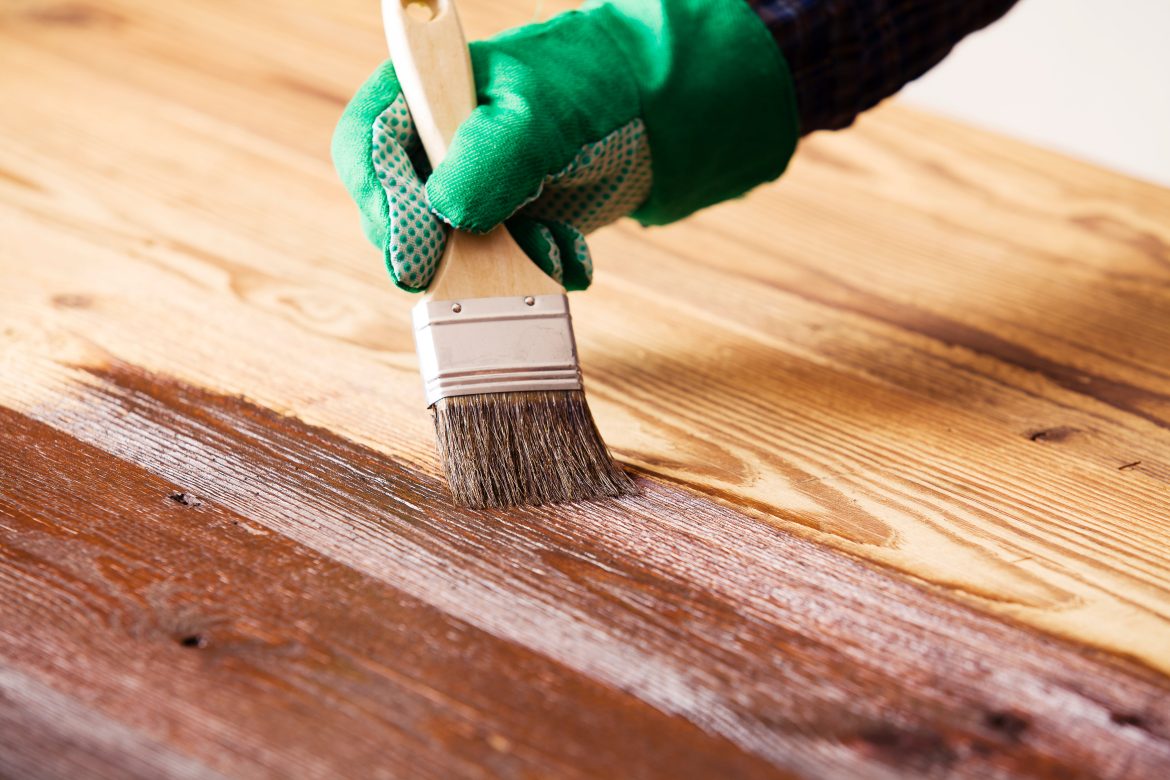
When you paint, using thin layers of paint is better than using thick ones. Using thin layers is great because they dry fast, so you won’t have to wait long. They’re less likely to create those annoying drips and streaks that can mess up your project. If you use several thin layers, your paint for veneer furniture work will look polished and shiny. Thin layers are a wonderful choice: they dry fast so that you can move on with your project sooner. Thick layers, on the other hand, take longer to dry and can test your patience. Thin layers also give you better control over your brush or roller, making it easier to avoid those frustrating drips that can ruin a shiny surface when you put on several thin layers, fixing imperfections and giving it a professional appearance.

2. Proper Brushing Technique

For the best painting results, you want to make sure you’ve got the right brush. If you’re using latex paint, grab a synthetic brush. If you’re using oil-based paint, go with a natural brush. When you’re painting, try to follow the wood’s lines, you know, those lines you see on the wood. Now, another thing to keep in mind is don’t overdo it with the brush strokes. If you use too many, your surface will be bumpy and uneven. Instead, keep it simple and steady for a nice, smooth finish. So, these two things, the type of brush you need depends on your paint for veneer furniture, and always paint in the same direction as the wood lines. With these basics in mind, you’ll be ready for a successful painting project.

3. Sand Between Coats

Once your paint is dry, you can make it shiny for the next coat. Just get some fine sandpaper and gently rub the painted area. This gets clear of any little problems and makes it nice and even. But the important part is that before you put on more paint for veneer furniture, use a clean cloth or paper towel to wipe away all the dust from sanding. This way, your new coat will go on smoothly and won’t have any bumps or specks. It’s all about the small things that make your paintwork view great. So, sand, wipe, and do it again until you like how it is viewed. Your walls will be nice and polished.

4. Topcoat for Protection

To make your furniture stronger and protect it from everyday use, follow this clear step. After your paint for veneer furniture dries completely, add a clear top layer like polyurethane or polyacrylic. It’s see-through and tough, guarding your painted surface from scratches, spills, and regular accidents. Using the topcoat is effortless. Once your paint is all dry, paint on a thin, even layer of the clear topcoat. Let it dry, and you’re finished. Now, your furniture can handle all the bumps and scrapes of daily life. So, this simple trick to keep furniture seems perfect for a long time. Put on that clear topcoat and give your furniture the safety it needs.

Final Tips and Tricks

Final Tips and Tricks

1. Prime

If you want to make your veneer furniture view wonderful with new paintwork, do these easy steps. First, get some primer, which is special wood paint. You have the option to apply it either with a brush or by using a spray. Make sure you spread it evenly, not too thick or too thin. Now, be patient and let the primer dry. Typically, it requires about one to two hours. This step is important because it makes the paint for veneer furniture ready for painting. Once the primer is completely dry, have fun and paint your furniture in any color you like. It can be a bright color or a soft one, your choice. Follow these clear steps, and you’ll turn your veneer furniture into something fantastic in no time. Getting it ready and waiting for things to dry is the key to making your furniture spot amazing with new paintwork. Enjoy your freshly painted furniture.

2. Thin Coats

When you’re painting veneer furniture, keep it plain and use thin layers of paint. Don’t go for thick coats. They cause messy drips and make your finish all uneven. Instead, follow this clear plan: put on one thin coat, let it dry completely, and do another. It may take a little longer, but the benefits are definitely worth the wait. You’ll have a shiny, pro-looking finish with no clumps or bumps. Your paint for veneer furniture work will last longer and stay looking great. When you’re cleaning up your veneer furniture, go slow and steady with those thin coats. Your furniture will seem awesome, and everyone will be impressed.

3. Dry Times

To make your veneer furniture view good, take it slow and follow these easy steps. First, put on a coat of primer or paint that’s made for veneer furniture. After that, don’t rush. Let it dry completely. This might take around 2 to 4 hours, but you can always check the paint can for the exact time. If you try to hurry, you won’t get a nice finish. It might end up feeling sticky or have smudges. So, be patient, let it dry well, and your furniture will turn out awesome. It’s worth waiting for a beautiful finish that makes your furniture shine like it’s new. Therefore, feel free to proceed at your own pace and savor the experience.

4. Sanding

Sand between layers of paint or finish. After you’ve put on a coat of paint, let it dry completely. Then, get some sandpaper that says 220 on it. It’s not hard to find; it seems the number 220 on the sandpaper. Now, take that sandpaper and gently rub it on the painted surface. Don’t press too hard; just let the sandpaper do its work. This paint for veneer furniture will make the surface polished and clear of any bumps or drips. Don’t forget to be gentle while doing this. You don’t want to damage the surface under the paint. After you’ve sanded, use a clean cloth or a special tack cloth to wipe away the dust. This gets clear of the sanding things so that the next coat of paint or finish goes on nicely. Keep doing this after each coat dries, and your project will be awesome when you’re done. So, always remember to sand between coats to make your project spot its best.

5. Protect

If you’ve painted your veneer furniture and want it to last, wait about a day after painting, then put on a clear coat. This clear coat protects your furniture from getting scratched, stained, or worn from everyday use. You can choose between a not-shiny (matte) or shiny finish, depending on your way. It’s all about what you like. By doing this simple step, you’ll make sure your painted veneer furniture stays nice and safe. This paint is for veneer furniture. You can enjoy it for a long time without any worries. It’s an easy way to care for your furniture and observe it well.

Conclusion

Painting veneer furniture can be a simple and rewarding project if you follow some plain tips and tricks. By getting the surface ready, picking the right paint for veneer furniture, and putting it on with care, you can make your furniture smooth and strong. This will totally change your furniture and make it brand new.

First, don’t forget to clean and sand the veneer surface to create a shiny surface for your paint. Use a primer to help the paint stick better and prevent it from chipping or peeling. When it comes to choosing paint, select a high-quality water-based or oil-based paint that suits your needs. Apply the paint evenly in thin coats, allowing each coat to dry completely before adding another. Lastly, consider adding a clear topcoat for extra protection and a polished appearance.

Follow these effortless steps, and you’ll have your veneer furniture looking brand new in no time.

October 17, 2023 0 comments
0 FacebookTwitterPinterestEmail

Recent Posts

  • A Complete Chalked Paint Review fo Better Selection 
  • A Guide to Painting Furniture without Sanding
  • 15 Steps to Create Faux Shiplap DIY Wall in Budget
  • How to Paint Furniture without Sanding or Priming
  • A Guide to Achieving Texture with Saltwash Paint Techniques

Recent Comments

No comments to show.

Recent Posts

  • A Complete Chalked Paint Review fo Better Selection 

    October 18, 2023
  • A Guide to Painting Furniture without Sanding

    October 18, 2023
  • 15 Steps to Create Faux Shiplap DIY Wall in Budget

    October 18, 2023
  • How to Paint Furniture without Sanding or Priming

    October 18, 2023
  • A Guide to Achieving Texture with Saltwash Paint Techniques

    October 18, 2023

Categories

  • Bathroom (15)
  • Bedroom (4)
  • Brush (3)
  • Decor & Design (15)
  • Decorating (1)
  • Dining Room (3)
  • DIY (2)
  • DIY Projects (11)
  • Door (5)
  • Fireplace (3)
  • Flooring (2)
  • Furniture (9)
  • Gardening (1)
  • Guide (11)
  • Home Crafts (1)
  • Home Decor (7)
  • Home Improvement (9)
  • Ideas (63)
  • Kitchen (16)
  • Outdoor Living (1)
  • Paints (18)
  • Review (1)
  • Room Ideas (3)
  • Tutorial (1)
  • Uncategorized (2)
  • Wall (6)

Instagram

About Us

Maecenas nec odio et ante tincidunt tempus. Donec vitae sapien ut libero venenatis faucibus, nullam quis.

01 Central Park, US, New York City
Phone: (012) 345 6789
Fax: (012) 345 6789

  • Facebook
  • Twitter

@2021 - All Right Reserved. Designed and Developed by PenciDesign


Back To Top
DormyHome
  • Decor & Design
  • DIY
  • Guide
  • Home Improvement
  • Smart Home