• Decor & Design
  • DIY
  • Guide
  • Home Improvement
  • Smart Home
DormyHome
keep your memories alive
Home » DIY Projects
Category:

DIY Projects

Rustoleum Chalked
DIY ProjectsHome Decor

A Complete Chalked Paint Review fo Better Selection 

by Marco Bianchi October 18, 2023
written by Marco Bianchi

Many paint colors in the world make our lives colorful. But there are some colors that we don’t know about, or if we know, we know a little. One such color is Rustoleum Chalked Paint. We’ll see a quick chalked paint review on the same, and we will get to know what is so special about that, how it makes our furniture look amazing, and many more.

Rustoleum Chalked paint review is a type of paint that lots of people are talking about. It’s not like your regular paint, which makes it special. It can help you make old furniture look brand new, and it does it in a pretty cool way. So, to give your furniture the best look and color it deserves or how you want it to, you should know all of this. It is the kind of paint color that is not so hard to understand.

So, understand all about this amazing paint color and give your furniture a look that they never had.

1. About Rust-Oleum and Chalked

About Rust-Oleum and Chalked

Rust-Oleum, a company with a rich history dating back to its founding in 1921, has become a trusted name in the fields of paint and coatings. Initially inspired by a sea captain’s observation regarding the protective properties of fish oil on metal surfaces, the company started many innovations in rust-preventive solutions. Over the decades, Rust-Oleum has evolved to offer various products catering to various surfaces and applications.

Within their extensive product line, Rust-Oleum introduced Chalked, their take on chalk-style paint. This paint, named Chalked, shows the company’s commitment to providing high-quality, user-friendly solutions for DIY projects. With the help of chalked paint review, it is connected to Rust-Oleum’s legacy of innovation and excellence, offering consumers a flexible and accessible option for achieving the desired finish on their furniture and decor.

2. Chalk Paint History and Annie Sloan

Chalk Paint History and Annie Sloan.jpg

The history of chalk-style paint traces back to Annie Sloan, an expert in decorative painting. In the 1990s, Annie Sloan introduced her version of chalk-style paint, aptly named Chalk Paint. Notably, this term was trademarked by her company, resulting in other paint manufacturers using alternative names for their versions of chalk-style paint. This trademark proves the impact of Annie Sloan’s innovation and the popularity of chalk-style paint.

Annie Sloan’s creation changed the painting industry by offering paint that required less preparation, allowing users to remove unwanted sanding or priming processes. This breakthrough made decorative painting accessible to a wider audience, empowering both amateurs and professionals to change furniture and decor with ease.

3. Background of This Amazing Color

Background of This Amazing Color

Rust-Oleum’s origins were created in the deep observation of a sea captain named Robert Fergusson, whose encounter with fish oil’s rust-preventing properties gave him an awesome idea. This important moment led to the developing of one of the world’s earliest rust-preventive paints. Established in 1921, Rust-Oleum quickly gained recognition as a leading innovator in protective coatings for metal surfaces. The company’s dedication to quality and effectiveness enabled it to the forefront of the industry.

Over the past decades, Rust-Oleum expanded its product offerings to have a diverse range of solutions for various surfaces and applications. The company’s commitment to innovation and excellence remained exceptional, ensuring that Rust-Oleum products continue to meet the evolving needs of consumers across the globe. Among their many product lines, Rust-Oleum introduced Chalked, a chalk-style paint designed to provide users with a flexible and user-friendly option for achieving desired finishes on furniture and decor.

4. Benefits of Chalk-style Paint

Benefits of Chalk-style Paint

Chalk-style paint, like Rustoleum Chalked, offers many advantages that make it a popular choice among fans and professional furniture refinishers.

  • Its flexibility is a unique feature, allowing it to be used on various surfaces, from wood to metal, glass, and even ceramic. This adaptability makes it a go-to option for various projects, providing a user-friendly experience regardless of the material.
  • One of the best qualities of chalk-style paint is its matte finish. This finish has a different vintage or country aesthetic to furniture and decor, adding character and beauty to each piece. It’s this unique characteristic that draws many to choose chalk-style paint over traditional options.
  • Also, the matte finish has a subtle beauty that complements various interior design styles, from simple to farmhouse style, offering an amazing look that everyone loves.
  • And chalk-style paint simplifies the painting process by removing the need for extensive prep work. Unlike some other types of paint, which may require sanding or priming before application, chalk-style paint adheres well to surfaces with less preparation.

5. Using Chalk Paint on Furniture

Using Chalk Paint on Furniture

Applying chalk paint to furniture is a simple process that requires very little preparation. After ensuring that the surface is clean and free of dust or debris, you can begin painting directly. Unlike some other types of paint, which may demand large sanding or priming, chalk-style paint sticks well to surfaces with a smooth finish. For furniture with glossy or particularly smooth surfaces, light sanding is recommended to improve paint adhesion. This step provides a slightly simpler surface for the paint to grip, ensuring a better overall finish and coverage.

While the additional sanding step may be necessary in certain cases, it doesn’t complicate the application process, making chalk-style paint a convenient choice for projects. It’s worth noting that chalk-style paint is known for its awesome nature, as mentioned in this chalked paint review. Even if you make a mistake or apply the paint unevenly, it can be easily corrected. Simply add more paint to the affected area, allow it to dry, and continue with the painting process.

6. Picking the Right Chalk Paint

Picking the Right Chalk Paint

Choosing the best chalk paint for your project involves considering several factors to ensure the best results. Factors such as color, availability, and coverage should be considered. Different brands offer varying options, and conducting research to determine which paint aligns with your project’s requirements is important. For instance, some paint companies may not offer chalk paint in a spray can format. If you want to use chalk paint for projects that require a spray application, this consideration will be important.

7. Cost of Rustoleum Chalked

Cost of Rustoleum Chalked

Rustoleum Chalked is an affordable option among chalk-style paints, making it an excellent choice for budget-conscious people. The price range is accessible, allowing individuals to start their creative projects without exceeding their budget constraints. This affordability extends across various sizes and colors, ensuring that Rustoleum Chalked caters to various project scopes and preferences.

By using chalked paint review, it does not matter if you’re working on a small craft project or tackling a larger furniture restoration; Rustoleum Chalked provides a cost-effective solution without compromising on quality.

8. Why People Like Chalk Paint

Why People Like Chalk Paint

The popularity of chalk-style paint, including Rustoleum Chalked, is underpinned by its exceptional user-friendliness and flexibility. Unlike some other types of paint, which may necessitate extensive preparation such as sanding or priming, chalk-style paint minimizes the pre-painting process. This simplicity makes it accessible to both beginners and experienced painters, offering an easy way to renovate furniture and decor. Also, chalk-style paint has a remarkable ability to hide minor imperfections in surfaces. This quality is highly valued by those working with older or well-loved pieces of furniture, as it not only adds to the beauty but also makes the painting process easier.

Some imperfections in the surface can contribute to the overall beauty of the finished piece, particularly for individuals looking for a shabby chic, vintage, farmhouse, or country aesthetic. By using ideas from chalked paint reviews, the matte finish achieved with chalk-style paint is another key factor in its amazing look. This finish has a different and awesome to furniture and decor. It complements various interior design styles, ensuring that pieces painted with chalk-style paint can easily mix into diverse home settings. The matte finish shows a subtle beauty that includes passing trends, contributing to its enduring popularity in the world of decorative painting. You should use wax sealers to seal the paint.

9. How Well Does Chalked Paint Cover?

How Well Does Chalked Paint Cover?.jpg

Rustoleum Chalked paint offers a decent level of coverage, which is necessary for achieving a smooth and even finish on your projects. However, it’s important to note that the thickness of this paint may differ from some other chalk-style options. As a result, in most cases, you’ll find that applying at least two coats is necessary to achieve the desired coverage.

Allowing enough drying time between coats is important for the best results. This step ensures that each layer properly sticks to the surface and dries to a consistent finish. When you use chalked paint review while applying multiple coats, it may require more time. The result is well worth the effort, as Rustoleum Chalked then provides a beautiful matte finish that is better than other brands in terms of quality and appearance.

10. Chalked Paint Works on Many Surfaces

Chalked Paint Works on Many Surfaces.jpg

One of the remarkable characteristics of Rustoleum Chalked paint is its exceptional quality of adaptation. It mixes effectively with any type of surface, including wood, metal, glass, ceramic, and more. This wide-ranging compatibility makes it a go-to option for various projects, as it can be applied to different materials without sacrificing quality or performance. While chalk-style paints typically offer excellent quality, it’s important to note that some surfaces may benefit from light sanding according to application.

This step helps create a slightly rougher texture, giving the paint a better grip. By following this simple preparation process with the help of chalked paint review, you can ensure that Rustoleum Chalked paint achieves better results on your chosen surface.

11. Adding Protection for Long-lasting Results

Adding Protection for Long-lasting Results

To improve the durability and long life of your chalked paint project, applying a sealant is an important final step. Rustoleum recommends their Ultra Matte Top Coat for this purpose. This top coat adds a protective layer that safeguards your painted items from wear and tear, ensuring that they maintain their beautiful finish over time.

It’s important to note that when applying the top coat, a light touch is recommended. Applying thin coats helps prevent any uneven feel in the finish. By taking this extra step to protect your project, you can enjoy the lasting beauty and quality that Rustoleum Chalked paint provides. You should use a sponge paintbrush for more convenience.

12. Pros and Cons Rustoleum Chalked Paint

Pros and Cons Rustoleum Chalked Paint

Pros

Rustoleum Chalked paint has several notable advantages that make it a favored choice among DIY people and professional painters.

  • One of its main strengths lies in its affordability. Among chalk-style paints, Rustoleum chalk stands out as one of the most economical options available on the market. This accessibility ensures that people with different budgets can start on their creative projects without compromising on quality.
  • In addition to affordability, Rustoleum Chalked paint is widely available. It can be found in various retail and hardware stores, including popular destinations like Lowes, Walmart, and Amazon. This widespread availability ensures that consumers have convenient access to this amazing paint, allowing them to start their projects with ease.
  • And Rustoleum Chalked offers an impressive selection of colors. While it comes in pre-mixed shades, the 30-ounce can of Rustoleum Chalked Ultra Matte Paint Tint Base opens up the possibility for custom color creation.

Cons

While Rustoleum Chalked paint offers many benefits, it’s important to consider some of its limitations and factors to keep in mind.

  • One consideration is the paint’s thinner consistency compared to certain other chalk-style options. As a result, achieving full coverage may require applying multiple coats. This aspect should be taken into account when planning your project timeline.
  • Another consideration is the necessity of applying a sealant to ensure the longevity of your finished piece. Like many chalk paints, Rustoleum chalk benefits from the additional protection provided by a sealant.
  • Following this step is important for preventing degraded quality or wear over time and ensuring that your painted items maintain their beauty and quality.
  • Finally, color availability may vary depending on your location and the retail stores in your area. If you’re looking for a specific color or shade, you should check with local retailers or inquire about custom color mixing services.

13. Colors in Rustoleum Chalked Paint

Colors in Rustoleum Chalked Paint

One of the standout features of Rustoleum Chalked Paint is its vast color range, offering a wide selection of options to suit diverse tastes and preferences. Whether you’re looking for soft, neutral tones or bright, dark shades, you will likely find the perfect color to complement your project. This variety allows for creative expression and ensures that you can achieve the exact look that you want.

In addition to pre-mixed colors, Rustoleum Chalked also provides the option to create custom shades. This service is available at select retail locations, allowing you to make the paint to your specific project requirements. The ability to access many colors helps you to bring your creative ideas into your work, making Rustoleum Chalked a good choice for a wide range of projects.

14. Where to Find

Where to Find

Rustoleum Chalked paint is always available at various retail and hardware stores, making it easily accessible to consumers. You can find it at well-known retailers like Lowes, Walmart, and Amazon, providing convenient options for purchasing this awesome paint. Also, some local hardware stores may carry Rustoleum Chalked, though availability may vary by location. By finding these options, you can get the paint you need for your creative projects and enjoy the exceptional benefits it offers. So, finding is not a hard thing; what matters the most is that you should choose the best color according to your needs.

Conclusion

Rustoleum Chalked paint is a standout choice for many projects and furniture restoration. Its affordability, widespread availability, and vast color selection make it a flexible option for various creative ideas. The matte finish achieved after two coats shows an amazing beauty to furniture and decor, improving their looks.

Rustoleum Chalked fast-drying nature ensures that projects can be completed efficiently, allowing you to enjoy the results of your efforts sooner. The paint’s excellent capabilities open up chances to create the best of the best according to your ideas, and hence, you get better results by using the chalked paint review.

With Rustoleum Chalked, you have the tools you need to turn your creative ideas into reality and improve the beauty of your living spaces.

October 18, 2023 0 comments
0 FacebookTwitterPinterestEmail
How to Create Faux DIY Shiplap Wall for Less
DIY ProjectsHome Decor

15 Steps to Create Faux Shiplap DIY Wall in Budget

by Ethan Tremblay October 18, 2023
written by Ethan Tremblay

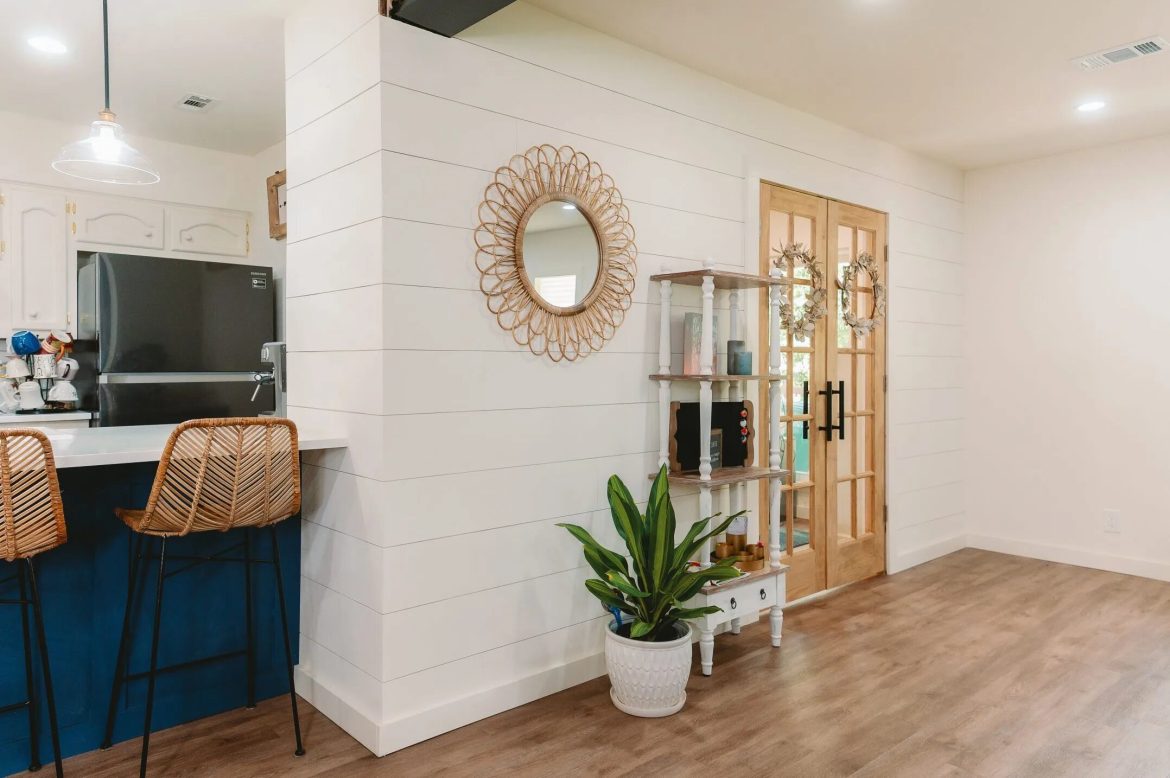
Everyone loves to make their houses beautiful, but sometimes it might need more money than expected. Creating a faux shiplap wall within your budget is easier than you might think, and it can add a beautiful vibe to any room in your home. There are many things that you should take care of while creating a shiplap wall for your home.

If you miss any of these single steps, then you might not get a perfect shiplap wall. It is best to apply these tips while using the shiplap wall properly. So, to get the best out of it, you should know what to do and how to do it. No one wants a dull look for their houses, and this shiplap wall will make your house exceptional and different from others.

So, let’s see how you can create the best shiplap wall for your house that will work as a complement.

1. Affordable Shiplap Walls

Affordable Shiplap Walls.jpg

Creating shiplap walls on a budget is not only easy but also a smart way to improve the looks of your living space within your budget. Shiplap, known for its different look and amazing beauty, has been a popular choice for interior wall coverings. But, traditional shiplap materials and installation methods can be quite expensive. There’s a cost-effective way to achieve the same stunning look. The key to affordability in faux shiplap wall installation is your choice of materials. Instead of choosing costly wood planks, consider using plywood.

Plywood is not only easily available but also much cheaper than traditional shiplap wood. To further save on costs, select a plywood thickness that suits your preferences and budget. By choosing the right plywood and thickness, you can create a beautiful shiplap wall without compromising quality. When you take on the task of installing shiplap yourself, you also save on labor costs. Use faux wooden panels while designing your house for an even better look.

2. Cutting Top Shiplap Piece

Cutting Top Shiplap Piece

When beginning a shiplap wall project, one of the important steps that might require extra attention is cutting the top shiplap piece. This piece plays a major role in ensuring a smooth and polished finish to your shiplap installation. The top shiplap piece is the final board that sits just below the ceiling or crown molding. It works as the finishing touch to your shiplap wall and should align perfectly with the upper edge. Achieving this alignment requires precision.

First, you’ll need to measure the space between the last wood strip and the ceiling. This measurement is important for determining the width of the top shiplap piece. Accuracy is key here, as even a slight misalignment can be noticeable. Once you have the measurement, use a saw, preferably a circular saw, to cut the last piece of plywood to the best width.

3. Paint & Measure

Paint & Measure

Before getting into the process of installing shiplap on your walls, it’s important to consider an important aspect that can impact the final result: paint and measurement. First, selecting the right paint color is necessary. The choice of paint can influence the overall aesthetic of your shiplap wall. To achieve a simple and clean look, it’s recommended to paint the walls the same color you plan to paint the faux shiplap.

This ensures that if there are any gaps between the boards, the underlying wall color won’t stand out. This small but thoughtful detail can make a notable difference in the final appearance of your shiplap wall. And when it comes to painting, preparation is important. Before applying any paint, it’s essential to make the surface ready for it properly. This includes cleaning the walls to remove any dust and ensuring they are smooth and free from imperfections.

4. Watch Out for Center Saws

Watch Out for Center Saws

When it comes to creating a shiplap wall, one aspect that requires careful attention is the use of saws at home improvement centers. These saws, often available for customer use, are primarily designed for rough cuts and may not provide the clean and precise edges needed for a polished shiplap installation. Saws at home improvement centers, such as those found in stores like Lowes or Home Depot, are typically made for basic cutting tasks. They are useful for customers who may require rough cuts for various projects. While these saws can be convenient for certain applications, they may not be the best choice for cutting shiplap boards.

The primary concern when using center saws for shiplap projects is the quality of the cuts. Shiplap boards require clean and precise edges to fit together easily. Any uneven edges can result in gaps between the boards, making the overall look of the shiplap wall weird. You should have a faux wallpaper that also looks amazing.

5. Nailing & Filling Tips

Nailing & Filling Tips.jpg

As you begin on your faux shiplap wall project, paying careful attention to the nailing and filling process is important for achieving a polished and professional finish. When it comes to nailing the shiplap boards to the wall, choosing the right type of nails is necessary. Choose nails that are specially designed for woodworking and suitable for your chosen material, whether it’s plywood or another type of wood.

Consider the length of the nails to ensure they provide secure anchoring without protruding through the boards. Using a nail gun can make the nailing process easy, more efficient, and precise. A nail gun allows for consistent nail placement and depth, resulting in a uniform and perfect shiplap installation. Be sure to adjust the nail gun settings according to the thickness of the boards to avoid over-penetration. Spacing between the nails is another important aspect to consider. While it’s necessary to secure the boards firmly, overcrowding with nails can lead to an unsightly appearance.

6. Consistent Spacing with Nickels

Consistent Spacing with Nickels

Creating a faux shiplap wall involves placing wooden planks in a manner that they form a perfect-looking pattern. One important aspect is maintaining consistent gaps, or spaces, between these planks. This not only contributes to the overall look but also ensures a balanced and better look.

To achieve this, a simple yet effective technique involves using nickels. These small, round coins act as spacers between the planks. By inserting a nickel at regular intervals as you install the planks, you can achieve equal spacing throughout the entire wall. This easy method guarantees that each plank is positioned at an equal distance from its neighboring plank, resulting in a better and well-proportioned shiplap pattern.

7. Smooth Seams with Filler

Smooth Seams with Filler.jpg

Once the wooden planks are in place, it’s important to address any gaps or seams that may exist between them. These spaces can disrupt the proper continuity of the shiplap pattern. To correct this, a basic yet highly effective solution is to use a filler, such as wood putty. This substance is good at filling in small gaps and seams.

Applying it along the edges and joints of the planks ensures that any irregularities are smoothed out. Using a putty knife, the excess filler is leveled, resulting in a smooth surface. This uncomplicated process makes a shiplap wall appear amazing and well-finished, with no visible gaps or interruptions.

8. Use Vacuum, Caulk, Paint

Use Vacuum, Caulk, Paint

Before proceeding with the final step of painting the faux shiplap wall, it’s important to make the surface smooth perfectly. This involves a perfect process that includes three key steps – vacuuming, caulking, and painting. To begin, a vacuum cleaner is used to remove any dust that may have been left in the gaps between the planks or on the surface of the wall. This ensures a clean and smooth look for the correct steps.

Following this, caulk is applied along the edges and corners of the wall. Caulk is a flexible material that seals any remaining gaps or joints, providing a smooth finish. Once the caulk has dried, the wall is ready for painting. The choice of paint color is a personal preference, with options ranging from muted neutrals to vibrant shades. Applying the paint evenly and consistently across the surface results in a fresh, clean look, bringing the shiplap wall to its final, polished state.

9. Adding More Rows

Adding More Rows

Expanding your faux shiplap wall is an easy process that allows you to customize the look to suit your space. To begin, measure the area you want to cover with precision. This ensures that the additional rows of planks will fit easily alongside the existing ones. Next, using a saw, carefully cut the planks to the required length. Position them against the wall, ensuring they align evenly with the existing rows.

To secure them in place, use nails or a nail gun, ensuring they are firmly attached. This uncomplicated method enables you to increase the height or width of your shiplap wall to your desired dimensions. Whether you’re looking to create a perfect feature wall or to cover an entire room, this process offers flexibility and practicality.

10. Dealing with Outlets

Dealing with Outlets

When installing a shiplap wall, you may face electrical outlets that must be put easily into the design. It’s important to complete this task with care and precision. Begin by turning off the power to the outlets to ensure safety during the installation process. Next, measure and mark the locations of the outlets on the planks. Using a jigsaw, carefully cut out the necessary openings to locate the outlets. Take your time with this step to ensure accuracy and precision.

Once the outlets are positioned securely within the perfect openings, you can continue installing the remaining planks around them. This simple process allows you to fix electrical outlets easily into the shiplap wall, ensuring both practicality and making it look good forever.

11. Finish One Wall First

Finish One Wall First.jpg

When starting your faux shiplap project, it’s a wise approach to begin by finishing one wall before proceeding to others. This method includes several valuable purposes. Firstly, it lets you become familiar with the process and techniques involved in shiplap installation, giving you the confidence to be familiar with larger areas later. Secondly, it helps you manage your time and resources effectively. Focusing on one wall at a time ensures that you’re not overwhelmed by the sheer scale of the project. Also, it provides you with an opportunity to estimate the impact of shiplap on your space before using more large renovations.

By starting from small and gradually expanding, you can create the project to your preferences and make any necessary adjustments along the way. This step-by-step approach ensures that each wall is finished with care and attention to detail.

12. Tools for Your Shiplap Project

Tools for Your Shiplap Project

Equipping yourself with the right tools is important when undertaking a shiplap project. These tools are the building blocks of your shiplap, enabling you to change a plain wall into a beautiful shiplap showcase. Among the necessary tools are a saw, which allows you to cut shiplap boards to the desired size accurately, and a hammer, which is important for securing the boards in place. A measuring tape ensures precise dimensions, ensuring a perfect fit for each board.

Also, nails are necessary for fastening the shiplap securely, while sandpaper helps smooth any rough edges or surfaces. Together, these tools form the backbone of your shiplap project, enabling you to achieve a professional-looking result.

13. Painting Your Shiplap Wall

Painting Your Shiplap Wall

Once your faux shiplap boards are securely installed, the creative painting process begins. This step offers an amazing chance to mix your style into the project. Choosing the right paint color is important, setting the tone for your entire room. Prefer to choose a paint shade that complements your existing decor or creates a look that should not be very different from other items, depending on your design goals.

The beauty of shiplap is that it provides a flexible chance for your creativity. It does not matter if you prefer a crisp, white finish for a classic, clean look or something different and colorful choice to make an amazing look; the choice is yours. Painting your shiplap wall is an enjoyable and changing part of the process, where you can see how you have used your ideas to make your shiplap awesome. You can use shiplap stencils instead of using wallpapers.

14. Supplies for DIY Shiplap

Supplies for DIY Shiplap.jpeg

In addition to the core tools, gathering the necessary supplies is important for a successful DIY shiplap project. Shiplap boards themselves are, of course, a major requirement. These boards typically come in various lengths and widths, allowing you to customize the appearance of your shiplap wall.

Sandpaper, while mentioned earlier as a tool, is equally important as a supply. It’s important for achieving a smooth finish on the shiplap boards, ensuring that your painted surface looks flawless. Paintbrushes are another necessary supply, as they enable you to apply the paint evenly and precisely, giving your shiplap wall the best shade with your chosen color. With the right tools and supplies in hand, you will face no problems in making the best shiplap for yourself.

15. Why Choose Faux Shiplap

Why Choose Faux Shiplap

Faux shiplap is an attractive choice for those searching for a cost-effective yet amazing-looking alternative to traditional shiplap. One of its primary advantages is its affordability. Genuine shiplap, crafted from solid wood, can be quite expensive. Faux shiplap, on the other hand, provides the same beautiful look at a fraction of the cost. This affordability makes it an excellent option for budget-conscious people who want the best option for themselves and do not want to spend that much money. Also, the shiplap is very easy to install.

Unlike traditional shiplap, which requires precise measurements, cuts, and complex fitting, shiplap often comes in interlocking panels or sheets, simplifying the installation process. Even those with limited DIY experience can achieve professional-looking results. This shiplap offers a wide range of styles and finishes, allowing you to choose the one that best suits your aesthetic preferences. Whether you aim for a clean, farmhouse-inspired look or a more modern, classic appearance, you can find faux shiplap options that fulfill your designs. Its flexibility makes it an overall choice for various design themes and preferences.

Conclusion

Making a faux shiplap wall is not hard or expensive. With some basic tools and supplies, you can change your space and give it a comfortable and new feel. It’s all about taking it one step at a time. First, finish one wall before moving on to the next. Use simple tools like a saw, level, hammer, and nails to get the job done.

Choose your materials wisely, ensuring they align with your idea for the project. With the right tools and some patience, you’ll change your wall into an amazing wall. Level up the overall look of faux shiplap and enjoy the beauty it brings to your home. If you want to add colors, painting your shiplap is easy. Just pick a color you like, and with a few shades, you can make your space feel brighter, depending on your preference.

It’s a fun and easy way to give your space a beautiful and new look within the budget.

October 18, 2023 0 comments
0 FacebookTwitterPinterestEmail
How to Get Texture With a Saltwash Paint Technique
DIY ProjectsHome Decor

A Guide to Achieving Texture with Saltwash Paint Techniques

by David Parker October 18, 2023
written by David Parker

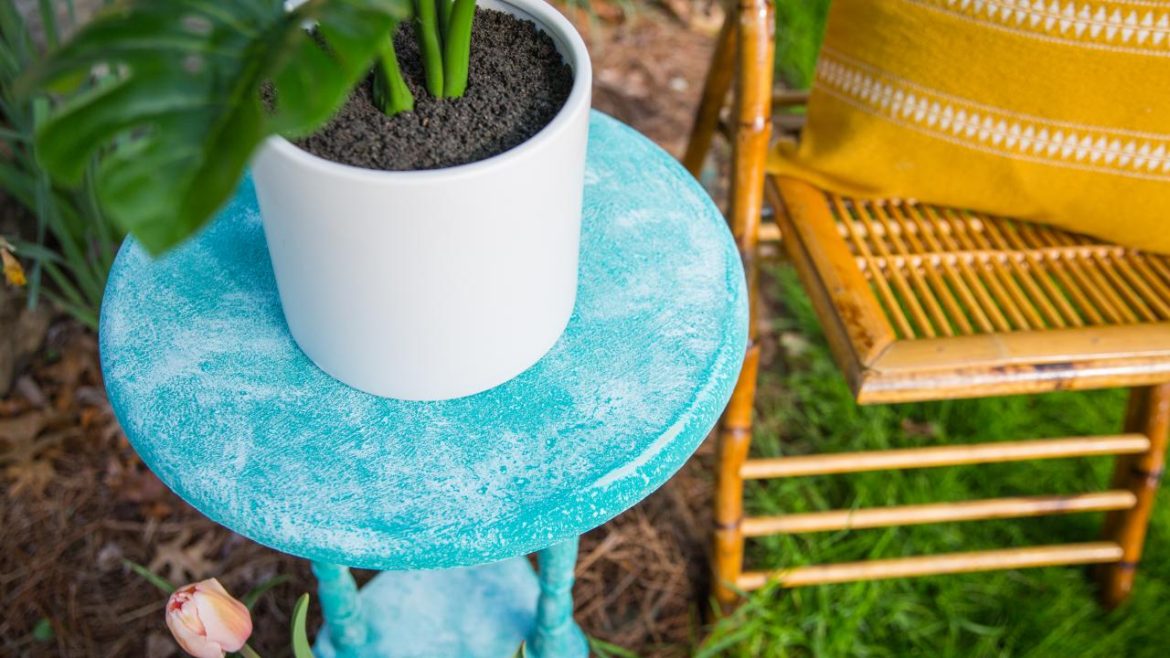
Saltwash paint is a technique that makes your dull-looking house and furniture look more amazing by giving them a different look. But it requires perfection to apply all those awesome textures that are the main thing in the Salt wash technique. It’s a fun and easy way to add texture, giving a unique touch to your projects.

There is no such thing that you have to be very good at applying these textures; stay focused on these techniques and how to do that, and you’ll have a house that everyone will appreciate. The salt wash technique is one of the ways by which you can make your regular-looking house look more awesome, but for that, you should know how to do all this. For that purpose, we are here. From getting the supplies to putting on the final touches, you’ll have all that knowledge that you might need for this.

So, let’s get started and look into how you can get the best textures with the amazing salt wash technique.

1. Apply First Salt wash Layer

Apply First Salt wash Layer

The first step in achieving an amazing textured paint finish using Saltwash is to apply the initial layer. This stage is both exciting and simple, making it accessible to both new and experienced painters. You’ll want to start with a piece of furniture or decor item you chose for this project. The beauty of the Salt wash technique is that it makes imperfections more unique, so there’s no need to worry about creating an awesome surface.

To begin, select a reliable paintbrush that you’re comfortable with. This will be your tool for applying the Salt wash mixture. It’s important to begin this step with a calm mindset; don’t worry about perfection at this stage. Instead, dip your brush into the Salt wash mixture and apply it to your chosen surface. You’ll notice that the texture begins to take shape as the mixture dries. You should use a good double-thick paintbrush while applying the first layer.

2. What You Need for Salt Wash Painting

What You Need for Salt Wash Painting.jpg

Before beginning your Saltwash painting adventure, it’s necessary to gather all the tools and materials. Having the right supplies at your disposal will make the process smoother and more enjoyable. First and most important, consider your choice of brushes. Zibra and Cling brushes are highly recommended for their soft bristles and user-friendly design. These brushes are perfect at working with the Salt wash mixture, allowing you to achieve the desired texture easily.

The main component of this is undoubtedly the Salt Wash paint additive. This special ingredient is the secret behind Salt wash’s amazing texture. Make sure you have plenty of it on hand to complete your project successfully. Also, having sandpaper available for smoothing purposes is important. A sanding block or standard sandpaper with a grit of 220 works perfectly. To maintain a clean workspace, a Shop-Vac is useful for quick cleanup.

3. Easy and Affordable Vintage Look

Easy and Affordable Vintage Look

One of the most remarkable aspects of the Saltwash painting technique is its ability to transform ordinary pieces into exquisite vintage-style treasures easily. What’s even more impressive is that this stunning effect can be achieved without going over the budget. Salt wash offers an affordable alternative to purchasing expensive vintage furniture or decor items. It enables you to mix your living space with quality and beauty without the high price tag.

This technique is proof of the idea that creating an amazing look doesn’t have to be complex or costly. Instead, it invites creativity and resourcefulness, allowing you to breathe new life into your surroundings. If you’re a DIY fan or want the best of home decor projects, Salt Wash comes with many possibilities, all within a budget-friendly framework.

4. Smooth Finish with Sanding

Smooth Finish with Sanding

As your Saltwash project progresses, achieving a smooth finish becomes an important step. This phase is necessary to ensure these designs mix properly, producing a polished and smooth surface. While the initial Salt wash layer adds texture and character, the outcome relies on creating an even and consistent base for the subsequent layers of paint.

To have this, you’ll need to use a sanding block or sandpaper. A grit of 220 is suitable for this purpose. Take your time with this step, as it is important for the foundation of a beautifully finished piece. The objective is not to completely remove the texture created by the Salt wash but rather to create a balanced and melodic surface. Gently sand the surface, paying attention to any irregularities, until you achieve the desired level of smoothness.

5. Add a Second Coat of Paint

Add a Second Coat of Paint

With the textured foundation in place, it’s the best time to get the best result by using the Saltwash project and adding the second coat of paint. This is where you can use your ideas, allowing you to introduce additional colors and different designs to your place. The second layer of paint works best for your creativity, enabling you to customize and improve the overall aesthetic.

As you start this stage, take care to preserve the unique texture created by the Salt wash. This texture is an important element of the Salt wash technique’s beauty, and it adds character to your piece. Choosing colors is entirely up to you; it’s an opportunity to mix your style and creativity into the project. Once the second coat of paint is applied, it’s important to allow it to dry properly. This ensures that the colors and textures settle beautifully, resulting in the best results that you can get.

6. Choose and Mix Paint Colors

Choose and Mix Paint Colors.jpeg.jpg

When you are on a saltwash paint project, one of the most important decisions you’ll make is selecting and mixing your paint colors. This step sets the tone for the entire piece. The colors you pick can directly affect the final look and feel of your furniture. For a special and amazing result, you might go for a high-contrast approach. Start with a light base coat, such as a creamy white, and then apply a darker top coat over it. This creates a contrast that highlights the textured effect created by the salt wash.

On the other hand, if you prefer a cleaner appearance, selecting colors within the same range can work wonders. These shades will blend easily, producing a gentler texture while still adding a unique vibe to your furniture’s appearance. Once you’ve decided on your paint colors, it’s time to mix them with the salt wash additive.

7. Updating Knobs & Handles

Updating Knobs & Handles

In furniture makeovers, it’s often the little details that make a big difference. One such detail is the knobs and handles leveling up your place. These small elements can majorly impact the overall aesthetic and feel of your furniture. When you’re looking for a vintage appearance using the salt wash technique, it’s important to ensure that even the hardware contributes to the desired look. If your furniture currently has outdated or mismatched knobs and handles, consider giving them a refreshed look.

Go for hardware that matches the vintage theme you’re looking for. Clear crystal knobs, for example, can be an excellent choice for achieving that classic, amazing look. They work as a different addition to your spot while maintaining simplicity. Does not matter if you’re renovating an old dresser, nightstand, or cabinet; these knobs can make the furniture more awesome looking.

8. Tools for Salt Wash Painting

Tools for Salt Wash Painting

Before you dive into your salt wash paint project, it’s essential to gather the right tools and materials. Having the required equipment on hand ensures that the process goes smoothly, allowing you to achieve the desired textured effect with ease. First and most important, invest in quality paintbrushes. The type of brushes you choose can impact the final texture, so go for those with soft bristles that are easy to work with and clean. Next, you’ll need the saltwash paint additive. This is the key ingredient that will create the textured finish you’re aiming for.

Make sure you have enough salt wash powder on hand for your entire project. Other important tools include furniture tri-wheelies, sandpaper around 150 grit suitable for prepping the surface, a roller gear screwdriver, a shop vac for cleaning up dust and debris, and lint-free cloths for wiping down surfaces. Having containers for mixing your paint and salt wash is important to ensure proper blending. A stir stick will help you achieve the right consistency for your paint mixture.

9. Simple Process for a Vintage Appearance

Simple Process for a Vintage Appearance.jpg

The look of the salt wash paint technique lies in its simplicity. While it produces stunning vintage effects, you don’t need to be a professional to get them. This simple process allows people of all skill levels to change their furniture into beautiful, perfect pieces. The simplicity begins with finding the piece of furniture you want to change. It could be an old wooden table, a vintage chair, or even a plain dresser.
The main thing is to select a piece that you want to mix with the outstanding beauty of that. Once you have your chosen furniture, the process involves a series of easy steps, which will help you to get the texture that you want. It does not require any hard steps to do that. You’ll be easily able to do all those things.

10. Letting It Dry

Letting It Dry

Allowing the Salt wash paint to dry is an important phase in the Saltwash paint technique, as it is the process by which the different and awesome texture is formed. When you initially apply Salt wash paint to your chosen surface, it contains moisture within its composition. This moisture needs sufficient time to evaporate into the surrounding air. As this moisture evaporates, it leaves behind the unique textured appearance that is the quality of this paint technique.

However, the drying time can fluctuate, primarily depending on environmental conditions such as temperature and humidity. In warmer and drier atmospheres, the Salt wash paint can dry relatively easily, sometimes in just a few hours. On the other hand, in cooler or more humid environments, the drying process might extend to up to a full day. Patience during this phase is important, as attempting to disturb the drying process can negatively affect the outcome. A reliable indicator that the Salt wash paint has reached the desired dryness level is when it no longer feels sticky or weird to the touch.

11. Cleaning Up

Cleaning Up.jpg

The cleanup process after applying Saltwash paint is not that complicated. Water works as the best component for this process. The primary focus during cleanup is ensuring that the tools used, such as brushes and any other implements, are thoroughly rinsed with clean water. It’s advisable to initiate this cleaning just after completing your Salt wash project. Allowing the paint to dry on your tools can make cleanup significantly more challenging. Also, suppose any unwanted splatters or spills occur on your clothing or the surrounding surfaces during the painting process. In that case, a soft cloth is generally all that’s required to remove them effectively.

To further improve the cleanup experience and prevent other messes, it’s a wise precaution to lay down newspaper or a plastic sheet on your workspace before starting your Salt wash project. This simple measure not only facilitates the tidying process but also helps in maintaining the cleanliness of your workspace. With just some water and a few basic precautions, you can be assured that your work area remains clean and free from unwanted paint residue.

12. Fixing Mistakes

Fixing Mistakes

Even the most experienced painters occasionally encounter moments where adjustments are necessary to achieve the desired outcome. Correcting mistakes in your Saltwash project is an issue-free process because of the amazing nature of the Salt wash paint technique. If you happen to identify areas on your textured surface where the texture didn’t quite match your vision, you have the creative chance to reapply the Salt wash paint to those specific spots.

To correct any inconsistencies or imperfections, use either a paintbrush or a sponge to reapply the paint smoothly. It’s important to ensure that the newly applied paint blends easily with the existing texture. Following this reapplication, allow the paint to dry once more. This awesome aspect of the Salt wash technique enables you to experiment and make adjustments until you achieve the desired texture and appearance. Don’t hesitate to revisit and refine your work, as it’s all part of the artistic process.

13. Customizing

Customizing

A unique and highly fantastic feature of working with Saltwash paint is the vast chance for customization it offers. This means you have the creative freedom to make your project to your exact specifications and preferences. You can begin this customization by finding many colors. Salt wash paint is exceptionally amazing for color mixing and improvements throughout this process. Also, you can use a truly one-of-a-kind palette, reflecting your unique style and artistic vision.

The thickness of the Salt wash paint mixture can be adjusted to achieve a collection of textured effects. This level of flexibility allows you to experiment with various levels of texture, from simple to complex and enables you to express your creativity in many ways. Use this opportunity to mix your personal touch into every piece you paint with Salt wash. By doing so, you can create textured masterpieces that will not only look amazing but also be different from other regular textures.

14. Sealing & Protecting Paint

Sealing & Protecting Paint

Ensuring the long life and flexibility of your textured creation requires the important step of sealing and protecting the Saltwash paint. This protective measure has a dual purpose: it protects the textured finish from any wear and tear while at the same time improving its overall look. There exist multiple options for sealers, with clear wax sealers and matte sealers being among the most common choices. These sealers, when properly applied, create a protective barrier over the textured surface, effectively protecting it from everyday usage and environmental factors.

To start this step with precision, apply the selected sealer evenly over the entire painted surface. It’s important to listen to the manufacturer’s instructions regarding application and drying times. Once the sealer has dried, it does more than protect your creation; it gives a polished finish that makes the overall appearance of your textured a masterpiece.

Conclusion

Making cool textures with Saltwash paint is easy and fun. You learned the important steps like letting it dry, cleaning up, fixing mistakes, customizing your colors, and sealing your creation. These steps might look difficult at first, but with practice, they become super simple.

Remember, patience is most important when waiting for the paint to dry. No need to rush; wait until it’s not sticky. Cleaning up is also easy; dip your brushes and wipe away any unwanted spots. And if you make a mistake, you can fix it by adding more paint and letting it dry again. Making it more amazing with fancy colors is a nice choice. Mix and match to create your special shades. You can make your project as unique as you want.

Now that you know these easy steps, you can create amazing textured things with this amazing paint. Practice makes perfect.

October 18, 2023 0 comments
0 FacebookTwitterPinterestEmail
The Best Knitting Machines
DIY ProjectsHome Crafts

A Review of the 6 Best Knitting Machines

by Ingrid Svensson October 18, 2023
written by Ingrid Svensson

Knitting machines are fantastic tools that can help you create beautiful garments and accessories easily. We’ll find the top 6 picks for the best knitting machines. Knitting machines are amazing for crafting comfy scarves, warm sweaters, and whatnot. They take the hard work out of knitting, making it accessible to everyone, regardless of their skill level.

Whether you’re a beginner or an experienced knitter, these machines can save you time and effort while allowing you to release your creativity. We understand that simplicity is important for knitting machines, so we’ve chosen models that are easy to set up and operate. So, if you’re ready to find the best knitting machines to make your knitting projects clear, let’s find them. We’ll provide you with all the information you need to choose the perfect machine for your needs.

Let’s get started on finding the best knitting.

Types of Knitting Machines

Manual Knitting Machines

1. Manual Knitting Machines

If you’re new to knitting, think of manual knitting machines as your trusted pick. They’re easy to handle, similar to using your hands, and look the same as flat boards with lots of needles sticking out. These best knitting machines are great for smaller knitting projects, and people who enjoy knitting for fun or as a hobby know them. You can get creative with them and make all sorts of cool designs. But they’re not fast and can only make a few things at a time. So, they’re awesome for beginners and crafty people but not for making a ton of things quickly.

2. Single Bed Knitting Machines

Single-bed knitting machines, or single-needle bed machines, are amazing wands for making flat pieces of fabric or clothes. They use just one needle bed and are great for making simple materials similar to scarves, hot blankets, and basic sweaters. People who enjoy knitting at home and short crafters love them because they’re clear to use and can help you create all sorts of comfy and stylish items without any trouble. So, whether you’re new to knitting or a pro, this best knitting machine is here to make your knitting adventures effortless and fun.

3. Double Bed Knitting Machines

Double-bed knitting machines are fine for knitting gear. Unlike single-bed machines, they have two layers of needles stacked up, which means you can do lots of fantastic knitting tricks and create detailed patterns. People love using double bed machines for making fancy clothes with things such as bumpy stitches, smooth slips, and colorful fair isle patterns. What’s even fabulous is that they can make fabrics that feel different, ranging from really thick to thin. These machines are similar to the knitting experts of the craft, letting you weave amazingly into your creations with ease.

4. Circular Knitting Machines

Circular knitting machines are the best fashion experts. They make tube-like clothes without any seams. They’re large at making things the same as socks, stockings, and leggings. Try a circle of special needles working together in a loop, making fabric without any stops. These best knitting machines are good at their job, making lots of clothes without any stitches showing.

5. Flat Bed Knitting Machines

Flatbed knitting machines are the best of the textile. They have a flat surface with lots of little needles that can make all sorts of awesome designs and things. People use these machines to make sweaters, cardigans, and warm blankets. They can make fabrics that feel special and look unique, and both small and big companies use them. Think of flatbed knitting machines as the textile industry’s hardworking champs. They have a flat surface and many short needles that create fancy patterns. People use them to make sweaters, cardigans, and comfy blankets. These machines can also make fabrics that feel different and look separate. Whether you’re in a little shop or a big factory, these machines are the real deal.

6. Electronic Knitting Machines

Electronic knitting machines are getting popular because they’re smart and make knitting plain. They use special controls to make stitches just right and create fabulous patterns. They can even add fancy designs, lacey patterns, and pictures into fabrics. People who make nice clothes and special fabrics love using this best knitting machine. They make knitting fun and ideal, and that’s why everyone loves them.

7. Jacquard Knitting Machines

They’re amazing at making impressive and detailed patterns on fabrics. People love them for making fancy, one-of-a-kind textiles. With these machines, you can create many colors and fancy designs and even put pictures on fabric. They’re great for making fancy knitwear and special textile items. These wonderful machines take knitting to a whole new level, allowing you to be creative in fashion and design. Whether you are colorful patterns or want to turn photos into wearable art, Jacquard knitting machines are your top choice for making unique and pretty fabrics.

Our Top 6 Picks of Knitting Machine

1. Silver Reed SK840

Silver Reed SK840

The Silver Reed SK840 is the best knitting machine. It has a big 200 needles and lots of stitches to pick from, so it’s great for anyone, even if you’re new to knitting. You can use it with all kinds of yarn, no matter if it’s light or heavy. That means you can make all sorts of items with it. Knitting with the SK840 is such a walk in the park. You can make pretty patterns and textures without any trouble. No more struggling with tricky stitches. It’s got 200 needles and tons of stitch choices, so you can have fun and make all sorts of cool material. Try it out, and you’ll see how easy and fun knitting can be.

2. Brother KH-930

Brother KH-930

If you need a good knitting machine, consider the Brother KH-930. Lots of knitters have liked it for a long time. It’s effortless to use, with 200 needles, and can make pretty patterns similar to Fair Isle and lace. Whether you’re new to knitting or a pro, this machine is an ideal choice. You can make the best knitting machine things without any trouble using the KH-930.

3. Addi Express King Size

Addi Express King Size

Looking for a simple knitting machine? The Addi Express King Size is a special choice. It’s a round knitting machine perfect for making hats, scarves, and small clothes. Why is it great? It’s simple to set up and use, so it’s superb for beginners. And it’s short so that you can take it with you anywhere. Think about a wonderful knitting tool that makes warm hats and stylish scarves without any problem. That’s what the Addi Express King Size does. Whether you’re new to knitting or a pro who wants a portable knitting machine, this one’s for you. Knit on the go and enjoy making beautiful things with ease.

4. Silver Reed LK150

Silver Reed LK150

It’s an amazing size, neither too large nor too small. It has 150 needles, and it’s easy to use. You can make all sorts of warm things with it, such as lightweight sweaters and warm blankets. This best knitting machine is important for beginners and pros alike because it’s simple and flexible. So, start knitting easily and create beautiful, comfy things for yourself and your loved ones with the Silver Reed LK150.

5. Prym MIDI 624168

Prym MIDI 624168

If you’re new to knitting machines, the Prym MIDI 624168 is a great choice. It’s a simple, low-cost manual machine that’s effortless to use. While it doesn’t have all the fancy features of the electronic ones, it’s fantastic for beginners who want to learn machine knitting and create simple projects. What makes it awesome is how clear it is. You won’t get lost in complicated buttons or settings. Instead, you’ll quickly get the hang of using it while finding the machine knitting. Whether you’re eager to make scarves, blankets, or other comfy items, this machine sets you up for success. So, if you’re itching to try machine knitting without spending a lot, this beginner-friendly model is an amazing fit. It’s a simple and affordable way to go into the best knitting machine.

6. Silver Reed SK280

Silver Reed SK280

The Silver Reed SK280 knitting machine is special for knitters who know their material. It has 200 needles and can make many different stitches and patterns so that you can create cool designs and textured fabrics. If you’re ready to get better at the best knitting machine and try new things, this machine is perfect for you. It makes knitting fun and exciting, and you can make all kinds of amazing items with it.

Advantages of Knitting Machines

Advantages of Knitting Machines

1. Increased Productivity

Knitting machines are like -speedy fabric makers. Unlike slow and tiring hand knitting, these machines work fast. They can make long pieces of cloth quickly, much faster than a skilled knitter could ever do by hand. This best knitting machine in speed has changed the textile industry. Now, factories can easily keep up with the growing demand for fabric from customers. They make fabric way faster and meet everyone’s needs in a flash.

2. Precision and Consistency

Choose knitting machines as skilled fabric makers. These machines work are awesome to create fancy designs, make every stitch beautiful, and keep the fabric tight and even. This means every piece of fabric they make is awesome and looks just the same as the others. Now, think about knitting by hand. It’s a small trying to draw a perfect circle without any tools; it’s not easy. When we knit by hand, we might make little mistakes or pull the yarn too tight in some places, and that can make the fabric less amazing. They ensure each piece is as awesome as the last one, while hand knitting can sometimes have short differences that make it unique but not always as wonderful.

3. Flexibility in Design

Designers can use them to make detailed patterns, twisted lace, and all sorts of textures, allowing them to try out different styles and techniques. What’s even cooler is that knitting machines quickly change yarn colors and stitch patterns. This best knitting machine means designers can bring their ideas to life in no time. Choose to go from a warm sweater with brave stripes to a fine, lacy shawl with just a few clicks and clacks of the machine. These machines are ultimate helpers for designers, always ready to bring their ideas to life quickly and beautifully. So, whether you are brave and chunky or soft and fine, knitting machines are here to assist designers in making stunning pieces that grab attention and brighten the heart.

4. Cost-Effective Production

Manufacturers can save lots of money by being efficient and careful. When they make clothes, using knitting machines is helpful. These machines don’t need as many people as hand knitting, so it costs less to pay workers. That’s good for the companies. But there are more amazing items. Knitting machines also make fewer mistakes and don’t waste as much material. This makes it cheaper to make clothes and textiles. When making things cheaper, companies can sell them at awesome prices for you. So, why is this important? Well, when companies save money, it can help you. You can buy clothes and textiles at lower prices. It’s nice for the Earth because we don’t waste as many things. So, using knitting machines is a big win. It’s good for companies, fantastic for you, and brilliant for our planet.

5. Increased Output Capacity

Think of knitting machines as -fast helpers for making many clothes and things. They’re fine at their job, so factories can make a whole bunch of material quickly and still do a great job. Whether it’s clothes, things for your home, or tough materials for industry, these machines can handle it all, even when there’s a tight schedule to follow if you run a textile factory. You get huge orders, and the customers want their items immediately. These machines are helping you get the job done fast and well. You can make tons of products without worrying about quality. So, thanks to this best knitting machine, you can meet tight deadlines and take on giant orders without breaking a sweat. They’re the secret behind getting lots of things made on time.

6. Reduced Physical Strain

Knitting by hand can be tough on our bodies because we have to do the same movements repeatedly, which can lead to injuries. They do the knitting work for us, so we don’t have to strain ourselves. Instead, we can focus on setting up and taking care of the machines and making sure the knitting turns out awesome. It’s doing the hard work while we enjoy the results without hurting ourselves. So, the best knitting machine makes knitting easier on our bodies and more fun.

7. Sustainable Manufacturing

Lately, the textile industry has been getting more eco-friendly. They’re using special knitting machines that are precise and exciting to make clothes without wasting any material. These machines are superb because they can make clothes without needing a lot of extra sewing, which means less work and less waste. The best knitting machine can use special materials that are kind to the environment, such as organic and recycled fibers. So, the clothes they make are not just stylish but also superb for the planet. These knitting machines are helping the textile industry become more eco-friendly. They save materials, reduce extra sewing, and use eco-friendly fibers.

Adaptability to Market Trends

The fashion industry always changes because people like different clothes at multiple times. Knitting machines are useful here. They can help fashion designers and makers switch things up quickly when they see new trends. If you’re a fashion designer, and you spot a cool new trend. With knitting machines, you can easily make trendy clothes. This best knitting machine keeps your things in demand and your brand strong. Manufacturers are also similar to knitting machines because they can quickly change what they make to match what people want to buy. This means they don’t end up with lots of clothes that nobody wants. So, knitting machines are the same as the quick-change artists in fashion. They help fashion stay fresh and ensure the clothes in stores are always cool and wanted.

Conclusion

Choosing the best knitting machine can be easy with the right information. Don’t forget that the knitting machine for you depends on your unique needs and preferences. Whether you’re a beginner looking for simplicity or an experienced knitter seeking flexibility, there’s a machine on our list that can meet your requirements.

The Silver Reed SK280 takes the top spot with its user-friendly features and durability. It’s a great choice for beginners and experts alike. If you’re on a budget, the Addi Express King Size offers excellent value and speed. For those who love to get creative with patterns, the Brother KH860 is a fantastic choice. And if you prefer something portable, the Prym MIDI Knitting Mill is compact and effortless to use.

With the right machine in hand, you’ll be knitting up a storm and creating masterpieces in no time.

October 18, 2023 0 comments
0 FacebookTwitterPinterestEmail
How to Make Your Own Stunning Macrame Wall Hanging
DIY ProjectsHome Decor

7 Easy Steps to Make Your Own Macrame Wall Art

by Ingrid Svensson October 18, 2023
written by Ingrid Svensson

Macrame is a classic craft that involves knotting cords together to create beautiful patterns and designs. It’s a fantastic way to add a touch of boho style to your home decor within budget. You don’t need any special skills or fancy tools to get started, just a little patience and a want to get creative. We’ll learn the process in simple, easy-to-follow instructions.

We’ll find the basic knots you’ll need to know and the materials you’ll require and provide tips and tricks along the way to ensure your success. We’ve learned how to create your very own macrame wall hanging, and we find it much easier than it looks. So, gather your materials, find a comfy spot, and we’ll find out how to make your very own stunning macrame wall hanging.

Let’s start with macrame and learn just how to make a macrame wall hanging that will leave everyone to think.

What is Macrame?

What is Macrame

Macrame is an old craft that started over 700 years ago. But now, it’s making a comeback and getting popular again. It’s all about making cool things by tying knots in cords and threads. At first, people used it for practical things like holding things together and making fabrics. But now, it’s all about being creative. What’s great about macrame is that it’s effortless and can be used in many ways.

With just a few basic knots, you can make things like pretty wall decorations, plant holders, or even fancy jewelry and accessories. People love it because it has a boho style and fits in with the trend of using handmade and eco-friendly things at home. Whether you’re really good at it or just starting, macrame is a fun way to show your creativity and make your home look nice. Give it a try, and you’ll learn how to make macrame wall hangings and beautifully present them.

Steps to Make a Macrame DIY Wall Hanging

Steps to Make a Macrame DIY Wall Hanging

Materials You’ll Need

Before you begin, gather the following materials

  • Macrame Cord: Choose a high-quality macrame cord made of cotton, jute, or a blend of natural fibers. The thickness of the cord can be huge depending on your design, but 3-4mm is a good starting point.
  • Wooden Dowel or Metal Ring: You’ll need strong support for your wall hanging. Wooden dowels and metal rings are common choices. The size depends on the width you want for your wall hanging.
  • Scissors: A sharp pair of scissors is important for cutting the cord cleanly.
  • Tape Measure or Ruler: To ensure precision in your measurements.
  • Combs or Brushes: These will help you comb out the fringes for a neat finish.

Steps to Get Started

1. Cut the Cord

Start by using a ruler or a piece of tape to measure how to make a macrame wall hanging. Then, just cut it into pieces that are all the same size. You’ll need several of these same-size cords to make different knots and patterns for your design. This easy step makes getting ready for your project clear and makes sure everything looks nice in the end. It doesn’t matter if you’re making jewelry, doing macramé art, or anything else with cords. This way, you stay organized and ready to make your design just the way you want it. Having cords that are all the same size is like having the right tools for the work, making the whole process go smoothly. So, measure and cut those cords for a successful project.

2. Attach the Cords to The Dowel

To make things look tidy, follow these effortless steps: Take each cord and fold it in half, then put it over the stick. Now, pull the loose ends through the folded part to tie the cord to the stick. Keep doing this for all your cords, making sure they’re evenly spread out along the stick. This basic method not only helps you organize your cords but also makes them look neat and in order. Keeping your cords tidy is great for preventing tangles and confusion. Whether you’re sorting out computer cables or hanging up decorations, this technique is handy and clear to follow. So, don’t let messy cords mess up your space. Fold and tie, and you’re good to know how to make a macrame wall hanging.

3. Create Your Knots

To begin your macrame project, you’ll want to start with three basic knots: the square knot, half-square knot, and spiral knot. These knots are like the building blocks for your macrame wall hanging. They are the important knots you need to learn to make your beautiful macrame creation. These knots are the key to crafting your amazing macrame artwork. Let’s take one step at a time. The square knot is your first knot, the half-square knot is similar, and the spiral knot adds a neat twist to your design. Once you’ve got these knots down, you’ll have the skills you need to create your very own macrame wall hanging. So, let’s start with these simple knots, and you’ll be on your way to making macrame art!

4. Build Your Design

Once you’ve learned the basic knots, it’s time to have some fun. Mix them to create your special designs. Try out different patterns, spaces between knots, and cord colors until you get the look you like. Knot-tying is all about experimenting and enjoying yourself. You’ll be surprised at the beautiful things you can make when you start combining them. So, jump in and enjoy turning plain knots into something amazing. Changing basic knots into unique creations is an exciting move. Whether you’re making jewelry, decorations, or useful items, don’t forget that you can do whatever you want with your knots. So, go on, find how to make a macrame wall hanging, and turn those basic knots into something truly fantastic.

5. Add Embellishments

Make your wall hanging special by adding beads, feathers, or other decorations. These little things can make your wall hanging unique. Wooden Beads can add a bit of sparkle, and feathers can make it look more natural. You can use different colors, shapes, and textures to create a design that fits your style. Whether you like wooden beads or colorful feathers, these decorations will make your wall hanging stand out. Use your creation and see how to make a macrame wall hanging.

6. Finishing Touches

After you’ve finished making your nice macrame wall decoration, make it look tidy by cutting off any extra string. Then, find a good spot on your wall to hang it up. You can use ultra-grip heavy hooks, nails, or whatever works best for your wall. Make sure it’s firmly attached so it won’t fall. Now, take a step back and enjoy what you’ve created. It’s not just a decoration. You make it with your hands, which adds a special touch to your home. Whenever you look at it, you’ll feel proud of how to make a macrame wall hanging and the comfort it brings to your space. It’s a unique addition that shows off your style and creativity. So, pat yourself on the back and enjoy your macrame wall decoration. It’s a simple way to make your home feel even more comfortable and inviting.

7. Hang It Up

Take a piece of string or thin rope. Make a loop to hang your beautiful art. Find a strong wall hook or nail, and hang your macramé securely. This way, you can enjoy your art and make your space look cool and comfy without any issues. Hanging art is effortless. Use some string and a strong hook, and you’re ready. Your room will instantly look better with your art up. This easy method means you won’t have to worry about your art falling or causing any problems. It’s an effortless way to clean up your space and make it feel just how you want it to to make a macrame wall hanging.

Different Types of Knots

1. Clove Hitch

Clove Hitch

The clove hitch is a useful knot because it keeps things firmly in place without any slipping. You create it by putting a rope over something, like a post or through a loop, and then crossing the rope over itself and tucking it underneath the first part. This knot comes in handy for securing your boat to a dock, beginning to tie things together, or even making a fast and temporary knot when you need it. So, whether you’re out on the water, working on a project, or need a quick fix, the clove hitch has got you how to make a macrame wall hanging with its strong and reliable hold.

2. Square Knot (Reef Knot)

Square Knot (Reef Knot).jpg

The square knot, also known as the reef knot, is a really basic way to tie two ropes of the same size together. Cross the ends of the ropes, then pass each end over and under the other rope. This knot is handy for keeping bandages in place during first aid, but be careful when using it with different-sized ropes because it might not hold well. The great thing about the square knot is that it’s easy to learn. You can use it for everyday things like tying packages, bundling things together, or even tying your shoe laces. But don’t forget, it works best with ropes of the same thickness. If you’re dealing with ropes of different sizes or materials, it’s smarter to use a different knot that’s made to be tough and more secure. So, while the square knot is handy, it’s not always the best choice for how to make macrame wall hanging.

3. Bowline Knot

Bowline Knot

The bowline knot is known as the king of knots because it’s really hard and won’t let you down when you need it. Tying a bowline is effortless. Start by making a small loop near the end of your rope. Then, take the loose end of the rope and pass it up through the loop, wrap it around the rest of the rope, and finally, tuck it back down through the loop. When you want to create a loop at the end of a rope, whether you’re climbing rocks, securing a boat, or helping someone in a tough spot. What makes the bowline knot special is that it won’t slip or come undone unexpectedly. That’s why it’s a favorite among outdoor supporters, sailors, and rescue teams. Whether you’re looking for how to make a macrame wall hanging or lending a hand in emergencies, the bowline knot is the go-to choice, strong and dependable.

4. Sheet Bend

Sheet Bend

The sheet bend is a handy knot for connecting two ropes, even if they’re not the same size or made from different materials. Take one of the ropes and make it into a U shape. Then, take the other rope and pass it through the U, wrap it around both sides of the U, and tuck it under itself. This knot is useful when you’re out camping or boating and need to make your ropes longer. Maybe you’ve got a thick rope and a thin one, or one’s made of nylon while the other is natural fiber, no problem. The sheet bend will help you join them securely. It’s a simple solution for when you’re in the great outdoors and need to extend your ropes, making sure you’re ready, big or small. So, don’t forget the sheet bend your go-to knot for joining ropes.

5. Taut Line Hitch

Taut Line Hitch

The taut line hitch is a handy knot, especially when you want to make a rope tight, like when you’re setting up a tent. First, wrap the rope around something tough, like a peg for your tent. Then, wrap the rope around the part you just wrapped, like making an extra loop around itself. Next, make a small loop right above the first wrap. This loop helps you adjust the knot easily and find out how to make a macrame wall hanging. The cool part is that you can slide this knot up or down the rope to make it tighter or looser. So, if your tent needs to be more stable, tighten the knot, and if you need some slack, loosen it up. That’s why it’s great for keeping your tent steady. You can always tweak it to fit your camping needs perfectly. So, don’t forget the taut line hitch next time you’re out camping.

6. Figure Eight Knot

Figure Eight Knot

The figure eight knot is a useful knot that helps ropes stay put and not slip through holes or pulleys. Making it is simple. Just make a loop, pass one end through it, and then thread it back down the same hole. It’s like a rope stopper. Climbers are a special version called the Figure Eight follow-through. It’s a safe way for them to tie themselves to their harnesses when they go climbing. So, whether you’re keeping things secure or getting ready to climb, the figure eight knot and its follow-through buddy have got you how to make a macrame wall hanging.

7. Double Fisherman’s Knot

Double Fisherman's Knot

The double fisherman’s knot, also known as the grapevine knot, is an important knot for joining two pieces of rope securely. To tie it, make a regular knot with one end of the rope. Then, pass the other end through the knot twice, wrapping it around. This creates a strong connection between the two ropes. This knot is important for climbers because it helps make hard loops in the rope. These loops are important for tasks like belaying and rappelling, ensuring you stay safe while climbing tough spots. So, learning how to make a macrame wall hanging is a must for anyone into climbing and outdoors.

8. Trucker’s Hitch

Trucker's Hitch

The trucker’s hitch is a great knot for making things tight. Make a circle with one end of the rope, push the other end through the circle, wrap it around what you want to tighten, and tie it up with a simple knot. People use this knot when they’re driving trucks, camping, or need to hold heavy things in place. It’s like a tough tool for keeping things secure. Truckers like it for keeping their cargo steady during long trips. Campers use it to keep their tents and tarps from flying away in the wind. When you’re moving big things, the trucker’s hitch stops it from wobbling around, so it’s safer. It’s easy to learn how to make a macrame wall hanging and handy for keeping things just where you want them.

Conclusion

Creating your amazing macrame wall hanging is an enjoyable and rewarding DIY project that anyone can gear. By following the step-by-step instructions provided, you can craft a beautiful piece of art to adorn your home. Don’t forget, it’s all about taking it one knot at a time and being patient with yourself as you learn. Start with the basics.

Your first step can be mastering the square knot and lark’s head knot. Before moving on to more twisted patterns. Experiment with different types of cords and colors to personalize your creation and match your decor. Don’t forget to gather the important tools and materials to make your macrame smooth and without difficulty. Your efforts will be rewarded with an amazing macrame wall hanging that adds a touch of style and personality to your living space.

So, grab your cords, get knotting, and enjoy the creativity of how to make macrame wall hanging.

October 18, 2023 0 comments
0 FacebookTwitterPinterestEmail
Krylon vs Rustoleum Spray Paint
DIY ProjectsHome Improvement

Krylon vs Rustoleum: Which is the Best Spray Paint

by Marco Bianchi October 17, 2023
written by Marco Bianchi

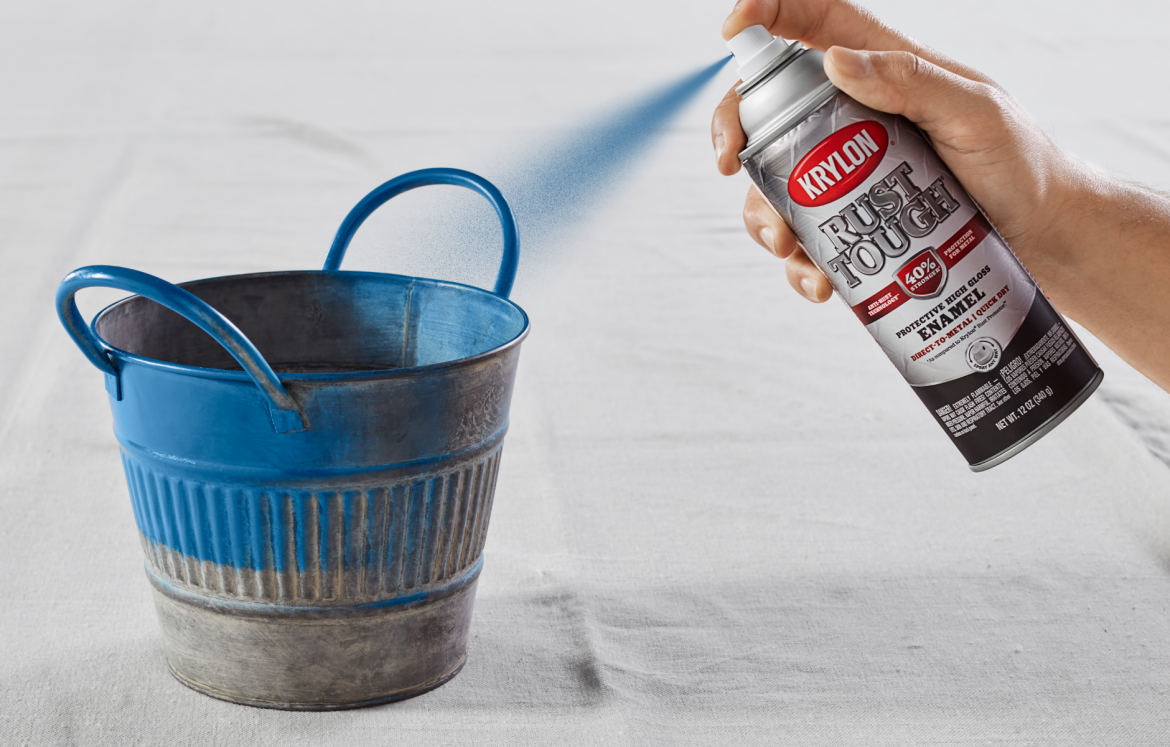
Spray paint is very handy for DIY, home makeovers, and art. Krylon and Rust-Oleum are the big players in the paint industry. People love them both and often argue about which is better. They are a little different when you look closely. Things like how easy they are to use, how nice they make things look, how tough they are, colors, and price.

There are more differences between these two spray paints, and each has its features. If you’re into DIY, a pro painter, or just starting, picking Krylon or Rust-Oleum matters. In this, we’ll compare these spray paints. We’ll discuss their histories, what they offer, and when to use them. Whether you’re fixing up furniture, doing a car project, or getting artsy, we’ll help you choose.

Let’s know about the Krylon vs Rust-Oleum spray paint so you can pick the best one for your next project.

1. What is Rust-Oleum?

What is Rust-Oleum.jpg

Rust-oleum is a type of paint. People use it for lots of things. It’s not like the paint for art. It’s unique. It’s good at going on things without being hard. Also, it keeps things safe from rust and other dust. Let’s learn more about Rust-Oleum. People use Rust-Oleum for different jobs. It’s handy for fixing up your old bike. If your fence looks bad, Rust-Oleum can help. Even your car can get a touch-up with it. It’s quite useful. You might also think, How’s Rust-Oleum different from Krylon? Well, that’s a question to think about. Some people prefer one over the other. So, next time you need to paint something, you can think about Krylon vs. Rust-Oleum.

2. Features

Features

Flexibility

Rust-oleum is a paint that works on many things like metal, wood, and plastic. This paint is handy because you can put it on different things, and it will stick. It’s not just for one thing; it’s for many things. So, if you have something metal, or maybe wood, or even plastic, you can use some Rust-oleum and make it look better. It’s easy to use, and you don’t need to be a pro. Just follow the instructions, and you’ll be good. Also, it comes in different colors, so you can pick the one you like. Whether it’s a chair or a table, rust oleum can help it look nice again. So, next time you have something that needs a fresh look, think about Rust-oleum or Varathane Wood Stain. It’s a simple way to make things better.

Durability

This paint is really strong. It doesn’t easily break or disappear. That means whatever you paint with Rust-Oleum will stay safe for a very long time. Krylon vs Rustoleum is an important choice when picking paint. Krylon and Rustoleum are two brands of paint. Some people like Krylon, and some like Rustoleum. They both work well. You can use either one to paint things like furniture or walls. It’s like choosing between two yummy ice cream flavors. If you want something that lasts a long time, Rust-Oleum is a good pick. So, when you want to paint something and make it look nice, think about Krylon vs Rustoleum, and go with what makes you smile. Your things will thank you for it.

Varied Sizes, Colors, And Finishes

Rust-Oleum paint is available in various sizes so that you can pick the perfect one. It also comes in many different colors and finishes, such as glossy or not shiny, to make your things appear awesome. When deciding between Krylon and Rustoleum, consider your needs and what you want to achieve with your painting project. Krylon and Rust-Oleum are both good choices for various DIY tasks. They offer easy-to-use spray paints, like Krylon Spray Paint, that can help you transform your items without much effort. So, think about what you want to paint and what kind of finish you prefer, and then decide whether Krylon or Rustoleum is the better option for you. Don’t forget to follow the instructions on the can for the best results.

Moderate Drying Time

After you use Rust-Oleum, it needs some time to get dry. It’s not super fast or really slow. This means you have time to check if it looks nice. When you compare Krylon vs Rustoleum, you’ll see differences. Krylon might dry faster, but Rust-Oleum gives you a little more time. People often wonder which is better, but it really depends on what you need. If you’re in a hurry, Krylon could be better. If you want to take your time, Rust-Oleum is a good choice. It’s important to think about what you want. Do you want quick and simple, like Krylon? Or do you prefer a bit more time, like Rust-Oleum offers? So, next time you’re in the store, consider Krylon vs Rustoleum and what suits your project best.

3. What is Rust-Oleum Used For?

What is Rust-Oleum Used For.jpeg

Rust-Oleum is a special kind of spray paint that’s really useful. You can use it to make things look good and prevent them from getting rusty. When you spray it, it makes a strong shield that stops rust, like putting on strong armor. You can use Rust-Oleum on things like bikes, fences, and tools. Also, it comes in many colors, so you can pick the one you love. If you’re specifically interested in painting bikes, there are specialized spray paints available for this purpose. They offer durability and rust protection for bicycle frames. When it comes to choosing between Krylon and Rust-Oleum, it’s important to consider your needs. Both are great for painting, but they have differences. Krylon is quick and easy, while Rust-Oleum offers extra protection. Think about what you want to paint and how much protection it needs. So, Krylon vs. Rust-Oleum, the choice is yours.

4. What is Krylon Spray Paint

What is Krylon Spray Paint

Krylon spray paint is a type of paint in a can that you can use to color or protect things. It comes in many colors, so you can choose the one you like. People often use Krylon to paint things like furniture, metal, or wood. Krylon spray paint dries fast, which means it doesn’t take a long time to become dry and ready to use. It’s easy for beginners to use because you press a button, and the paint comes out. Also, using an Advanced Heat Gun alongside Krylon spray paint can be helpful for certain techniques like distressing or removing old paint. Krylon is good for small projects or when you want a quick and simple way to change the color of something.

5. Features

Features.png

Krylon has many good things. It comes in lots of colors and finishes. You can find the color you like. It dries fast, so you don’t have to wait long. You can use it on many things like wood or metal.

Variety of Colors and Finishes

Krylon offers lots of colors to choose from. They have shiny and not-shiny options. This means you can select colors that make things look super bright or not so bright. When deciding between Krylon and Rustoleum, it’s important to think about the shades you want. Krylon provides a wide selection. Rustoleum also has its range, but Krylon has even more. So, if you’re looking for many color choices, Krylon might be your best bet.

Quick-Drying Formula

Krylon dries really fast. You don’t have to wait a long time. This is nice because you can finish your project fast. When you compare Krylon vs Rustoleum, Krylon dries quickly, so it’s good when you want to finish a project fast. Rustoleum, on the other hand, may take longer to dry. So, if you’re in a hurry, Krylon is a good choice. So, if you want to complete your painting job quickly, you might want to pick Krylon over Rustoleum. That’s because it’s quick.

Smooth and Even Application

Krylon vs Rustoleum are like different types of paint. Krylon is simple to use. You spray it on. It makes your things pretty. Rustoleum is another kind of paint. Some people like Krylon better. They say it goes on smoothly, which means it spreads easily. It makes your thing look good, and that’s what we want. So, if you’re thinking about Krylon vs Rustoleum, know that Krylon is easy to put on things. Just spray it, and your thing will look nice. Also, using a Drop Cloth or Plastic Sheeting is recommended to protect surfaces from paint splatter and spills during your project.

Durability and Protection

It keeps them safe and makes them stay around for a really long time. That’s important because you don’t want your things to go bad or break apart. When you compare Krylon vs Rustoleum, They both do a great job of keeping things in top shape. So, next time you’re thinking about protecting your thing, remember Krylon vs Rustoleum and pick the one that suits your needs best. It’s an easy way to keep your things safe and sound.

Sensitive to The Environment

Krylon is good for the Earth. It doesn’t harm nature. This is necessary because we want to protect our beautiful planet. Krylon cares about not causing pollution. When we use Krylon, we don’t make the Earth dirty. This helps us have clean air and water. When we talk about paint, we often hear about Krylon vs Rustoleum. People want to know which one is better for the environment. Krylon is an eco-friendly choice. So, when you choose Krylon, you’re helping the Earth stay healthy. It’s a smart decision for a clean world.

6. What is Krylon Used For?

What is Krylon Used For

Krylon spray paint and rust-oleum are similar. They both make things look nice and stop them from getting rusty. You can use Krylon on many pieces of furniture, like chairs and yard furniture. Krylon has lots of colors, too. So, you can choose the one that makes you smile. If you’re thinking about Krylon vs RustOleum, they’re both good for fixing up your things. So, next time you want to paint something, you can think about Krylon vs. Rust-Oleum and pick the one you like.

7. Difference Between Rustoleum and Krylon Spray Paint

Difference Between Rustoleum and Krylon Spray Paint

When it comes to Rustoleum and Krylon spray paints, there are some key differences you should know.

Price

Rustoleum costs less money than Krylon, so if you’re looking to spend less, Rustoleum could be a smarter pick. When deciding between Rustoleum and Krylon, think about your wallet. Rustoleum tends to be easier on your finances. Both brands make sprays for various things, like painting metal or wood. They’re both good, but Rustoleum doesn’t hit your wallet as hard. So, if you’re on a tight budget, Rustoleum could be the way to go. In the debate of Krylon vs Rustoleum, your bank account might sway your decision towards Rustoleum. Just remember that it’s important to choose what suits your needs and doesn’t empty your pockets.

Colors

Both Krylon and Rustoleum have many colors. But Krylon has even more special and bright choices. If you want something unique, Krylon is a good choice. When choosing paint, it’s important to think about your project and what you want it to look like. Krylon vs Rustoleum have different paints for various things. Rustoleum is great for outdoor projects, while Krylon can be used indoors. So, before you decide, think about where you’ll use the paint. Also, remember to compare prices to get the best deal.

Drying Time

When we talk about how long it takes for Rustoleum and Krylon spray paint to dry, it’s important to know that both paints dry pretty fast. Krylon usually dries a little quicker than Rustoleum. With Krylon, you won’t have to wait too long. In about 15 to 20 minutes, your project is ready to touch or move. Rustoleum also dries reasonably fast, but it may take more than Krylon in about 25 to 30 minutes. So, if you’re in a hurry to finish your project, Krylon might be the better choice for you. However, both paints do a good job, so you can pick the one that suits your needs and timeline the best.

8. Uses of a Paint Sprayer

Uses of a Paint Sprayer

Paint sprayers are handy tools for various tasks, just as follows.

Furniture

A paint sprayer is a special tool for furniture. It helps make furniture look beautiful with paint. You don’t need to be an expert to use it—just point and spray. You can paint chairs, tables, and even cabinets with it. It’s super quick, so you can finish your furniture projects quickly. Also, it makes your furniture look smooth and neat. No more messy brush is needed. The paint sprayer also saves paint because it spreads it evenly. So, if you want to give your old furniture a fresh and colorful makeover, a paint sprayer is a good choice. It’s easy and fast and makes your furniture look fantastic.

Walls

If you’re painting a room, a paint sprayer can help a lot. Instead of using brushes or rollers, which can be tiring and slow, the sprayer makes things easier. You point and spray, and the paint goes on the walls quickly. Krylon vs. Rustoleum that’s a choice you might need to make when picking paint. Krylon might be easier to say than Rustoleum, but both can work well. They come in cans, and you spray the paint from them. So, if you want to paint your room fast and simple, think about using a paint sprayer.

Outdoor Projects

Sprayers are great for painting things like fences, decks, and the outside of your house. They’re great at covering big spaces quickly. This means you can get your painting done faster and easier. Now, when it comes to choosing the right paint, you might wonder about Krylon vs Rustoleum. These are two brands that make paint for different things. Krylon is like one brand of crayons, and Rustoleum is another brand of crayons. They both make paint that sticks really well and lasts a long time. So, you can pick the one that you like best for your painting project.

Cars and Bikes

Car fans use paint guns to make their vehicles and bike frames look great. Some people find which is better, Krylon or Rustoleum, when it comes to painting. Krylon and Rustoleum are brands that make spray paints, and both can give your ride a nice coat. They’re like two different flavors of ice cream, and you can choose the one you like. These paints come in cans that you can easily spray on your things. Just follow the directions on the can, and your ride will look super cool in no time. So, whether you pick Krylon or Rustoleum, you can make your wheels look awesome without much trouble.

DIY Art

People who make art can use paint sprayers. Paint sprayers help artists make pretty and colorful pictures. This makes artists very happy because they can show their ideas and feelings through their art. There are different kinds of paint sprays, like Krylon and Rustoleum. These sprays are like tools for artists. Artists use them to make their art look nice. Paint sprayers work by spraying paint on things. They are easy to use. Artists can choose many colors. This is good because it gives them lots of choices. When artists use Krylon and Rustoleum, they can make beautiful paintings. These paintings can make people feel happy when they look at them. So, paint sprayers help artists make the world more colorful and enjoyable with their art. A strong drop cloth or Painter’s Tape can be a practical accessory for any artist using a paint sprayer.

Conclusion

When you look at Krylon and Rustoleum spray paints, this is similar to comparing two different kinds of colors. Both have their good sides, but they’re not the same. Krylon is easy to use, simple, and gives you decent color. Rustoleum might take a little more effort, but the result can be really nice.

So, which one is better? Well, that depends on what you’re painting and how much time you want to spend. If you need to cover something quickly and don’t care too much about the details, go for Krylon. But if you want your project to really stand out, Rustoleum is the way to go. It might need more patience, but the finish can be amazing. So, when you’re at the store and you see these spray paints, don’t worry too much.

Just think about what you’re painting and pick the one that fits from Krylon vs Rustoleum.

October 17, 2023 0 comments
0 FacebookTwitterPinterestEmail
Affordable Kitchen Drawer Organizers - Custom Look for Less
DIY ProjectsHome ImprovementKitchen

A Complete Guide on Custom Drawer Organizers in Budget 

by Jonathan Tremblay October 17, 2023
written by Jonathan Tremblay

If you are tired of your messy kitchen drawers, a kitchen custom drawer organizer is what you need. We’ll show you different affordable kitchen drawer organizers that can give your kitchen a custom look for less. Kitchen drawers often become cluttered with utensils, gadgets, and various odds and ends, making it difficult to find what you need.

Affordable kitchen drawer organizers are here to rescue you from confusion. These smart solutions are designed to fit your drawers perfectly, creating a small space for all your kitchen essentials. What’s even better is that you don’t have to spend too much money to achieve a custom look. With these budget-friendly organizers, you can change your kitchen into an organized place if you want a cleaner kitchen.

These organizers offer a simple yet effective way to upgrade your space. So, let’s learn how to create a customized look affordably.

1. Trimmable Kitchen Drawer Organizers

Trimmable Kitchen Drawer Organizers

Trimmable kitchen custom drawer organizers are a cost-effective solution for achieving a customized look in your kitchen drawers without spending too much money. These organizers are versatile and designed to fit your unique storage needs. They are available in various sizes, making them suitable for various drawer dimensions.

How to Make It

  1. Start by measuring the dimensions of your kitchen drawer. Note both the width and length accurately.
  2. Choose a trimmable kitchen drawer organizer that matches your drawer’s width. These organizers often come in a roll or sheet, and you can cut them to fit your drawer’s length perfectly.
  3. Using a pair of ultra-sharp scissors or a utility knife, carefully cut the organizer material to match the length of your drawer. Be accurate to make sure it is a secure fit.
  4. Place the trimmed organizer into your drawer. Arrange it to provide your kitchen utensils, cutlery, or other items as needed.
  5. Your DIY trimmable kitchen drawer organizer is ready to use. It not only keeps your utensils and tools in order but also improves the aesthetics of your kitchen drawers.

2. Knife Rack DIY Drawer Organizer

Knife Rack DIY Drawer Organizer

A DIY knife rack custom drawer organizer is a fantastic way to store your knives safely and stylishly. It ensures easy access to your knives while keeping them out of sight, making your kitchen both organized and safe.

How to Make It

  1. You’ll need a wooden board, wooden dowels, a saw, sandpaper, a ruler, and wood glue.
  2. Measure the length and width of your drawer and cut the wooden board to fit securely inside it.
  3. Cut the wooden dowels into pieces of equal length, about 1.5 inches each. These will serve as the slots for your knives.
  4. Using a ruler and pencil, mark where you want to place the dowels on the wooden board. Space them evenly to set your knives.
  5. Carefully cut slots into the wooden board where you marked using a saw, making sure they are deep enough to hold your knives securely.
  6. Sand the edges of the board and dowels to smooth any rough surfaces. Then, apply wood glue to the slots and insert the dowels.
  7. Allow the glue to dry thoroughly.
  8. Once dry, place your DIY knife rack organizer into your kitchen drawer and arrange your knives in the slots.

3. Utensil Drawer Organizers

Utensil Drawer Organizers

Utensil custom drawer organizers are essential for maintaining order in your kitchen. They come in various shapes and sizes, allowing you to neatly separate and store your cooking utensils, flatware, and more.

How to Make It

  1. Begin by measuring the dimensions of your utensil drawer to determine the size of the organizer you’ll need.
  2. Choose a utensil drawer organizer that fits the width and deepness of your drawer. These organizers often feature compartments of different sizes for various utensils.
  3. Simply insert the utensil drawer organizer into your kitchen drawer. You can further customize it by arranging your utensils within the compartments to suit your needs.
  4. With your utensil drawer organizer in place, you’ll have a clean kitchen drawer where everything has its designated spot; making meal preparation and clean-up is an easy task.

4. Modular Kitchen Drawer Organizer

Modular Kitchen Drawer Organizer

A modular kitchen custom drawer organizer is a flexible and adaptable solution for creating a highly customized storage space in your kitchen. It allows you to design your drawer organization according to your specific needs, making it easy to set various items efficiently.

How to Make It

  1. Start by measuring the dimensions of your kitchen drawer, including width, length, and deepness.
  2. Purchase modular drawer organizer components such as dividers, trays, and bins that can be mixed and matched to make the layout.
  3. Think of the items you want to store in the drawer and plan the layout accordingly. For example, you might want sections for cutlery, utensils, and kitchen tools.
  4. Lay out the modular components within the drawer to ensure they fit well and make the organizational scheme you think.
  5. Use the provided clips, adhesive, or other fastening methods to secure the modular components in place. Ensure they are stable and won’t shift during regular drawer usage.
  6. Once the modular kitchen custom drawer organizer is securely in place, fill it with your utensils, kitchen gadgets, or other items. Adjust the layout as needed to set different sizes and shapes.
  7. With your modular organizer in place, you’ll have a neatly organized kitchen drawer that perfectly suits your storage needs.

5. Dish Drawer Organizers

Dish Drawer Organizers

Dish drawer organizers are designed to keep your dishes, plates, and bowls neatly stacked and easily accessible. They provide a clean and efficient storage solution for your dining essentials.

How to Make It

  1. Measure the dimensions of your drawer to determine the size of the dish drawer organizer you’ll need.
  2. Choose a dish drawer organizer that fits the width and deepness of your drawer. These organizers often have grooves or slots to hold dishes securely.
  3. Simply insert the dish custom drawer organizer into your kitchen drawer. Ensure that the slots or grooves align with the size of your dishes.
  4. Carefully place your dishes, plates, and bowls into the slots or grooves of the organizer. Stack them neatly to maximize space. With your dish drawer organizer in place, your tableware will be well-organized and protected from chipping or scratching.

6. Pots and Lids Drawer Organizer

Pots and Lids Drawer Organizer

A pots and lids drawer organizer is a practical solution for storing your pots, pans, and their lids. It keeps your cookware neatly arranged, making it easy to find the right pot or pan when cooking.

How to Make It

  1. Start by measuring the dimensions of your kitchen drawer, considering its width, length, and deepness.
  2. Choose a pots and lids custom drawer organizer that fits the width and deepness of your drawer. These organizers often feature dividers and compartments for pots and lids.
  3. Insert the pots and lid drawer organizer into your kitchen drawer, positioning it so that it sets your cookware.
  4. Place your pots and pans into the designated compartments of the organizer. Stack pots of similar sizes together and store lids vertically to save space.
  5. With your pots and lids drawer organizer in place, you’ll have a clean drawer where you can quickly access the cookware you need for your cooking.

7. DIY Wooden Drawer Organizer

DIY Wooden Drawer Organizer

A DIY wooden custom drawer organizer lets you make a personalized storage solution for your kitchen or any other space. Using wood, you can craft a durable and attractive organizer for your specific needs.

How to Make It

  1. Collect wood boards, a saw, sandpaper, measuring tape, wood glue, and clamps.
  2. Measure the dimensions of your drawer to determine the size of the organizer you’ll need.
  3. Plan the layout of your organizer. Decide how many compartments you want and their sizes. Sketch a design if needed.
  4. Use the saw to cut the wood pieces according to your design. These pieces will become the dividers and bottom of each compartment.
  5. Sand the edges of the cut wood pieces to smooth them and prevent splinters.
  6. Apply wood glue to the edges of the dividers and attach them to the bottom piece to make compartments.
  7. Sand the entire organizer to ensure a smooth finish. Apply a wood finish or paint if you want a polished look.
  8. Once the organizer is dry and finished, insert it into your drawer. It’s now ready to help you keep your items neatly organized.
  9. Your DIY wooden drawer organizer not only provides useful storage but also adds a touch of artistry to your space.

8. Flatware Drawer Organizer

Flatware Drawer Organizer

A flatware drawer organizer is essential for keeping your cutlery neatly arranged and easily accessible. It streamlines meal preparation and table setting while maintaining a tidy kitchen.

How to Make It

  1. Measure the width and length of your drawer to determine the size of the flatware drawer organizer you need.
  2. Choose a flatware custom drawer organizer that fits the dimensions of your drawer. These organizers typically have compartments designed for various types of forks.
  3. Simply insert the flatware drawer organizer into your kitchen drawer. Ensure that the compartments align with your knife needs.
  4. Organize your flatware within the designated compartments of the organizer. Place forks, knives, spoons, and other utensils in their respective slots.

9. Desk Drawer Organizer

Desk Drawer Organizer

A desk drawer organizer is a practical addition to your workspace, helping you keep pens, paper, stationery, and other office supplies in order. It increases productivity and reduces clutter.

How to Make It

  1. Measure the dimensions of your desk drawer to decide the size of the organizer you need.
  2. Choose a desk drawer organizer that fits the width and deepness of your drawer. These organizers often feature compartments and dividers for various office supplies.
  3. Insert the desk custom drawer organizer into your desk drawer. Ensure that the compartments align with the items you plan to store.
  4. Arrange your office supplies within the designated compartments. Use smaller compartments for items such as pens, paper clips, and sticky notes and larger sections for notebooks or files.

10. Adjustable Kitchen Drawer Organizers

Adjustable Kitchen Drawer Organizers

Adjustable kitchen drawer organizers provide flexibility and customization for your kitchen storage needs. They allow you to adapt the compartments to fit various utensils and kitchen tools, making them a practical addition to any kitchen.

How to Make It

  1. Start by measuring the dimensions of your kitchen drawer, including width, length, and deepness.
  2. Purchase an adjustable kitchen custom drawer organizer that fits the width of your drawer. These organizers often include movable dividers and compartments.
  3. Adjust the dividers within the organizer to make compartments of the desired size. You can set different utensils and tools by simply sliding the dividers.
  4. Insert the adjustable organizer into your kitchen drawer, ensuring that the shade compartments align with your storage needs.
  5. Organize your utensils, cutlery, or kitchen gadgets within the adjustable compartments. Customize the layout as needed to maximize space and keep items readily accessible.

11. Baking Supplies DIY Drawer Organizer

Baking Supplies DIY Drawer Organizer

A DIY custom drawer organizer for baking supplies is a practical solution for keeping your baking tools, measuring cups, and rolling pins organized and within easy reach. It smooths your baking process and ensures all your supplies are neatly stored.

How to Make It

  1. Collect a wooden board, dowels, a saw, measuring tape, wood glue, and clamps.
  2. Measure the dimensions of your drawer to determine the size of the organizer you’ll need for your baking supplies.
  3. Design the layout of your custom drawer organizer. Think about compartments for items like rolling pins, measuring cups, spatulas, and cookie cutters.
  4. Use the saw to cut the wooden board into the size of the base of the organizer. Cut dowels into pieces of appropriate length to serve as dividers.
  5. Apply wood glue to the ends of the dowels and attach them vertically to the base to make compartments. Use clamps to secure them in place while the glue dries.
  6. Sand the entire organizer to make a smooth finish. Apply a wood finish or paint for a polished appearance.

12. Ziplock Bag Organizer

Ziplock Bag Organizer

A ziplock bag organizer and wrap dispenser help you maintain an organized kitchen by keeping plastic wraps, aluminum foils, and ziplock bags easily accessible. These organizers reduce clutter and make food storage more convenient.

How to Make It

  1. Measure the dimensions of your kitchen drawer to determine the size of the organizer you’ll need.
  2. You can either purchase a ready-made ziplock bag organizer and wrap dispenser or make one yourself. If making it yourself, consider using a wooden board and dowels.
  3. Insert the ziplock bag organizer and wrap dispenser into your kitchen drawer, ensuring it fits securely.
  4. Store your plastic wraps, aluminum foils, and ziplock bags within the designated slots or compartments of the organizer.

13. Cardboard Drawer Organizer

Cardboard Drawer Organizer

A cardboard custom drawer organizer is a cost-effective way to make customized storage in your drawers. It’s a simple yet practical solution for organizing small items.

How to Make It

  1. Collect cardboard sheets, a ruler, a pencil, a utility knife or scissors, and glue.
  2. Measure the dimensions of your drawer to determine the size of the organizer you’ll need.
  3. Plan the layout of your cardboard organizer, including the number and size of compartments. You can make various-sized compartments by adjusting the height and width of cardboard pieces.
  4. Using the ruler and pencil, mark the measurements for your compartments on the cardboard sheets. Carefully cut out the cardboard pieces using a utility knife or scissors.
  5. Fold the cardboard pieces along the marked lines to make the sides and dividers of your compartments. Apply glue along the edges and corners to secure them together. Use clips or heavy books to hold the pieces in place while the glue dries.
  6. Once the compartments are dry and secure, place the cardboard drawer organizer in your drawer.

Conclusion

Affordable kitchen custom drawer organizers are a great way to keep your kitchen clean and efficient. These smart organizers can give your kitchen a personalized touch without a high cost. By investing in these budget-friendly options, you can tidy up your drawers, easily locate your utensils and tools, and create a more organized kitchen space. They’re easy to set up and come in various sizes and styles to match your specific needs.

No more searching through messy drawers or struggling to find the right kitchen tool when needed. These organizers increase your cooking experience. It’s surprising how such a simple addition can make a remarkable impact on your kitchen. So, if you want an organized kitchen, affordable kitchen custom drawer organizers are the way to go.

Don’t hesitate to start decluttering your kitchen.

October 17, 2023 0 comments
0 FacebookTwitterPinterestEmail
DIY ProjectsHome Improvement

How to Cover Nail Holes in the Wall: A Basic Guide

by Ethan Tremblay October 17, 2023
written by Ethan Tremblay

Are you frustrated by those nail holes ruining the look of your walls? Well, we have some methods that can help you to get rid of those holes. Suppose you are a homeowner who wants to refresh your living space, then learning how to cover nail holes in walls is a handy skill to have. Nail holes can add up and make your walls look less than perfect. But fixing them is easy.

We’ll show you some budget-friendly methods to cover up these annoying holes so your walls look best again. You don’t have to be a DIY expert for these techniques. With just a few basic tools and supplies, you can make your walls look brand new. We’ll explain different methods of using everyday items. We’ll give you step-by-step instructions and tips to ensure you get professional-looking results.

So, let’s check how to cover nail holes in the wall.

Why Cover Nail Holes?

Why Cover Nail Holes?

Nail holes on your wall can look bad and make your place seem messy. They usually happen when you hang things such as pictures or shelves. You can easily hide these holes to keep your walls looking nice, and you won’t have to fix them or repaint the whole wall.

Method 1: Use Toothpaste

Use Toothpaste

How do you cover nail holes in the wall? If you have nail holes in your wall that make your room look bad. You can fix them easily with something you already have at home, like toothpaste. This cheap trick can make your walls look nice again without spending much money. We’ll show you exactly how to do it, and we’ll share some important tips to make sure you do it correctly.

Materials Needed

  • Toothpaste
  • A putty knife or scraper
  • A damp cloth
  • Sandpaper
  • Primer

Steps

  • How do you cover nail holes in the wall? Make sure you have white, non-gel toothpaste. Gel toothpaste may not work well for this task.
  • Before you begin, ensure the hole is clean and free from dust or waste. Use a moistened cloth to remove any loose debris.
  • Squeeze a small amount of toothpaste directly into the hole. You don’t need much; a pea-sized amount should suffice for small holes. For larger holes, apply a bit more.
  • Take your putty knife or scraper and use it to spread the toothpaste evenly over the hole. Press down gently to fill the hole.
  • After filling the hole, use a damp cloth to remove any excess toothpaste. It should be flush with the wall.
  • Allow the toothpaste to dry completely. This may take a few hours or even overnight, depending on the size of the hole.
  • If the patched area is not easily smooth, you can lightly sand it with fine-grit sandpaper to achieve a perfect finish.
  • If you wish to repaint the wall, wait until the toothpaste is completely dry, and then apply a primer and matching paint to the patched area.

Method 2: Using Spackling Compound

Using Spackling Compound.jpg

When you need to hide those small holes in your wall from nails, you can try using the spackling compound. Spackling compound is a handy repair material for fixing little problems on walls and ceilings. To help you cover nail holes in the wall, use a spackling compound to make your walls look perfect again. We’ll also list the things you need and provide easy steps to follow.

Materials Needed

  • Spackling compound
  • Putty knife or spackling knife
  • Sandpaper
  • A clean cloth

Steps

  • Ensure the hole is clean and free from any loose dust. Use a damp cloth to wipe it clean.
  • Use the putty knife to scoop a small amount of spackling compound and press it into the nail hole. Spread it evenly over the hole, ensuring it’s slightly raised.
  • After applying the compound, use the putty knife to even the surface, making it flush with the wall. Remove any excess compound.
  • Allow the spackling compound to dry completely. The drying time may vary, but it typically takes a few hours.
  • Once the compound is dry, use the fine-grit sandpaper to lightly sand the patched area. This will create a smooth and even surface.
  • Check the patched area for any scratches. If necessary, apply a second coat of spackling compound, let it dry, and sand it again.

Method 3: Using Wall Putty

Using Wall Putty

How do you cover nail holes in the wall? Wall putty is a popular choice for covering nail holes and minor scratches on walls. It provides an even finish, making it an excellent option for maintaining a clean wall surface. Here’s an easy way to use wall putty for this purpose, along with the materials you’ll need and step-by-step instructions.

Materials Needed

  • Wall putty
  • Trowel
  • Sandpaper
  • A damp cloth

Steps

  • How do you cover nail holes in the wall? Start by cleaning the nail hole and the surrounding area. Ensure it’s free from dust and dirt.
  • Scoop a small amount of wall putty onto your putty knife or trowel. Press it into the nail hole and spread it evenly over the hole. Aim to make the surface slightly raised.
  • Use the putty knife or trowel to smooth the surface, blending the putty easily with the surrounding wall. Remove any excess putty.
  • Allow the wall putty to dry completely. Drying times may vary, but it generally takes a few hours.
  • Once the putty is dry, use sandpaper to sand the patched area lightly. This will create an even and uniform surface.
  • Check the patched area for any scratches. If necessary, apply a second coat of wall putty, let it dry, and sand it again.

Method 4: Using Patching Tape

Using Patching Tape

Patching tape is a fast and simple way to hide nail holes in your wall. It’s great for small fixes, and you won’t need many tools or put in much effort. Below, you’ll find, using patching tape, how to cover nail holes in the wall, including what you’ll need and simple steps to follow.

Materials Needed

  • Patching tape
  • Scissors or a utility knife
  • A clean cloth
  • Paint and paintbrush

Steps

  • How to cover nail holes in the wall: begin by cleaning the nail hole and the area around it. Remove dust or dirt.
  • Measure and cut a piece of patching tape that is slightly longer than the nail hole.
  • Press the patching tape over the nail hole, ensuring it covers it completely. Gently flatten it to remove any trapped air bubbles or creases.
  • Use your fingers or a clean putty knife to press the tape firmly onto the wall, ensuring it attaches securely.
  • Most patching tapes dry quickly, often within an hour or less.
  • Examine the patched area for any scratches. If necessary, you can apply a thin layer of spackling compound or joint compound over the tape to further even it out. Allow it to dry, and then sand it lightly to create a perfect finish.
  • If you plan to repaint the wall, wait until the patched area is completely dry. Then apply a primer and matching paint for an ideal appearance

Method 5: Using a Drywall Patch

Using a Drywall Patch.jpg

Suppose you need to hide nail holes in your wall and want it to stay strong and last a long time; then you should think about using something called a drywall patch. How to cover nail holes in the wall: this drywall patch is really good at fixing bigger holes and scratches on your walls, making them look nice and smooth.

Materials Needed

  • Drywall patch
  • Putty knife
  • Sandpaper
  • Utility knife
  • A damp cloth

Steps

  • How to cover nail holes in the wall: begin by cleaning the nail hole and its surroundings. Remove any loose debris or dirt.
  • Open the drywall patch kit and mix the patching compound according to the manufacturer’s instructions. Then, use a putty knife to spread the compound over the nail hole and the surrounding area.
  • If your kit includes patching mesh or tape, press it into the wet patching compound, ensuring it covers the hole. Level it out with the putty knife, removing any air bubbles.
  • Allow the patching compound to dry completely. Drying times may vary, but it generally takes a few hours.
  • Once the patching compound is dry, use sandpaper to sand the patched area until it’s level and even with the wall.
  • Check the patched area for scratches. If necessary, apply a second coat of patching compound, let it dry, and sand it again.
  • If you plan to repaint the wall, wait until the patched area is completely dry. Then, apply a primer and matching paint for a perfect finish.

Tips for Perfectly Covering Nail Holes in the Wall

Tips for Perfectly Covering Nail Holes in the Wall

1. Prepare the Surface

Before you begin fixing the nail hole, it’s important to ensure the surface is nice and clean. Protect any dirt, dust, or loose paint by wiping it with a wet cloth. Doing this ensures that whatever method you use to fix the hole sticks better and looks smoother.

2. Choose the Right Repair Material

Choose the right fix-it material depending on how big the nail hole is. If it’s a small hole, you can use toothpaste or patching tape. For medium-sized holes, spackling compound or wall putty works well. And if the hole is big, go for a drywall patch. Picking the correct material makes sure your repair lasts and looks good.

3. Apply Thin Layers and Sand

Whether you’re using toothpaste, spackling compound, wall putty, or drywall patch, it’s important to put on thin coats and let each coat dry completely. If needed, sanding between coats can make the surface smoother. Thin coats are easier to handle and make your project look more professional.

4. Match the Paint

If you want to fix nail holes in your wall and then repaint it, then make sure you have the correct paint color and type that matches the wall around it. First, apply a primer to the patched area, and after it dries, paint over it with the matching paint. Do this carefully so that the fixed part looks just like the rest of the wall. This way, you’ll get a perfect result that nobody can tell apart from the original surface.

Conclusion

We’ve seen how to cover nail holes in the wall. Fixing nail holes in your wall is a cost-effective task that anyone can do. All you need are some basic materials such as spackle, a putty knife, sandpaper, and paint. Clean the hole and its surroundings. Fill the hole with a spackle. Smooth it out with a putty knife. Let it dry and sand it even.

Paint over the repaired area. By following these steps, you can make your wall look as good as new without much effort. It’s essential to ensure a perfect finish. This process is achievable for everyone. Not only does fixing nail holes improve the appearance of your walls, but it also prevents further damage.

So, don’t let those holes bother you any longer with a little knowledge of how to cover nail holes in the wall and some simple tools. You can keep your walls looking fresh and clean.

Frequently Asked Questions

Do I Need to Sand the Patched Area Before Painting?

Yes, sanding is important to smooth out the patched area and blend it with the surrounding wall. How to cover nail holes in the wall: use fine-grit sandpaper for this step.

Can I Use Wall Decals or Artwork to Cover Nail Holes Instead of Patching Them?

If you think you can cover a hole, yes. How to cover nail holes in the wall: you can use decorative items to cover nail holes, but this won’t repair the wall. For a proper fix, it’s best to patch and paint over the holes first.

Is It Possible to Prevent Nail Holes Altogether when Hanging Items on The Wall?

Yes, you can use adhesive hooks, picture hanging strips, or wall-mounted organizers that minimize the need for nails or screws, reducing wall damage.

What if I Need to Cover Nail Holes in a Textured Wall?

When dealing with textured walls, match the texture as closely as possible when patching. How to cover nail holes in the wall: You need to use a textured spray or consult a professional for the best results.

What’s the Best Way to Fill Larger Nail Holes or Dents in The Wall?

For larger holes, you may need to use a patching compound or a pre-made wall patch. Follow the manufacturer’s instructions for filling and sanding.

October 17, 2023 0 comments
0 FacebookTwitterPinterestEmail
Restoring Wood Furniture Without Stripping: A Step-bystep Guide
DIY ProjectsHome Improvement

Restoring Wood Furniture without Stripping: Complete Guide

by Ethan Tremblay October 17, 2023
written by Ethan Tremblay

Many people are unsure about furniture restoration because they believe it requires difficult methods and costly tools. We know that the idea of removing old finishes and refinishing wooden furniture can seem difficult and take a lot of time. We’ll show you how to revive your wooden furniture’s natural beauty, whether it’s a vintage dresser or a weathered dining table.

All you need are some basic supplies, a little patience, and a want to give your furniture a new look. We’ll learn each step, from improving the condition of your furniture to choosing the right finish. You’ll find how to clean, repair, and refinish your wooden pieces, all without stripping away their character. By the end, you’ll have the knowledge and confidence to restore your wood furniture without the difficulty of stripping.

So, grab your tools, and let’s restore wood furniture without stripping.

Materials You’ll Need for Restoring Wood Furniture

Materials You'll Need for Restoring Wood Furniture 

Before you start fixing things, get these things together

  • Soft Cloths: To clean and put finishes on things, use soft cloths like microfiber, cotton, or ones that don’t leave.
  • Wood Cleaner: You can clean wood with a gentle cleaner or mix some water and a bit of mild dish soap.
  • Fine-Grade Steel Wool: To fix short problems and little marks.
  • Sanding Sponge or Sandpaper: Sandpaper comes in different types for different jobs. You can use 220-grit sandpaper to make things smooth and 400-grit sandpaper for a nice final touch.
  • Wood Finish: Select a good finish for your furniture, such as polyurethane, tung oil, or shellac, to make it look wonderful.
  • Wood Stain: To make the wood look its original color again.
  • Tack Cloth: To clean up dust and dirt
  • Protective Gear: Wear gloves and safety glasses, and work in a space with good air circulation.

Step-By-Step Restoring Wood Furniture Without Stripping

Step 1: Clean the Furniture

Clean the Furniture

Let’s start by cleaning your furniture. Take a soft cloth, like an old T-shirt, and make it a little wet. You can use a special wood cleaner or mix dish soap with water. Now, use this damp cloth to wipe down your furniture gently. Make sure you cover the whole surface, removing all the dust, dirt, and grime that might be there. Don’t forget the corners and hidden spots where dust can hide. When you finish, your furniture will look fresh and shiny. Regular cleaning is the same as this; restoring wood furniture without stripping keeps it in good shape and helps it last a long time. So, don’t forget to clean it now and then.

Step 2: Assess the Finish

Assess the Finish

Look closely at your furniture’s surface. If you see just a few small scratches or it’s lost some shine, you can clean it up without removing the current finish. But if there’s a lot of damage or the finish is peeling off, you’ll need to strip it down to the bare wood before you start fixing it. Sometimes, a quick touch-up works, and other times, it needs a more thorough makeover. So, don’t forget, for minor problems, skip stripping, but for big issues, stripping is the way to go for a successful furniture makeover.

Step 3: Repair Minor Imperfections

Repair Minor Imperfections

If your wooden things, like tables or chairs, have some small scratches or little bumps, you can fix them easily. Just grab some soft steel wool and gently rub it on those marks. Always move it in the same direction as the lines in the wood. This restoring wood furniture without stripping will make the wood smooth again, similar to a smooth road. Once you’ve done that, you can give your wood a fresh look by adding a new finish layer, such as paint or varnish. So, when you see small scratches or short bumps on your wood, use soft steel wool to rub them away. Then, add a new finish to make it look great again.

Step 4: Sand the Surface

Sand the Surface.jpg

First, use a soft sanding sponge or fine sandpaper with a grit of 220. Rub it gently over your furniture’s surface. This restoring wood furniture without stripping helps remove any rough spots and makes it nice and even. After that, switch to even finer sandpaper, like one with a grit of 400. Give your furniture another gentle rub with this smoother sandpaper. It’ll make your furniture feel silky and smooth. With just a bit of sanding, your furniture will go from bumpy to perfectly smooth. So, grab your sandpaper, and let’s make that furniture shine.

Step 5: Apply Wood Stain (If Desired)

Apply Wood Stain (If Desired)

Want to change the color of your wood? You can do it easily with wood stain. First, choose the color you like. Then, check the label on the stain can for how to use it. Grab a brush or cloth and put on the stain, covering everything evenly. Now, wait until it’s dry, which might take a few hours. Don’t touch it until it’s fully dry. Your restored wood furniture without stripping will look fresh and lovely with its new color.

Step 6: Apply the Wood Finish

Apply the Wood Finish

To keep your furniture looking nice and lasting longer, you can choose from a few simple options. If you want it to stay strong, use polyurethane; it helps your furniture stay safe and strong. If you prefer a natural look, try tung oil. It makes the wood look good in a natural way. And for a classic appearance, go with shellac. When applying these finishes, put them on thinly and evenly using a soft cloth or brush. Let each layer dry before adding more. Usually, two or three layers are enough, but if your furniture gets a lot of use, consider adding more layers. This restoring wood furniture without stripping will look great and last a long time.

Step 7: Final Touches

Final Touches

Once the final layer of paint or finish has dried on your furniture, take a good look at it. Check for any rough or not-so-smooth spots. If you see any, grab some fine sandpaper and gently rub them away. Then, use a special cloth that catches dust to clean the piece.

By doing these simple steps, you’ll make sure your furniture is smooth and looks great. It’s all about those final touches to create restoring wood furniture without stripping you can be proud of in your home.

Step 8: Protect and Maintain

Protect and Maintain

To make sure your wooden furniture stays nice for a long time, follow these two simple steps: First, keep it clean by wiping it with a soft, damp cloth, and don’t use tough cleaning things. Second, you can make it shiny and guard it against scratches and moisture by using special furniture wax or polish. These easy actions will help your wooden furniture stay pretty and strong, becoming a favorite part of your home. So, keep it clean and give it a little polish, and your furniture will look fantastic for years.

Benefits of Restoring Wood Furniture Without Stripping

Benefits of Restoring Wood Furniture Without Stripping.jpg

1. Preserves the Patina and Character

Restoring old wooden furniture without removing its original layers is a smart move. It helps the wood keep its natural beauty that grows over time. Old pieces have a unique attraction because they’ve been used for years and have aged gracefully. When you remove the old finish, you lose those special qualities, and the wood looks brand new. But if you decide not to remove it, you keep the history and character of the piece. Try an old table that’s been part of many family gatherings. These marks tell a story and make it special. If you strip it down to just the wood, you erase those stories.

2. Retains Original Finish and Stain

Restoring old wooden furniture without removing its old coating is like keeping its story intact. This restoring wood furniture without stripping is especially important for really old and cool furniture that means something historically or artistically. The old coating shows how it was made back when it was created, and keeping it can make it look even better. When you remove the old coating, you might lose that special look and the nice color that has aged well over time. By keeping the old coating as it is, you’re not just keeping a piece of furniture. You’re keeping its history alive, and you can still enjoy how it looks today.

3. Environmentally Friendly

If you want to make old wooden furniture look new, you might think you need strong chemicals. But these chemicals can harm the environment and your health. Instead, try a no-stripping method. It’s a better choice because it helps nature and keeps you safe. This way, you use fewer harmful chemicals, and there’s less chance of breathing in bad fumes or touching dangerous things. So, your furniture looks great, and you help make the world greener and healthier.

4. Saves Time and Effort

Taking off old paint from wood furniture can be tough and take a lot of time, especially if you’re starting. But there’s a simpler way to make your old wood furniture look nice again. You don’t have to remove the old paint. Instead, you clean it up, fix any problems, and make it look better. This restoring wood furniture without stripping you saves time and makes the whole job much easier. It’s a great option, especially if you’re not very experienced with fixing up furniture. So, instead of struggling with the hard work of removing paint, try this easier method to bring your wooden furniture back to life.

5. Cost-Effective

Restoring old wooden furniture without removing the old finish can save you money. Stripping materials like chemicals, sandpaper, and tools can be costly. When you skip the stripping step, you can use your money on better finishes or new hardware. So, when you want to make your old wooden furniture look new again, try restoring wood furniture without stripping.

6. Less Risk of Damage

Fixing up old wooden furniture can be a bit tricky. If you remove the old coating, you might damage the wood, taking off too much or affecting its strength. But there’s a safer way to make your favorite furniture look good again. Instead of stripping it down, you can work on restoring it while keeping the existing coating as is. This restoring wood furniture without stripping is safer and helps keep the unique attraction of your pieces. So, don’t take unnecessary risks; choose the gentler way to keep your furniture in top shape.

7. DIY-Friendly

Restoring wooden furniture without stripping it down is a great choice for people who enjoy DIY projects. Stripping can be tricky for beginners, but you can learn to refinish and fix up the old finish with practice. This makes it a perfect project for those who want to get better at working with wood. With this method, you can keep the unique quality of the piece while giving it a fresh look. You’ll enjoy making your furniture look new again without the problem of starting from the beginning. It’s a budget-friendly way to change your living space and show off your woodworking skills. So, gather your supplies, and let your creativity shine as you bring your wooden treasures back to life.

8. Maintains Value

Vintage and old furniture lovers know it’s important to keep the realness of a piece to keep it valuable. When fixing up old wooden furniture, it’s best not to change how it looks. This helps it keep its specialness. It won’t lose its value and might even become worth more over time. People who love old furniture understand that making it look new can lower its historical worth. So, they choose ways to fix it that don’t change its unique look. This restoring wood furniture without stripping can tell its story with the marks and wear it has from over the years, which makes it even more interesting.

Conclusion

Restoring wood furniture without stripping it can be easy and simple. First, improve the condition of your furniture to decide if it’s a good candidate for restoration. Then, gather the basic supplies like sandpaper, wood filler, and paint or stain. Don’t forget that safety comes first, so wear protective gear similar to gloves and a mask when working with chemicals or sanding.

Start by cleaning the furniture thoroughly and sanding away any rough spots. Fill in any cracks or holes with wood filler and sand again to secure a smooth surface. Apply a fresh coat of paint or stain, and allow it to dry completely. Finally, add a protective finish to keep your furniture looking great for years to come. Restoring wood furniture without stripping doesn’t have to be difficult. With patience and care, you can change your old pieces into beautiful, useful items that add attraction to your home.

So go, give it a try, and enjoy the new look of your furniture.

October 17, 2023 0 comments
0 FacebookTwitterPinterestEmail
DIY ProjectsHome Decor

How to Paint a Rainbow on a Wall: Complete Guide

by Marco Bianchi October 17, 2023
written by Marco Bianchi

If you are thinking about how to Paint a rainbow on a wall, then there are some ways and things you can do. We’ll help you how to paint a rainbow on a wall with many steps. Painting a rainbow on a wall is a colorful and fun way to bring a touch of happiness and creativity to any room.

If you’re decorating a child’s bedroom or just adding some energy to your space, this simple DIY project can brighten up your day. You don’t need to be an artist to do this; all you need are some basic painting supplies and a little bit of patience. We will talk about choosing the right colors, preparing your wall, and creating those beautiful arches of color. You’ll be amazed at how a few strokes of paint can change a plain wall into a work of art.

So, get your brushes ready, and let’s check how to paint a rainbow on a wall and start painting the rainbow.

Materials You’ll Need to Paint a Rainbow on a Wall

Materials You'll Need to Paint a Rainbow on a Wall

Before you start painting your rainbow, you’ll need to gather the necessary materials. Here’s a list of what you’ll require:

1. Paint: Acrylic paints are an excellent choice for this project. They offer bright colors and are easy to work with. You’ll need the primary rainbow colors: red, orange, yellow, green, blue, indigo, and violet.

2. Paintbrushes: A variety of brush sizes will be helpful. You’ll need larger brushes for the broad strokes and smaller ones for the finer details.

3. Painter’s Tape: This will help you make clean, straight lines for your rainbow.

4. Drop Cloths or Plastic Sheets: To protect your floor and furniture from paint splatters.

5. Pencil and Eraser: To sketch the outline of your rainbow.

6. Ruler or Straight Edge: For creating precise lines.

7. Palette: Mix and blend colors.

8. Water and Containers: For cleaning brushes and diluting paint if needed.

9. Paper Towels or Cloth Rags: To wipe excess paint and clean brushes.

10. A Step Ladder: To reach higher areas if necessary.

Gather Your Colors

Gather Your Colors

When Gathering your Colors, think about how to paint a rainbow on a wall. The paint you need to make a rainbow. So, what colors do you need? That stands for Red, Orange, Yellow, Green, Blue, Indigo, and Violet. Think about these colors in your mind, and make sure you have enough paint for each. Before you start painting, you want it to be as smooth as possible, clean it up, and make it nice, and even this helps your rainbow shine and look its best. It’s time to plan where your rainbow will go. How to paint a rainbow on a wall: first steps to gather your colors. Sketch the Rainbow means drawing a gentle outline with a pencil.

Prepare the Wall

Prepare the Wall

This is an important step to prepare the wall before you add the lively colors of your rainbow. Preparing the wall is close to setting the perfect for an artwork that attracts. Begin by analyzing your wall, ensuring it’s free from any dust, dirt, or imperfections. How to paint a rainbow on a wall smooth surface is key to achieving a perfect finish for your rainbow masterpiece. Take the time to wipe down the wall, addressing any irregularities, so your colors can shine without any scratches. Consider the type of paint you’re working with. Select high-quality, water-based paints that not only confirm a loaded and long-term color but also make the application process smoother. This choice increases the overall beauty and long life of your rainbow creation. As you get ready to start this artistic way, try it, where the arch of your rainbow will show in an attractive way.

Sketch the Rainbow

Sketch the Rainbow

When you think about how to Paint a rainbow on a wall, the rainbow helps to complete your thinking. Sketching the Rainbow, a Playful opening to Colorful Creativity. Let’s talk about sketching the rainbow on your wall. This step is like creating a vision for your colors when you’re about to start. Think about your wall as a palette awaiting the rainbow. Before you pick up a paintbrush, take a moment to look at the graceful shape your rainbow will follow. Don’t worry about perfection. This is a gentle test outline, such as the first strokes of a storyteller’s pen. Use a pencil, the quiet conductor of your creative band. With its lead, decorate the initial art of your rainbow, letting your thinking guide the way. The placement is a forming display. As your pencil side, you’re not just outlining, you’re mapping out a route for the shade to follow, ensuring each color finds its place in the multicolored combination.

Painting Order Matters

Painting Order Matters.jpg

Painting order when creating your showing rainbow. Thinking about how to paint a rainbow on a wall? You’ve got your method, art your wall ready for an upgrade. Now, why does the sequence of colors matter so much? Think of a rainbow, and each color is important for making this. To bring out the best in your rainbow, you start with the brightest color at the top, red. As you move down the wall, transitioning through orange, yellow, green, blue, indigo, and finally, violet. You’re making an attractive masterpiece. This specific order isn’t just a random choice; it’s the part of that iconic rainbow look we all appreciate.

Blend and Overlap

Blend and Overlap

Making balance in Rainbow Colors is important. Let’s talk about the interesting Blend and Overlap and how to paint a rainbow on a wall in the context of painting a rainbow on your wall. This step ensures your rainbow transitions easily from one color to the next, giving it that thrilling and blended effect.

1. Blending

When discussing blending, consider it the gentle dance between colors and how to paint a rainbow on a wall. As you paint your rainbow, especially where two colors meet, use your brush to mix them slightly. This blending softens the transition and removes any distinct lines between colors. It’s similar to a gentle grade, allowing each color to flow smoothly into the next. where the colors in the sky meld together easily. Similarly, in your rainbow, blending makes that attractive, almost pleasing environment, making your wall art feel more fine.

2. Overlap

How to paint a rainbow on a wall overlap. Overlap pictures of the colors of your rainbow as a partner. As you paint, let them walk hand in hand, sometimes crossing paths. Overlapping involves allowing one color to cover another at the point where they meet slightly. This overlapping technique ensures that your rainbow doesn’t look like disconnected lines. Instead, it forms a family and balanced whole. Think of a Venn diagram where the colors share a little space, symbolizing unity and collaboration. In your rainbow, this makes a continuous flow and shows pleasant vibes.

Add Clouds for Beauty

How to paint a rainbow on a wall helps with adding clouds for beauty. Let’s give beauty to your rainbow masterpiece by introducing some fluffy clouds. Think about a rainbow extending from one end to the other, and at each end, beautifully paint playful clouds. These clouds aren’t just any clouds. They’re the part that adds a fairytale vibe to your creation.

1. Creating Cloud decorative

How to Paint a Rainbow on a Wall: you can choose creative cloud decorative ideas. Let me tell you what you can do with cloud decorates. Choose a light white or soft gray paint to craft clouds that seem to twirl with the colors of the rainbow. These clouds aren’t just there for show. They provide a wonderful difference and support the overall environment.

2. Brush Technique Matters

How to paint a rainbow on a wall helps with Brush Technique Matters. As you start on cloud creation, adjust your brush technique. Think light strokes, gentle curves, and a vibe of artistic skill. These clouds are the supporting part of your rainbow’s role, so make them soft and inviting.

3. Positioning for Balance

How to paint a rainbow on a wall with the help of positioning your clouds. Placing them at each end of your rainbow not only adds amazing balance but also makes a fascinating narrative. It’s as if your rainbow is peeking out from behind these clouds, ready to brighten anyone’s day.

4. Tailor Cloud Size

Clouds come in all shapes and sizes. Make the size of your clouds to complement the scale of your rainbow. It’s too big, and they might steal the show. They are too small, and they could get lost in the colorful display. Efforts for that perfectly balanced clouds.

5. Blend with The Rainbow

Blend the sides of your clouds slightly with the surrounding rainbow colors. How to paint a rainbow on a wall: the fine blending ensures a smooth transition between the clouds and the rainbow, improving the overall sight request.

6. Step Back and Compliment

Once your cloud is in place, take a step back and compliment the modification of the wall. Those added clouds aren’t just a decorative vibe. They’re the satisfying detail that takes your rainbow from lovely to completely unreal.

Let It Dry

Let It Dry

After you’ve painted your rainbow on the wall with all those awesome colors, you need to give it some time to dry. When you finish painting your rainbow if you want to add more colors right away. Let the paint do its thing and dry out completely. This way, your rainbow stays bright, and you won’t accidentally mess up the colors.

Finishing Touches

Finishing Touches.jpg

After the paint has dried and you’ve made any necessary touch-ups, step back and admire your handiwork. A rainbow on your wall can instantly boost the environment of your room, creating a cheerful and inviting atmosphere. Here are some additional tips for finishing touches.

1. Furniture and Decor

Arrange furniture and decor items that complement the rainbow theme. Colorful cushions, artwork, or curtains can improve the overall look.

2. Lighting

Consider installing soft, warm lighting to highlight your rainbow wall, especially if it’s in a bedroom or nursery. This can create a warm atmosphere.

3. Personalization

If you’re painting a rainbow in a child’s room, you can add their name or a meaningful quote using stencils or freehand painting.

4. Maintenance

To keep your rainbow looking fresh, periodically wipe it down with a damp cloth to remove dust and dirt.

Seal the Deal

Seal the Deal

Seal the Deal means taking a final step to confirm the long life and protection of your artwork. After you’ve successfully painted the rainbow and allowed it to dry, applying a clear Protector is like adding a protective shield. This clear Protector is a barrier, safeguarding your colorful creation from potential damage or wear over time. Think of it as a finishing touch that not only maintains the brilliance of your artwork but also makes it easier to clean if needed. So, sealing the deal is the last action you take to secure and increase the beauty of your painted rainbow. So, it stays delightful for a long time.

Enjoy Your Colorful Creation

Enjoy Your Colorful Creation

In the final step, take a moment to show the beauty of what you’ve made. Stand back, drown in the lively colors, and appreciate the feeling that your masterpiece brings to the space. This is the time to enjoy the bright atmosphere you’ve added to your surroundings.

Conclusion

Now, you know, how to paint a rainbow on a wall. Painting a rainbow on a wall is a fun and creative project that anyone can try. It’s not just about colors; it’s about spreading positivity in your space. Start by gathering your materials, such as paint, brushes, and tape. Plan your rainbow carefully, choosing the right order of colors, red, orange, yellow, green, blue, and purple. Prepare your wall by cleaning and priming it. Apply the paint in even strokes, letting each color dry before adding the next one. Take your time to make it look pretty.

If you make a mistake, don’t worry; you can always fix it. Once your rainbow is complete, step back and praise your work. It symbolizes hope and happiness that can brighten up any room. Painting a rainbow on your wall is a wonderful way to express your creativity and bring a smile to your face. So, grab your paintbrushes and start spreading those colorful vibes.

Enjoy the process and the beautiful rainbow you’ll make.

Frequently Asked Questions

How Do I Prepare the Wall Before Painting?

Start by cleaning the wall to remove any dust or dirt. Then, apply a primer to make a smooth surface for the paint to adhere to.

What Is the Best Way to Make a Rainbow Shape on The Wall?

You can use a pencil and a measuring tape to mark the center point of your rainbow arch. Then, use a level to draw a curved line connecting the two ends of the rainbow.

In What Order Should I Paint the Colors of The Rainbow?

Start with the outermost color, which is typically red, and work your way inward—following the order of the rainbow: red, orange, yellow, green, blue, indigo, and violet.

How Many Coats of Paint Should I Apply for Each Color?

Depending on the quality of your paint and the color you’re working with, two coats of paint are usually enough. However, you may need more coats for better coverage.

How Do I Ensure the Colors Blend Smoothly?

To achieve smooth transitions between colors, blend the edges while the paint is still wet. This can be done by gently feathering the edges with a clean brush.

October 17, 2023 0 comments
0 FacebookTwitterPinterestEmail
Newer Posts
Older Posts

Recent Posts

  • A Complete Chalked Paint Review fo Better Selection 
  • A Guide to Painting Furniture without Sanding
  • 15 Steps to Create Faux Shiplap DIY Wall in Budget
  • How to Paint Furniture without Sanding or Priming
  • A Guide to Achieving Texture with Saltwash Paint Techniques

Recent Comments

No comments to show.

Recent Posts

  • A Complete Chalked Paint Review fo Better Selection 

    October 18, 2023
  • A Guide to Painting Furniture without Sanding

    October 18, 2023
  • 15 Steps to Create Faux Shiplap DIY Wall in Budget

    October 18, 2023
  • How to Paint Furniture without Sanding or Priming

    October 18, 2023
  • A Guide to Achieving Texture with Saltwash Paint Techniques

    October 18, 2023

Categories

  • Bathroom (15)
  • Bedroom (4)
  • Brush (3)
  • Decor & Design (15)
  • Decorating (1)
  • Dining Room (3)
  • DIY (2)
  • DIY Projects (11)
  • Door (5)
  • Fireplace (3)
  • Flooring (2)
  • Furniture (9)
  • Gardening (1)
  • Guide (11)
  • Home Crafts (1)
  • Home Decor (7)
  • Home Improvement (9)
  • Ideas (63)
  • Kitchen (16)
  • Outdoor Living (1)
  • Paints (18)
  • Review (1)
  • Room Ideas (3)
  • Tutorial (1)
  • Uncategorized (2)
  • Wall (6)

Instagram

About Us

Maecenas nec odio et ante tincidunt tempus. Donec vitae sapien ut libero venenatis faucibus, nullam quis.

01 Central Park, US, New York City
Phone: (012) 345 6789
Fax: (012) 345 6789

  • Facebook
  • Twitter

@2021 - All Right Reserved. Designed and Developed by PenciDesign


Back To Top
DormyHome
  • Decor & Design
  • DIY
  • Guide
  • Home Improvement
  • Smart Home