• Decor & Design
  • DIY
  • Guide
  • Home Improvement
  • Smart Home
DormyHome
keep your memories alive
Home » Archives for
Author

Marco Bianchi

Marco Bianchi
Marco Bianchi

Marco Bianchi is a trained expert in color theory and paint application techniques. Holding a Master's degree in Fine Arts from the University of Florence, Marco has spent over 9 years in the industry, specializing in color psychology and sustainable painting practices. Joining our website in 2020 as a full-time freelancer, he has become a pivotal figure in offering insights into the latest trends and innovations in paint analysis. Marco is passionate about architectural photography in his leisure time, capturing the interplay of colors in urban landscapes.

Rustoleum Chalked
DIY ProjectsHome Decor

A Complete Chalked Paint Review fo Better Selection 

by Marco Bianchi October 18, 2023
written by Marco Bianchi

Many paint colors in the world make our lives colorful. But there are some colors that we don’t know about, or if we know, we know a little. One such color is Rustoleum Chalked Paint. We’ll see a quick chalked paint review on the same, and we will get to know what is so special about that, how it makes our furniture look amazing, and many more.

Rustoleum Chalked paint review is a type of paint that lots of people are talking about. It’s not like your regular paint, which makes it special. It can help you make old furniture look brand new, and it does it in a pretty cool way. So, to give your furniture the best look and color it deserves or how you want it to, you should know all of this. It is the kind of paint color that is not so hard to understand.

So, understand all about this amazing paint color and give your furniture a look that they never had.

1. About Rust-Oleum and Chalked

About Rust-Oleum and Chalked

Rust-Oleum, a company with a rich history dating back to its founding in 1921, has become a trusted name in the fields of paint and coatings. Initially inspired by a sea captain’s observation regarding the protective properties of fish oil on metal surfaces, the company started many innovations in rust-preventive solutions. Over the decades, Rust-Oleum has evolved to offer various products catering to various surfaces and applications.

Within their extensive product line, Rust-Oleum introduced Chalked, their take on chalk-style paint. This paint, named Chalked, shows the company’s commitment to providing high-quality, user-friendly solutions for DIY projects. With the help of chalked paint review, it is connected to Rust-Oleum’s legacy of innovation and excellence, offering consumers a flexible and accessible option for achieving the desired finish on their furniture and decor.

2. Chalk Paint History and Annie Sloan

Chalk Paint History and Annie Sloan.jpg

The history of chalk-style paint traces back to Annie Sloan, an expert in decorative painting. In the 1990s, Annie Sloan introduced her version of chalk-style paint, aptly named Chalk Paint. Notably, this term was trademarked by her company, resulting in other paint manufacturers using alternative names for their versions of chalk-style paint. This trademark proves the impact of Annie Sloan’s innovation and the popularity of chalk-style paint.

Annie Sloan’s creation changed the painting industry by offering paint that required less preparation, allowing users to remove unwanted sanding or priming processes. This breakthrough made decorative painting accessible to a wider audience, empowering both amateurs and professionals to change furniture and decor with ease.

3. Background of This Amazing Color

Background of This Amazing Color

Rust-Oleum’s origins were created in the deep observation of a sea captain named Robert Fergusson, whose encounter with fish oil’s rust-preventing properties gave him an awesome idea. This important moment led to the developing of one of the world’s earliest rust-preventive paints. Established in 1921, Rust-Oleum quickly gained recognition as a leading innovator in protective coatings for metal surfaces. The company’s dedication to quality and effectiveness enabled it to the forefront of the industry.

Over the past decades, Rust-Oleum expanded its product offerings to have a diverse range of solutions for various surfaces and applications. The company’s commitment to innovation and excellence remained exceptional, ensuring that Rust-Oleum products continue to meet the evolving needs of consumers across the globe. Among their many product lines, Rust-Oleum introduced Chalked, a chalk-style paint designed to provide users with a flexible and user-friendly option for achieving desired finishes on furniture and decor.

4. Benefits of Chalk-style Paint

Benefits of Chalk-style Paint

Chalk-style paint, like Rustoleum Chalked, offers many advantages that make it a popular choice among fans and professional furniture refinishers.

  • Its flexibility is a unique feature, allowing it to be used on various surfaces, from wood to metal, glass, and even ceramic. This adaptability makes it a go-to option for various projects, providing a user-friendly experience regardless of the material.
  • One of the best qualities of chalk-style paint is its matte finish. This finish has a different vintage or country aesthetic to furniture and decor, adding character and beauty to each piece. It’s this unique characteristic that draws many to choose chalk-style paint over traditional options.
  • Also, the matte finish has a subtle beauty that complements various interior design styles, from simple to farmhouse style, offering an amazing look that everyone loves.
  • And chalk-style paint simplifies the painting process by removing the need for extensive prep work. Unlike some other types of paint, which may require sanding or priming before application, chalk-style paint adheres well to surfaces with less preparation.

5. Using Chalk Paint on Furniture

Using Chalk Paint on Furniture

Applying chalk paint to furniture is a simple process that requires very little preparation. After ensuring that the surface is clean and free of dust or debris, you can begin painting directly. Unlike some other types of paint, which may demand large sanding or priming, chalk-style paint sticks well to surfaces with a smooth finish. For furniture with glossy or particularly smooth surfaces, light sanding is recommended to improve paint adhesion. This step provides a slightly simpler surface for the paint to grip, ensuring a better overall finish and coverage.

While the additional sanding step may be necessary in certain cases, it doesn’t complicate the application process, making chalk-style paint a convenient choice for projects. It’s worth noting that chalk-style paint is known for its awesome nature, as mentioned in this chalked paint review. Even if you make a mistake or apply the paint unevenly, it can be easily corrected. Simply add more paint to the affected area, allow it to dry, and continue with the painting process.

6. Picking the Right Chalk Paint

Picking the Right Chalk Paint

Choosing the best chalk paint for your project involves considering several factors to ensure the best results. Factors such as color, availability, and coverage should be considered. Different brands offer varying options, and conducting research to determine which paint aligns with your project’s requirements is important. For instance, some paint companies may not offer chalk paint in a spray can format. If you want to use chalk paint for projects that require a spray application, this consideration will be important.

7. Cost of Rustoleum Chalked

Cost of Rustoleum Chalked

Rustoleum Chalked is an affordable option among chalk-style paints, making it an excellent choice for budget-conscious people. The price range is accessible, allowing individuals to start their creative projects without exceeding their budget constraints. This affordability extends across various sizes and colors, ensuring that Rustoleum Chalked caters to various project scopes and preferences.

By using chalked paint review, it does not matter if you’re working on a small craft project or tackling a larger furniture restoration; Rustoleum Chalked provides a cost-effective solution without compromising on quality.

8. Why People Like Chalk Paint

Why People Like Chalk Paint

The popularity of chalk-style paint, including Rustoleum Chalked, is underpinned by its exceptional user-friendliness and flexibility. Unlike some other types of paint, which may necessitate extensive preparation such as sanding or priming, chalk-style paint minimizes the pre-painting process. This simplicity makes it accessible to both beginners and experienced painters, offering an easy way to renovate furniture and decor. Also, chalk-style paint has a remarkable ability to hide minor imperfections in surfaces. This quality is highly valued by those working with older or well-loved pieces of furniture, as it not only adds to the beauty but also makes the painting process easier.

Some imperfections in the surface can contribute to the overall beauty of the finished piece, particularly for individuals looking for a shabby chic, vintage, farmhouse, or country aesthetic. By using ideas from chalked paint reviews, the matte finish achieved with chalk-style paint is another key factor in its amazing look. This finish has a different and awesome to furniture and decor. It complements various interior design styles, ensuring that pieces painted with chalk-style paint can easily mix into diverse home settings. The matte finish shows a subtle beauty that includes passing trends, contributing to its enduring popularity in the world of decorative painting. You should use wax sealers to seal the paint.

9. How Well Does Chalked Paint Cover?

How Well Does Chalked Paint Cover?.jpg

Rustoleum Chalked paint offers a decent level of coverage, which is necessary for achieving a smooth and even finish on your projects. However, it’s important to note that the thickness of this paint may differ from some other chalk-style options. As a result, in most cases, you’ll find that applying at least two coats is necessary to achieve the desired coverage.

Allowing enough drying time between coats is important for the best results. This step ensures that each layer properly sticks to the surface and dries to a consistent finish. When you use chalked paint review while applying multiple coats, it may require more time. The result is well worth the effort, as Rustoleum Chalked then provides a beautiful matte finish that is better than other brands in terms of quality and appearance.

10. Chalked Paint Works on Many Surfaces

Chalked Paint Works on Many Surfaces.jpg

One of the remarkable characteristics of Rustoleum Chalked paint is its exceptional quality of adaptation. It mixes effectively with any type of surface, including wood, metal, glass, ceramic, and more. This wide-ranging compatibility makes it a go-to option for various projects, as it can be applied to different materials without sacrificing quality or performance. While chalk-style paints typically offer excellent quality, it’s important to note that some surfaces may benefit from light sanding according to application.

This step helps create a slightly rougher texture, giving the paint a better grip. By following this simple preparation process with the help of chalked paint review, you can ensure that Rustoleum Chalked paint achieves better results on your chosen surface.

11. Adding Protection for Long-lasting Results

Adding Protection for Long-lasting Results

To improve the durability and long life of your chalked paint project, applying a sealant is an important final step. Rustoleum recommends their Ultra Matte Top Coat for this purpose. This top coat adds a protective layer that safeguards your painted items from wear and tear, ensuring that they maintain their beautiful finish over time.

It’s important to note that when applying the top coat, a light touch is recommended. Applying thin coats helps prevent any uneven feel in the finish. By taking this extra step to protect your project, you can enjoy the lasting beauty and quality that Rustoleum Chalked paint provides. You should use a sponge paintbrush for more convenience.

12. Pros and Cons Rustoleum Chalked Paint

Pros and Cons Rustoleum Chalked Paint

Pros

Rustoleum Chalked paint has several notable advantages that make it a favored choice among DIY people and professional painters.

  • One of its main strengths lies in its affordability. Among chalk-style paints, Rustoleum chalk stands out as one of the most economical options available on the market. This accessibility ensures that people with different budgets can start on their creative projects without compromising on quality.
  • In addition to affordability, Rustoleum Chalked paint is widely available. It can be found in various retail and hardware stores, including popular destinations like Lowes, Walmart, and Amazon. This widespread availability ensures that consumers have convenient access to this amazing paint, allowing them to start their projects with ease.
  • And Rustoleum Chalked offers an impressive selection of colors. While it comes in pre-mixed shades, the 30-ounce can of Rustoleum Chalked Ultra Matte Paint Tint Base opens up the possibility for custom color creation.

Cons

While Rustoleum Chalked paint offers many benefits, it’s important to consider some of its limitations and factors to keep in mind.

  • One consideration is the paint’s thinner consistency compared to certain other chalk-style options. As a result, achieving full coverage may require applying multiple coats. This aspect should be taken into account when planning your project timeline.
  • Another consideration is the necessity of applying a sealant to ensure the longevity of your finished piece. Like many chalk paints, Rustoleum chalk benefits from the additional protection provided by a sealant.
  • Following this step is important for preventing degraded quality or wear over time and ensuring that your painted items maintain their beauty and quality.
  • Finally, color availability may vary depending on your location and the retail stores in your area. If you’re looking for a specific color or shade, you should check with local retailers or inquire about custom color mixing services.

13. Colors in Rustoleum Chalked Paint

Colors in Rustoleum Chalked Paint

One of the standout features of Rustoleum Chalked Paint is its vast color range, offering a wide selection of options to suit diverse tastes and preferences. Whether you’re looking for soft, neutral tones or bright, dark shades, you will likely find the perfect color to complement your project. This variety allows for creative expression and ensures that you can achieve the exact look that you want.

In addition to pre-mixed colors, Rustoleum Chalked also provides the option to create custom shades. This service is available at select retail locations, allowing you to make the paint to your specific project requirements. The ability to access many colors helps you to bring your creative ideas into your work, making Rustoleum Chalked a good choice for a wide range of projects.

14. Where to Find

Where to Find

Rustoleum Chalked paint is always available at various retail and hardware stores, making it easily accessible to consumers. You can find it at well-known retailers like Lowes, Walmart, and Amazon, providing convenient options for purchasing this awesome paint. Also, some local hardware stores may carry Rustoleum Chalked, though availability may vary by location. By finding these options, you can get the paint you need for your creative projects and enjoy the exceptional benefits it offers. So, finding is not a hard thing; what matters the most is that you should choose the best color according to your needs.

Conclusion

Rustoleum Chalked paint is a standout choice for many projects and furniture restoration. Its affordability, widespread availability, and vast color selection make it a flexible option for various creative ideas. The matte finish achieved after two coats shows an amazing beauty to furniture and decor, improving their looks.

Rustoleum Chalked fast-drying nature ensures that projects can be completed efficiently, allowing you to enjoy the results of your efforts sooner. The paint’s excellent capabilities open up chances to create the best of the best according to your ideas, and hence, you get better results by using the chalked paint review.

With Rustoleum Chalked, you have the tools you need to turn your creative ideas into reality and improve the beauty of your living spaces.

October 18, 2023 0 comments
0 FacebookTwitterPinterestEmail
Best Chalk Paint Brushes
BrushPaints

15 Best Brush for Chalk Paint to Buy Online

by Marco Bianchi October 18, 2023
written by Marco Bianchi

Everybody loves to have a sweet-looking house, which should be beautiful from both inside and outside. But for that, you should have the best paint colors, colored with the best paint brushes. Especially when it comes to furniture, you should make sure that you have the best brush for chalk paint that will make your existing furniture look more good. These are special tools for painting furniture and making it look nice.

Chalk paintbrushes help you put the paint on smoothly and make your projects look amazing. There are many different kinds of brushes, and each one has its special job. Some are good for big areas, and others are great for small details. If you want your furniture to look good, choosing the right brush is important. Even if you have a not so good looking furniture, you can change the whole perspective by using the best chalk paint brushes.

So, let’s see what are some of the best paintbrushes out there.

1. Chalkology Chalk Paint Brush

Chalkology Chalk Paint Brush

Features

The Chalkology Chalk Paint Brush is made to work well for all kinds of chalk paint projects. It’s good for both beginners and experienced painters. The brush is designed specially to make sure the paint goes on smoothly and accurately. This means even if you’re new to using chalk paint and want the best brush for chalk paint, you can still make your project look really good. The brush has high-quality bristles holding the paint, so it won’t drip or leave streaks on your work. You can use it on many different things like furniture or decorations, giving everything an even coat of paint. The handle of the brush is made with a lot of thought, so it’s easy to hold and lets you do both small, detailed work and big, sweeping strokes.

Pros

  • Works for all types of chalk paint projects
  • Good for beginners and experienced painters
  • Makes paint go on smoothly and accurately
  • High-quality bristles prevent drips and streaks
  • It can be used on different surfaces
  • Comfortable handle for detailed and broad strokes

Cons

  • Requires careful cleaning, which can take some time.
  • It may be relatively more expensive compared to some other brushes.

2. Brossum Large Paint Brush

Brossum Large Paint Brush

Features

The Brossum Large Paint Brush is a really good tool, especially if you’re working on big chalk paint projects. The brush has wide bristles that help you cover many areas quickly and evenly. This makes it great for painting big things like furniture or large walls. You can use this brush on different materials like wood and metal, which is pretty handy. The way the brush is shaped makes it comfortable to hold, even if you’re working for a long time, so your hand won’t get tired easily because you use the best brush for chalk paint.

Pros

  • Works especially well for big chalk paint projects
  • Wide bristles cover a lot of area quickly and evenly
  • Good for painting furniture and large walls
  • It can be used on different materials like wood and metal
  • Comfortable to hold, even during long painting sessions
  • Bristles hold onto the paint well, preventing messy drips and streaks

Cons

  • The wide bristles may not be as precise for detailed work.
  • The Brossum Large Paint Brush may not be the best choice for smaller choices.

3. Bristello Paint Brush Set

Bristello Paint Brush Set

Features

The Bristello Paint Brush Set is a great choice for artists and people who want really good brushes for painting. It comes with lots of different brush sizes so that you can do both detailed work and big strokes. Each brush is made carefully, with good bristles that work well with chalk paint. This makes sure that every time you paint, it goes on smoothly and looks nice. Using the best brush for chalk paint gives you a lot of options.

Pros

  • It is a good choice for artists and people who want good brushes
  • Comes with different brush sizes for detailed and big strokes
  • High-quality bristles work well with chalk paint
  • Ensures smooth and consistent application
  • Gives you lots of options for painting
  • Soft handles for comfortable painting

Cons

  • It can be Costly.
  • Not fit for everyone.

4. FolkArt Home Decor Brush Set

FolkArt Home Decor Brush Set

Features

The FolkArt Home Decor Brush Set is made with great care and attention to detail. Each brush in this set has natural bristles that make your project look professional. There are brushes of different shapes and sizes in the set so you can use them for lots of different techniques. Whether you’re fixing up furniture, adding decorative touches, or making wall art, these brushes can do the job well, as these are the best brushes for chalk paint. The special thing about them is that they work with both chalk and acrylic paints. This means you have a lot of options for what you can create. They’re also easy to clean so you can use them for a long time.

Pros

  • Made with care and attention to detail
  • Natural bristles for a professional finish
  • Different brushes for different techniques
  • Works with both chalk and acrylic paints
  • Easy to clean for long-lasting use

Cons

  • The set could be a bit pricey.
  • The variety of brush options might be confusing for some.

5. New Renaissance Painting Brush

New Renaissance Painting Brush

Features

The New Renaissance Painting Brush is made with great care and skill, showing off some great craftsmanship. It’s perfect for artists and people who want to be precise in their work and want the best brush for chalk paint. The brush has very fine bristles that can do even the softest strokes, giving your projects a level of detail that makes them stand out. It’s designed to feel just right in your hand, so you won’t get tired even if you’re painting for a long time. It’s one of the best brushes for chalk paint. The brush is of really high quality, so every stroke you make is important in making your final piece look perfect. Whether you like gentle designs or want things to look refined, this brush will be there for you, helping you turn your creative ideas into amazing art with confidence and ease.

Pros

  • Made with amazing skill and care
  • Perfect for precise work
  • Fine bristles for detailed strokes

Cons

  • Expensive
  • Limited availability

6. Brossum Round Wax Brush

Brossum Round Wax Brush

Features

The Brossum Round Wax Brush is designed to give chalk-painted surfaces a top-quality wax finish. Its rounded shape is perfect for reaching hard corners and ensuring everything gets a nice, even coat of wax. The bristles of this brush are just right, not too soft, not too hard. This means you have really good control over how you put on the wax. When you use the Brossum Round Wax Brush, you can be sure your wax finishes will look great without any rough spots. The brush is the best brush for chalk paint so you can use it again and again for all your chalk paint projects.

Pros

  • Ideal for achieving top-quality wax finishes
  • Rounded shape for reaching tricky spots
  • Balanced bristles for precise application

Cons

  • Fewer Size Options
  • Requires Proper Cleaning

7. FolkArt Wax Brushes

FolkArt Wax Brushes

Features

The FolkArt Wax Brushes are specially made tools for giving your chalk-painted projects a perfect wax finish. They have soft bristles that make sure the wax goes on smoothly and evenly, giving you a finish that looks great. These brushes are designed very carefully to make them easy to use to cover different surfaces evenly. They’re built to last a long time, so they’ll be with you whenever you need them for wax finishing, and these are some of the best brushes for chalk paint.

Pros

  • Perfect for achieving a smooth wax finish on chalk-painted projects
  • Soft bristles for smooth and consistent application
  • Easy to use for even coverage on various surfaces

Cons

  • No protective case.
  • Limited size options.

8. Vintage Tonality Paint Brush

Vintage Tonality Paint Brush

Features

The Vintage Tonality Paint Brush Set is a set of brushes for many painting projects. Each brush in this set is made carefully and with a lot of attention to detail. They have really good bristles that make the chalk paint go on smoothly and evenly. This set has brushes of different shapes and sizes so that you can do many different painting techniques, from small, detailed work to big, sweeping strokes. The brushes’ handles are soft and easy to hold, which means you can control your brush strokes well, and this brush is one of the best brushes for chalk paint.

Pros

  • Made for a variety of painting projects
  • Each brush is carefully crafted
  • High-quality bristles for smooth and even application
  • Different shapes and sizes for various techniques

Cons

  • Limited brush variety.
  • Potential shedding of bristles.

9. Zibra Paint Brush

Zibra Paint Brush

Features

The Zibra Paint Brush is a really good tool for painting. It’s made specially to ensure you can paint efficiently and accurately with chalk paint. The brush has high-quality bristles that hold onto the paint well and prevent drips or streaks. This means you can use it on different surfaces like furniture or metal, and it’ll always give you really good results. The handle of the brush is a nice touch. It fits nicely in your hand, so you can hold it securely and paint smoothly because this is one of the best brushes for chalk paint.

Pros

  • Reliable tool for painting
  • Unique design for efficient and precise application
  • High-quality bristles prevent drips and streaks
  • It can be used on different surfaces
  • Comfortable handle for a secure grip

Cons

  • Pricey
  • Limited size options

10. Heirloom Traditions Brush

Heirloom Traditions Brush

Features

The Heirloom Traditions Brush is a top-quality tool made for artists and those who want to be precise in their chalk paint projects. It’s especially good for fine details. The brush has very fine bristles that make accurate strokes and smooth finishes. This makes it an excellent choice for people who want their work to be very precise. The brush is made with a good weight balance, and it’s easy to hold. This means you can use it for a long time without your hand getting tired. It’s the best brush for chalk paint, which means it’s made to very high-quality standards.

Pros

  • Premium tool for precision and fine detailing
  • Best for accurate strokes and smooth finishes
  • Balanced weight and comfortable grip for extended use
  • Professional-grade quality and craftsmanship
  • Enables fantastic results with confidence
  • Perfect for artists and craftspeople
  • Maintains quality and precision in chalk paint projects

Cons

  • Delicate bristles
  • Not suitable for large areas

11. Annie Sloan Paint Brush

Annie Sloan Paint Brush

Features

The Annie Sloan Paint Brush is a reliable tool for getting really good results with chalk paint. It’s made with a lot of care, and it has high-quality bristles that make sure the paint goes on smoothly and evenly. The design of the brush helps you have more control over how the paint goes on, so you can do detailed work or big strokes. As this is one of the best brushes for chalk paint, the handle is easy to hold so that you can work comfortably and precisely. Whether you’re fixing up furniture, working on decorations, or doing other creative projects, this brush is a good choice for getting the best results with chalk paint.

Pros

  • Trusted tool for professional-grade results
  • High-quality bristles for smooth application
  • Gives better control over brush strokes
  • Suitable for detailed and broader work
  • Comfortable and precise handle

Cons

  • May be expensive
  • Some users may find it too big for very detailed work

12. FolkArt Plaid Brushes

FolkArt Plaid Brushes

Features

The FolkArt Plaid Brushes are important tools for artists and anyone aiming for high-quality results with chalk paint. They are carefully crafted with natural bristles that give a smooth and even application. This set comes with brushes in various shapes and sizes, letting you use different techniques for detailed work or broader strokes. These brushes can be used with both chalk and acrylic paints, giving you more options for your creative projects. Keeping these best brushes for chalk paint clean and in good condition is simple, ensuring they stay dependable tools for all your projects.

Pros

  • Important for achieving professional-grade finishes
  • Compatible with both chalk and acrylic paints
  • Easy to clean and maintain

Cons

  • Some users may find natural bristles shed over time
  • The set may not include all brush shapes needed for specific projects

13. Retique It Chalk Brushes

Retique It Chalk Brushes

Features

The Retique It Chalk Brushes are made especially for using chalk-based paints and finishes. They’re built with care to give you precise and smooth coverage. The best brush for chalk paint is designed to be easy to hold so you can make controlled and steady strokes. They work on lots of different surfaces, which means you can use them for all sorts of projects.

Pros

  • Specialized for chalk paints
  • Precise and even coverage
  • Comfortable grip
  • Versatile for different surfaces
  • Professional-looking results

Cons

  • Higher cost
  • Requires careful cleaning for longevity

14. Wooster Brush Paintbrush

Wooster Brush Paintbrush

Features

The Wooster Brush Paintbrush is the best brush for chalk paint to get professional-level results with chalk paint. It’s made with high-quality bristles to make sure the paint goes on smoothly and evenly. The design of the brush is all about precision, giving you great control over how the paint goes on, whether you’re doing detailed work or broader strokes. The handle is made to be comfortable in your hand so you can work easily and with accuracy. Whether you’re designing your furniture, doing decor projects, or letting your creativity flow, this is a go-to brush for chalk paint that you can trust to give you the best results.

Pros

  • Gets professional results
  • Smooth application
  • Precise control
  • Comfortable grip
  • Versatile use
  • Noticeable improvement

Con

  • Higher price
  • Slightly heavy

15. Mont Marte Chalk Brush Set

Mont Marte Chalk Brush Set

Features

The Mont Marte Chalk Brush Set is a collection of brushes made for various painting projects. Each brush in this set is crafted with precision and care, featuring high-quality bristles that deliver consistent and smooth application of chalk paint. The set includes brushes of different shapes and sizes, allowing many techniques, from detailed work to broader strokes, to be used. The handle of this brush provides a comfortable grip, ensuring you have precise control over your brush strokes. It does not matter what thing you are using it for; the Mont Marte chalk brush is one of the best brushes for chalk paint.

Pros

  • Best for achieving top-quality looks
  • A rounded shape Helps more
  • Better bristles for accurate use

Cons

  • Less Size Options
  • Requires Proper Cleaning

Conclusion

So, those are some of the best brushes for chalk paint. These brushes make painting with chalk paint easy and fun. They have special bristles that make your strokes smooth and precise. And they feel good in your hand, so you can paint for a long time without getting tired. These brushes are made with care and high-quality materials, so they last a long time. You can use them for all sorts of projects, from detailed designs to simple finishes.

No matter what you’re working on, these brushes help you create amazing results. Try them out and see which one feels better for you. Because having the best furniture will not only make your whole house look amazing but it will also show how much you care about colors and shades.

So, pick one of these brushes that suits you.

October 18, 2023 0 comments
0 FacebookTwitterPinterestEmail
Krylon vs Rustoleum Spray Paint
DIY ProjectsHome Improvement

Krylon vs Rustoleum: Which is the Best Spray Paint

by Marco Bianchi October 17, 2023
written by Marco Bianchi

Spray paint is very handy for DIY, home makeovers, and art. Krylon and Rust-Oleum are the big players in the paint industry. People love them both and often argue about which is better. They are a little different when you look closely. Things like how easy they are to use, how nice they make things look, how tough they are, colors, and price.

There are more differences between these two spray paints, and each has its features. If you’re into DIY, a pro painter, or just starting, picking Krylon or Rust-Oleum matters. In this, we’ll compare these spray paints. We’ll discuss their histories, what they offer, and when to use them. Whether you’re fixing up furniture, doing a car project, or getting artsy, we’ll help you choose.

Let’s know about the Krylon vs Rust-Oleum spray paint so you can pick the best one for your next project.

1. What is Rust-Oleum?

What is Rust-Oleum.jpg

Rust-oleum is a type of paint. People use it for lots of things. It’s not like the paint for art. It’s unique. It’s good at going on things without being hard. Also, it keeps things safe from rust and other dust. Let’s learn more about Rust-Oleum. People use Rust-Oleum for different jobs. It’s handy for fixing up your old bike. If your fence looks bad, Rust-Oleum can help. Even your car can get a touch-up with it. It’s quite useful. You might also think, How’s Rust-Oleum different from Krylon? Well, that’s a question to think about. Some people prefer one over the other. So, next time you need to paint something, you can think about Krylon vs. Rust-Oleum.

2. Features

Features

Flexibility

Rust-oleum is a paint that works on many things like metal, wood, and plastic. This paint is handy because you can put it on different things, and it will stick. It’s not just for one thing; it’s for many things. So, if you have something metal, or maybe wood, or even plastic, you can use some Rust-oleum and make it look better. It’s easy to use, and you don’t need to be a pro. Just follow the instructions, and you’ll be good. Also, it comes in different colors, so you can pick the one you like. Whether it’s a chair or a table, rust oleum can help it look nice again. So, next time you have something that needs a fresh look, think about Rust-oleum or Varathane Wood Stain. It’s a simple way to make things better.

Durability

This paint is really strong. It doesn’t easily break or disappear. That means whatever you paint with Rust-Oleum will stay safe for a very long time. Krylon vs Rustoleum is an important choice when picking paint. Krylon and Rustoleum are two brands of paint. Some people like Krylon, and some like Rustoleum. They both work well. You can use either one to paint things like furniture or walls. It’s like choosing between two yummy ice cream flavors. If you want something that lasts a long time, Rust-Oleum is a good pick. So, when you want to paint something and make it look nice, think about Krylon vs Rustoleum, and go with what makes you smile. Your things will thank you for it.

Varied Sizes, Colors, And Finishes

Rust-Oleum paint is available in various sizes so that you can pick the perfect one. It also comes in many different colors and finishes, such as glossy or not shiny, to make your things appear awesome. When deciding between Krylon and Rustoleum, consider your needs and what you want to achieve with your painting project. Krylon and Rust-Oleum are both good choices for various DIY tasks. They offer easy-to-use spray paints, like Krylon Spray Paint, that can help you transform your items without much effort. So, think about what you want to paint and what kind of finish you prefer, and then decide whether Krylon or Rustoleum is the better option for you. Don’t forget to follow the instructions on the can for the best results.

Moderate Drying Time

After you use Rust-Oleum, it needs some time to get dry. It’s not super fast or really slow. This means you have time to check if it looks nice. When you compare Krylon vs Rustoleum, you’ll see differences. Krylon might dry faster, but Rust-Oleum gives you a little more time. People often wonder which is better, but it really depends on what you need. If you’re in a hurry, Krylon could be better. If you want to take your time, Rust-Oleum is a good choice. It’s important to think about what you want. Do you want quick and simple, like Krylon? Or do you prefer a bit more time, like Rust-Oleum offers? So, next time you’re in the store, consider Krylon vs Rustoleum and what suits your project best.

3. What is Rust-Oleum Used For?

What is Rust-Oleum Used For.jpeg

Rust-Oleum is a special kind of spray paint that’s really useful. You can use it to make things look good and prevent them from getting rusty. When you spray it, it makes a strong shield that stops rust, like putting on strong armor. You can use Rust-Oleum on things like bikes, fences, and tools. Also, it comes in many colors, so you can pick the one you love. If you’re specifically interested in painting bikes, there are specialized spray paints available for this purpose. They offer durability and rust protection for bicycle frames. When it comes to choosing between Krylon and Rust-Oleum, it’s important to consider your needs. Both are great for painting, but they have differences. Krylon is quick and easy, while Rust-Oleum offers extra protection. Think about what you want to paint and how much protection it needs. So, Krylon vs. Rust-Oleum, the choice is yours.

4. What is Krylon Spray Paint

What is Krylon Spray Paint

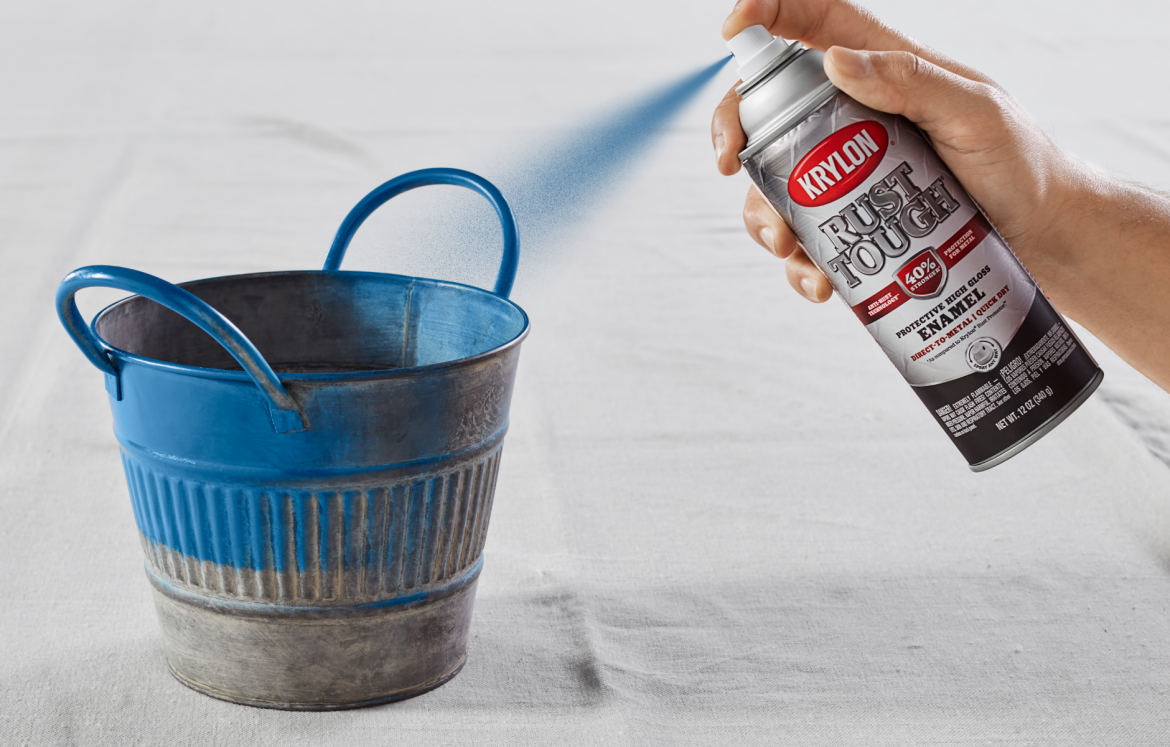
Krylon spray paint is a type of paint in a can that you can use to color or protect things. It comes in many colors, so you can choose the one you like. People often use Krylon to paint things like furniture, metal, or wood. Krylon spray paint dries fast, which means it doesn’t take a long time to become dry and ready to use. It’s easy for beginners to use because you press a button, and the paint comes out. Also, using an Advanced Heat Gun alongside Krylon spray paint can be helpful for certain techniques like distressing or removing old paint. Krylon is good for small projects or when you want a quick and simple way to change the color of something.

5. Features

Features.png

Krylon has many good things. It comes in lots of colors and finishes. You can find the color you like. It dries fast, so you don’t have to wait long. You can use it on many things like wood or metal.

Variety of Colors and Finishes

Krylon offers lots of colors to choose from. They have shiny and not-shiny options. This means you can select colors that make things look super bright or not so bright. When deciding between Krylon and Rustoleum, it’s important to think about the shades you want. Krylon provides a wide selection. Rustoleum also has its range, but Krylon has even more. So, if you’re looking for many color choices, Krylon might be your best bet.

Quick-Drying Formula

Krylon dries really fast. You don’t have to wait a long time. This is nice because you can finish your project fast. When you compare Krylon vs Rustoleum, Krylon dries quickly, so it’s good when you want to finish a project fast. Rustoleum, on the other hand, may take longer to dry. So, if you’re in a hurry, Krylon is a good choice. So, if you want to complete your painting job quickly, you might want to pick Krylon over Rustoleum. That’s because it’s quick.

Smooth and Even Application

Krylon vs Rustoleum are like different types of paint. Krylon is simple to use. You spray it on. It makes your things pretty. Rustoleum is another kind of paint. Some people like Krylon better. They say it goes on smoothly, which means it spreads easily. It makes your thing look good, and that’s what we want. So, if you’re thinking about Krylon vs Rustoleum, know that Krylon is easy to put on things. Just spray it, and your thing will look nice. Also, using a Drop Cloth or Plastic Sheeting is recommended to protect surfaces from paint splatter and spills during your project.

Durability and Protection

It keeps them safe and makes them stay around for a really long time. That’s important because you don’t want your things to go bad or break apart. When you compare Krylon vs Rustoleum, They both do a great job of keeping things in top shape. So, next time you’re thinking about protecting your thing, remember Krylon vs Rustoleum and pick the one that suits your needs best. It’s an easy way to keep your things safe and sound.

Sensitive to The Environment

Krylon is good for the Earth. It doesn’t harm nature. This is necessary because we want to protect our beautiful planet. Krylon cares about not causing pollution. When we use Krylon, we don’t make the Earth dirty. This helps us have clean air and water. When we talk about paint, we often hear about Krylon vs Rustoleum. People want to know which one is better for the environment. Krylon is an eco-friendly choice. So, when you choose Krylon, you’re helping the Earth stay healthy. It’s a smart decision for a clean world.

6. What is Krylon Used For?

What is Krylon Used For

Krylon spray paint and rust-oleum are similar. They both make things look nice and stop them from getting rusty. You can use Krylon on many pieces of furniture, like chairs and yard furniture. Krylon has lots of colors, too. So, you can choose the one that makes you smile. If you’re thinking about Krylon vs RustOleum, they’re both good for fixing up your things. So, next time you want to paint something, you can think about Krylon vs. Rust-Oleum and pick the one you like.

7. Difference Between Rustoleum and Krylon Spray Paint

Difference Between Rustoleum and Krylon Spray Paint

When it comes to Rustoleum and Krylon spray paints, there are some key differences you should know.

Price

Rustoleum costs less money than Krylon, so if you’re looking to spend less, Rustoleum could be a smarter pick. When deciding between Rustoleum and Krylon, think about your wallet. Rustoleum tends to be easier on your finances. Both brands make sprays for various things, like painting metal or wood. They’re both good, but Rustoleum doesn’t hit your wallet as hard. So, if you’re on a tight budget, Rustoleum could be the way to go. In the debate of Krylon vs Rustoleum, your bank account might sway your decision towards Rustoleum. Just remember that it’s important to choose what suits your needs and doesn’t empty your pockets.

Colors

Both Krylon and Rustoleum have many colors. But Krylon has even more special and bright choices. If you want something unique, Krylon is a good choice. When choosing paint, it’s important to think about your project and what you want it to look like. Krylon vs Rustoleum have different paints for various things. Rustoleum is great for outdoor projects, while Krylon can be used indoors. So, before you decide, think about where you’ll use the paint. Also, remember to compare prices to get the best deal.

Drying Time

When we talk about how long it takes for Rustoleum and Krylon spray paint to dry, it’s important to know that both paints dry pretty fast. Krylon usually dries a little quicker than Rustoleum. With Krylon, you won’t have to wait too long. In about 15 to 20 minutes, your project is ready to touch or move. Rustoleum also dries reasonably fast, but it may take more than Krylon in about 25 to 30 minutes. So, if you’re in a hurry to finish your project, Krylon might be the better choice for you. However, both paints do a good job, so you can pick the one that suits your needs and timeline the best.

8. Uses of a Paint Sprayer

Uses of a Paint Sprayer

Paint sprayers are handy tools for various tasks, just as follows.

Furniture

A paint sprayer is a special tool for furniture. It helps make furniture look beautiful with paint. You don’t need to be an expert to use it—just point and spray. You can paint chairs, tables, and even cabinets with it. It’s super quick, so you can finish your furniture projects quickly. Also, it makes your furniture look smooth and neat. No more messy brush is needed. The paint sprayer also saves paint because it spreads it evenly. So, if you want to give your old furniture a fresh and colorful makeover, a paint sprayer is a good choice. It’s easy and fast and makes your furniture look fantastic.

Walls

If you’re painting a room, a paint sprayer can help a lot. Instead of using brushes or rollers, which can be tiring and slow, the sprayer makes things easier. You point and spray, and the paint goes on the walls quickly. Krylon vs. Rustoleum that’s a choice you might need to make when picking paint. Krylon might be easier to say than Rustoleum, but both can work well. They come in cans, and you spray the paint from them. So, if you want to paint your room fast and simple, think about using a paint sprayer.

Outdoor Projects

Sprayers are great for painting things like fences, decks, and the outside of your house. They’re great at covering big spaces quickly. This means you can get your painting done faster and easier. Now, when it comes to choosing the right paint, you might wonder about Krylon vs Rustoleum. These are two brands that make paint for different things. Krylon is like one brand of crayons, and Rustoleum is another brand of crayons. They both make paint that sticks really well and lasts a long time. So, you can pick the one that you like best for your painting project.

Cars and Bikes

Car fans use paint guns to make their vehicles and bike frames look great. Some people find which is better, Krylon or Rustoleum, when it comes to painting. Krylon and Rustoleum are brands that make spray paints, and both can give your ride a nice coat. They’re like two different flavors of ice cream, and you can choose the one you like. These paints come in cans that you can easily spray on your things. Just follow the directions on the can, and your ride will look super cool in no time. So, whether you pick Krylon or Rustoleum, you can make your wheels look awesome without much trouble.

DIY Art

People who make art can use paint sprayers. Paint sprayers help artists make pretty and colorful pictures. This makes artists very happy because they can show their ideas and feelings through their art. There are different kinds of paint sprays, like Krylon and Rustoleum. These sprays are like tools for artists. Artists use them to make their art look nice. Paint sprayers work by spraying paint on things. They are easy to use. Artists can choose many colors. This is good because it gives them lots of choices. When artists use Krylon and Rustoleum, they can make beautiful paintings. These paintings can make people feel happy when they look at them. So, paint sprayers help artists make the world more colorful and enjoyable with their art. A strong drop cloth or Painter’s Tape can be a practical accessory for any artist using a paint sprayer.

Conclusion

When you look at Krylon and Rustoleum spray paints, this is similar to comparing two different kinds of colors. Both have their good sides, but they’re not the same. Krylon is easy to use, simple, and gives you decent color. Rustoleum might take a little more effort, but the result can be really nice.

So, which one is better? Well, that depends on what you’re painting and how much time you want to spend. If you need to cover something quickly and don’t care too much about the details, go for Krylon. But if you want your project to really stand out, Rustoleum is the way to go. It might need more patience, but the finish can be amazing. So, when you’re at the store and you see these spray paints, don’t worry too much.

Just think about what you’re painting and pick the one that fits from Krylon vs Rustoleum.

October 17, 2023 0 comments
0 FacebookTwitterPinterestEmail
Best Paint Brushes For Polyurethane
FurniturePaints

The Best Paint Brushes for Applying Polyurethane

by Marco Bianchi October 17, 2023
written by Marco Bianchi

Polyurethane is a durable coating that can add beauty and longevity to your projects, but using the right paint brush is important to achieve a smooth and even application. We’ll help you choose the best brush for polyurethane needs.

We’ll find everything for you to pick the perfect brush without any confusion.

We’ll find various types of brushes, including bristle brushes and foam brushes, and discuss their pros and cons. You’ll also learn about the important factors to consider when selecting a paintbrush, such as brush size and shape.

We’ll provide practical tips to ensure that your polyurethane projects turn out beautifully. So, whether you’re refinishing your kitchen cabinets, restoring a wooden table, or working on any polyurethane project, let’s make your work easier by finding the best paint brush for the work.

Let’s start and make your projects the best.

Understanding Polyurethane

Understanding Polyurethane

Think about polyurethane as a tough shield for your wood and metal belongings. It’s like a coat that makes things look great and keeps them safe. You can use it on furniture, metal storage cabinets, and floors to stop water, scratches, and damage.

To use the best brush for polyurethane the right way, you need the right tools, like brushes. If you don’t have the right tools, it can be a bit tricky. So, ensure you have the right gear to make your wood and metal things look awesome and stay protected. With the right tools, you can be the hero your furniture and floors need.

So, be ready to release the power of polyurethane and keep your valuable things safe and looking fantastic. For DIY and home improvement, polyurethane is your handy helper. With the right tools, you can be the hero your furniture and floors deserve.

So, ensure you’ve got the gear to change your items into showstoppers while providing them with the tough protection they need. Take the power of polyurethane and safeguard your cherished belongings in style.

Characteristics of the Best Brushes for Polyurethane

Characteristics of the Best Brushes for Polyurethane

1. Bristle Material

Choosing the right brush bristles is important when you’re working with polyurethane. For polyurethane projects, go for brushes with natural bristles like those made from hog hair. But why, you ask? Well, These best brushes for polyurethane are special.

They can grab onto the polyurethane and spread it out evenly. Think about that. With the right brush, you can make it all smooth and nice. Natural bristle brushes do the same thing for polyurethane. They help you get a perfect, smooth finish that looks good.

So, when you’re getting ready to use polyurethane, don’t forget to pick a brush with hog hair or other natural bristles. It’s not just about making your work easier. It’s about getting a fantastic result. When you use the right brush, applying polyurethane becomes a breeze, and your project turns out awesome.

2. Brush Shape

The brush you pick matters when you’re working with polyurethane. For polyurethane, it’s best to use a flat or angled brush. These brushes are like the pros’ secret tools because they make it easy to apply polyurethane just the way you want, especially when you’re working on flat surfaces.

A flat best brush for polyurethane has a wide, flat surface that’s ideal for covering big areas smoothly. It’s a bit like using a paint roller for polyurethane. Now, an angled brush has slanted bristles that make it clear to get into corners and tight spots so you can be precise.

So, if you want your polyurethane work to look nice and even, don’t forget to grab a flat or angled brush. They make it plain to do top-notch work, whether you’re sprucing up furniture or adding a protective coat to your floors or cabinets.

3. Size Matters

Choosing the right brush is important for your project, just like picking the right tool for a work. It’s all about the size of the brush. If you’re working on a big area, like painting a huge wall in your house, go for a wide brush.

A wide brush can paint a big space in one go, making your work faster and simpler. But when you’re dealing with smaller tasks, like fixing up little things or doing crafts, grab a narrower brush. A narrow brush lets you be accurate. Think about painting a short picture frame or adding little details. A narrow brush helps you do it carefully and without mistakes.

So, match your brush size with your project size. If you do that, you’ll get awesome results. Whether you’re taking on a big painting work or doing some fine detail work, choosing the best brush for polyurethane can make a big difference in how well you do.

4. Quality Matters

If you want your art or projects to look awesome, using fantastic brushes is important. The best brushes for polyurethane are built to last because they’re made strong with handles and bristles that won’t come off.

When you use them, they don’t just work for a long time; they also make your work look much better. By picking high-quality brushes, you save money because they stay with you for a long while. They make your work stand out wonderfully.

It’s like a double win for your art or any project requiring brushes. Don’t underestimate how much good brushes can improve your work. So, if you want to create amazing art or projects and save money in the long run, investing in top-notch brushes is the way to go.

Best Brushes for Polyurethane

Best Brushes for Polyurethane

1. Purdy White Bristle Series

Purdy is a famous brand known for making amazing brushes. They’ve got a particular set of brushes called the White Bristle Series, which are superb for applying polyurethane.

What’s awesome is that these brushes come in different sizes and shapes, so you can pick the one that works best for your project. This best brush for polyurethane has natural bristles that are excellent at picking up paint and spreading it evenly.

Whether you’re a DIY person or a pro, using Purdy’s White Bristle Series brushes makes painting easier, and you’ll always get a fantastic finish. So, if you want top-quality brushes, choose Purdy.

They simplify painting, and your results will look amazing every time. When you use Purdy brushes, your painting projects become much easier, and the result will impress you every single time you paint.

2. Wooster Alpha Brushes

Meet the awesome Wooster Alpha Brushes. These brushes are specially made for use with water-based polyurethane coatings. They’re strong, plain to clean, and will stay in perfect shape for a long time. What makes these brushes unique is that they’re designed to work well with water-based polyurethane. Unlike other brushes, they won’t fall apart or lose their shape when they get wet.

You can count on them to last, so you won’t have to keep buying new ones. Cleaning up after your project is a breeze with Wooster Alpha Brushes. Their synthetic bristles make them easy to clean, so they’ll be all set for your next project in no time.

Say goodbye to the hassle of cleaning up brushes that don’t cooperate. To sum it up, if you want the best brush for polyurethane that is tough, simple to maintain, and rare for a smooth, streak-free finish with water-based polyurethane, go for Wooster Alpha Brushes.

3. Benjamin Moore Ultra Spec

Benjamin Moore’s Ultra Spec brushes are the best for precise and effortless painting. These brushes work well with polyurethane and other finishes. What’s rare about them is their slanted shape, which helps you control your painting, especially when you’re doing detailed work. Thinking about using these brushes feels like a walk in the park, whether you’re doing short details or covering a big area.

Their secret is their clever design. The slanted bristles help you get into tight spots and handle tricky edges without a hassle—no need to worry about messy spots or uneven coverage. So, whether you’re a pro painter or just doing some DIY, Benjamin Moore’s Ultra Spec best brush for polyurethane will make your painting projects a breeze. Enjoy painting with precision, and make your finishing touches stand out with these amazing brushes.

4. Wooster Silver Tip

The Wooster Silver Tip brushes are pretty amazing. What makes them unique? Well, it’s all about their bristles. These brushes have a mix of white and silver nylon bristles that work well together. Think about it like this: When you use these brushes to paint, it’s smooth.

The bristles are magnets for paint, so it’s effortless to spread it evenly. This means your paintwork looks great, with no weird spots or unevenness. The secret is in those singular bristles. The white and silver nylon bristles are a superb team, making sure your paint goes on smoothly without any mess. So, why pick the Wooster Silver Tip brushes? Because they make painting clear, and you get a pro-quality finish every time.

No more struggling with uneven paint or messy work. With these brushes, your projects will be simpler, and your results will be fantastic. Try the Wooster Silver Tip, the best brush for polyurethane, and enjoy the easy, professional paint work they bring to your projects. Painting perfection is just a brush away.

5. Zibra Round Brush

Zibra’s Round Brush is unique for small work and detailed work. It’s a handy tool because it’s short and round, which means you can control it easily and be precise. It’s fantastic for getting into tight spots and corners, so it’s just what you need when you want to be extra careful and get things exactly right.

Whether you’re fixing up a piece of furniture, adding a protective layer to trim, or doing any work that needs close attention, Zibra’s Round Brush is a top pick. With this brush, you won’t have difficulty reaching tricky spots or accidentally using too much polyurethane.

The best part is that Zibra’s Round Brush helps you make smooth and careful strokes so your work looks neat and professional. You won’t have to worry about making it uneven when you use Zibra’s Round Brush. It’s the best brush for polyurethane for the work when you want things to look wonderful without any worry.

6. Purdy XL Elite Monarch

Purdy’s XL Elite Monarch brushes are famous for being good. They’re made with a mix of real bristles and man-made things, giving you the best of both paintings. These brushes are perfect for painting because they let out paint like a pro and make your project look smooth.

They’re fabulous for polyurethane projects. When you use XL Elite Monarch brushes, you get the benefit of real bristles for being accurate and man-made fibers for being tough. It’s a winning combo that makes your painting tasks a breeze.

So, whether you’re a DIY enthusiast or a professional painter, this is the best brush for polyurethane. When it’s time to paint, reach for XL Elite Monarch brushes and watch your projects shine.

7. Wooster Pro Nylon/Polyester

Let’s talk about Wooster’s Pro Nylon/Polyester brushes, the go-to tools for all your polyurethane projects. These brushes are flexible because they work with both oil-based and water-based coatings. They’re tough and can be cleaned up without a fuss, so they stay in fantastic shape.

What’s cool about these brushes is that no matter how much you use them, they keep their shape. Whether your project is small or big, Wooster has different sizes to pick from, so you always have the right brush. Whether you’re a pro or just like doing things yourself, you’ll like using Wooster’s Pro Nylon/Polyester brushes.

They make putting on polyurethane effortless and make your work look professional every time. You won’t have to worry about the best brush for polyurethane getting old and tired. These brushes will be your reliable helpers for all your polyurethane work. With Wooster’s Pro Nylon/Polyester brushes, you’ll easily get a fantastic finish on your polyurethane projects.

8. Purdy Nylox Glide

Purdy’s Nylox Glide brushes are a special type of paintbrush made from a mix of nylon and polyester bristles. These brushes are great for use with different kinds of paint, even polyurethane. What makes them rare is how well you can control them, and they make your paintwork look smooth and nice. The mix of nylon and polyester in these brushes makes them strong and wonderful at spreading paint evenly.

When you use them, you’ll find them easy to handle, which helps you paint just the way you want. Whether you’re a professional painter or enjoy DIY projects, these brushes are made to make your painting tasks easier and more fun. Then you pick Purdy’s Nylox Glide brushes; you’re choosing brushes that work well and are clear to use. They’re the top choice for making your painting projects look professional and make your surfaces look their best brush for polyurethane without too much effort.

9. Wooster Shortcut Angle Sash

Meet the Wooster Shortcut Angle Sash brush, your handy helper for slight work at home. This little brush is designed to make a painting or adding a clear coat called polyurethane in tight spots clear. Think about whether you’re fixing up a little piece of furniture or giving a cramped corner a fresh coat of paint. His best brush for polyurethane is your perfect companion.

It’s short and angled, so it’s good for getting into tricky spots and making sure your work looks neat. What’s cool about it is that it can reach places where big brushes can’t go. It’s like having a unique tool for those little pieces of work that needs a gentle touch. Whether you’re a DIY pro or just like doing short projects around the house, the Wooster Shortcut Angle Sash brush is to make things simple and leave your projects looking amazing. It’s the little tool that packs a big punch.

Conclusion

Finding the best brush for polyurethane doesn’t have to be tough work. We’ve learned a few things to help you make the right choice. First and foremost, it’s important to pick a brush with the right bristles. For polyurethane, synthetic bristles are perfect because they won’t wet up the finish, making your work smoother and less drippy—next, the brush size matters. Smaller brushes work great for small projects, while bigger ones are handy for larger surfaces.

Don’t forget the handle. A comfortable handle makes your painting experience more enjoyable and reduces hand strain. Look for one that suits your grip. Lastly, clean-up is important. After you finish using the brush, give it a good wash with the suggested cleaning liquid. This will help your brush last longer.

Don’t forget that with the right brush, your polyurethane projects will be smoother than ever.

October 17, 2023 0 comments
0 FacebookTwitterPinterestEmail
DIY ProjectsHome Decor

How to Paint a Rainbow on a Wall: Complete Guide

by Marco Bianchi October 17, 2023
written by Marco Bianchi

If you are thinking about how to Paint a rainbow on a wall, then there are some ways and things you can do. We’ll help you how to paint a rainbow on a wall with many steps. Painting a rainbow on a wall is a colorful and fun way to bring a touch of happiness and creativity to any room.

If you’re decorating a child’s bedroom or just adding some energy to your space, this simple DIY project can brighten up your day. You don’t need to be an artist to do this; all you need are some basic painting supplies and a little bit of patience. We will talk about choosing the right colors, preparing your wall, and creating those beautiful arches of color. You’ll be amazed at how a few strokes of paint can change a plain wall into a work of art.

So, get your brushes ready, and let’s check how to paint a rainbow on a wall and start painting the rainbow.

Materials You’ll Need to Paint a Rainbow on a Wall

Materials You'll Need to Paint a Rainbow on a Wall

Before you start painting your rainbow, you’ll need to gather the necessary materials. Here’s a list of what you’ll require:

1. Paint: Acrylic paints are an excellent choice for this project. They offer bright colors and are easy to work with. You’ll need the primary rainbow colors: red, orange, yellow, green, blue, indigo, and violet.

2. Paintbrushes: A variety of brush sizes will be helpful. You’ll need larger brushes for the broad strokes and smaller ones for the finer details.

3. Painter’s Tape: This will help you make clean, straight lines for your rainbow.

4. Drop Cloths or Plastic Sheets: To protect your floor and furniture from paint splatters.

5. Pencil and Eraser: To sketch the outline of your rainbow.

6. Ruler or Straight Edge: For creating precise lines.

7. Palette: Mix and blend colors.

8. Water and Containers: For cleaning brushes and diluting paint if needed.

9. Paper Towels or Cloth Rags: To wipe excess paint and clean brushes.

10. A Step Ladder: To reach higher areas if necessary.

Gather Your Colors

Gather Your Colors

When Gathering your Colors, think about how to paint a rainbow on a wall. The paint you need to make a rainbow. So, what colors do you need? That stands for Red, Orange, Yellow, Green, Blue, Indigo, and Violet. Think about these colors in your mind, and make sure you have enough paint for each. Before you start painting, you want it to be as smooth as possible, clean it up, and make it nice, and even this helps your rainbow shine and look its best. It’s time to plan where your rainbow will go. How to paint a rainbow on a wall: first steps to gather your colors. Sketch the Rainbow means drawing a gentle outline with a pencil.

Prepare the Wall

Prepare the Wall

This is an important step to prepare the wall before you add the lively colors of your rainbow. Preparing the wall is close to setting the perfect for an artwork that attracts. Begin by analyzing your wall, ensuring it’s free from any dust, dirt, or imperfections. How to paint a rainbow on a wall smooth surface is key to achieving a perfect finish for your rainbow masterpiece. Take the time to wipe down the wall, addressing any irregularities, so your colors can shine without any scratches. Consider the type of paint you’re working with. Select high-quality, water-based paints that not only confirm a loaded and long-term color but also make the application process smoother. This choice increases the overall beauty and long life of your rainbow creation. As you get ready to start this artistic way, try it, where the arch of your rainbow will show in an attractive way.

Sketch the Rainbow

Sketch the Rainbow

When you think about how to Paint a rainbow on a wall, the rainbow helps to complete your thinking. Sketching the Rainbow, a Playful opening to Colorful Creativity. Let’s talk about sketching the rainbow on your wall. This step is like creating a vision for your colors when you’re about to start. Think about your wall as a palette awaiting the rainbow. Before you pick up a paintbrush, take a moment to look at the graceful shape your rainbow will follow. Don’t worry about perfection. This is a gentle test outline, such as the first strokes of a storyteller’s pen. Use a pencil, the quiet conductor of your creative band. With its lead, decorate the initial art of your rainbow, letting your thinking guide the way. The placement is a forming display. As your pencil side, you’re not just outlining, you’re mapping out a route for the shade to follow, ensuring each color finds its place in the multicolored combination.

Painting Order Matters

Painting Order Matters.jpg

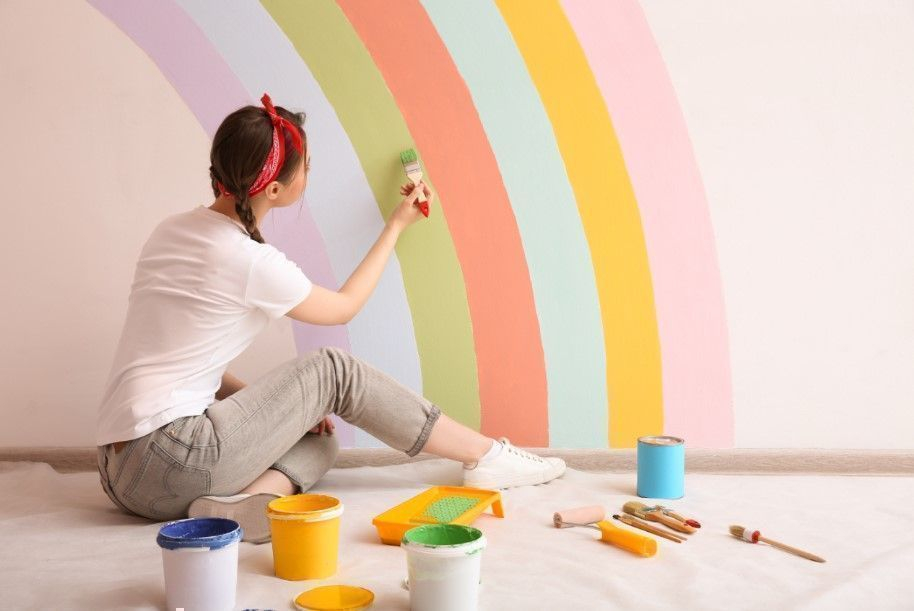
Painting order when creating your showing rainbow. Thinking about how to paint a rainbow on a wall? You’ve got your method, art your wall ready for an upgrade. Now, why does the sequence of colors matter so much? Think of a rainbow, and each color is important for making this. To bring out the best in your rainbow, you start with the brightest color at the top, red. As you move down the wall, transitioning through orange, yellow, green, blue, indigo, and finally, violet. You’re making an attractive masterpiece. This specific order isn’t just a random choice; it’s the part of that iconic rainbow look we all appreciate.

Blend and Overlap

Blend and Overlap

Making balance in Rainbow Colors is important. Let’s talk about the interesting Blend and Overlap and how to paint a rainbow on a wall in the context of painting a rainbow on your wall. This step ensures your rainbow transitions easily from one color to the next, giving it that thrilling and blended effect.

1. Blending

When discussing blending, consider it the gentle dance between colors and how to paint a rainbow on a wall. As you paint your rainbow, especially where two colors meet, use your brush to mix them slightly. This blending softens the transition and removes any distinct lines between colors. It’s similar to a gentle grade, allowing each color to flow smoothly into the next. where the colors in the sky meld together easily. Similarly, in your rainbow, blending makes that attractive, almost pleasing environment, making your wall art feel more fine.

2. Overlap

How to paint a rainbow on a wall overlap. Overlap pictures of the colors of your rainbow as a partner. As you paint, let them walk hand in hand, sometimes crossing paths. Overlapping involves allowing one color to cover another at the point where they meet slightly. This overlapping technique ensures that your rainbow doesn’t look like disconnected lines. Instead, it forms a family and balanced whole. Think of a Venn diagram where the colors share a little space, symbolizing unity and collaboration. In your rainbow, this makes a continuous flow and shows pleasant vibes.

Add Clouds for Beauty

How to paint a rainbow on a wall helps with adding clouds for beauty. Let’s give beauty to your rainbow masterpiece by introducing some fluffy clouds. Think about a rainbow extending from one end to the other, and at each end, beautifully paint playful clouds. These clouds aren’t just any clouds. They’re the part that adds a fairytale vibe to your creation.

1. Creating Cloud decorative

How to Paint a Rainbow on a Wall: you can choose creative cloud decorative ideas. Let me tell you what you can do with cloud decorates. Choose a light white or soft gray paint to craft clouds that seem to twirl with the colors of the rainbow. These clouds aren’t just there for show. They provide a wonderful difference and support the overall environment.

2. Brush Technique Matters

How to paint a rainbow on a wall helps with Brush Technique Matters. As you start on cloud creation, adjust your brush technique. Think light strokes, gentle curves, and a vibe of artistic skill. These clouds are the supporting part of your rainbow’s role, so make them soft and inviting.

3. Positioning for Balance

How to paint a rainbow on a wall with the help of positioning your clouds. Placing them at each end of your rainbow not only adds amazing balance but also makes a fascinating narrative. It’s as if your rainbow is peeking out from behind these clouds, ready to brighten anyone’s day.

4. Tailor Cloud Size

Clouds come in all shapes and sizes. Make the size of your clouds to complement the scale of your rainbow. It’s too big, and they might steal the show. They are too small, and they could get lost in the colorful display. Efforts for that perfectly balanced clouds.

5. Blend with The Rainbow

Blend the sides of your clouds slightly with the surrounding rainbow colors. How to paint a rainbow on a wall: the fine blending ensures a smooth transition between the clouds and the rainbow, improving the overall sight request.

6. Step Back and Compliment

Once your cloud is in place, take a step back and compliment the modification of the wall. Those added clouds aren’t just a decorative vibe. They’re the satisfying detail that takes your rainbow from lovely to completely unreal.

Let It Dry

Let It Dry

After you’ve painted your rainbow on the wall with all those awesome colors, you need to give it some time to dry. When you finish painting your rainbow if you want to add more colors right away. Let the paint do its thing and dry out completely. This way, your rainbow stays bright, and you won’t accidentally mess up the colors.

Finishing Touches

Finishing Touches.jpg

After the paint has dried and you’ve made any necessary touch-ups, step back and admire your handiwork. A rainbow on your wall can instantly boost the environment of your room, creating a cheerful and inviting atmosphere. Here are some additional tips for finishing touches.

1. Furniture and Decor

Arrange furniture and decor items that complement the rainbow theme. Colorful cushions, artwork, or curtains can improve the overall look.

2. Lighting

Consider installing soft, warm lighting to highlight your rainbow wall, especially if it’s in a bedroom or nursery. This can create a warm atmosphere.

3. Personalization

If you’re painting a rainbow in a child’s room, you can add their name or a meaningful quote using stencils or freehand painting.

4. Maintenance

To keep your rainbow looking fresh, periodically wipe it down with a damp cloth to remove dust and dirt.

Seal the Deal

Seal the Deal

Seal the Deal means taking a final step to confirm the long life and protection of your artwork. After you’ve successfully painted the rainbow and allowed it to dry, applying a clear Protector is like adding a protective shield. This clear Protector is a barrier, safeguarding your colorful creation from potential damage or wear over time. Think of it as a finishing touch that not only maintains the brilliance of your artwork but also makes it easier to clean if needed. So, sealing the deal is the last action you take to secure and increase the beauty of your painted rainbow. So, it stays delightful for a long time.

Enjoy Your Colorful Creation

Enjoy Your Colorful Creation

In the final step, take a moment to show the beauty of what you’ve made. Stand back, drown in the lively colors, and appreciate the feeling that your masterpiece brings to the space. This is the time to enjoy the bright atmosphere you’ve added to your surroundings.

Conclusion

Now, you know, how to paint a rainbow on a wall. Painting a rainbow on a wall is a fun and creative project that anyone can try. It’s not just about colors; it’s about spreading positivity in your space. Start by gathering your materials, such as paint, brushes, and tape. Plan your rainbow carefully, choosing the right order of colors, red, orange, yellow, green, blue, and purple. Prepare your wall by cleaning and priming it. Apply the paint in even strokes, letting each color dry before adding the next one. Take your time to make it look pretty.

If you make a mistake, don’t worry; you can always fix it. Once your rainbow is complete, step back and praise your work. It symbolizes hope and happiness that can brighten up any room. Painting a rainbow on your wall is a wonderful way to express your creativity and bring a smile to your face. So, grab your paintbrushes and start spreading those colorful vibes.

Enjoy the process and the beautiful rainbow you’ll make.

Frequently Asked Questions

How Do I Prepare the Wall Before Painting?

Start by cleaning the wall to remove any dust or dirt. Then, apply a primer to make a smooth surface for the paint to adhere to.

What Is the Best Way to Make a Rainbow Shape on The Wall?

You can use a pencil and a measuring tape to mark the center point of your rainbow arch. Then, use a level to draw a curved line connecting the two ends of the rainbow.

In What Order Should I Paint the Colors of The Rainbow?

Start with the outermost color, which is typically red, and work your way inward—following the order of the rainbow: red, orange, yellow, green, blue, indigo, and violet.

How Many Coats of Paint Should I Apply for Each Color?

Depending on the quality of your paint and the color you’re working with, two coats of paint are usually enough. However, you may need more coats for better coverage.

How Do I Ensure the Colors Blend Smoothly?

To achieve smooth transitions between colors, blend the edges while the paint is still wet. This can be done by gently feathering the edges with a clean brush.

October 17, 2023 0 comments
0 FacebookTwitterPinterestEmail
Paint for Veneer Furniture: How To and Tips and Tricks for A Smooth & Durable Finish
FurniturePaints

Best Paint for Veneer Furniture: Expert Tips for The Perfect Finish

by Marco Bianchi October 17, 2023
written by Marco Bianchi

Veneer furniture is popular because it’s affordable and flexible, but with time, it can begin to seem down and damaged. Veneer furniture, often made with a thin layer of wood glued onto a strong base, can be a little difficult to paint if you don’t know the right steps. But worry not; we learn to make it as easy as possible.

Find the simple and plain process of painting veneer furniture to achieve a smooth and long-lasting finish. We’ll find all the basics, from choosing the right paint and tools to preparing your furniture for painting. We share some handy tips and tricks to ensure your paintwork looks professional and lasts for years to come. We’ll find everything you need to know about painting veneer furniture. Be ready to create a fresh, durable look with your furniture shining like new.

Let’s get started and find paint for veneer furniture.

Preparing Your Veneer Furniture

Preparing Your Veneer Furniture .jpg

1. Clean Thoroughly

Before you start painting, it’s important to make your furniture nice and clean. Get clear of all the dust, dirt, and any gross things you might find. First, mix some mild soap with water. Then, use that soapy mix to wipe your furniture all over gently. Following that, wash it with fresh water. Now, it’s time for the waiting phase. Leave your furniture to dry completely. This step is really important because it helps the paint stick better. Once your furniture is clean and dry, it’s all set for a fresh coat of paint for veneer furniture. Doing this cleaning work will make sure your project spot is amazing when you’re all done. So, go and enjoy your painting project. Make your furniture view fantastic.

2. Sanding

Before you start painting on the veneer, give it a good sanding. This step is important to help the paint stick well. You only need some fine sandpaper, preferably around 150-220 grit. Then, gently sand the whole piece. This makes the surface a little rough so the paint can grab onto it. But be careful not to sand too hard. You don’t want to damage the veneer. So, take it easy, and your paint for veneer furniture will stay put nicely. Taking your time and being gentle during the sanding process ensures that your paintwork will stick securely, just like glue. So, remember that a little sanding before painting can make a big difference in the final result. It gives your veneer project a polished and long-lasting finish that seems great.

3. Fill Imperfections

If you want to make your furniture seem better, follow these effortless steps. First, check your furniture for bumps, scrapes, or holes. If you find any, don’t worry; we can fix them. Use something called wood filler. Put it in the bumps, scrapes, or holes to fill them up. Then, wait for it to dry. It might take a few hours, but it’s worth it. When the wood filler is dry, it’s time to make it shiny. Get some sandpaper and gently rub it on the fixed spots. Keep rubbing until they’re nice and even with the rest of your furniture. That’s it. Your furniture will seem new, and everyone will be impressed. It’s a clear way to make your furniture better and more beautiful.

4. Prime the Surface

If you want your veneer furniture to look fantastic when you paint it, follow these simple steps. Start by getting a good wood primer. Think of it as a special base coat that helps the paint stick and hides the lines in the wood. You can apply it with a brush or use a spray can. It’s easy. Just follow the instructions on the label, especially how long it takes to dry. Using the right primer is important. It ensures your paintwork stays put for a long time without chipping or coming off, so when you’re painting veneer wood, don’t forget that the first coat of primer is important.

Choosing the Right Paint

Choosing the Right Paint

1. Latex or Oil-Based Paint

When you’re choosing paint for veneer furniture, it’s important to understand the differences. Latex paint is like water-based paint. It’s clear to clean with water, and it’s not very harmful. It dries quickly and doesn’t smell bad, so it’s amazing for indoor projects. On the other hand, oil-based paint sticks better and lasts longer. It’s amazing for furniture that gets a lot of use, and it makes the surface polished. But, you need special liquids to clean it, which has a stronger smell. Think about where you’re painting, how good you are at painting, and how you want to clean up when you’re deciding between the two types of paint.

2. Acrylic Paint

Acrylic paint is a perfect pick for sprucing up veneer furniture. It’s similar to water-based paint but sticks well and lasts a long time. You can find acrylic paint in many colors, and it’s effortless to use and dries quickly. You can even mix it with water or special acrylic things to make it seem old or worn on purpose. It’s important to put a clear coat on top of your acrylic-painted furniture to keep it safe and looking wonderful for a long time. So, go and use acrylic paint for veneer furniture to give your furniture a fresh, cool appearance.

3. Spray Paint

Spray painting veneer furniture can be useful for small projects and fancy designs. If you do it right, it’ll be nice and pro. To start, make sure you get the surface ready by sanding it and putting on some primer. This helps the paint stick well. When you’re spray painting, be careful and work in a place with fresh air. This way, you won’t make a mess, and you’ll stay safe. With the right preparation and care, spray painting can be a great way to make your veneer furniture seem awesome. Whether you want to give a new view to an old piece or add your personal touch, spray paint can help you do it. So, grab your gear, pick a perfect spot, and get creative as you change your veneer furniture with a fresh coat of paint for veneer furniture. It’s easy and fun.

4. Quality Matters

If you want your veneer furniture to seem amazing, don’t be stingy with your paint and primer. Get the best paint for veneer furniture and primer. That’s the trick. The good things stick well, won’t chip or peel, and leave a smooth finish. You’ll be fixing it or redoing it way too much. So, pick brands that people trust for being strong and having cool colors. When you do that, your veneer furniture will seem perfect and stay that way for a long time.

Applying the Paint

Applying the Paint .jpg

1. Use Thin Coats

When you paint, using thin layers of paint is better than using thick ones. Using thin layers is great because they dry fast, so you won’t have to wait long. They’re less likely to create those annoying drips and streaks that can mess up your project. If you use several thin layers, your paint for veneer furniture work will look polished and shiny. Thin layers are a wonderful choice: they dry fast so that you can move on with your project sooner. Thick layers, on the other hand, take longer to dry and can test your patience. Thin layers also give you better control over your brush or roller, making it easier to avoid those frustrating drips that can ruin a shiny surface when you put on several thin layers, fixing imperfections and giving it a professional appearance.

2. Proper Brushing Technique

For the best painting results, you want to make sure you’ve got the right brush. If you’re using latex paint, grab a synthetic brush. If you’re using oil-based paint, go with a natural brush. When you’re painting, try to follow the wood’s lines, you know, those lines you see on the wood. Now, another thing to keep in mind is don’t overdo it with the brush strokes. If you use too many, your surface will be bumpy and uneven. Instead, keep it simple and steady for a nice, smooth finish. So, these two things, the type of brush you need depends on your paint for veneer furniture, and always paint in the same direction as the wood lines. With these basics in mind, you’ll be ready for a successful painting project.

3. Sand Between Coats

Once your paint is dry, you can make it shiny for the next coat. Just get some fine sandpaper and gently rub the painted area. This gets clear of any little problems and makes it nice and even. But the important part is that before you put on more paint for veneer furniture, use a clean cloth or paper towel to wipe away all the dust from sanding. This way, your new coat will go on smoothly and won’t have any bumps or specks. It’s all about the small things that make your paintwork view great. So, sand, wipe, and do it again until you like how it is viewed. Your walls will be nice and polished.

4. Topcoat for Protection

To make your furniture stronger and protect it from everyday use, follow this clear step. After your paint for veneer furniture dries completely, add a clear top layer like polyurethane or polyacrylic. It’s see-through and tough, guarding your painted surface from scratches, spills, and regular accidents. Using the topcoat is effortless. Once your paint is all dry, paint on a thin, even layer of the clear topcoat. Let it dry, and you’re finished. Now, your furniture can handle all the bumps and scrapes of daily life. So, this simple trick to keep furniture seems perfect for a long time. Put on that clear topcoat and give your furniture the safety it needs.

Final Tips and Tricks

Final Tips and Tricks

1. Prime

If you want to make your veneer furniture view wonderful with new paintwork, do these easy steps. First, get some primer, which is special wood paint. You have the option to apply it either with a brush or by using a spray. Make sure you spread it evenly, not too thick or too thin. Now, be patient and let the primer dry. Typically, it requires about one to two hours. This step is important because it makes the paint for veneer furniture ready for painting. Once the primer is completely dry, have fun and paint your furniture in any color you like. It can be a bright color or a soft one, your choice. Follow these clear steps, and you’ll turn your veneer furniture into something fantastic in no time. Getting it ready and waiting for things to dry is the key to making your furniture spot amazing with new paintwork. Enjoy your freshly painted furniture.

2. Thin Coats

When you’re painting veneer furniture, keep it plain and use thin layers of paint. Don’t go for thick coats. They cause messy drips and make your finish all uneven. Instead, follow this clear plan: put on one thin coat, let it dry completely, and do another. It may take a little longer, but the benefits are definitely worth the wait. You’ll have a shiny, pro-looking finish with no clumps or bumps. Your paint for veneer furniture work will last longer and stay looking great. When you’re cleaning up your veneer furniture, go slow and steady with those thin coats. Your furniture will seem awesome, and everyone will be impressed.

3. Dry Times

To make your veneer furniture view good, take it slow and follow these easy steps. First, put on a coat of primer or paint that’s made for veneer furniture. After that, don’t rush. Let it dry completely. This might take around 2 to 4 hours, but you can always check the paint can for the exact time. If you try to hurry, you won’t get a nice finish. It might end up feeling sticky or have smudges. So, be patient, let it dry well, and your furniture will turn out awesome. It’s worth waiting for a beautiful finish that makes your furniture shine like it’s new. Therefore, feel free to proceed at your own pace and savor the experience.

4. Sanding

Sand between layers of paint or finish. After you’ve put on a coat of paint, let it dry completely. Then, get some sandpaper that says 220 on it. It’s not hard to find; it seems the number 220 on the sandpaper. Now, take that sandpaper and gently rub it on the painted surface. Don’t press too hard; just let the sandpaper do its work. This paint for veneer furniture will make the surface polished and clear of any bumps or drips. Don’t forget to be gentle while doing this. You don’t want to damage the surface under the paint. After you’ve sanded, use a clean cloth or a special tack cloth to wipe away the dust. This gets clear of the sanding things so that the next coat of paint or finish goes on nicely. Keep doing this after each coat dries, and your project will be awesome when you’re done. So, always remember to sand between coats to make your project spot its best.

5. Protect

If you’ve painted your veneer furniture and want it to last, wait about a day after painting, then put on a clear coat. This clear coat protects your furniture from getting scratched, stained, or worn from everyday use. You can choose between a not-shiny (matte) or shiny finish, depending on your way. It’s all about what you like. By doing this simple step, you’ll make sure your painted veneer furniture stays nice and safe. This paint is for veneer furniture. You can enjoy it for a long time without any worries. It’s an easy way to care for your furniture and observe it well.

Conclusion

Painting veneer furniture can be a simple and rewarding project if you follow some plain tips and tricks. By getting the surface ready, picking the right paint for veneer furniture, and putting it on with care, you can make your furniture smooth and strong. This will totally change your furniture and make it brand new.

First, don’t forget to clean and sand the veneer surface to create a shiny surface for your paint. Use a primer to help the paint stick better and prevent it from chipping or peeling. When it comes to choosing paint, select a high-quality water-based or oil-based paint that suits your needs. Apply the paint evenly in thin coats, allowing each coat to dry completely before adding another. Lastly, consider adding a clear topcoat for extra protection and a polished appearance.

Follow these effortless steps, and you’ll have your veneer furniture looking brand new in no time.

October 17, 2023 0 comments
0 FacebookTwitterPinterestEmail
Can You Really Spray Paint Glass? +10 Best Spray Paint for Glass
Paints

Can You Really Spray Paint Glass? +10 Best Spray Paint for Glass

by Marco Bianchi August 22, 2023
written by Marco Bianchi

Have you ever tried spray paint for glass? If not, then get stressed. There are a few things you should keep in mind to ensure that the paint adheres properly and doesn’t chip or peel off. First, make sure to thoroughly clean the glass with rubbing alcohol or vinegar to remove any dirt, dust, or fingerprints.

Then, lightly sand the surface of the glass with fine-grit sandpaper to create a rough texture that the paint can grip onto. Finally, use a spray paint specifically designed for glass or ceramic surfaces, and apply several thin coats, allowing each coat to dry completely before applying the next one.

With these tips in mind, you should be able to achieve beautiful and long-lasting painted glass!

Steps to Follow to Spray Paint Your Glass Properly

Steps to Follow to Spray Paint Your Glass Properly

Step 1: Cleaning Your Glass Properly

When it comes to spraying paint onto glass, the process can be a bit tricky. However, with a few simple steps, you can achieve a beautiful and long-lasting painted glass piece. Firstly, it’s important to clean the glass surface thoroughly with rubbing alcohol or vinegar. This is necessary to remove any dirt, dust, or fingerprints that can interfere with the paint’s adhesion.

Step 2: Removal of Residue

Once the glass surface is clean, you should proceed to sand the surface with a ne-grit sandpaper lightly. This will create a rough texture that the paint can grip onto, which is essential for proper adhesion. After sanding, it’s important to wipe the glass with a damp cloth to remove any sanding residue.

Step 3: Preparation of Paint

To prepare your paint for spray painting a glass, you will need to follow a few simple steps. First, choose a paint that is designed for use on glass surfaces. Next, mix the paint thoroughly to ensure that it is evenly blended and free of any lumps or clumps. Then, pour the paint into your spray gun or airbrush and adjust the settings according to the manufacturer’s instructions. Finally, test the paint on a small, inconspicuous area of the glass to ensure that it adheres properly and dries evenly. With these steps completed, you should be ready to begin your spray painting project with confidence.

Step 4: Apply the Paint

Now comes the fun part – applying the paint! It’s important to use spray paint that is specifically designed for glass or ceramic surfaces. This type of paint is formulated to bond with glass surfaces and will provide a long-lasting finish. When applying the paint, it’s best to apply several thin coats, allowing each coat to dry completely before applying the next one. This will help to prevent the paint from dripping or running. It’s also important to remember that temperature and humidity can affect the paint’s drying time.

Step 5: Final Touches

Make sure you are painting in a well-ventilated area and follow the manufacturer’s instructions for optimal drying time. Once the paint has dried completely, you can add any additional details or designs with a paint marker or brush.

Step 6: Summing Up

In summary, spray painting glass is definitely possible and can result in a beautiful and unique piece of art. However, it’s important to follow the proper steps to ensure proper adhesion and a long-lasting finish. With a little patience and attention to detail, you can create a stunning painted glass piece that you can enjoy for years to come.

Precautions to Take While Spray Painting Your Glass

Precautions to Take While Spray Painting Your Glass

When spray painting glass, it’s important to take several precautions to ensure that the process is safe and successful.

Here are five important precautions to take:

  • First, make sure to work in a well-ventilated area to avoid inhaling any fumes. It’s also important to wear gloves and a mask to protect your skin and lungs.
  • Before spraying, clean the glass thoroughly to ensure that the paint adheres properly.
  • Additionally, avoid spraying too close to the glass to prevent drips and uneven coverage.
  • Finally, allow the paint to fully dry and cure before handling the glass to avoid any smudging or damage.
  • By taking these precautions, you can achieve a beautiful and lasting finish on your glass projects.

Problems that Can Occur While Painting Your Glass

Problems that Can Occur While Painting Your Glass

When painting glass, it’s important to be aware of some of the common problems that can arise.

  • An issue that many people encounter is streaks or smudges on the surface of the glass. This can be caused by a variety of factors, including using the wrong type of paint or not properly preparing the surface of the glass before painting.
  • Another issue that can arise is paint that chips or peels off over time. To avoid this problem, it’s important to use high-quality paint and apply it evenly and in thin layers.
  • It is important to be aware of the potential for the paint to run or drip, which can be particularly problematic if you’re working on a vertical surface. To avoid this problem, be sure to use a steady hand and work slowly and carefully.

With a little bit of care and attention, however, it’s possible to create beautiful, long-lasting painted glass pieces that you can enjoy for years to come.

How to Choose a Spray Paint for Your Glass?

How to Choose a Spray Paint for Your Glass

When choosing spray paint for your glass, there are a few things to consider.

  • Make sure you choose a spray paint that is specifically designed for glass surfaces. This will ensure that the paint adheres properly and doesn’t peel or chip off. Look for paint that is labeled as “glass paint” or “glass enamel.”
  • Next, consider the color and finish you want for your glass. Some spray paints come in a variety of colors and finishes, from matte to glossy. Think about the overall look and feel you want to achieve and choose a paint that matches your vision. It’s also important to consider the durability of the spray paint. If you’re painting a glass surface that will be exposed to the elements or handled frequently, you’ll want to choose a paint that is designed to withstand wear and tear.
  • Finally, make sure to read the instructions on the spray paint can carefully before using it. Some paints require multiple coats or specific drying times, so be sure to follow the instructions to ensure the best results.

By keeping these factors in mind, you can choose the right spray paint for your glass and achieve a worthy viewing glass for your home!

Types of Paint that Can Be Used for Spray Painting Your Glass

Types of Paint that Can Be Used for Spray Painting Your Glass

When it comes to spray painting glass, there are a variety of options available. Some popular choices include using:

  • Frosted glass spray paint for a subtle, opaque finish
  • Metallic spray paint for a bold, shiny look
  • Stained glass spray paint for a colorful, translucent effect
  • You can also choose between glossy or matte finishes, depending on your preference. Before you begin, make sure to thoroughly clean and prepare your glass surface for the best results by following the steps given above.

Awesome Spray Paint Suggestions for Your Glass

1. Krylon K09055007 Sea Glass Paint

Krylon K09055007 Sea Glass Paint

The Krylon spray paint comes in sea foam color with seven other color options. It has a gloss finish. This item comes with a volume of 12 quarts. This product is recommended to be used on indoor glasses for the best results. With this sea glass spray paint, your indoor glass is going to have a beautiful frosted look. This seafoam paint will give your glass a semi-translucent look and the sea glass finish that brings the beach indoors. You can spray this sea green foam on vases, glasses, platters, and more for an absolute dreamy powdery look. This spray paint takes 15 minutes to dry and can cover a surface of 25 square feet.

2. Door and Window Shading Frosted Glass Paint

Door and Window Shading Frosted Glass Paint

The hazy frosted glass spray paint is waterproof and UV resistant. The specialty of this spray paint is that it is a window privacy spray for all smooth and flat glass surfaces. This spray paint comes with a glass finish. The shading frosted glass paint by Poiu comes with five major benefits. First, Privacy is protected as the frosted glass paint can not clearly see the indoor situation on the surface, giving a very vague feeling. Second, UV Protection, this paint effectively reduces annoying glares by up to 80% and blocks out UV rays by up to 96%. Third, it can be applied to both smooth and flat glass surfaces. Fourth, it is best for DIY glass decoration activities. Fifth, it reduces renovation costs as it helps you to decorate your glasses at home at lower costs rather than hiring any professionals for that.

3. Rust-Oleum 331171 Painter’s Touch 2 X Ultra Cover Spray Paint

Rust-Oleum 331171 Painter’s Touch 2 X Ultra Cover Spray Paint

This spray paint comes in 127 color options, 13 size options, and 8 style options for you to choose from, whichever one looks perfect for your glass type, size, and color. This spray paint by Rust-Oleum that you can see above is of High gloss white color. The finish type of this spray paint is glossy. The special features of this spray paint are that it has a low odor and it is chip resistant. The surface recommendations for this spray paint are metal, ceramic, plastic, and wood. It comes with an oil-based formula which makes it low in odor, chip resistant, and long-lasting protection. It dries to touch in 20 minutes and can cover up to 12 sq. feet per can. This durable formula provides excellent hide and goes on smoothly on the surface.

4. Rust-Oleum 7701830 Stops Rust Spray Paint

Rust-Oleum 7701830 Stops Rust Spray Paint

Rust-Oleum’s Spray paint comes in 70 color options, 9 size options, and 4 style options. This one shade of Rust-Oleum spray paint is of gloss crystal clear color. The paint type of this paint is enamel. It can be painted on the glass surface and also on metal and wood surfaces. This spray paint has weather and corrosion coating that protects exterior and interior surfaces like wood, metal, concrete, etc. It has an oil-based formula that provides a durable protective coating with excellent rust prevention. It dries to touch in 2 to 4 hours and covers up to 15 sq. ft. It has excellent resistance to abrasion, fading, and chipping. It has a glossy finish that provides fresh shine to the surfaces.

5. Krylon K09028000 Stained Glass Paint

Krylon K09028000 Stained Glass Paint

As someone who enjoys adding unique touches to my home decor, we recently discovered Krylon K09028000 stained glass paint. This paint is perfect for creating a stained glass effect on glass surfaces. We were impressed with how easy it was to use, and the finished product looked stunning. The paint provides a translucent finish that lets light shine through, creating a beautiful and colorful effect. We also appreciate that it’s durable and long-lasting, so we don’t have to worry about it fading or peeling over time. Overall, we highly recommend Krylon K09028000 stained glass paint to anyone looking to add a creative touch to their home decor.

6. Rust-Oleum 245221 Universal All-Surface Metallic Spray Paint

Rust-Oleum 245221 Universal All-Surface Metallic Spray Paint

Rust-Oleum 245221 universal all-surface metallic spray paint is a great choice for anyone looking to add a metallic touch to any surface, including glass, metal, wood, concrete, masonry, and more. With its advanced formula, it provides superior coverage and durability, ensuring that your project will look great and last for a long time. The paint dries quickly, and the metallic finish is smooth and shiny, helping your project stand out from the crowd. Rust-Oleum 245221 universal all-surface metallic spray paint is also versatile and can be used for indoor and outdoor projects. It’s a great option for adding a touch of glam to furniture, decor, or even outdoor fixtures like mailboxes or planters.

7. Seymour 16-083 Good GripSlip Resistant Coating Spray

Seymour 16-083 Good GripSlip Resistant Coating Spray

Seymour 16-083 Good Grip Slip Resistant Coating Spray is perfect for anyone looking to add slip resistance to surfaces like ramps, stairs, and floors. Its advanced formula makes it easy to apply and provides a long-lasting, durable finish that will help prevent slips and falls. The coating dries quickly, and the surface is smooth and slip-resistant, making it safe for people to walk on even when it’s wet. Seymour 16-083 Good Grip Slip Resistant Coating Spray is also versatile and can be used for indoor and outdoor projects. It’s an excellent option for anyone looking to improve the safety of their home or workspace.

8. Krylon K03104777 Lemon Yellow Fluorescent Paint

Krylon K03104777 Lemon Yellow Fluorescent Paint

Krylon Lemon Yellow Fluorescent Paint is perfect for adding a pop of bright color to any project. It has a fluorescent finish that really stands out in natural light. The fast-drying formula makes it easy to apply and provides excellent coverage on a variety of surfaces, including wood, metal, and plastic. The Krylon Lemon Yellow Fluorescent Paint is also durable, providing long-lasting color that won’t fade or chip easily. It’s great for use on both indoor and outdoor projects. Overall, if you’re looking to add a vibrant touch to your next project, the Krylon Lemon Yellow Fluorescent Paint is a great choice.

9. Krylon K05223000 Chalkboard Brush-On Paint Black

Krylon Chalkboard Brush-On Paint Black is a high-quality paint that is perfect for creating a chalkboard surface on a variety of indoor surfaces. This versatile paint dries to a smooth, hard finish that is perfect for writing and drawing on chalk. It is easy to apply, and the fast-drying formula makes it perfect for use on a variety of surfaces, including wood, metal, and plastic. This paint is long-lasting and durable, providing a surface that is easy to clean and maintain. It is also water-resistant, making it an excellent choice for use in kitchens, classrooms, and other high-traffic areas. Overall, if you’re looking for reliable and easy-to-use chalkboard paint, Krylon K05223000 Chalkboard Brush-On Paint Black is an excellent choice.

10. Brilliant Spray Paint Krylon Metallic Copper

Brilliant Spray Paint Krylon Metallic Copper

Looking for a high-quality spray paint that will add a touch of brilliance to your next project? Look no further than Krylon General Purpose Spray Paint in Metallic Copper. This versatile paint is perfect for use on a wide range of surfaces, including metal, wood, plastic, and more. With a smooth, even finish and long-lasting formula, this spray paint is sure to provide the durable and reliable coverage that you need. Plus, with its eye-catching metallic copper color, it’s sure to add a touch of elegance and sophistication to any project. So why wait? Choose Krylon Document Number 1 General Purpose Spray Paint in Metallic Copper today and take your projects to the next level!

Wrapping It Up

Last but not least, spraying paint on glass is a great way to add some color and creativity to your home decor. However, it’s important to choose the right spray paint for the job. After researching and testing various options, we’ve determined that the best spray paint for glass is Rust-Oleum Specialty Frosted Glass Spray Paint. This paint is specifically designed for glass surfaces and creates a frosted effect that looks beautiful and unique.

It’s also easy to use and dries quickly, making it a great option for both novice and experienced DIYers. With the right spray paint, you can transform any glass surface into a work of art that will impress your guests and add a personal touch to your space.

So, go ahead and give it a try – you might just discover a new hobby or passion!

August 22, 2023 0 comments
0 FacebookTwitterPinterestEmail
15 White Kitchens Cabinet Painting Tips
Kitchen

15 White Kitchens Cabinet Painting Tips

by Marco Bianchi August 22, 2023
written by Marco Bianchi

Are you thinking about transforming your kitchen? The idea of painting kitchen cabinets with white is exciting. It brings a peaceful charm and refreshing brightness to any kitchen. Painting kitchen cabinets is a significant decor project that requires careful consideration.

So, before painting your kitchen cabinets, you need to ask yourself some questions. It will help you make better decisions. That is why we have compiled 15 important questions that you should consider before you take up this task.

Asking yourself these questions will provide valuable insights. It will help you make an informed decision about painting your white cabinet kitchens. Conscious thoughts and planning are necessary to achieve the kitchen of your dreams.

Considerations Before Painting Your Kitchen Cabinets White

Considerations Before Painting Your Kitchen Cabinets White

  • No one can deny the beauty of white kitchen cabinets. They are trending in the world of decor. But before you get white cabinets for your kitchen, you need to consider your personal style and preferences. Does the clean and classic look of the white cabinets resonate with you? Will they match your kitchen’s overall aesthetic and complement your home’s decor? To answer these questions, it is crucial to assess your style preferences and existing color palette. This will help determine if the cabinets are the right fit.
  • You also need to check the condition of your cabinets. You need to evaluate if their structure needs any repairs or not. Depending on their condition, you can decide if they only need painting or refinishing or a replacement altogether.
  • The most important factor that you should consider is budget. You must have an amount in mind that you are willing to invest in this project. Depending on your budget, you can consider hiring professional help. In case your budget is low, you can also take up the painting process yourself. Understanding your budget will help you define the project’s scope and any necessary compromises.

To help you make this decision, go through the questions enlisted below.

1. Why Should You Paint Your Kitchen Cabinets?

Why Should You Paint Your Kitchen Cabinets

This is the first question that you need to ask yourself. You know what difference a new coat of paint can make to a space or worn-out furniture. You might have fallen in love with the dark wood of your kitchen, and it still might be in good condition. But color trends change over time. You might be seeing white and light colors in the more modern home designs every day. This is because white inspires a fresh and bright environment. If you want to imitate this aesthetic, then painting cabinets can be a good money-saving option as it costs only a few hundred dollars.

2. What Types of Cabinets Do You Have?

What Types of Cabinets Do You Have

One of the first steps while revamping cabinets is to discover what sort of cabinets you have. This will help you decide whether or not to paint your cabinets. This will also help you know what kind of preparation they might need. The following are some of the most typical cabinet materials:

  • If you see any repeating patterns or seams around the edges of the doors of the cabinets, you can conclude that they are not made of solid wood. You have to sand solid wood only if it is unfinished or if its surface is extremely smooth.
  • Doors that were previously waxed or varnished with Jolie Piants or any other paint products are complete. Generally, the cabinets that have already been completed don’t need to be sanded.
  • If your cabinets have a flat appearance or plastic finish, they might be made of laminate or Melamine. Such cabinets require quick sanding and 48 hours to cure after the first layer of paint is applied.
  • Thermofoil is frequently mistaken for laminate and melamine. A thin coating of vinyl is pressed onto the cabinet doors of thermofoil cabinets. Thermofoil often doesn’t accept paint over the long term; thus, it is not advised to paint it.
  • If you have metal doors, we will advise you not to paint them with powder coated finish.

3. Which Type of White Will Suit Your Kitchen?

 Which Type of White Will Suit Your Kitchen

Ideally, your kitchen surface should be cohesive and complement one specific white. The whites in your kitchen should match each other and be of the same kind. It’s also crucial that their undertones complement one another. You can choose the perfect shade for your cabinets depending on the color of your kitchen countertop. If your countertop is white, you should choose clean white paint with little to no undertone. You should consider warm white paint colors for your cabinets if your white countertop has a tent of orange or red in it.

4. What is the Best Paint for My Cabinets?

 What is the Best Paint for My Cabinets

When deciding on paint for your cabinets, it is essential to invest in good paint. This is an important factor to take into account as it determines the durability. There are specialized cabinet paints that offer a smooth surface. However, any high-quality paint should also work. Just make sure that the paint is acrylic and not vinyl. Paint with an acrylic latex base is long-lasting and simple to clean. Stick to the manufacturer’s recommendations to know the cure time of latex paint. Cure time is the period before the painted surface can tolerate daily use.

After painting, you will have to choose the type of finish you want, matte or glossy. A matte finish produces a low-gloss, flatter surface. On the other hand, a high gloss finish offers a high sheen and reflecting surface. If you want to achieve a look that is somewhere in between, you can go for a satin finish. You can find the detailed directions on the label of the paint can. While your cabinets will shine under a gloss finish, it can make dents and faults more visible. Besides, a flat finish can get challenging to clean. That is why kitchens frequently embrace semi-gloss or satin finish.

5. Should I Use Varnish or Finishing Wax as a Topcoat?

Should I Use Varnish or Finishing Wax as a Topcoat

The answer to this question depends on personal choice. However, Finishing Wax can be the more convenient of the two options. It is excellent at concealing breaststrokes and other floors because of its matte appearance. It simply replaces any scratches or scuffs. Additionally, it comes in a range of colors that may be used to create a variety of finishes. On the other hand, Varnish can be a fantastic option if you want a little extra longitude or a great gloss.

6. Should I Try Tester Pots for The Right Color?

 Should I Try Tester Pots for The Right Color

There are many variations of each shade of color available in the market. Therefore you might get indecisive while choosing the perfect color. You may think you have already chosen the base color as white. So choosing a shade of white won’t be difficult. But we assure you it won’t be easy either. Deciding to paint the cabinets white is half of the work done. Different shades of white might look the same from far away. But they may appear completely different when applied on various surfaces. Even the lighting has a huge impact on how paint appears on the wall or cabinet. To avoid any confusion, it is better to try tester pots on a small part of the get the best idea.

7. Do I Have All the Supplies I Need?

Do I Have All the Supplies I Need

After starting the job, you might not want to waste your time going to the Home Centre to pick up supplies. So it is better to keep the required tools handy in advance. These tools include a Ladder, Painter’s tape, Drop cloths, a Drill or screwdriver, Sandpaper (of various grits), a shop vacuum, a degreasing agent, sponges, wood filler, putty knives, primer, paint, paint trays, liners, applicators (sprayer or brush and roller), etc.

According to the most recent paint tests conducted by Good Housekeeping, experts suggest Benjamin Moore’s Advance as the best paint for the kitchen. This paint is specially formulated for kitchen cabinets. It applies easily and smoothly and hardens to a furniture-grade gloss that can withstand even the busiest kitchens.

8. How Should I Plan My Prep Work?

How Should I Plan My Prep Work

The biggest error that you can make while undertaking any project is failing to know the requirements before starting. Painting kitchen cabinets might appear to be simple. However, it is a time-consuming DIY activity. Most cabinets require sanding the surface, followed by the application of wood filler to any gaps or uneven surfaces, and drying time. Use a moist towel or a lint-free tack cloth to wipe up all of the dust and debris after sanding. Uncleaned tiny particles might float into the paint and tarnish the cabinet’s smooth surface.

9. Can I Just Paint Over My Old Cabinets?

Can I Just Paint Over My Old Cabinets

You should not take any shortcuts while renovating your cabinets. If you paint over your old cabinet, then they may get excessively thick. This will make the doors difficult to open and close. Also, if your old cabinets are not clean, their oil might ruin the freshly painted surface. So it is better to take out all the hardware. Unhinge the cabinet doors, sand and prime them, and then paint. This might seem like a lot of work to do, but it will be worth it. It’s normal for kitchen cabinets and drawers to be flat. So if you organize before starting the process, it will become simpler.

10. How Do I Sand the Surface?

How Do I Sand the Surface

Every surface should be gently sanded. The lacquer, varnish, or even a coat of prior paint can make the surface too smooth. The surface needs to be etched so that the paint can stick to it. It is common for DIY-painted cabinets to chip. Paints done by nonprofessionals can start peeling off if the surface is not sanded properly. Chipping is most likely to happen there if the area is not adequately prepared. So you need to keep in mind that you may sand cabinets between each and every layer of paint, not just the first one. Additionally, you should be sure to sand every corner and edges and crevices thoroughly.

You should sand the difficult portions, like cabinet door edges, manually. Otherwise, you can use an orbital sander, as advised by experts, to produce better and faster results. If the cabinets haven’t been painted or strained before, you should start with medium-grit sandpaper and then move to a finer one. You should consider stripping if it has an excessive amount of paint or a surface that is noticeably rough.

11. Is Rolling on Paint Better than Brushing?

Is Rolling on Paint Better than Brushing

Both rollers and brushes have different qualities. You should try to use them both for specific purposes. A brush can be effective for getting into small spaces, like the inside border of a traditional Shaker door. At the same time, you can use a foam roller while painting bigger uniform areas. This will speed up the procedure and make it easier to apply paint.

12. Do I Need to Remove Doors and Drawer Fronts?

You might have seen cabinets where the paints were slopped over the drawers’ inside and applied to hinges and hardware. As you start painting kitchen cabinets, it may seem convenient to leave the doors in place for painting. However, doing so will not result in a neat and polished outcome. Instead, you can use masking tape to cover the drawer sides and bottom if you don’t want to paint them.

13. How Do I Remember What Goes Where?

How Do I Remember What Goes Where

To paint the cabinets, you will have to take drawers out of their slots and cabinet doors off of their hinges. Then you’ll need to devise a method to remember where everything goes. Create a little schematic and mark each piece appropriately. This will help you reassemble each piece after they are dry. Additionally, you’ll need tape to cover hinges, fasteners, and edges properly. You’ll also need rosin paper or brown builder’s paper to cover the counters. Otherwise, it will add another unnecessary task of scrubbing the paint off the counter after you are done painting the cabinets.

14. How Much Will It Cost to Paint?

 How Much Will It Cost to Paint

Taking up the task of painting is the least expensive way to transform into white kitchen cabinets. However, it is the most labor-intensive choice. You will spend less money but a lot more time if you do a DIY job. However, in DIY painting, you will have to invest in a range of supply tools and equipment. You should not attempt to refinish your kitchen cabinets if you don’t have the right equipment. You might have to redo all your hard work if you do so. The size of the kitchen and the type of paint used will also affect the budget for this kitchen transformation.

A DIY project will typically cost between $200 and $600. You need to keep in mind that painting is only a short-term solution. Depending on the quality of the job, you will have to again busy fresh paint and repaint the cabinets eventually. That is why we will advise you to give this task all the time it needs. With patience, you can get the best ROI.

15. How Should I Finish the Project?

How Should I Finish the Project

After the painting is done, you will have to reassemble the hardware and cabinets. You can make sure the doors and drawers are placed in the right places with the help of labels. After you’ve finished painting your cabinets, you can upgrade them by putting a new backsplash or under cabinet lighting.

Summing It Up

All in all, by addressing these questions, you’ll be well-equipped to make informed decisions and achieve a successful transformation of your kitchen cabinets. With the right answers, you will be able to get the best results as well. It is evident from this article that it is not necessary to spend loads of money to give your kitchen a makeover.

Just remember to analyze the conditions of your old cabinets and make the necessary amendments.

Comment if you have any more questions. We will be happy to answer.

August 22, 2023 0 comments
0 FacebookTwitterPinterestEmail
10 Best Black Wood Stains with Test of Comparisons
Ideas

10 Best Black Wood Stains with Test of Comparisons

by Marco Bianchi August 22, 2023
written by Marco Bianchi

Natural wood’s beauty has no equal, and woodworking has a long history—wooden items, from furniture to accessories, radiate warmth, and beauty. Artisans and DIY enthusiasts have long favored wood stains to beautify and protect wood surfaces while exposing their natural character.

The black stain is a daring and functional option among wood stain colors. We provide the “10 Best Wood Stain Colors” in this extensive guide and a thorough comparison test. Whether you are an experienced woodworker or a passionate hobbyist, the list of the best black stains will guide you in selecting the black stain for your woodworking projects.

The advice and suggestions in the article will be an individual resource as you start your woodworking journey or take on your next DIY project to get the most out of your black wood stain.

So what are you waiting for? Let’s move ahead and have a look at the best wood stain colors.

Best Wood Stain Colors to Help You in Wood Projects

1. Black Varathane Premium Fast Dry Stain

Black Varathane Premium Fast Dry Stain

The fastest-drying and most extended black stain on our list is Varathane premium fast-dry black stain. This oil-based stain is ideal for giving all types of wood a rich, deep black finish. With just one application, it provides exceptional coverage, profoundly penetrates, and enhances the naturally occurring grain patterns. Particularly useful for completing jobs is the quick drying feature.

2. Black Gel Stain by General Finishes

Black Gel Stain by General Finishes

With a particular gel-based composition that adheres to vertical surfaces, General Finishes Black gel stain is ideal for challenging applications like cabinets and doors. It adds a deep black color with improved clarity, emphasizing the grain and personality of the wood. With the gel consistency, the color intensity may be more precisely controlled and applied.

3. Black Minwax Wood Finish Stain

Black Minwax Wood Finish Stain

An outstanding Wood Finish Black Stain is available from Minwax, a well-known brand in the woodworking field. The oil-based stain gives the wood a traditional black tone while enhancing its natural beauty and shielding it from moisture and scuffs. Both novices and experts will find it the best option because of the simple application technique, which guarantees even coverage.

4. Cabot Black Wood Stain for Interiors

 Cabot Black Wood Stain for Interiors

The water-based, low VOC formula of Cabot interior black wood stain is famous for being secure for indoor work. It gives your hardwood furniture a rich, opaque black gloss for a modern appearance. It is an environmentally friendly option for enclosed places because of its simple cleanup and low odor.

5. Old Masters Black Wiping Stain

Old Masters Black Wiping Stain

Old Masters Black Wiping Stain is ideal for a more natural and aged appearance. This oil-based stain offers control over the black color intensity and can be applied with a brush or wiped on. It highlights the grain and gives your projects a lovely, worn appearance when applied to open-grained timbers like oak.

6. The Black Water Based Stain from General Finishes

The Black Water Based Stain from General Finishes

The Black Water Based Stain from General Finishes, another outstanding product, offers quick drying and simple washing with soap and water. This stain performs remarkably well on woods like maple and pine, which tend to smudge with conventional oil-based stains. Obtain a uniform, smooth black color without obliterating the wood’s original grain.

7. Rust-Oleum Ultimate Black Stain

 Rust-Oleum Ultimate Black Stain

Rust-Oleum Ultimate Black Stain is a two-in-one product that combines polyurethane and stain. This water-based stain dries rapidly and provides superb defense against damage. It performs best on interior wood surfaces and is ideal for DIY tasks requiring a short turnaround time.

8. Black Cherry Water Based By General Finishes

Black Cherry Water Based By General Finishes

General Finishes Black Cherry Water Based is an intriguing alternative if you’re looking for a modern take on the classic black stain. This shade creates a refined finish while letting the wood’s grain show through by blending black and deep cherry tones. The stain is ideal for giving your woodworking projects depth and complexity.

9. Sman Interior Water-Based Stain

Sman Interior Water-Based Stain

A Canadian-made product called Saman Interior Water, based on the black stain, is renowned for its water-based, environmentally friendly recipe. Both interior and exterior projects can use it safely, and it produces a rich black color. This strain is an excellent option for projects involving kids and pets because it is non-toxic.

10. Behr Premium Black Solid Color

Behr Premium Black Solid Color

Behr premium black solid color stain is an excellent option for exterior wood projects like decks and fences. This stain with an acrylic base offers exceptional UV protection, preventing the wood from fading or turning gray from exposure to sunlight. Your outdoor settings get a contemporary touch from the solid black stain, which goes well with different types of landscaping.

Comparison Test of Black Wood Stains

We performed a thorough comparison test to give a fair and honest evaluation of the top ten black wood stains. To investigate how each stain reacted with diverse grains and textures, we used a variety of wood types, including oak, pine, and maple. We also examined durability, color richness, drying time, and application.

The outcomes of the comparison tests are as follows:

Comparison Test

1. Easy Application: The application was simple, especially on vertical surfaces, and the general finishes, black gel stain and combat interior black wood stain, provided even smooth coverage.

2. Color Intensity: Varathane Premium Fast Dry Black Stain, Minwax Wood Finish Black Stain, and General Finishes Black Water Based Stain all received good marks for producing a dark and vivid black color.

3. Drying Time: Rust-Oleum Ultimate Black Stain and Varathane Premium Fast Dry Black Stain dried quickly, saving time during projects.

4. Flexibility: Standard Finishes, both black gel stain and old masters black wiping stain, display outstanding adaptability and can regulate the strength of the black color.

5. Clarity of Wood Grains: Wood Grain Clarity was maintained exceptionally well by general finishes, black water-based stain, and available finishes with black cherry water-based stain.

6. Outdoor Protection: Behr premium black solid color stain excelled when shielding wood from the weather. You are prepared to take your woodworking projects to new heights with the help of our comparison test results and the top 10 black wood stain colors. Accept the audacity of black stain and unleash your creativity to turn everyday wood into unique works of art that leave an impression.

Advantages of Black Wood Stain Color

Advantages of Black Wood Stain Color

Black wood stain colors stand out from other wood stain colors for various reasons and provide unique advantages.

The significance of black wood stain colors can be seen for the following principal reasons;

1. Aesthetics and Visual Appeal: Black wood stain colors give any wooden surface a sense of sophistication and elegance. The natural beauty of wood is enhanced by the rich, deep black color, which makes it eye-catching and appealing. It conveys a sense of drama and depth that other stain colors cannot.

2. Versatility: Black wood stain colors are adaptable and can go with various interior design styles, from rustic and classic to modern and contemporary. They go nicely with various decor and can be employed in simple and ornate settings.

3. Accentuation of Grain Patterns: Black stain accentuates the grain patterns on wood surfaces, giving them depth and character. This feature makes it an excellent option for highlighting the distinctive qualities of several wood types.

4. Focal Points and Design Contrast: When paired with lighter wood or other hues, black wood stains can produce an eye-catching contrast in interior design. It can be the room’s focal point and draw attention to particular features or architectural aspects.

5. Modern and Timeless Look: Black wood stains give woodworking projects a contemporary and classic appearance. The color black continues to be a timeless option that never goes out of style, whether used for furniture, cabinetry, or decorative items.

6. Hiding of Flaws: Black wood stain is especially helpful for hiding minor flaws and blemishes in the wood. It can assist in hiding kinks, scratches, and tiny dents, giving the completed product a smoother appearance.

Where Can We Use the Ultimate Black Wood Stain Color

Black wood stain colors are utilized in a variety of woodworking tasks. Black stain is frequently used in many places; let’s have a look at them:

1. Flooring: Black-stained timber flooring is becoming more fashionable in contemporary interior design. It may make a strong statement in large rooms and serves as an excellent backdrop for additional decor.

2. Furniture: Black-stained furniture gives every area a dash of drama and refinement. Dining tables, seats, sideboards, and cabinets are frequently made with it.

3. Door And Windows: Exterior and interior doors and windows can be stained with black stain to improve curb appeal and create a spectacular entrance to your property.

4. Paneling and Wall Accents: A space can benefit from the texture and visual interest that black stained wood paneling and wall accents can bring, giving it a distinctive and fashionable look.

5. Decorative Items: Pictures frames, shelves, and sculptures made of wood that has been stained black can act as eye-catching focus pieces for your interior design.

6. Outdoor Structures: Wooden fences, pergolas, and decks can be treated and protected using black wood stains. It not only makes them seem better, but it also offers superb outdoor durability.

Additional Tips to Consider While Using Black Wood Stain

There are several crucial variables to consider when using black wood stain to achieve the most significant outcomes and a successful woodworking project.

Here are some wise reminders to beat in mind:

1. Surface Preparation: Sand the wood surface to a smooth finish and take off any paint, coatings, or impurities to prepare it properly. Sanding improves the overall finish and aids in the stain’s even penetration.

2. Wood Choice: Select the appropriate kind of wood for your project. The ultimate color and appearance of the wood are impacted by how different wood species absorb dyes. Consider utilizing woods with tight grains; other wood species absorb stains. Consider using woods with close grains, such as maple or cherry, for a more consistent outcome.

3. Stir Well: Before using, thoroughly stir the black stain. It guarantees that the pigment is dispersed uniformly across the stain, preventing color variations.

4. Test on a Scrap Piece: Testing a scrap piece of the same wood before using the black stain on your project is a good idea. But by doing this, you may observe how the stain interacts with the wood and, if necessary, modify the application method.

5. Apply Evenly: Apply the black pigment uniformly using a brush, cloth, or foam applicator. Work with the direction of the wood grain for a smooth and even finish. Removing too much discoloration from the surface will prevent blotchiness.

6. Wipe Off Extra: After applying the stain, remove any extra stain with a clean cloth. It prevents the stain from pooling and forming crooked areas on the wood’s surface.

7. Apply Multiple Coats: You might need to use more than one coat of stain to achieve a more prosperous, deeper shade of black. Before applying the next layer, let the previous one completely dry. Determine the number of coats required for your desired look by conducting a test on a scrap piece.

8. Provide Enough Drying Time: Black wood stains may require more drying time than lighter colors. Before applying any protective finish and after each coat, give enough time for drying.

9. Apply a Protective Finish: Once the black stain has dried, use a clear protective finish to seal and protect the wood, like polyurethane or varnish. The protective coating provides durability and color enhancement.

10. Use Ventilation: Ensure your workspace has adequate Ventilation before applying any wood finishes, including black wood stain. Work in a well-ventilated location to prevent breathing in fumes, or use a respirator mask.

11. Cleaning: Immediately after using the black stain, wash your hands, brushes, and applicators. For cleanup, use mineral spirits if you use an oil-based paint; for water-based stains, use soap and water.

12. Test Over Existing Finishes: To put a black stain over an existing finish, perform a small test area first. Some finishes need to work better with the stain, which could cause problems with adhesion and drying.

Conclusion

All in all, black wood stain colors are an essential option in woodworking for elevating and transforming wooden products into enthralling works of art. Each stain had distinctive properties that could enhance the inherent beauty of the wood while adding a touch of refinement and intrigue, ranging from traditional black colors to cutting-edge cherry-infused tones.

The comparison test further emphasizes the benefits of these black wood stains by demonstrating their color intensity, simplicity of use, drying time, grain clarity, adaptability, and outside protection qualities.

With these vibrant hues of the fine details of the wood grain, the general finishes’ black water-based stain and black cherry water-based stain showcase the beauty of water-based information.

What are you waiting for? Happy woodworking and staining!

Frequently Asked Questions

Which Kind of Wood Can I Put a Black Stain On?

Most species of wood, including softwoods like pine and cedar and hardwoods like oak, maple, and cherry, can be stained with black. Nevertheless, various wood types may absorb the stain differently, influencing the final hue. Before applying the stain to your product, testing a scrap piece of the same wood is always advised.

How Many Coats of Black Wood Stain Should We Use for The Most Significant Effects?

The desired color intensity and wood porosity determine how many coats of black wood stain are necessary. In most cases, two to three coats are enough to get a deep, rich black hue. For a more opaque finish, some stains may need extra layers. Before applying the next layer, let the previous one completely dry.

Can I Coat the Black Wood Stain with a Clear Protective Finish?

A clear protective finish must be applied over a black wood stain to seal and safeguard the wood. The color of the stain is enhanced and made durable by a clear finish, such as polyurethane or varnish, which also shields the wood from UV rays, moisture, and scratches. Before applying the finishing coat of protection, confirm that the stain is dried.

Is Black Wood Stain Suitable for Outdoor Projects?

Although some black wood treatments can be used indoors and outdoors, not all stains are intended for packaging. Choose a stain that gives UV protection and is primarily intended for exterior use of outdoor wood projects like decks and fences, such as Behr premium black solid color stain.

August 22, 2023 0 comments
0 FacebookTwitterPinterestEmail
Accessible Beige Sherwin Williams Paint Color (Review)
Paints

Accessible Beige Sherwin Williams Paint Color (Review)

by Marco Bianchi August 17, 2023
written by Marco Bianchi

Accessible Beige Sherwin Williams paint color is a beautiful warm-toned versatile paint color. It is one of the best paint colors for people who want something modern and subtle for their house. Well, color is one of the most preferred colors when it comes to interior design.

This versatile color has its own texture and can be used in various parts of the house. One can use it in the kitchen, living room, bedroom, or even for house exteriors. It can be complemented with other elements in the house.

Therefore, if you want to know more about Accessible Beige Sherwin Williams Paint Colour, then keep on reading.

What is Accessible Beige Sherwin Williams Paint Colour?

What is Accessible Beige Sherwin Williams Paint Colour

One might think that understanding the concept behind accessible beige paint color is quite simple because, unlike other neutral colors, it is just basic beige. However, it is a light-toned, warm, greige color that is often seen in markets for interiors. This color has a little tint of grey in it, and if you sum it up, then you can see more beige tones in this color. It might appear different depending on the exposure it gets. The facing of the room and lighting can change the accessible beige paint color slightly. If you are someone who wants a grey-toned paint color with warm beige tones, then this one is for you.

Is It a Warm-Toned or Cool-Toned Colour?

Is It a Warm-Toned or Cool-Toned Colour

Accessible Beige Sherwin William paint color is a neutral warm-toned paint color. It falls under the warm tone category and appears to be more yellow than other grey and green paint colors. However, it does not have complete tones of yellow color, so you cannot consider it a complete beige color.

Accessible Beige is perfect for people looking for earthy tones. Usually, it can easily be predicted if a color is warm-toned or cool-toned by looking at it. At the same time, there are certain shades that are not so easy to figure out. You can simply compare Accessible Beige Sherwin Williams with agreeable green as it is greyer in color and cool-toned.

What Are the Undertones of Accessible Beige Paint Colour?

What Are the Undertones of Accessible Beige Paint Colour

Each and every paint color has its own hue family. In similar words, every color has its own respective space on the color wheel. These colors get their place on the color wheel as per their dominant light ways. Accessible Beige Sherwin Williams has an LCh hue angle of 88.052. With this degree, it falls under the yellow hue family. However, it does not mean it is a complete yellow color.

Every color on the color wheel has undertones; some of them have similar undertones, whereas some are quite complex to understand. Accessible Beige has quite noticeable yellow undertones. Additionally, it also has a sneaky undertone that is green in color. If a room has a southern exposure, then one can see clear green undertones of Accessible Beige Sherwin Williams.

What is the LRV Value of Accessible Beige?

What is the LRV Value of Accessible Beige

LRV, also known as Light Reflectance Value, means how much light color can reflect back. Colors with 100 LRV are the most reflective colors, whereas 0 is the least reflective. In other words, pure white has an LRV of 100, whereas black has 0. Accessible Beige Sherwin Willaims has an LRV of 58.

With a Value of 58, it can be said that it reflects the average amount of light in the room. When you look at the LRV number, you will suspect that it is more of a light color which ranks high on the scale. When the paint color gets bright sunlight, unlike other shades, it starts to wash out.

How Does Accessible Beige Affect the Room Exposure?

How Does Accessible Beige Affect the Room Exposure

Basically, exposure means how the color appears when the light comes from various directions in a room. Accessible Beige is a less colorful paint color due to which it appears grey in north-facing rooms or east-facing morning light. However, in a southern-facing or west-facing room, it looks subtle beige. To know about the exposure of Accessible Beige Sherwin Williams, read the below-mentioned classification.

  • Accessible Beige and South-Facing Room: If you have a south-facing room, then accessible beige appears to be soft and neutral beige color. It is no little grey tones to it. Moreover, it will not become very warm, which will hurt your eyes.
  • Accessible Beige and North-Facing Room: In a north-facing room, you can expect accessible beige to appear more in grey tones. It is perfect for people who want a warm grey-toned color that looks beautiful.

Colors that Complement Accessible Beige Sherwin Wiliams

Colors that Complement Accessible Beige Sherwin Wiliams

Just like any neutral color, Accessible Beige Sherwin Williams can also be complemented with many different colors. One can find many colors that will look stunning with them. The best tip one can look into while learning about complementing colors in similar tones and LRVs.

If you ask, then some of the best combinations of Accessible Beige Sherwin Williams are either with other earth-toned shades or bright colors. Some of the best earth-toned colors that work perfectly are browns and greys. However, brighter shades with green and blue in them also look beautiful.

Some of the other colors to mention for your reference are SW Sea Salt, SW Alabaster, SW Dovetail, and SW Urbane Breeze. You can simply pair these colors with each other, or you can add little elements in your room with similar tones. They can be easily paired with each other for living rooms, bedrooms, and kitchens.

Where Accessible Beige Sherwin Williams Colour Be Used?

Where Accessible Beige Sherwin Williams Colour Be Used

Accessible Beige Sherwin Williams Paint Colour can be used in various places in the house. It is a versatile shade, and you can use it anywhere in your house, be it your kitchen, living room, or bedroom.

Here are some examples of how you can use Accessible Beige paint color in your house.

  • Living Room: Living Rooms are one of the most used areas in the house. One spends most of their time in living rooms while watching movies or when guests come. If you want to keep your living room minimal and subtle, then you can use AB as your living room color. Pair it with different color and texture elements like browns and dark green shades for more visibility.
  • Kitchen: Getting a light-colored and neutral-toned kitchen is on most people’s lists these days. It is classic and appears to be bigger and spacious when you get your kitchen walls painted with Accessible Beige paint color. You can even get cabinets and countertops with matching or dark colors.
  • Bedroom: When it comes to bedrooms, they should have a more cozy and comfortable vibe. It should be something that keeps you happy and positive. You can do so by getting a neutral palette in your room. Complement other colors as well with this for a more modern vibe.

Comparison of Accessible Beige with Other Paint Colors

Accessible Beige is a neutral beige color that is often compared with other shades that have similar shade patterns. Some of the comparisons are quite common and compared widely.

Hence, keeping the same in mind, here are a few popular comparisons you must know today.

1. Accessible Beige Sherwin Williams and Benjamin Morre Revere Pewter

 Accessible Beige Sherwin Williams and Benjamin Morre Revere Pewter

People often say that Accessible Beige and Revere Pewter are almost similar, and there is no difference between them. Both of the colors have their own element and color. However, if you see both of them side by side, you will see they are different from each other. It is difficult to say which one is better. If you want some with more warm tones, then choose AB.

Some of the differences between the two of them are mentioned below.

  • Accessible Beige Sherwin Williams is warmer than Revere Pewter.
  • The LRV of Accessible Beige is higher than the other one, with 58 and 55.51, respectively.
  • Accessible Beige has more grey undertones and Beige colors than others.

2. Accessible Beige Sherwin Williams and Balanced Beige

Accessible Beige Sherwin Williams and Balanced Beige

One of the most popular and often compared colors are Balanced Beige and Accessible Beige. Both of the paint colors are on the same color strip and look nothing but stunning. Balanced Beige is a slightly darker version of Accessible Beige Sherwin Willaims.

Below are some of the differences between both of them are mentioned.

  • Accessible Beige has a slightly higher LRV of 58, whereas Balanced Beige has 46.
  • Both of the colors are light colors and fall in the medium range.
  • The undertones of both colors are grey.
  • Balanced Beige has little undertones of taupe in it.

How to Get the Most Accessible Beige Sherwin Williams?

How to Get the Most Accessible Beige Sherwin Williams

Imagine buying a beautiful paint color and not getting the most out of it. You paint it across your house, and it turns out to be a waste. No one wants to land in such kind of situation. Hence, it is important to know about the paint color deeply and then choose the setting for it that turns out to be beautiful and perfect.

Here are some key points you can keep considering in mind.

  • Choose Your Paint Colour: The first step is to choose the right paint color. The neutral color palette is very wide, and one might get overwhelmed. Due to the wide concept, it is best advised to study deeply about your paint color.
  • Decide Upon the Area: You might want to know where you want the color to get painted. Decide upon that first. It can be a bedroom, kitchen, living room, or washroom.
  • Choose the Right Interiors: Moving forward, once you have the paint color in your mind. It is important to learn about other interiors and how you want to keep other elements and textures.
  • Add Decorative Materials: As you all know, you have chosen a very subtle and neutral color so you can play it well with other decorative items. You can go for some color while choosing art, hangings, rugs, and cushions.
  • Get Sampling: Once everything is decided, you can purchase the color. Go for a sampling of the color. Go to the nearby paint shop and test the color. If you like it, then only go ahead.

Summing It Up

All in all, Accessible Beige Sherwin Williams is nothing but a stunning shade to consider. It is a perfect neutral greige paint color to choose from and incorporate into your house. You can easily play with this paint color with various decorative formats, interiors, and styles.

The paint color is also known as builders’ beige, which means it is chosen by many interior designers and it is buildable. There is a whole more texture and statement to this color, and one should understand it generously. It is worth trying out and incorporating in your house.

Don’t think much; just grab your paint color and start painting your house with Accessible Beige Sherwin WIlliams paint color.

August 17, 2023 0 comments
0 FacebookTwitterPinterestEmail
Newer Posts
Older Posts

Recent Posts

  • A Complete Chalked Paint Review fo Better Selection 
  • A Guide to Painting Furniture without Sanding
  • 15 Steps to Create Faux Shiplap DIY Wall in Budget
  • How to Paint Furniture without Sanding or Priming
  • A Guide to Achieving Texture with Saltwash Paint Techniques

Recent Comments

No comments to show.

Recent Posts

  • A Complete Chalked Paint Review fo Better Selection 

    October 18, 2023
  • A Guide to Painting Furniture without Sanding

    October 18, 2023
  • 15 Steps to Create Faux Shiplap DIY Wall in Budget

    October 18, 2023
  • How to Paint Furniture without Sanding or Priming

    October 18, 2023
  • A Guide to Achieving Texture with Saltwash Paint Techniques

    October 18, 2023

Categories

  • Bathroom (15)
  • Bedroom (4)
  • Brush (3)
  • Decor & Design (15)
  • Decorating (1)
  • Dining Room (3)
  • DIY (2)
  • DIY Projects (11)
  • Door (5)
  • Fireplace (3)
  • Flooring (2)
  • Furniture (9)
  • Gardening (1)
  • Guide (11)
  • Home Crafts (1)
  • Home Decor (7)
  • Home Improvement (9)
  • Ideas (63)
  • Kitchen (16)
  • Outdoor Living (1)
  • Paints (18)
  • Review (1)
  • Room Ideas (3)
  • Tutorial (1)
  • Uncategorized (2)
  • Wall (6)

Instagram

About Us

Maecenas nec odio et ante tincidunt tempus. Donec vitae sapien ut libero venenatis faucibus, nullam quis.

01 Central Park, US, New York City
Phone: (012) 345 6789
Fax: (012) 345 6789

  • Facebook
  • Twitter

@2021 - All Right Reserved. Designed and Developed by PenciDesign


Back To Top
DormyHome
  • Decor & Design
  • DIY
  • Guide
  • Home Improvement
  • Smart Home