• Decor & Design
  • DIY
  • Guide
  • Home Improvement
  • Smart Home
DormyHome
keep your memories alive
Home » Archives for
Author

Jonathan Tremblay

Jonathan Tremblay
Jonathan Tremblay

Jonathan Tremblay holds a Master’s in Aerospace Science and Engineering from the University of Toronto. With over 15 years of experience in the aerospace sector, he has been a pivotal part of various space organization initiatives, focusing on designing and developing space habitats and systems. He became a part of our team, aiming to demystify space technology for our readers. Outside of his professional life, he is a rock climber and volunteers at local science education programs, fostering a love for science in the younger generation.

Affordable Kitchen Drawer Organizers - Custom Look for Less
DIY ProjectsHome ImprovementKitchen

A Complete Guide on Custom Drawer Organizers in Budget 

by Jonathan Tremblay October 17, 2023
written by Jonathan Tremblay

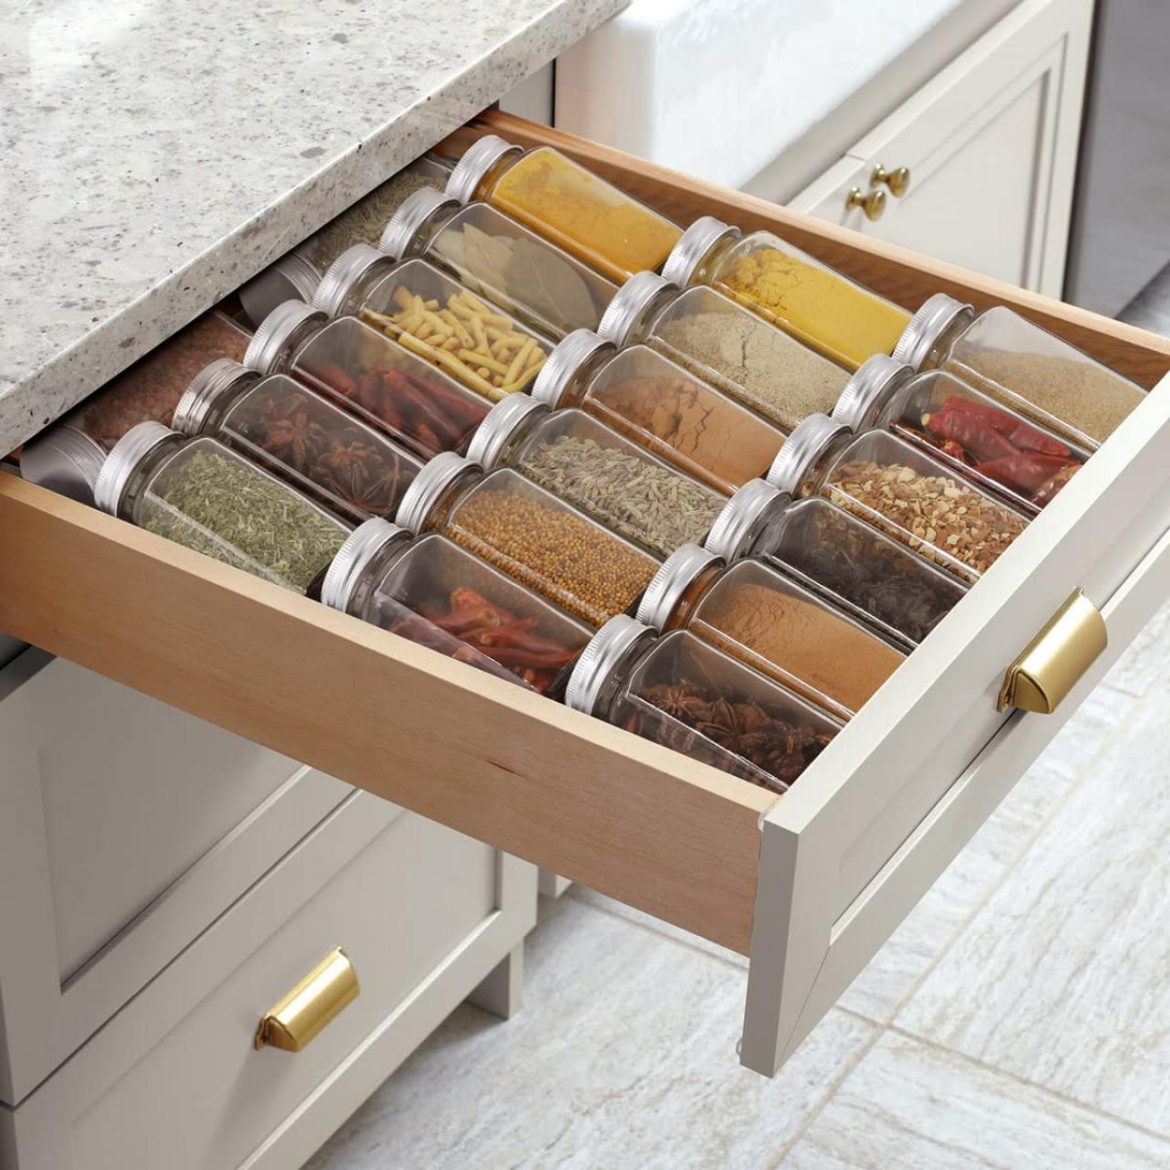
If you are tired of your messy kitchen drawers, a kitchen custom drawer organizer is what you need. We’ll show you different affordable kitchen drawer organizers that can give your kitchen a custom look for less. Kitchen drawers often become cluttered with utensils, gadgets, and various odds and ends, making it difficult to find what you need.

Affordable kitchen drawer organizers are here to rescue you from confusion. These smart solutions are designed to fit your drawers perfectly, creating a small space for all your kitchen essentials. What’s even better is that you don’t have to spend too much money to achieve a custom look. With these budget-friendly organizers, you can change your kitchen into an organized place if you want a cleaner kitchen.

These organizers offer a simple yet effective way to upgrade your space. So, let’s learn how to create a customized look affordably.

1. Trimmable Kitchen Drawer Organizers

Trimmable Kitchen Drawer Organizers

Trimmable kitchen custom drawer organizers are a cost-effective solution for achieving a customized look in your kitchen drawers without spending too much money. These organizers are versatile and designed to fit your unique storage needs. They are available in various sizes, making them suitable for various drawer dimensions.

How to Make It

  1. Start by measuring the dimensions of your kitchen drawer. Note both the width and length accurately.
  2. Choose a trimmable kitchen drawer organizer that matches your drawer’s width. These organizers often come in a roll or sheet, and you can cut them to fit your drawer’s length perfectly.
  3. Using a pair of ultra-sharp scissors or a utility knife, carefully cut the organizer material to match the length of your drawer. Be accurate to make sure it is a secure fit.
  4. Place the trimmed organizer into your drawer. Arrange it to provide your kitchen utensils, cutlery, or other items as needed.
  5. Your DIY trimmable kitchen drawer organizer is ready to use. It not only keeps your utensils and tools in order but also improves the aesthetics of your kitchen drawers.

2. Knife Rack DIY Drawer Organizer

Knife Rack DIY Drawer Organizer

A DIY knife rack custom drawer organizer is a fantastic way to store your knives safely and stylishly. It ensures easy access to your knives while keeping them out of sight, making your kitchen both organized and safe.

How to Make It

  1. You’ll need a wooden board, wooden dowels, a saw, sandpaper, a ruler, and wood glue.
  2. Measure the length and width of your drawer and cut the wooden board to fit securely inside it.
  3. Cut the wooden dowels into pieces of equal length, about 1.5 inches each. These will serve as the slots for your knives.
  4. Using a ruler and pencil, mark where you want to place the dowels on the wooden board. Space them evenly to set your knives.
  5. Carefully cut slots into the wooden board where you marked using a saw, making sure they are deep enough to hold your knives securely.
  6. Sand the edges of the board and dowels to smooth any rough surfaces. Then, apply wood glue to the slots and insert the dowels.
  7. Allow the glue to dry thoroughly.
  8. Once dry, place your DIY knife rack organizer into your kitchen drawer and arrange your knives in the slots.

3. Utensil Drawer Organizers

Utensil Drawer Organizers

Utensil custom drawer organizers are essential for maintaining order in your kitchen. They come in various shapes and sizes, allowing you to neatly separate and store your cooking utensils, flatware, and more.

How to Make It

  1. Begin by measuring the dimensions of your utensil drawer to determine the size of the organizer you’ll need.
  2. Choose a utensil drawer organizer that fits the width and deepness of your drawer. These organizers often feature compartments of different sizes for various utensils.
  3. Simply insert the utensil drawer organizer into your kitchen drawer. You can further customize it by arranging your utensils within the compartments to suit your needs.
  4. With your utensil drawer organizer in place, you’ll have a clean kitchen drawer where everything has its designated spot; making meal preparation and clean-up is an easy task.

4. Modular Kitchen Drawer Organizer

Modular Kitchen Drawer Organizer

A modular kitchen custom drawer organizer is a flexible and adaptable solution for creating a highly customized storage space in your kitchen. It allows you to design your drawer organization according to your specific needs, making it easy to set various items efficiently.

How to Make It

  1. Start by measuring the dimensions of your kitchen drawer, including width, length, and deepness.
  2. Purchase modular drawer organizer components such as dividers, trays, and bins that can be mixed and matched to make the layout.
  3. Think of the items you want to store in the drawer and plan the layout accordingly. For example, you might want sections for cutlery, utensils, and kitchen tools.
  4. Lay out the modular components within the drawer to ensure they fit well and make the organizational scheme you think.
  5. Use the provided clips, adhesive, or other fastening methods to secure the modular components in place. Ensure they are stable and won’t shift during regular drawer usage.
  6. Once the modular kitchen custom drawer organizer is securely in place, fill it with your utensils, kitchen gadgets, or other items. Adjust the layout as needed to set different sizes and shapes.
  7. With your modular organizer in place, you’ll have a neatly organized kitchen drawer that perfectly suits your storage needs.

5. Dish Drawer Organizers

Dish Drawer Organizers

Dish drawer organizers are designed to keep your dishes, plates, and bowls neatly stacked and easily accessible. They provide a clean and efficient storage solution for your dining essentials.

How to Make It

  1. Measure the dimensions of your drawer to determine the size of the dish drawer organizer you’ll need.
  2. Choose a dish drawer organizer that fits the width and deepness of your drawer. These organizers often have grooves or slots to hold dishes securely.
  3. Simply insert the dish custom drawer organizer into your kitchen drawer. Ensure that the slots or grooves align with the size of your dishes.
  4. Carefully place your dishes, plates, and bowls into the slots or grooves of the organizer. Stack them neatly to maximize space. With your dish drawer organizer in place, your tableware will be well-organized and protected from chipping or scratching.

6. Pots and Lids Drawer Organizer

Pots and Lids Drawer Organizer

A pots and lids drawer organizer is a practical solution for storing your pots, pans, and their lids. It keeps your cookware neatly arranged, making it easy to find the right pot or pan when cooking.

How to Make It

  1. Start by measuring the dimensions of your kitchen drawer, considering its width, length, and deepness.
  2. Choose a pots and lids custom drawer organizer that fits the width and deepness of your drawer. These organizers often feature dividers and compartments for pots and lids.
  3. Insert the pots and lid drawer organizer into your kitchen drawer, positioning it so that it sets your cookware.
  4. Place your pots and pans into the designated compartments of the organizer. Stack pots of similar sizes together and store lids vertically to save space.
  5. With your pots and lids drawer organizer in place, you’ll have a clean drawer where you can quickly access the cookware you need for your cooking.

7. DIY Wooden Drawer Organizer

DIY Wooden Drawer Organizer

A DIY wooden custom drawer organizer lets you make a personalized storage solution for your kitchen or any other space. Using wood, you can craft a durable and attractive organizer for your specific needs.

How to Make It

  1. Collect wood boards, a saw, sandpaper, measuring tape, wood glue, and clamps.
  2. Measure the dimensions of your drawer to determine the size of the organizer you’ll need.
  3. Plan the layout of your organizer. Decide how many compartments you want and their sizes. Sketch a design if needed.
  4. Use the saw to cut the wood pieces according to your design. These pieces will become the dividers and bottom of each compartment.
  5. Sand the edges of the cut wood pieces to smooth them and prevent splinters.
  6. Apply wood glue to the edges of the dividers and attach them to the bottom piece to make compartments.
  7. Sand the entire organizer to ensure a smooth finish. Apply a wood finish or paint if you want a polished look.
  8. Once the organizer is dry and finished, insert it into your drawer. It’s now ready to help you keep your items neatly organized.
  9. Your DIY wooden drawer organizer not only provides useful storage but also adds a touch of artistry to your space.

8. Flatware Drawer Organizer

Flatware Drawer Organizer

A flatware drawer organizer is essential for keeping your cutlery neatly arranged and easily accessible. It streamlines meal preparation and table setting while maintaining a tidy kitchen.

How to Make It

  1. Measure the width and length of your drawer to determine the size of the flatware drawer organizer you need.
  2. Choose a flatware custom drawer organizer that fits the dimensions of your drawer. These organizers typically have compartments designed for various types of forks.
  3. Simply insert the flatware drawer organizer into your kitchen drawer. Ensure that the compartments align with your knife needs.
  4. Organize your flatware within the designated compartments of the organizer. Place forks, knives, spoons, and other utensils in their respective slots.

9. Desk Drawer Organizer

Desk Drawer Organizer

A desk drawer organizer is a practical addition to your workspace, helping you keep pens, paper, stationery, and other office supplies in order. It increases productivity and reduces clutter.

How to Make It

  1. Measure the dimensions of your desk drawer to decide the size of the organizer you need.
  2. Choose a desk drawer organizer that fits the width and deepness of your drawer. These organizers often feature compartments and dividers for various office supplies.
  3. Insert the desk custom drawer organizer into your desk drawer. Ensure that the compartments align with the items you plan to store.
  4. Arrange your office supplies within the designated compartments. Use smaller compartments for items such as pens, paper clips, and sticky notes and larger sections for notebooks or files.

10. Adjustable Kitchen Drawer Organizers

Adjustable Kitchen Drawer Organizers

Adjustable kitchen drawer organizers provide flexibility and customization for your kitchen storage needs. They allow you to adapt the compartments to fit various utensils and kitchen tools, making them a practical addition to any kitchen.

How to Make It

  1. Start by measuring the dimensions of your kitchen drawer, including width, length, and deepness.
  2. Purchase an adjustable kitchen custom drawer organizer that fits the width of your drawer. These organizers often include movable dividers and compartments.
  3. Adjust the dividers within the organizer to make compartments of the desired size. You can set different utensils and tools by simply sliding the dividers.
  4. Insert the adjustable organizer into your kitchen drawer, ensuring that the shade compartments align with your storage needs.
  5. Organize your utensils, cutlery, or kitchen gadgets within the adjustable compartments. Customize the layout as needed to maximize space and keep items readily accessible.

11. Baking Supplies DIY Drawer Organizer

Baking Supplies DIY Drawer Organizer

A DIY custom drawer organizer for baking supplies is a practical solution for keeping your baking tools, measuring cups, and rolling pins organized and within easy reach. It smooths your baking process and ensures all your supplies are neatly stored.

How to Make It

  1. Collect a wooden board, dowels, a saw, measuring tape, wood glue, and clamps.
  2. Measure the dimensions of your drawer to determine the size of the organizer you’ll need for your baking supplies.
  3. Design the layout of your custom drawer organizer. Think about compartments for items like rolling pins, measuring cups, spatulas, and cookie cutters.
  4. Use the saw to cut the wooden board into the size of the base of the organizer. Cut dowels into pieces of appropriate length to serve as dividers.
  5. Apply wood glue to the ends of the dowels and attach them vertically to the base to make compartments. Use clamps to secure them in place while the glue dries.
  6. Sand the entire organizer to make a smooth finish. Apply a wood finish or paint for a polished appearance.

12. Ziplock Bag Organizer

Ziplock Bag Organizer

A ziplock bag organizer and wrap dispenser help you maintain an organized kitchen by keeping plastic wraps, aluminum foils, and ziplock bags easily accessible. These organizers reduce clutter and make food storage more convenient.

How to Make It

  1. Measure the dimensions of your kitchen drawer to determine the size of the organizer you’ll need.
  2. You can either purchase a ready-made ziplock bag organizer and wrap dispenser or make one yourself. If making it yourself, consider using a wooden board and dowels.
  3. Insert the ziplock bag organizer and wrap dispenser into your kitchen drawer, ensuring it fits securely.
  4. Store your plastic wraps, aluminum foils, and ziplock bags within the designated slots or compartments of the organizer.

13. Cardboard Drawer Organizer

Cardboard Drawer Organizer

A cardboard custom drawer organizer is a cost-effective way to make customized storage in your drawers. It’s a simple yet practical solution for organizing small items.

How to Make It

  1. Collect cardboard sheets, a ruler, a pencil, a utility knife or scissors, and glue.
  2. Measure the dimensions of your drawer to determine the size of the organizer you’ll need.
  3. Plan the layout of your cardboard organizer, including the number and size of compartments. You can make various-sized compartments by adjusting the height and width of cardboard pieces.
  4. Using the ruler and pencil, mark the measurements for your compartments on the cardboard sheets. Carefully cut out the cardboard pieces using a utility knife or scissors.
  5. Fold the cardboard pieces along the marked lines to make the sides and dividers of your compartments. Apply glue along the edges and corners to secure them together. Use clips or heavy books to hold the pieces in place while the glue dries.
  6. Once the compartments are dry and secure, place the cardboard drawer organizer in your drawer.

Conclusion

Affordable kitchen custom drawer organizers are a great way to keep your kitchen clean and efficient. These smart organizers can give your kitchen a personalized touch without a high cost. By investing in these budget-friendly options, you can tidy up your drawers, easily locate your utensils and tools, and create a more organized kitchen space. They’re easy to set up and come in various sizes and styles to match your specific needs.

No more searching through messy drawers or struggling to find the right kitchen tool when needed. These organizers increase your cooking experience. It’s surprising how such a simple addition can make a remarkable impact on your kitchen. So, if you want an organized kitchen, affordable kitchen custom drawer organizers are the way to go.

Don’t hesitate to start decluttering your kitchen.

October 17, 2023 0 comments
0 FacebookTwitterPinterestEmail
How to Turn a Closet into a Pantry
Home ImprovementKitchen

Turning a Closet Into a Pantry: Complete Guide

by Jonathan Tremblay October 17, 2023
written by Jonathan Tremblay

Many of us have faced the challenge of limited storage in our homes. But worry not. We’ll show you how to change that used closet into a useful pantry. Do you also have a closet that’s full of clothes or just collecting dust? Turning a closet into a pantry is an easy and cost-effective way to create additional storage space for your kitchen items.

We’ll find step-by-step how to turn a simple closet into a handy pantry. Whether you live in a small apartment or a large house, this is adaptable to your needs. We’ll learn everything from clearing out the closet and planning your pantry layout to installing shelves and organizing your new pantry space. By the end, you’ll have a useful pantry that will make your kitchen more organized and efficient.

So, let’s get started turning your closet into a pantry.

Steps to Turn a Closet Into a Pantry

Step 1: Clear and Empty the Closet

Clear and Empty the Closet

To start turning your closet into a pantry, the first thing to do is empty it. Take everything out and see what you have. Turning a closet into a pantry is the time to clean up and get rid of things you don’t need anymore. If something’s old or useless, try giving it away or throwing it out. After your empty closet, think about how you want your pantry to spot and work. Choose shelves, hooks, or bins that will help keep things organized. Measure the space to make sure your storage items will fit. Now, give the closet a good clean. Wipe down shelves, walls, and floors to make it nice and clean for your new pantry. Once it’s clean and dry, you can start making it into a useful pantry. With a little planning and work, you can change that unused closet into a pantry that’s clear to use for all your food storage needs.

Step 2: Assess the Closet Space

Assess the Closet Space

After you’ve emptied the closet, it’s time to check it out. Use a tape measure to see how tall, wide, and deep it is. Also, view any shelves or rods inside. You might need to move or take them out to make room for your pantry material. Take your time with this step. Planning and measuring now will save you trouble later. It’s fun to try turning a closet into a pantry. So, grab that tape measure, select your shelves, and be ready to turn that closet into an organized pantry.

Step 3: Plan the Pantry Layout

Plan the Pantry Layout

Before you start arranging your pantry, think about what you’ll keep there items like canned foods, pasta, spices, and kitchen tools. Knowing what you’ll store will help you pick the right shelves or containers. Cans can go on sturdy shelves, and dry foods can be in clear boxes or bins. Spices can sit on a spice rack or in a drawer. For kitchen gadgets, find them in a good spot, maybe on hooks or special racks. Try using baskets or bins to keep things orderly. Hooks are great for hanging aprons or cups. If space is tight, wall racks, then by planning and organizing based on what you have, your pantry can be useful and plan to use. So, select your ideal pantry and set it up to turn a closet into a pantry.

Step 4: Install Shelving

Install Shelving

Shelves in your pantry are important. You can go for fixed ones or ones you can adjust, depending on what works best for your space and what you want to store. Adjustable shelves are cool because they can handle things of all sizes. But make sure you attach them well so they don’t fall. They keep your food organized and clear to find. So, choose carefully and set them upright. When your shelves are strong and just the right size, your pantry becomes a clean, plain place to turn a closet into a pantry.

Step 5: Add Lighting

Add Lighting

Good lighting is important in your pantry. It helps you find items easily and ensures nothing hides in the dark. There are two simple ways to make your pantry brighter

First, you can use battery-powered LED lights. These lights are a breeze to install. Just stick them wherever you need more light. There is no need for fancy wiring because they run on batteries. When you open your pantry door, these lights turn on automatically so you can see everything. They don’t use up too much energy, so you won’t have to change the batteries all the time. Another option is overhead lighting. If your pantry has an electrical plug, try installing lights on the ceiling. This turning a closet into a pantry gives you good, even light across the whole pantry. You can pick from different types of lights to match how your pantry looks. With the right lighting in your pantry, finding things becomes easy, and you’ll never have to deal with dark corners again.

Step 6: Organize and Label

Organize and Label.jpg

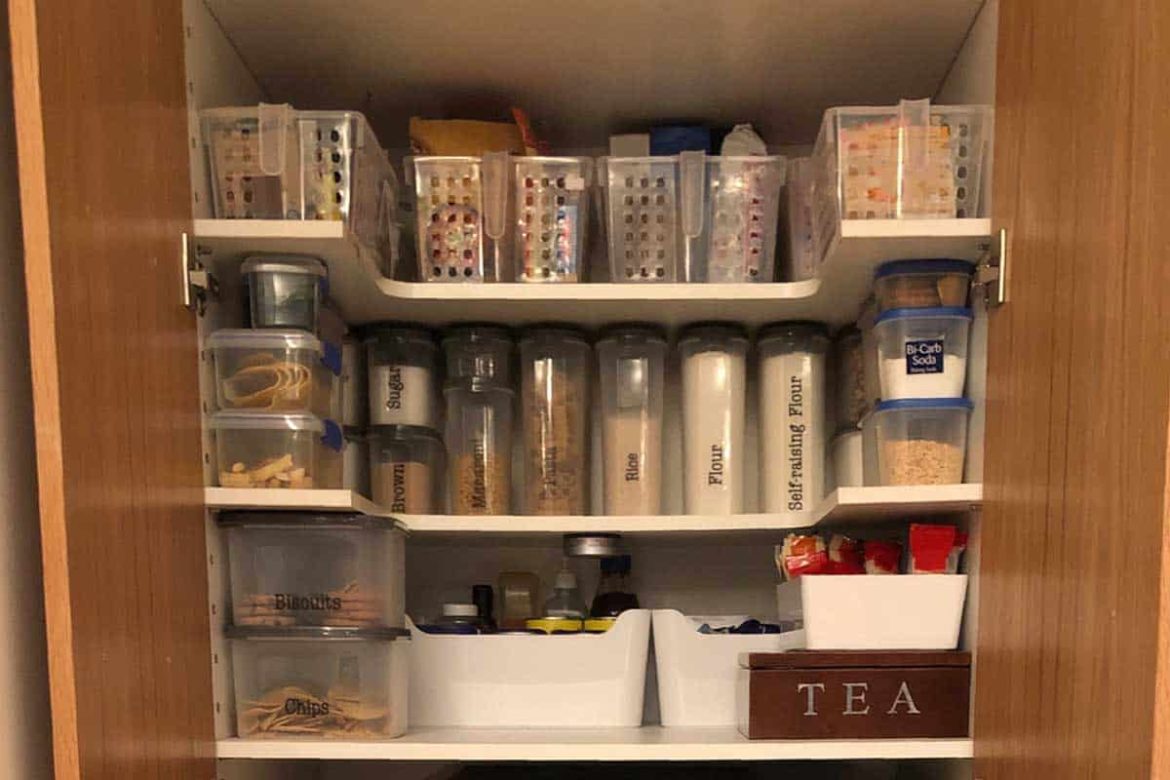
Once you’ve got your shelves and lights all set up. Let’s get your pantry organized and looking great. First, use baskets, bins, and containers to group similar items together. This turns a closet into a pantry so you can find things quickly, and it saves space, too. You can use a label maker for a fancy touch or use chalkboard labels for a cute appearance. With labels, your pantry will be in order, and you won’t have to hunt for things. So, grab those baskets and labels, and make your pantry a clean, organized, and easy-to-use space.

Step 7: Stock the Pantry

Stock the Pantry

Now that your pantry is all organized and labeled. It’s time to fill it with your favorite kitchen items. Put the things you use a lot where it’s clear to see and reach like at your eye level. Items like pasta, canned food, and snacks should go there. For the things you don’t use as much, put them up high or down low on the shelves. This turns a closet into a pantry. You use all the space in your pantry. By setting up your pantry like this, you’ll save time and make cooking less stressful. You won’t have to search for your spices or snacks anymore. Everything will be in the right place, ready when you need it. Enjoy your cooking.

Step 8: Maintain and Update

Maintain and Update

To keep your pantry working smoothly, get used to checking for old things and buying what you need. Keeping your pantry orderly might take some time, but it’s worth it because it saves you time and stops food from going bad. First, look at the dates on your pantry items. Throw away anything too old. Eating expired food isn’t good for you, and it doesn’t taste great. After throwing out old things, see what you’re running out of and make a shopping list. It’s helpful always to have basics like pasta, canned goods, and spices in your pantry so you don’t have to rush to the store when you’re cooking. Arrange your pantry so things you use a lot are plain to reach, and group similar things together. You can also put labels on shelves or containers to help you find things quickly. Following these effortless steps will make your pantry work better and make cooking and planning meals easier for you.

How to Maintain a Pantry

How to Maintain a Pantry

1. Declutter Regularly

To keep your pantry well-ordered, the first thing to do is clean it up. Look at what’s on your pantry shelves. If something is too old and unhealthy to eat, throw it away. If you have food that won’t go bad and you won’t use it, give it to someone who needs it. Throw away anything that’s broken or open to keep things fresh and safe. Cleaning up your pantry has two benefits. First, it makes more space and makes your pantry better. Second, it helps you see what you need to buy again. When you get rid of old or unwanted food, you can list what you’re missing. This turns a closet into a pantry. When you go shopping, you’ll know exactly what to get. Think of cleaning your pantry like giving it a fresh start. It’s like making your kitchen cleaner and more organized. Your pantry and your future self will be happy you did it.

2. Organize with Zones

Keeping your pantry organized is as simple as ABC. Just group your items by what they are, like grains, canned goods, baking things, snacks, and condiments. You can use clear boxes, baskets, or shelves in each group. And the easy part is to put labels on everything. Labels are like name tags that tell you what’s inside. No more searching high and low for your favorite snacks or spices. So, make your pantry orderly by sorting your food, using clear containers, and adding labels. You’ll be a pantry pro in no time, and cooking or snacking will be a breeze when turning a closet into a pantry.

3. Invest in Storage Solutions

Getting your pantry in order is a big deal for keeping your kitchen well-ordered. To simplify, Consider adjustable shelves that move up or down to fit different-sized items. This way, you can use all the space and easily access your things. Try pull-out drawers, which are great for keeping your snacks, spices, and canned goods organized—no more searching for things at the back of the pantry. Use spinning trays, like Lazy Susans, for those tricky corner cabinets. They make it a breeze to reach items hiding in the corners. For items like flour, sugar, pasta, and cereals, go for clear containers, either plastic boxes or glass jars. Turning a closet into a pantry not only keeps your pantry looking organized but also lets you see when you’re running low on supplies. These simple pantry storage ideas can change your kitchen into an organized, efficient space, saving you time and reducing food waste.

4. First In, First Out

To stop food from going to waste, Use the first in, first out (FIFO) method. Just put the newer food behind the older things in your pantry or fridge. This turns a closet into a pantry. You’ll grab the older items first when you’re cooking or snacking. Why is this a good idea? Well, it means you won’t forget about food hidden at the back, which might go bad before you use it. By using the older items first, you make sure nothing gets wasted. Think of your pantry as a lineup of groceries waiting for their turn. When you always pick from the front, you’ll see less food going to waste. It’s a clear trick that saves money and helps the planet by reducing food waste. So, give first in, first out a go, and you’ll see less food ending up in the trash.

5. Regularly Check Expiration Dates

Make it a regular thing to look at the dates on the items in your pantry when you do your pantry organizing. Doing this simple job not only keeps you from eating old food but also helps you plan your meals with items that need to be used soon. By checking those dates often, you’ll easily find items that are about to go bad. Turning a closet into a pantry lets you use them before they spoil, which means less wasted food and money saved. You’ll be eating fresher, safer food. This habit also makes your grocery shopping easier. When you know what’s getting close to its end date, you can focus on using those items and get replacements for your pantry basics on your next shopping trip. It’s a small thing to do that can give you big benefits like healthier eating and better money management. So, start checking your pantry today.

6. Rotate Stock

When you fill-up your pantry with groceries, keep things fresh and stop food from going bad. It’s called stock rotation, and it’s effortless how it works. When you buy new groceries, put them in the back of your pantry. That’s the spot for the new things. Then, take the older items you already have and move them to the front. Now, the older items are right in front, ready to be used first. Why do this? Well, it makes sure you use the food that’s been in your pantry the longest before it goes bad. By turning a closet into a pantry, nothing gets left behind and wasted in the hidden corners of your shelves. It helps you save money by cutting down on food that gets thrown away. So, when you fill your pantry, give your groceries a little shuffle, new at the back, old at the front. It’s an easy way to keep your pantry organized and your food from spoiling.

7. Regular Cleaning

Apart from your usual cleaning, it’s really important to keep your pantry nice and clean. Just wipe the shelves, watch out for spills or crumbs, and be sure to sweep or vacuum the floor often. A clean pantry not only looks better but also stops bugs from getting into your food. Think of turning a closet into a pantry as a safe place for your food. When it’s clean, bugs and mice won’t find anything to eat, so they’ll stay away. A clean pantry helps you find what you need, so you waste less food and save money. So, make cleaning your pantry part of your routine. It’s a clear way to keep your food safe and your wallet happy.

8. Inventory Management

Make a list of what’s in your pantry, whether you use paper or your computer in your kitchen. Turning a closet into a pantry helps you stay organized and makes cooking and shopping easier. Consider writing down everything you have in your pantry, like pasta, canned tomatoes, and spices. It helps you know what you have so you don’t buy the same things again or forget something important for your recipes. But that’s not all. With your pantry list, planning meals is simple. You can look at your list and decide what to cook without going to the store. And when you do go shopping, you know exactly what to buy, so you save time and shop smarter. It makes sure you’re ready to cook, whether you’re making a big meal or just a quick snack

Conclusion

Changing a closet into a pantry is simpler than you might think. With a few basic steps and some handy tools, you can create a useful and organized space to store your kitchen needs. Start by clearing out the closet and measuring the space to plan your shelves and storage bins accordingly. Next, install strong shelves or wire racks to maximize storage capacity.

Don’t forget to add hooks or racks inside the closet door to hang small items like aprons or kitchen utensils. To keep things nice, use clear containers or baskets to store items like pasta, canned goods, and snacks. It’s important to keep your pantry orderly by regularly checking for expired items and restocking as needed, whether you have a small closet or a larger one.

Turning a closet into a pantry is an achievable project that can make a big difference in your kitchen.

October 17, 2023 0 comments
0 FacebookTwitterPinterestEmail
21 Gorgeous Home Office Rug Ideas That Transform a Work Area
Ideas

21 Gorgeous Rug Ideas to Elevate Your Home Office Work Area

by Jonathan Tremblay August 15, 2023
written by Jonathan Tremblay

Don’t you think while you set up a home office, every single detail is essential? Because every part of an inspiring and productive office is important, from the furniture to the lighting. But the rug is one of the items that people usually forget, but it holds a lot of value.

A well-chosen rug for the office can add comfort, style, and usefulness. The right rug can center the room, define your office, and give your feet something nice to feel and look at. Whether you like bright colors, clean lines, or complicated patterns, a rug out there will look great in your office decor and help you finish your work.

In this article, we’ll look at 21 beautiful ideas for rugs for your office that will make your space more stylish and inviting.

So let’s get started and dive into the world of rugs for offices and find out how they can change the look of your space.

Beautiful Rug Ideas for Your Home Office

In addition to the aesthetic appeal, a piece of rug in your home office can also be helpful. It can help you make the room better for concentrating, dampen sound, and quieter. The soft cushioning under your feet can give you much-needed relief and reduce pain and fatigue.

Rugs also act as visual dividers in open-concept spaces, defining the boundaries of your office area and giving the room a feeling of structure. With so many options of rug for the office, you can find the perfect mix between functionality and style, making an inspiring workspace and harmonious environment that shows off your style.

1. Minimalist Elegance

Minimalist Elegance

A simple and sleek rug with clean lines and one color can give your home office a touch of class. Pick a carpet in a neutral color, like brown or gray, to make the room more relaxed and calm and a place where you can concentrate.

2. Natural Fibers

Natural Fibers

You can easily pick a mat made of natural fibers like sisal and jute for a touch of earthy charm. These materials not only give your space warmth but also add texture and make a connection with nature, which makes people calm and well.

3. Pick Patterns

Pick Patterns

If you want to make your office look more attractive, you can add a rug with patterns. Patterns can be geometric, floral, or any. Bold designs help you add energy to a room and still make it look professional.

4. Timeless Charm

Timeless Charm

If you like an old and nostalgic look, then consider a rug that has a vintage-inspired feel. Oriental or Persian rugs with intricate designs and warm colors can add a bit of elegance and history to your workspace.

5. Pop of Colors

Pop of Colors

You can add personality to your home office by adding a bold color and lively rug. Rich-colored rugs, like mustard yellow and deep blue, can quickly brighten your workspace and make you feel more sociable.

6. Artistic Flair

Artistic Flair

If you want to showcase your artistic side, choose a rug you can hang on walls. Go and pick rugs with painterly themes, abstract patterns, or bold graphics that can work as the focal point of your space.

7. Minimal Magic

Minimal Magic

You can embrace the power of white and black by choosing a rug with only these two colors. This classic mix always stays in style and can give your office a stylish and sleek look.

8. Refreshing Vibe

Refreshing Vibe

With nautical theme rugs, you can bring the refreshing and calming feeling of the beach to your office. You can opt for rugs with white stripes and navy blue shades or patterns like anchors and ships to create a sense of escape and calmness.

9. Bohemian Style

Bohemian Style

Choose a bohemian-style rug if you want your home office to have a varied feel and be free-spirited. Many of these rugs have intricate patterns, bright colors, and fun tassels or fringes that add playfulness and creativity to your space.

10. Airy Comfort

Airy Comfort

An airy rug can make you feel great under your feet, making your office space more welcoming and warm. You can make your office more luxurious by picking the right high pile or thick rug.

11. Get Inspired by Nature

Get Inspired by Nature

A rug with motifs or designs inspired by nature can bring outdoor beauty into your home office. Green prints, floral patterns, and even rugs that look like grass can make a room full of heart and peace.

12. Swedish Simplicity

Swedish Simplicity

A rug with geometric patterns and neutral colors can help you embrace Swedish designs’ straightforward style and clean lines. This design makes your space more calm and free of mess, which is fantastic for completing your work.

13. Fun Patterns

Fun Patterns

A rug with funny and bold patterns can add creativity and fun to your home office. These rugs, from chevrons to polka dots, can make your workspace more fun and lighthearted.

14. Industrial Edge

Industrial Edge

If you want an industrial loft style or modern touch to your home office, you can pick a rug that matches your look. So choose mats with textures, abstract patterns, or metallic accents to give your workspace an edgy or urban feel.

15. Vintage Revival

Vintage Revival

You can bring a bit of nostalgia to your workspace with an ancient rug. You can choose rugs with retro patterns, like mod and paisley, to give your home office your style and a feeling of nostalgia.

16. Moroccan Touch

Moroccan Touch

You can pick a rug made in the style of traditional Moroccan designs that will take your space to the exotic beauty of Morocco. These rugs have intricate geometric patterns and bright colors that make your home office rich and cultural.

17. Leather Accents

Leather Accents

You can choose a rug made of leather or with leather accents that can give your room a classy and elegant look. Leather rugs give your desk a touch of richness and elegance, making it look better.

18. Use Neutral Tones

Use Neutral Tones

Try to pick rugs in soft and neutral tones that can make your home office look more peaceful and calm. Cream, ivory, and brown can create a soothing background for your workspace, helping you in your work and making you feel relaxed.

19. Color Coordinated

Color Coordinated

Select a rug that stands out from your room decorations and furniture. If most of your desk’s colors are light, choose a dark rug to give the room a sense of stability and vice versa.

20. Visual Impact

Visual Impact

A rug with eye-catching designs can make a strong statement and make your workspace bold. Whether the rugs have bright colors or significant patterns, or geometric designs, choose the one that can be a beautiful focal point and can start a conversation.

21. Customised Pieces

Customised Pieces

If you want to make your home office of your own, you could have a rug made right for it. A custom rug can be an essential and unique addition to your office. You can choose the patterns, colors, size, and shape that works best with your space.

After understanding these 21 home office rug ideas, let’s understand why these rugs for the office are essential and why they are

Why are Rugs Important?

Rugs for offices are important for not just one reason but several reasons. Here are some of them explaining why we need office rugs:

1. Design and Comfort

Spending much time in a home office can be hard on your body. Office rugs work as an additional layer of comfort by giving extra support and padding. They make the workspace more comfortable by making it easier on your legs, feet, and back. The softness of a rug can make it easier to work for more extended amounts of time without getting uncomfortable or tired.

2. Aesthetics

Office rugs can make a huge difference in how pleasant a workspace generally looks. They add texture, visual interest, and color to a plain or boring office, making it a more visually appealing and welcoming place. A well-chosen rug can tie the room all together, match the style of the office, and give the room a more clean and put-together look.

3. Noise Reduction

Offices can be noisy, especially if they have hard bricks like brick or wood. Rugs in the offices help absorb sound and cut down echoes and reverberations, making it easier and quieter to work. The padding and rug thread absorbs sound, making it quieter when chairs are adjusted when people walk, or do other office tasks.

4. Defined Workplace

In offices with an open layout or rooms that serve multi-purposes, office rugs are a vital part of defining and separating the work area from other rooms. Putting a rug under the desk and sitting area can make a clear line between the workplace and other rooms. It visually separates the office space area, makes concentrating easier, and improves productivity.

5. Coziness and Warmth

Rugs also add coziness and warmth to a workplace, making it more attractive and comfortable. A rug can act as insulation, especially in colder areas or during the winter months. It keeps heat from escaping through several floors and keeps the rooms warm and cozy. It also makes the workplace more comfortable and helps people get work done.

6. Individuality & Style

Office rugs are an excellent option for adding style and personality to your office. With so many patterns, designs, and colors to choose from, you can find the perfect one that fits your style and goes well with the theme of your office. Make sure that the rug lets you change and adjust your workspace, making it a place that feels like yours.

At last, office rugs are essential because they make the room look better, give ergonomic support and comfort, define the workspace, add coziness and warmth, and let people make it their own. By choosing a perfect rug in your home office, you can create a space that not only looks nice but also helps you in your work and help you stay focused and feel good in general.

Conclusion

All in all, a well-chosen rug can significantly impact your home office, taking its style and usefulness to another new level. By putting a rug in your office, you make it look better and more comfortable, reduce noise and define space.

The soft, cushioned feel under your feet makes you feel like you’re walking on clouds and makes those long work days more fun. Also, rugs can effectively block out noise, creating a calm and quiet space for focusing and getting work done.

Not just one there are several rug options to choose from, so you can try different styles, materials, and colors to find the perfect one that matches your taste and the vibe of your office. The right rug will not only change the overall look of your office, but also it will add personality and style to it, making it look like your own.

Frequently Asked Questions

Are Rugs Necessary in Home Offices?

Rugs are not mandatory to have in a home office, but they have a lot of benefits. They can make a room look larger, make it more comfortable, quieter, and define the space. Not just this, whether you want a rig in your home office depends on your taste and the mood you want to set for your office.

What Size of a Rug is Required in My Home Office?

The ideal size of a rug depends on the size of your home office setup. In an ideal situation, the rug should be enough size to fit a desk and chair in the main work area. Choosing a rug that goes well with the furniture is best so you can quickly move around and look like a one-piece.

What Kind of Materials Do We Need to Make Rugs for The Home Office?

The choice of the material for the rug depends on what you like and how you want the room to be. Wool, Jute, and sisal are some natural fibers that are strong and feel cozy. Most of the time, synthetic fibers like polyester and nylon are easy to clean and cheaper. So while you choose the material, consider the comfort, how you will clean it, and how the overall room will look.

How Can Mats Help Reduce Noise Outside of a Home Office?

Rugs can absorb sound and lower the amount of noise in a room. Some rugs have a thick, dense pile that can help you block out reverberations and echoes, making it easier to work and quieter. This feature can be helpful if your home office has hardwood floors that tend to make a loud noise.

Can a Rug Define a Workplace with An Open Floor Plan?

Absolutely! In a home office with an open floor plan, a rug placed creatively can act as a visual diver and define the limits of your workspace. By choosing a rug that goes well with the overall design and matches your furniture, you can set up a separate area within the bigger space, making it easy to tell the difference between the workspace and other rooms.

August 15, 2023 0 comments
0 FacebookTwitterPinterestEmail
21 Hallway Cupboard Ideas
Ideas

21 Stylish Hallway Cupboard Ideas to Maximize Your Space

by Jonathan Tremblay August 9, 2023
written by Jonathan Tremblay

The hallway is the first room a visitor enters when they arrive at your house. And you should understand how to organize your hallway cupboards efficiently unless you enjoy seeing your visitors trip over shoes, fight their way through racks of jackets, and generally cause mischief.

Fortunately, there are tons of creative storage solutions for hallways that may assist you in creating a clutter-free corridor. It should always be beautifully functional and aesthetically pleasing. The storage is essential for quick access to shoes, jackets, and dog leashes, which will make leaving the house in the morning even simpler.

n this article, we will look at some of the greatest always storage solutions that may make your corridor both fashionable and useful. Make the most of this frequently overlooked space by picking a concept that speaks to you.

Hallway Cupboard Ideas for Perfect Hallway Look

Here are some of the hallway cupboard ideas which you can try out to make your hallway more organized and practical.

1. Rustic Hallway

Rustic Hallway

Wooden console tables with potted plants and flowers, rustic candles, and white porcelain accents can be seen in this hallway. The beach walls are decorated with a white framed mirror in a farmhouse style to add to the space’s rustic appeal.

2. Monochromatic Mosaic

Monochromatic Mosaic

Among the spotless white walls of this hallway is a shoe cabinet made of wood. The gorgeous area is illuminated by black accented farmhouse pendant lighting, and monochrome mosaic floor tile gives the visual intrigue.

3. Create a Stylish Built-In

Create a Stylish Built-In

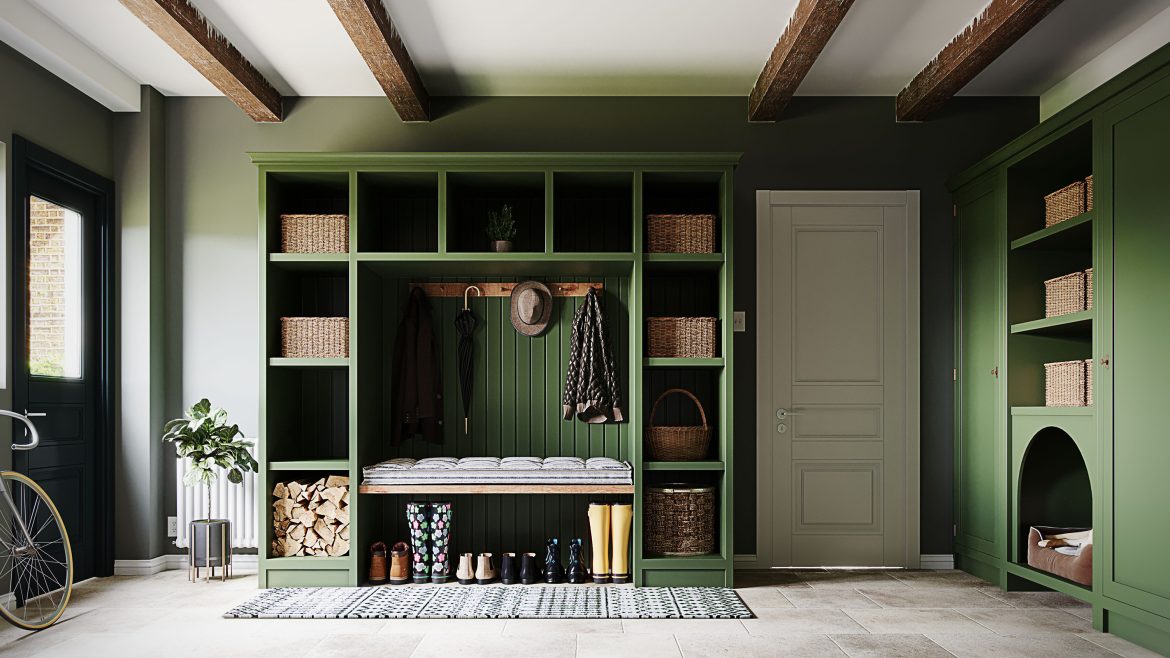
You could profit from a chic built-in, depending on the placement of your corridor and your storage requirements. Families will find this to be the perfect answer because each cubby may belong to a different person. Use this area to store anything you want, including baseball bats, sweaters, shoes, and backpacks.

4. Mudroom

Mudroom

The best storage option for your home can be a little mudroom if your hallway is close to an external door. With a straightforward adjustable shelf system, you can make room for goods like boots, umbrellas, dog leashes, and other commonplace items. A pair of attractive baskets can spruce up the design, while heavy-duty plastic bins that can handle a lot of dirt and grime will keep the storage ultra-practical.

5. Make It a Pantry

Make It a Pantry

Have you ever thought of adding more pantry space in your hallway? An open-shelf hallway-style pantry system is a great addition to homes for families that spend a lot of time cooking and socializing in the kitchen. Include both more aesthetically pleasing choices like wicker and wire baskets as more useful storage options like shelf risers and lazy susans.

6. Concealed Wooden Storage Area

Concealed Wooden Storage Area

A charming white door with a treasure trove of woven baskets and a wooden storage room is located at the end of an attractive corridor. Oriental carpets, framed pictures, and hanging plants all add to the mood.

7. Gold Accents for More Majestic Looks

Gold Accents for More Majestic Looks

A magnificent corridor leads to a mesmerizing black cabinet with sparkling golden accents and a structure of eye-catching artwork atop it. Beautiful artwork is displayed on the wall beyond, and magnificent works are displayed in silver frames on neighboring walls.

8. Enclosed Shoe Storage

Expired shoes are one of the first items to clog a hallway. As soon as you enter the door, they start to pile up wherever they are kicked off, creating an attractive mound of shoes. There are several thin shoe storage alternatives available that offer a surface for keys, mail, and other items in addition to a place to keep the shoes.

9. Under the Stairs

 Under the Stairs

The area underneath the stairs is often overlooked but offers the chance for taller storage for bulkier items like jackets, umbrellas, and, if you are lucky, bikes if you have enough place. You could just add some frames and doors, or you could go a little more elaborate with pull-out drawers and shelves, depending on how customized you want to go. Storage under the stairs is very popular, but truly under-stairs storage is a unique concept.

10. Hang Your Wardrobes

Hang Your Wardrobes

For storing taller items and jackets, if under-stair built-ins are not your style or are not an option for you, a narrow style might be a substitute. Since there are large pieces of furniture, we would advise painting them the same color as the wall. If they are in the same corner, consider hiring a carpenter to make them appear built-in for a cleaner appearance.

11. Utilize Crates and Containers

Utilize Crates and Containers

No matter what is in your closet, using a selection of crates and containers is one of the simplest methods to organize it. Basic plastic bins will serve just fine, but you might choose a pair of chic baskets from your favorite retailer. We recommend totally emptying the closet and sorting the goods into groups of possessions back in the closet in clearly marked storage bins. This is quite a mannered and sophisticated way of managing things. Also, this will embrace your attention to detail skills very well.

12. Built-In Benches with Pegs

Built-In Benches with Pegs

In a hallway, seats are frequently handy, especially if you have small kids who require assistance putting their shoes on. You can lift the top of a bench and stow everything you need within. Utilizing the whole height of the wall is made possible by using the wall above a seat for additional shelves and hanging storage.

13. Add a Minimal Shelf

Add a Minimal Shelf

Not every hallway has enough space for a small mudroom or built-in pantry. Why not include a little shelf if you have limited space? You may decorate it with a nice photo and use it to store smaller goods like keys and credit cards. A candle or diffuser would look fantastic in this location to keep the foyer smelling fresh.

14. Choose a Functional Furniture

Choose a Functional Furniture

Large built-in cubbies and entrance hutches can fit in certain corridors, while smaller storage solutions could be needed in others. Nevertheless, there are many different styles and sizes of useful furniture. For instance, this hallway has a thin seat and table that are ideal for removing your shoes after a hard day and placing down your bag or wallet before entering the house.

15. Trim Out The Cupboards

Trim Out The Cupboards

Although the sloped design might make it challenging to reach, the under-stairs space is a common location for hallway storage. Therefore, as the team at EMR Architecture has done here, think about including three or four normal hinged doors rather than just one. They have made it simpler to access every section of the cabinet hollow by segmenting the surface into a series of stepping doors.

16. Label the Closets

Label the Closets

One of the professional home organizer’s most well-known pieces of advice may be summed up in one word- labels. Be sure to identify your storage containers and baskets to keep organized, whether you decide to stock your hallway closet with blankets and pillows, various cooking oils, or everything from prescriptions to tape measures.

17. Select a Sleek and Slender Cupboard

Select a Sleek and Slender Cupboard

If you have the space, think about putting in one or two cabinets in your hallway for storage below and lovely decoration on top. Since cabinets conceal all of your storage behind closed doors, corridors might benefit especially from their utilization. To avoid overpowering the compact area with loud colors or decorations, stick with a neutral wood tone or color palette for your cabinets.

18. Wooden Built-In Storage Area

Wooden Built-In Storage Area

A gorgeous wooden built-in storage room is located in this corridor and is surrounded by white walls. The built-in cabinet has several storage spaces of different sizes, making it ideal for storing everything you need or want. The side potted plant gives a splash of color. The beige walls and mosaic floor provide a warm and contemporary atmosphere in the hallway.

19. Open up The Areas

 Open up The Areas

Getting rid of all the cabinet doors and replacing them with open shelves will also make the area beneath the stairs more accessible. The open design makes it simple for the owners to remove their footwear and, more crucially, to put it back again. There are places for boots and smaller ones for shoes.

20. Try Some Sliding Doors Too

Try Some Sliding Doors Too

It makes sense to use a space-saving cabinet door if your corridor is small. A bifold design that unfolds like a concert will stick out less than a hinged one, but a sliding door like this one by Macdonald Wright architects will be much less noticeable. The large door slides back to allow access to the narrow but roomy cupboards without getting in the way of those trying to pass by.

21. Country-Style Bench and Cupboard

Country-Style Bench and Cupboard

Beautiful country-style benches that double as cupboards are the ideal way to blend usefulness and beauty in a modern rustic or country-style décor. A great place to sit before leaving the house and a place to stash stuff away. Put a cushion and a blanket on top for more texture in the area. The most important rule when designing furniture for a hallway is to make sure that there is still adequate traffic movement around the item; if it blocks the area or makes it seem cramped, you should seek something else that will work better.

Bonus Ideas

Who doesn’t love things if given extra? Here are some bonus ideas to try out that you would make a great impact.

1. Blend with The Console Table

Make sure the hallway cabinet you install in your immediate entryway fits the area and doesn’t impede traffic flow to the stairs or the rest of the corridor. If you have a little corridor, look for specialized thin go smaller than larger. A unit that is too big can make the area feel even smaller. Panel Cabinets make of black and rattan are really fashionable right now. Don’t forget to style the top perfectly while you have the chance.

2. Narrow Black Cupboard for a Contemporary Look

A black accent is one of the distinctive features of a modern home design. It’s a terrific approach to provide clarity and a dash of modernism to integrate a black accent with a cabinet. Combine with a few more tastefully placed black accents in the area to unify the environment.

3. Integrate a Surface

If you are undecided between a low console with a tabletop and a full-height cabinet or a low console with a surface, try combining the two. Zulufish, the architect of this room, built a frame storage around a practical console unit by using the entire wall. A window above the console top that views into the living room and the somewhat shallower wall cabinets and shelves surrounding the unit work together to prevent the bank of storage from protruding into the corridor. Instead of a rail that runs from side to side, utilize pull-out hanging hooks if you are designing a shallow cabinet for your coats.

4. Add Some Drawers

You might invest in pull-out cabinets on runners, like the ones by Margot Tsim Interiors, to take things a step further. As the drawers can be pushed out to provide access to objects at the rear, this is especially helpful if the cupboard space is rather deep. The shelves of these drawers are slanted to accommodate the owners’ shoes.

Conclusion

Finally, hallway cabinets are a useful and adaptable addition to the foyer of any house. Of course, you can decorate a hallway with attractive designs, but it’s also perfect for storing shoes, sweaters, and even extra pantry space. They provide plenty of room for storing shoes, jackets, and other commonly used goods, keeping the corridor tidy and arranged.

There are several design alternatives, ranging from standalone wardrobes to built-in cabinets, to accommodate varied tastes and configurations. Whether your entryway is large or narrow, adding a well-designed cabinet may improve the looks while supplying much-needed storage options.

Therefore, take advantage of many suggestions and ideas at your disposal to make your hallway a useful and attractive space that stylishly greets you and your visitors.

Frequently Asked Questions

What Advantages Come with Having a Hallway Cabinet?

Hallway cabinets provide several advantages, including providing effective space for shoes, jackets, and other regularly used goods. They assist in maintaining the organization of your hallway, creating a clean and pleasing entranceway. Additionally, by easily blending in with your current decor, always cabinets may improve the appearance of your room.

How Can I Successfully Organize My Hallway Cupboard?

To efficiently organize your hallway cabinet, think about installing shelves or Kabir for shoes and accessories and hooks or packs for hanging quotes and had. For storing smaller items like gloves or scarves, use baskets or containers. Maintaining a clean and organized cabinet may also be achieved by labeling or categorizing storage spaces.

Can Hallway Cabinets Be Modified to Meet My Unique Storage Needs?

Hallway cabinets may be altered to meet your unique storage requirements. You can use a professional carpenter or modular storage solutions that include moveable dividers, adjustable shelves, and other customizable options. This enables you to design a cabinet that ideally meets your organization’s needs.

August 9, 2023 0 comments
0 FacebookTwitterPinterestEmail

Recent Posts

  • A Complete Chalked Paint Review fo Better Selection 
  • A Guide to Painting Furniture without Sanding
  • 15 Steps to Create Faux Shiplap DIY Wall in Budget
  • How to Paint Furniture without Sanding or Priming
  • A Guide to Achieving Texture with Saltwash Paint Techniques

Recent Comments

No comments to show.

Recent Posts

  • A Complete Chalked Paint Review fo Better Selection 

    October 18, 2023
  • A Guide to Painting Furniture without Sanding

    October 18, 2023
  • 15 Steps to Create Faux Shiplap DIY Wall in Budget

    October 18, 2023
  • How to Paint Furniture without Sanding or Priming

    October 18, 2023
  • A Guide to Achieving Texture with Saltwash Paint Techniques

    October 18, 2023

Categories

  • Bathroom (15)
  • Bedroom (4)
  • Brush (3)
  • Decor & Design (15)
  • Decorating (1)
  • Dining Room (3)
  • DIY (2)
  • DIY Projects (11)
  • Door (5)
  • Fireplace (3)
  • Flooring (2)
  • Furniture (9)
  • Gardening (1)
  • Guide (11)
  • Home Crafts (1)
  • Home Decor (7)
  • Home Improvement (9)
  • Ideas (63)
  • Kitchen (16)
  • Outdoor Living (1)
  • Paints (18)
  • Review (1)
  • Room Ideas (3)
  • Tutorial (1)
  • Uncategorized (2)
  • Wall (6)

Instagram

About Us

Maecenas nec odio et ante tincidunt tempus. Donec vitae sapien ut libero venenatis faucibus, nullam quis.

01 Central Park, US, New York City
Phone: (012) 345 6789
Fax: (012) 345 6789

  • Facebook
  • Twitter

@2021 - All Right Reserved. Designed and Developed by PenciDesign


Back To Top
DormyHome
  • Decor & Design
  • DIY
  • Guide
  • Home Improvement
  • Smart Home