• Decor & Design
  • DIY
  • Guide
  • Home Improvement
  • Smart Home
DormyHome
keep your memories alive
Home » Archives for
Author

David Parker

David Parker
David Parker

David Parker, a home renovation specialist, holds an impressive resume with a degree in Interior Design and over 18 years in the industry. His career began in small-scale residential projects, gradually moving to more complex renovations. His expertise lies in blending functionality with aesthetic appeal, a skill he brought to our website. His insightful articles cover various topics, from eco-friendly remodeling to budget-friendly redesigns. In his free time, he enjoys photography and participating in DIY workshops within his community.

How to Paint Furniture Without Sanding
BrushFurniturePaints

A Guide to Painting Furniture without Sanding

by David Parker October 18, 2023
written by David Parker

Painting furniture can be a fun DIY project, but sanding can be real work. It creates dust, takes up much time, and requires some muscle power. But what if we told you that there’s a way to achieve a smooth and beautiful paint finish without all that sanding problem? We’ll find a simple and easy way to paint furniture without sanding.

If you want to refresh an old piece of furniture or add some color to your decor, our step-by-step instructions will make the process effortless. We’ll find the materials you’ll need, the effortless preparation steps, and the best painting techniques to get a professional-looking result. So, if you’re ready to change your furniture with a fresh coat of paint and skip the sandpaper, let’s find out. You’ll be amazed at how clear and effective this method can be.

Let’s start the process of changing your furniture.

Why Avoid Sanding?

Why Avoid Sanding?

Sanding furniture before painting can be messy and time-consuming work. It’s all about removing the old paint, which creates dust and needs a big cleanup. Some furniture, especially ones with fancy designs or odd shapes, can be hard to sand properly.

But don’t worry, there are easier and quicker ways to do it. You can use special chemicals to remove the old paint without the messy sanding part. Or you can use a good primer that sticks well to the old paint, so you don’t have to sand it at all. These methods make painting furniture easier and faster, even if you’re not a DIY expert, and they keep your furniture looking awesome. So, you can give your furniture paint, no sanding, if it’s a plain table or a fancy dresser.

Materials You’ll Need for Furniture Painting

Materials You'll Need for Furniture Painting

Before you start, gather these things

  • Furniture piece: Choose the item you want to paint, whether it’s a table, chair, dresser, or any other piece of furniture.
  • Screwdriver and hardware: If your furniture has hardware like knobs or handles, remove them using a screwdriver.
  • Cleaning supplies: To ensure a clean surface, you’ll need mild dish soap, warm water, and a cloth or sponge.
  • Primer: A good quality bonding primer is important. It helps the paint stick to the surface without sanding.
  • Paint: Choose your preferred paint color and finish. Latex or acrylic paints are excellent choices for furniture.
  • Paintbrushes and rollers: High-quality brushes and rollers will give you a smoother finish.
  • Painter’s tape: Use this to protect any areas you don’t want to paint.
  • Drop cloth or newspaper: Protect your workspace against paint drips and spills.

Steps to Paint Furniture without Sanding

Follow these simple steps to make painting your furniture easy:

Step 1: Clean the Furniture

Clean the Furniture

If you want your furniture to look nice, clean it well. Just use some mild soap and water to get clear of dirt, grease, or grime. After cleaning, be sure to wash it off and let it dry completely. This furniture paint, with no sanding, will leave your furniture looking clean and good to go. Regular cleaning helps your furniture last longer and stay in perfect shape. So, don’t forget to give it the best cleaning now and then to keep it looking great for years to come.

Step 2: Remove Hardware

Remove Hardware .jpg

When you want to paint your furniture, and it has knobs, handles, or things like that, here’s what you can do. If you can easily take them off, remove them before you start painting. This furniture paint, no sanding, will make the painting much clearer because you won’t get paint on it by accident. But what if they don’t come off easily? No problem. You can still protect them by using painter’s tape. Just wrap the hardware with this special tape, making sure it’s covered well. This way, your knobs and handles won’t get any paint on them while you’re giving your furniture a fresh look. Whether you’re a DIY fan or just cleaning your home, this tip will simplify painting.

Step 3: Apply Primer

Apply Primer

Before you start painting your furniture, use a special primer. This helps furniture paint; no sanding helps the paint stick better and gives a shiny finish. Just follow the instructions on the primer to know how long to wait between coats of paint. This way, you’ll do perfect work, and your furniture will look awesome when you’re done. So, take your time, follow these easy steps, and you’ll have wonderfully painted furniture that you can be proud of. Don’t rush; instead, do each step carefully. Your patience and attention to detail will pay off, leaving you with a nice, refreshed living space that you’ll love.

Step 4: Paint

Paint

When your primer is all dry, it’s time to paint. Get the best paintbrush or roller for a smooth job. Put on the paint in thin, even layers, and don’t rush. Wait until each layer has dried before applying the next one. This way, your paint job will look great and stay that way for a long time. So, enjoy the process and see your space change with each coat of furniture paint, no sanding.

Step 5: Sand-Free Techniques

Sand-Free Techniques .jpg

Some special paints from certain brands are handy. They make your things shiny without the need for tough sandpaper. So, if you want your projects to look wonderful without all that sanding work, these paints are a real-time and effort-saver. You’ll like how things turn out. Whether you’re fixing furniture, cleaning your home, or doing fun DIY things, these paints are the way to go. Take the convenience and the better look these wonderful paints bring to your projects. Make your crafting experience better with furniture paint, no sanding, and see your creations come out nice and effortless.

Step 6: Optional Distressing

Optional Distressing

To make your project look old and cool, do this after painting. Get some sandpaper or a sanding block, and use them gently. Don’t press too hard. Just lightly rub them on the surface to show a little bit of the base paint or wood underneath where you want it to look old. This furniture painting, with no sanding, makes your project look special and aged, giving it a vintage style. It’s an easy way to get that trendy, simple look without any hard steps. So, give it a try and play around with sanding.

Step 7: Protect and Seal

Protect and Seal

After you’re happy with how the paint looks and feels on your project, think about giving it extra protection. You can use a clear coating like polyurethane or furniture wax. This furniture paint no sanding step is especially important if you know your project will be used often and might get scratched or worn out. Polyurethane is like a strong shield for your paint, protecting it from damage. Furniture wax, on the other hand, gives a polished, protective layer and adds a little shine to your work. So, whether it’s a piece of furniture that gets a lot of use or something you want to keep looking nice, don’t forget to do this last step to ensure your paint job stays great for a long time.

Tips for a Successful Finish

Tips for a Successful Finish

1. Work in a Well-Ventilated Area

When you’re painting things, it’s really important to have fresh air around you to stay safe. Paint and sealant things can let out chemicals that are not good to breathe. Breathing in these chemicals can hurt your health. Ventilation is just a fancy word for removing these bad chemical fumes and bringing in fresh air. You can make fine ventilation happen by doing effortless things. Open windows and doors to let fresh air in and push the bad fumes out. If that’s not enough, you can wear a special respirator mask. So, when you’re working with furniture paint, no sanding or sealants, always make sure you have lots of fresh air around you to stay safe and healthy.

2. Use the Right Brushes

To make your painting look smooth, choose superb brushes or foam rollers. The type of paint you use decides which tools to use. For thick paints like oil-based ones, pick brushes with natural bristles. They’re amazing for these paints and make things shiny. If you’re using water-based paints like latex or acrylic, foam rollers are your best bet. They make it easy to put on an even and polished coat on your walls. So, don’t forget to choose the right brushes or foam rollers based on your paint type. It’s a simple step that can make a big difference in how your furniture is painted without sanding.

3. Follow the Manufacturer’s Instructions

Different kinds of paint have special instructions for how to put them on and how long you need to wait for them to dry. It’s important to pay attention to these guidelines to get the best results. When you’re painting, whether it’s walls, furniture, or art, take a moment to check the label or product info. They’ll tell you things like the best tools to use, how to get the surface ready, and the ideal conditions for painting. Drying times can also be different. Certain paints dry fast, while others need more time to dry. Hurrying this step can lead to streaks or uneven surfaces. Being patient when waiting for furniture to be painted and not sanding to dry is a good idea. Follow the suggested drying times to make sure your project turns out great. So, don’t forget, each kind of paint has its own rules. By following them closely, you’ll make your painting experience smoother and the results better.

4. Be Patient

If you rush through painting, your project might not turn out well. So, take it slow and be patient. When you paint furniture, let each coat of paint dry completely before adding more. Don’t skip this step! It might seem like it’s taking a while, but it’s worth it. Being patient and letting each coat dry well will make your project look much better and shinier. Remember that it’s better to wait a some longer than to hurry and end up with a messy result. So, go at a comfortable pace, give those paint layers plenty of time to dry, and you’ll be rewarded with a fantastic-looking piece of furniture. Your patience will pay off, and your project will turn out great.

Best Paint for Furniture without Sanding

Best Paint for Furniture without Sanding

1. Chalk Paint

Chalk paint is a great pick for cleaning up old furniture without the need for sanding. It sticks well to different surfaces and can give your pieces a nice, old-fashioned look. Brands like Annie Sloan and Rust-Oleum offer lots of pretty colors and finishes to choose from for your furniture redo. Chalk paint makes it clear to give your old things a fresh and stylish appearance, and that’s why many people who like DIY projects and home decorating enjoy using it. You won’t have to spend ages sanding, as chalk furniture paint does not go on smoothly and hides flaws well. Whether you want a simple, shabby, attractive vibe or a classy vintage style, chalk paint offers plenty of options. So, if you’re looking for an easy way to change your furniture and get that attractive, old-timey look, chalk paint is perfect—no more tough sanding work. Grab your paintbrush and enjoy the makeover.

2. Milk Paint

Milk paint is awesome because it makes things look flat, not shiny, and is effortless. You don’t even have to sand the surface before you paint it. If you’re considering which brands are good, look into General Finishes and Miss Mustard Seed’s Milk Paint. They’re known for doing perfect work, so whether you’re a beginner or have some experience, milk paint can help you make surfaces look flat and important. Milk paint is an amazing tool for furniture and decor. It’s perfect if you want a matte, non-shiny look. You won’t have to struggle with sandpaper before you paint. Just get some General Finishes or Miss Mustard Seed’s Milk Paint, and you’re ready to roll. This furniture paint with no sanding is famous for making great paint that works well. So, whether you’re just starting or have done this before, milk paint can help you make a beautiful flat finish that’ll make your things look fantastic.

3. Acrylic Paint

Acrylic paints are clear to use, and you can find them easily. They’re best for giving your furniture a makeover. Start with a fine base coat to make the furniture paint, no sanding stick well, and then put on a special layer to keep it looking fresh. Brands like Benjamin Moore and Behr make paints that can handle many uses, so your furniture will look good for a long time. The cool thing about acrylic paints is they come in lots of colors. Whether you want bright and brave or subtle and classy, acrylics work for both. They dry fast, so you won’t have to wait too long to see your furniture’s new look. So, get some acrylic paints and see your furniture become amazing. You’ll be surprised at how great it looks and how your space feels fresh and exciting.

4. Spray Paint

When it comes to painting small pieces of furniture or difficult little details, grab a spray can. Brands like Krylon and Rust-Oleum offer many colors and finishes in spray cans that make painting a snap. Spray paint is plain to use and gives you a smooth, even coat every time. Whether you’re fixing up a little table or adding some color to twisted designs, spray paint is the way to go. Just pick your favorite color, and you’re all set to make your furniture look amazing. Give it a try, and you won’t be let down. Your furniture will look fantastic with some effort. Spray furniture paint, no sanding is a must-have tool for people who love DIY and decorating their homes. Enjoy the simplicity and accuracy of spray painting for all your furniture projects.

Conclusion

Painting furniture without sanding doesn’t have to be a difficult task. We’ve learned some simple steps to change your old, tired furniture into something fresh and stylish. First, clean your furniture thoroughly to get clear of dirt and grime. Then, choose the right paint and primer for your project. Apply a primer if needed; it helps the furniture paint, and no sanding sticks better. When painting, use even swipe and take your time to avoid drips.

Let each coat completely dry before adding more. Don’t forget to protect your work area with dirty clothes and wear old clothes. And when you’re done, clean your brushes and rollers immediately with soap and water. So, there you have it, an easy way to give your furniture a new look without any difficulty of sanding. It’s a budget-friendly, time-saving option that anyone can do.

Don’t forget you can use different colors and finishes to match your style.

October 18, 2023 0 comments
0 FacebookTwitterPinterestEmail
Painting Furniture Without Sanding or Priming
BrushPaints

How to Paint Furniture without Sanding or Priming

by David Parker October 18, 2023
written by David Parker

Painting furniture without sanding or priming is similar to giving your old things a colorful and amazing look without too much hard work. Consider whether you have a table or a chair that’s seen better days. It might have scratches or doesn’t look as good as it used to.

Sanding and priming can be a lot of work. But guess what? You can skip all that. Painting without sanding or priming is similar to a shortcut to make a fresh look. You can choose any color you like and start painting. It can be easy to grab a brush and make your furniture look nice again. The best part is that it works on all sorts of furniture, from tables and chairs to dressers and cabinets. It’s something anyone can do. So, if you want to try painting furniture without sanding, check out these steps.

We’ll show you how to make your old stuff look amazing again with just a few simple steps.

Can You Paint Furniture without Sanding?

Can You Paint Furniture without Sanding?

Yes, you can paint furniture without sanding it beforehand. This technique is known as no-sanding painting. Instead of using sandpaper, you clean the furniture thoroughly and apply a special type of paint called chalk paint. Chalk paint easily sticks to the furniture’s surface without the need for any sanding or priming. It’s a fast and easy method to give your furniture a new appearance.

Painting furniture without sanding is a great choice, especially if you want to avoid the struggle of sanding down the old finish. This method can save you time and effort. To start, gather your cleaning supplies, including Microfiber Cleaning Cloths and chalk paint. Begin by wiping down the furniture to remove any dirt or dust. Then, apply the chalk paint with a brush or roller. You might have to put on another layer to make it cover better. Once the paint is dry, your furniture will have a fresh, updated look.

Best Furniture Paints without sanding

1. Chalk Paint

Chalk Paint

Chalk paint is a great option for redoing furniture. You don’t have to sand or prime it, making it uncomplicated. Just put it on your furniture. Chalk paint dries fast and gives a nice flat look. It also has many colors to match your style. This way, you can make your furniture look new without too much effort. It’s a budget-friendly and time-saving way to renovate your home. So, don’t worry about complicated steps; grab some chalk paint and give your furniture a fresh look.

2. Milk Paint

Milk Paint

Milk paint is a very good choice. It’s made from things like milk, lime, and colors. It makes your furniture look old and nice. You don’t need to sand or prime. Just mix it with water, put it on with a brush, and you get that old-time look. Painting without sanding can save you time and effort. It’s a good way to refresh your pieces. This paint is easy to use. It’s not hard like some other paints. You can make your furniture look cool without too much work. So, if you want a quick and easy way to make your furniture look vintage, try milk paint. It’s natural and fun to use. Also, consider using Wood Furniture Finishing Wax for added protection and to increase the finish of your painted furniture.

3. Mineral Paints

Mineral Paints

Mineral paints are really tough and good to use. They stick to things well, even if you don’t sand them first. No need for any sanding or priming things. These paints have many colors and shiny or not-shiny looks so you can use them on all kinds of furniture. If you’re thinking about painting furniture without sanding, mineral paints are a great choice. They make it super easy to give your furniture a new look. You won’t have to struggle or work too hard to make it look nice. Just get some mineral paint and get creative.

4. Enamel Paints

Enamel Paints

Enamel paints work really well on furniture because they make it look shiny and nice. You don’t have to sand or prime the furniture before using them, so that’s easy. They also keep your furniture safe from getting old and damaged. Suppose you want to try painting furniture without sanding; this paint is good for your work.

Material Used for Painting Furniture without Sanding

Material Used for Painting Furniture without Sanding

Electric Screwdriver

An electric screwdriver is like a super-fast, twisty tool. It helps you remove the furniture so you can paint every part easily. Just press a button, and it twists screws out super quick. When you’re painting furniture without sanding, you want things to be as simple as possible. These tools are just helpful to you. You don’t have to work super hard to get screws out. Once you take everything apart, painting is like coloring. You pick your favorite colors and brush them on. It’s all about making your furniture look awesome. So, get your electric screwdriver and start painting without sanding.

Krud Kutter and Damp Rag

Krud Kutter is a special cleaning liquid. You can use it to make your furniture clean. Just mix it with water and use a wet cloth. This is important when you want to paint furniture without sanding. Cleaning your furniture with Krud Kutter is easy. First, get a bucket of water. Then, pour some Krud Kutter into the water. Mix it up. Now, take a wet rag or cloth. Dip it into the water with Krud Kutter. Wipe your furniture with the wet rag. It will remove dirt and grime. Your furniture will be nice and clean. After cleaning with Krud Kutter, you’re ready to paint. Painting furniture without sanding is a time-saver.

Heirloom Traditions Paint in Oyster

This paint is simple. It comes in a can. Oyster is a soft, creamy color. It’s perfect for making your furniture look fresh and new. Just dip a paintbrush in the can and start painting. You don’t need to do heavy work like sanding. Think of giving your chairs, tables, or dressers a new life with this paint. You can do it all by yourself—no need to hire someone or spend lots of money. Painting furniture without sanding can save you time and effort. So, get your can of oyster paint and make your furniture. It’s easy and budget-friendly.

Paint Brush

A paintbrush is like a special tool for your furniture. You use it to add color. It’s kind of like when you color with a big, soft crayon. Be sure to cover all the little corners and bumps. Painting furniture without sanding can be done, too. You don’t need to make the surface rough first. Just use a brush and paint right on. This is similar to giving your furniture a colorful makeover. When you’re done, it’ll look all fresh and new. And you did it without any sandpaper. So, don’t be afraid to pick up that paintbrush set and upgrade your furniture.

Foam Roller

A foam roller is like a big, soft paintbrush. It helps you paint your furniture without sanding. Just roll it on your furniture, covering much of the surface simultaneously. This makes your furniture look really good, and you don’t need to do much work. You move the roller back and forth, and your furniture gets a fresh color. It’s a simple way to make your old furniture look new again. You might be thinking why it’s important to use a foam roller. Well, it’s because it saves you time and effort. When you use a foam roller, you don’t have to sand your furniture first. Sanding can be hard work, and it takes a long time. But with a foam roller, you can skip that step and still get great results.

Tack Cloth

A tack cloth is kind of like a special cleaning rag. It is sticky, so it grabs all the little pieces of dirt before you start painting. You can use it to wipe down your furniture, and then you’re all set to paint without any sanding. Painting furniture without sanding is a simple way to freshen up your old pieces. You don’t have to work very hard. Remember, when you use the tack cloth and Disposable Gloves, make sure to go over the whole surface so it’s nice and clean. This way, your paint will stick better, and your furniture will look nice and new. So, if you want to update your furniture without much work, try painting it without sanding. It can make a big difference in how your furniture looks.

Farmhouse All-In-One Paint Scratch Test

Farmhouse All-In-One Paint Scratch Test

Farmhouse all-in-one paint is a special kind of paint. It’s strong and lasts a long time. You can check how strong it is by trying a little test. Take a coin or a key and gently rub it on the painted surface. If the paint doesn’t come off easily, that means it’s good for your furniture. This paint keeps your furniture safe from regular use. When you want to change the color of your furniture without a lot of work, you must try using a Deglosser before painting. This paint can help you with that, too. It’s easy to use and can make your furniture look different without much effort. So, if you want your furniture to look nice and last a long time, consider using this kind of paint. It’s simple and makes your furniture stronger.

Painting Tables with Farmhouse All-In-One Paint

Painting Tables with Farmhouse All-In-One Paint .jpg

You can try Farmhouse All-In-One Paint for painting furniture without sanding. It’s really uncomplicated. You don’t need to sand anything beforehand. All you need to do is choose the color you like, get a brush, and start painting. This paint works great; it covers nicely and dries fast. Your tables will look fantastic with a fresh, pretty appearance. Using Nitrile Gloves while painting will also help protect your hands. Using this paint is like giving a new and amazing upgrade to your furniture. It’s a quick and easy way to give your tables a new and lovely appearance without all the hard sanding work. So, if you want to refresh your furniture without the struggle of sanding, give Farmhouse All-In-One Paint a try. You’ll be amazed at how easy it is to upgrade your tables with this paint.

Remove Dresser Hardware

Remove Dresser Hardware

Remove any handles, knobs, or other hardware from your dresser. You can use a screwdriver or pliers if it’s hard to do. Doing this makes sure the paint goes on easily without any problems. Now, let’s talk about painting furniture without sanding. It’s a process that saves you time and effort. You don’t have to do much hard work before you start painting. Next, get your paint ready. Choose a color you like and get a brush or a roller. You can use a brush if you want to be more precise or a roller if you want to cover a big area quickly. Dip your brush or roller in the paint and apply it to the dresser. Be careful not to get paint on the floor or anywhere else you don’t want it. Use a Paint Tray and Liners to keep your work area clean and organized. After you’ve done painting, allow the dresser to dry. It could take a few hours or even all night. After it’s dry, put the hardware back on, and your dresser will look great. Painting furniture without sanding can be a simple way to give your furniture a fresh new look.

Clean Dresser

Clean Dresser

Clean your dresser with a wet cloth. This removes dust, dirt, and any messy elements on it. Having a clean surface is super important for the paint to stick right. After you’ve wiped it down, let it dry for a bit. Now, let’s talk about painting furniture without sanding, which is a cool trick. You can do this on your dresser, too. First, get some paint in the color you like. Then, start painting your dresser with a brush or a roller. Make sure to cover it all evenly. If you want it to look extra nice, you can do two coats. Just wait for the first coat to dry before adding the second. It’s like giving your dresser a fancy new outfit. Once it’s all dry, put your things back on it, and you’ve got a fresh-looking piece of furniture without all the hard sanding work. It’s easy and makes your dresser look awesome.

Paint the Dresser with Heirloom Traditions Paint

Paint the Dresser with Heirloom Traditions Paint

Now, it’s time to put the paint on your furniture. You should use Heirloom Traditions Paint. This paint is good because you don’t have to sand or prime it before using it. You can use a brush or a roller to put the paint on. Make sure to put on a smooth coat of paint. After you finish one coat, let it dry before putting on another coat. This way, your dresser will look nice with the paint on it, and you won’t have to do all the extra work of sanding or priming. Painting furniture without sanding can save you time and effort, and Heirloom Traditions Paint is a good choice for this. So, give it a try and paint your dresser with ease.

Steps to Paint Any Furniture without Sanding

Steps to Paint Any Furniture without Sanding

  • Clean: Start by cleaning the furniture. Use a wet cloth or sponge to clean the dust and dirt.
  • Gather Supplies: Get your painting supplies ready. You’ll need paint, a brush or roller, a paint tray, and some old newspapers or a drop cloth to protect your floor.
  • Choose Paint: Pick the paint color you like. Make sure it’s suitable for the type of furniture you’re painting.
  • Mix Paint: Open the paint can and stir it well with a stick. Mix it until it’s smooth.
  • Apply Paint: Dip your brush or roller into the paint and apply it to the furniture. Do this by making straight and even lines to cover the whole furniture surface.
  • Let it Dry: Let the first layer of paint dry all the way. This may take a few hours.
  • Apply Second Coat: Apply a second coat of paint in the same way as the first. This helps ensure even coverage and a nice finish.
  • Final Drying: Let the furniture dry thoroughly. It might take a day or more, depending on the paint type and weather.
  • Optional Seal: If you want extra protection, you can apply a clear sealant after the paint has dried.
  • Enjoy Your New Look: Once everything is dry, your furniture is ready to use again with its fresh coat of paint.

Conclusion

Painting furniture without sanding or priming can be a simple and enjoyable way to give your old pieces a fresh and colorful look. You don’t need to do any hard work before adding new paint. Just clean the furniture well, choose your favorite colors, and apply the paint. This easy method saves time and effort. You can do it yourself without any fancy tools or techniques.

Also, you’ll have a chance to be creative with your furniture’s new look. You can make it bright, playful, or stylish, depending on your taste. So, if you have old furniture that needs a new lease on life, don’t worry about sanding and priming. Just grab some paint and get started. It’s a fun and budget-friendly way to upgrade your space.

Give it a try, and you’ll be amazed at how easy and rewarding it can be.

October 18, 2023 0 comments
0 FacebookTwitterPinterestEmail
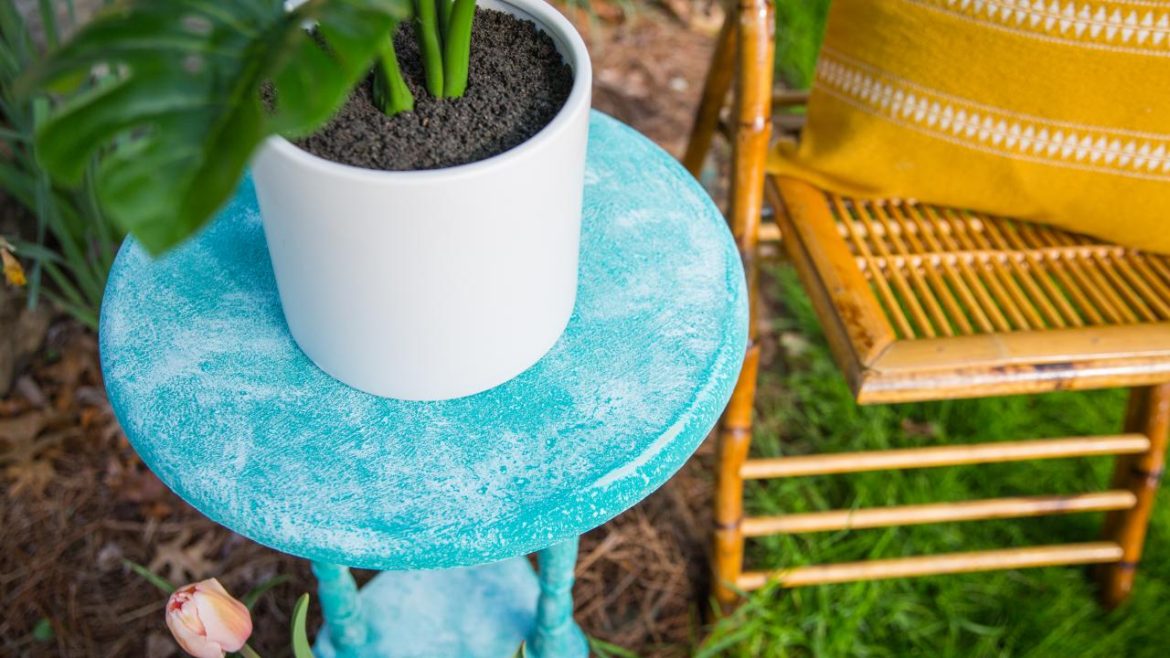
How to Get Texture With a Saltwash Paint Technique
DIY ProjectsHome Decor

A Guide to Achieving Texture with Saltwash Paint Techniques

by David Parker October 18, 2023
written by David Parker

Saltwash paint is a technique that makes your dull-looking house and furniture look more amazing by giving them a different look. But it requires perfection to apply all those awesome textures that are the main thing in the Salt wash technique. It’s a fun and easy way to add texture, giving a unique touch to your projects.

There is no such thing that you have to be very good at applying these textures; stay focused on these techniques and how to do that, and you’ll have a house that everyone will appreciate. The salt wash technique is one of the ways by which you can make your regular-looking house look more awesome, but for that, you should know how to do all this. For that purpose, we are here. From getting the supplies to putting on the final touches, you’ll have all that knowledge that you might need for this.

So, let’s get started and look into how you can get the best textures with the amazing salt wash technique.

1. Apply First Salt wash Layer

Apply First Salt wash Layer

The first step in achieving an amazing textured paint finish using Saltwash is to apply the initial layer. This stage is both exciting and simple, making it accessible to both new and experienced painters. You’ll want to start with a piece of furniture or decor item you chose for this project. The beauty of the Salt wash technique is that it makes imperfections more unique, so there’s no need to worry about creating an awesome surface.

To begin, select a reliable paintbrush that you’re comfortable with. This will be your tool for applying the Salt wash mixture. It’s important to begin this step with a calm mindset; don’t worry about perfection at this stage. Instead, dip your brush into the Salt wash mixture and apply it to your chosen surface. You’ll notice that the texture begins to take shape as the mixture dries. You should use a good double-thick paintbrush while applying the first layer.

2. What You Need for Salt Wash Painting

What You Need for Salt Wash Painting.jpg

Before beginning your Saltwash painting adventure, it’s necessary to gather all the tools and materials. Having the right supplies at your disposal will make the process smoother and more enjoyable. First and most important, consider your choice of brushes. Zibra and Cling brushes are highly recommended for their soft bristles and user-friendly design. These brushes are perfect at working with the Salt wash mixture, allowing you to achieve the desired texture easily.

The main component of this is undoubtedly the Salt Wash paint additive. This special ingredient is the secret behind Salt wash’s amazing texture. Make sure you have plenty of it on hand to complete your project successfully. Also, having sandpaper available for smoothing purposes is important. A sanding block or standard sandpaper with a grit of 220 works perfectly. To maintain a clean workspace, a Shop-Vac is useful for quick cleanup.

3. Easy and Affordable Vintage Look

Easy and Affordable Vintage Look

One of the most remarkable aspects of the Saltwash painting technique is its ability to transform ordinary pieces into exquisite vintage-style treasures easily. What’s even more impressive is that this stunning effect can be achieved without going over the budget. Salt wash offers an affordable alternative to purchasing expensive vintage furniture or decor items. It enables you to mix your living space with quality and beauty without the high price tag.

This technique is proof of the idea that creating an amazing look doesn’t have to be complex or costly. Instead, it invites creativity and resourcefulness, allowing you to breathe new life into your surroundings. If you’re a DIY fan or want the best of home decor projects, Salt Wash comes with many possibilities, all within a budget-friendly framework.

4. Smooth Finish with Sanding

Smooth Finish with Sanding

As your Saltwash project progresses, achieving a smooth finish becomes an important step. This phase is necessary to ensure these designs mix properly, producing a polished and smooth surface. While the initial Salt wash layer adds texture and character, the outcome relies on creating an even and consistent base for the subsequent layers of paint.

To have this, you’ll need to use a sanding block or sandpaper. A grit of 220 is suitable for this purpose. Take your time with this step, as it is important for the foundation of a beautifully finished piece. The objective is not to completely remove the texture created by the Salt wash but rather to create a balanced and melodic surface. Gently sand the surface, paying attention to any irregularities, until you achieve the desired level of smoothness.

5. Add a Second Coat of Paint

Add a Second Coat of Paint

With the textured foundation in place, it’s the best time to get the best result by using the Saltwash project and adding the second coat of paint. This is where you can use your ideas, allowing you to introduce additional colors and different designs to your place. The second layer of paint works best for your creativity, enabling you to customize and improve the overall aesthetic.

As you start this stage, take care to preserve the unique texture created by the Salt wash. This texture is an important element of the Salt wash technique’s beauty, and it adds character to your piece. Choosing colors is entirely up to you; it’s an opportunity to mix your style and creativity into the project. Once the second coat of paint is applied, it’s important to allow it to dry properly. This ensures that the colors and textures settle beautifully, resulting in the best results that you can get.

6. Choose and Mix Paint Colors

Choose and Mix Paint Colors.jpeg.jpg

When you are on a saltwash paint project, one of the most important decisions you’ll make is selecting and mixing your paint colors. This step sets the tone for the entire piece. The colors you pick can directly affect the final look and feel of your furniture. For a special and amazing result, you might go for a high-contrast approach. Start with a light base coat, such as a creamy white, and then apply a darker top coat over it. This creates a contrast that highlights the textured effect created by the salt wash.

On the other hand, if you prefer a cleaner appearance, selecting colors within the same range can work wonders. These shades will blend easily, producing a gentler texture while still adding a unique vibe to your furniture’s appearance. Once you’ve decided on your paint colors, it’s time to mix them with the salt wash additive.

7. Updating Knobs & Handles

Updating Knobs & Handles

In furniture makeovers, it’s often the little details that make a big difference. One such detail is the knobs and handles leveling up your place. These small elements can majorly impact the overall aesthetic and feel of your furniture. When you’re looking for a vintage appearance using the salt wash technique, it’s important to ensure that even the hardware contributes to the desired look. If your furniture currently has outdated or mismatched knobs and handles, consider giving them a refreshed look.

Go for hardware that matches the vintage theme you’re looking for. Clear crystal knobs, for example, can be an excellent choice for achieving that classic, amazing look. They work as a different addition to your spot while maintaining simplicity. Does not matter if you’re renovating an old dresser, nightstand, or cabinet; these knobs can make the furniture more awesome looking.

8. Tools for Salt Wash Painting

Tools for Salt Wash Painting

Before you dive into your salt wash paint project, it’s essential to gather the right tools and materials. Having the required equipment on hand ensures that the process goes smoothly, allowing you to achieve the desired textured effect with ease. First and most important, invest in quality paintbrushes. The type of brushes you choose can impact the final texture, so go for those with soft bristles that are easy to work with and clean. Next, you’ll need the saltwash paint additive. This is the key ingredient that will create the textured finish you’re aiming for.

Make sure you have enough salt wash powder on hand for your entire project. Other important tools include furniture tri-wheelies, sandpaper around 150 grit suitable for prepping the surface, a roller gear screwdriver, a shop vac for cleaning up dust and debris, and lint-free cloths for wiping down surfaces. Having containers for mixing your paint and salt wash is important to ensure proper blending. A stir stick will help you achieve the right consistency for your paint mixture.

9. Simple Process for a Vintage Appearance

Simple Process for a Vintage Appearance.jpg

The look of the salt wash paint technique lies in its simplicity. While it produces stunning vintage effects, you don’t need to be a professional to get them. This simple process allows people of all skill levels to change their furniture into beautiful, perfect pieces. The simplicity begins with finding the piece of furniture you want to change. It could be an old wooden table, a vintage chair, or even a plain dresser.

The main thing is to select a piece that you want to mix with the outstanding beauty of that. Once you have your chosen furniture, the process involves a series of easy steps, which will help you to get the texture that you want. It does not require any hard steps to do that. You’ll be easily able to do all those things.

10. Letting It Dry

Letting It Dry

Allowing the Salt wash paint to dry is an important phase in the Saltwash paint technique, as it is the process by which the different and awesome texture is formed. When you initially apply Salt wash paint to your chosen surface, it contains moisture within its composition. This moisture needs sufficient time to evaporate into the surrounding air. As this moisture evaporates, it leaves behind the unique textured appearance that is the quality of this paint technique.

However, the drying time can fluctuate, primarily depending on environmental conditions such as temperature and humidity. In warmer and drier atmospheres, the Salt wash paint can dry relatively easily, sometimes in just a few hours. On the other hand, in cooler or more humid environments, the drying process might extend to up to a full day. Patience during this phase is important, as attempting to disturb the drying process can negatively affect the outcome. A reliable indicator that the Salt wash paint has reached the desired dryness level is when it no longer feels sticky or weird to the touch.

11. Cleaning Up

Cleaning Up.jpg

The cleanup process after applying Saltwash paint is not that complicated. Water works as the best component for this process. The primary focus during cleanup is ensuring that the tools used, such as brushes and any other implements, are thoroughly rinsed with clean water. It’s advisable to initiate this cleaning just after completing your Salt wash project. Allowing the paint to dry on your tools can make cleanup significantly more challenging. Also, suppose any unwanted splatters or spills occur on your clothing or the surrounding surfaces during the painting process. In that case, a soft cloth is generally all that’s required to remove them effectively.

To further improve the cleanup experience and prevent other messes, it’s a wise precaution to lay down newspaper or a plastic sheet on your workspace before starting your Salt wash project. This simple measure not only facilitates the tidying process but also helps in maintaining the cleanliness of your workspace. With just some water and a few basic precautions, you can be assured that your work area remains clean and free from unwanted paint residue.

12. Fixing Mistakes

Fixing Mistakes

Even the most experienced painters occasionally encounter moments where adjustments are necessary to achieve the desired outcome. Correcting mistakes in your Saltwash project is an issue-free process because of the amazing nature of the Salt wash paint technique. If you happen to identify areas on your textured surface where the texture didn’t quite match your vision, you have the creative chance to reapply the Salt wash paint to those specific spots.

To correct any inconsistencies or imperfections, use either a paintbrush or a sponge to reapply the paint smoothly. It’s important to ensure that the newly applied paint blends easily with the existing texture. Following this reapplication, allow the paint to dry once more. This awesome aspect of the Salt wash technique enables you to experiment and make adjustments until you achieve the desired texture and appearance. Don’t hesitate to revisit and refine your work, as it’s all part of the artistic process.

13. Customizing

Customizing

A unique and highly fantastic feature of working with Saltwash paint is the vast chance for customization it offers. This means you have the creative freedom to make your project to your exact specifications and preferences. You can begin this customization by finding many colors. Salt wash paint is exceptionally amazing for color mixing and improvements throughout this process. Also, you can use a truly one-of-a-kind palette, reflecting your unique style and artistic vision.

The thickness of the Salt wash paint mixture can be adjusted to achieve a collection of textured effects. This level of flexibility allows you to experiment with various levels of texture, from simple to complex and enables you to express your creativity in many ways. Use this opportunity to mix your personal touch into every piece you paint with Salt wash. By doing so, you can create textured masterpieces that will not only look amazing but also be different from other regular textures.

14. Sealing & Protecting Paint

Sealing & Protecting Paint

Ensuring the long life and flexibility of your textured creation requires the important step of sealing and protecting the Saltwash paint. This protective measure has a dual purpose: it protects the textured finish from any wear and tear while at the same time improving its overall look. There exist multiple options for sealers, with clear wax sealers and matte sealers being among the most common choices. These sealers, when properly applied, create a protective barrier over the textured surface, effectively protecting it from everyday usage and environmental factors.

To start this step with precision, apply the selected sealer evenly over the entire painted surface. It’s important to listen to the manufacturer’s instructions regarding application and drying times. Once the sealer has dried, it does more than protect your creation; it gives a polished finish that makes the overall appearance of your textured a masterpiece.

Conclusion

Making cool textures with Saltwash paint is easy and fun. You learned the important steps like letting it dry, cleaning up, fixing mistakes, customizing your colors, and sealing your creation. These steps might look difficult at first, but with practice, they become super simple.

Remember, patience is most important when waiting for the paint to dry. No need to rush; wait until it’s not sticky. Cleaning up is also easy; dip your brushes and wipe away any unwanted spots. And if you make a mistake, you can fix it by adding more paint and letting it dry again. Making it more amazing with fancy colors is a nice choice. Mix and match to create your special shades. You can make your project as unique as you want.

Now that you know these easy steps, you can create amazing textured things with this amazing paint. Practice makes perfect.

October 18, 2023 0 comments
0 FacebookTwitterPinterestEmail
How to Cane Furniture and Repair Chair Caning by Hand
FurniturePaints

A Guide to Furniture Caning and Handwoven Chair Repairs

by David Parker October 17, 2023
written by David Parker

Are you ready to learn a handy skill that can breathe new life into your old chairs? Repairing furniture caning by hand is a craft that allows you to revive worn-out furniture and give it a fresh, attractive appearance. So that you can easily learn how to fix them by hand, and it’s not as hard as you might think.

We’ll show you how to move furniture and chairs by hand; you won’t need fancy tools or complicated skills. If you want to save money on furniture repairs, this process is accessible to everyone. You’ll experience the satisfaction of giving your old chairs a fresh, comfortable look. We’ll see the basics of caning and provide step-by-step instructions to make the process smooth and enjoyable.

So, let’s find out how to do furniture caning and repair chair caning by hand to add a touch of artistry to your home!

Why Choose Cane Furniture?

Why Choose Cane Furniture?

Cane furniture has become really popular lately, and there are some best reasons for that. It’s made from natural materials, which makes it seem nice, lasts a long time, and is good for the environment. So, if you want furniture caning for inside your home or outside, a cane is a great choice.

1. Natural Beauty: Cane furniture has a classic, natural appearance that works well with many different interior design styles. Their earthy colors and detailed weaving patterns bring a delightful feel to any room.

2. Lightweight and Maneuverable: Cane furniture has a notable advantage: they’re super light, so you can easily shift and rearrange them, giving you many options for decorating.

3. Durability: Although cane furniture may look fine, they are actually quite strong. They can handle everyday use well and are less likely to get damaged than other materials. So, choosing them is a smart decision for long-lasting furniture caning.

4. Eco-Friendly: Cane furniture is made from materials that come from sources that can be renewed, which makes them best for the environment. When you pick rattan or cane furniture, you’re helping the planet by supporting sustainable methods of nature.

5. Comfort: Cane furniture often has cushions or padding, offering comfort and a natural appearance.

How Much Cane Do I Need to Get?

How Much Cane Do I Need to Get?

Calculating the correct amount of cane for your chair repair or furniture caning project is important to prevent wasting materials or running out. This easy-to-follow guide will help you figure out the right quantity to use.

1. Measure the Seat: Measure the length and width of the seat or area you plan to cane. Calculate the square footage by multiplying these dimensions together.

2. Caning Pattern: Different caning patterns require varying amounts of cane. For standard cane webbing patterns, you’ll typically need approximately one square foot of cane per chair.

3. Account for Extras: It’s best idea to purchase a bit more than your calculated amount to account for mistakes or future repairs.

Tools Needed for Furniture Caning

Tools Needed for Furniture Caning

Furniture caning holds a classic attraction, and if you’re keen to learn the art of caning, you’ll need a few essential tools to get started. Here, we’ll walk you through each tool you’ll need and why it’s necessary for this fascinating craft.

1. Strand Chair Cane: A strand chair cane is the main thing you’ll need for weaving. It comes from the rattan palm, which is known for being bendy and strong. Before you use it for weaving, it’s usually soaked to make it flexible.

2. Binder Cord: A binder cord, or lacing cord, plays a major role in keeping the cane strands secure on a chair. It stops them from coming undone and ensures that the cane stays tightly woven within the chair’s frame.

3. Work Table: Your workspace needs a strong and comfortable work table that is just the right size for your chair. This table gives you stability while you work and helps you concentrate on the detailed weaving process.

4. Measuring Tape: In chair caning, it’s important to be accurate. Using a measuring tape will help you make sure the gaps between the cane strands are the same, which will make your finished chair look good and work well.

5. Chair Caning Pegs: Chair caning pegs, often made of hardwood, are used to hold the cane in place while you weave. They help maintain even tension and spacing as you work your way across the chair.

6. Dish Pan: You’ll need a dishpan filled with warm water to soak your cane strands. This helps to make them softer and more flexible, which makes weaving much easier in furniture caning.

7. Water Bucket: A water bucket is a important tool for chair caning. You use it to soak both the cane strands and the binder cord. When you soak them, they become softer and more flexible, which makes them easier to use.

8. Scissors: Scissors come in handy when you need to trim extra cane to make your caning project appear neat and perfect. Being careful while trimming is essential to make it look like a pro job.

9. Hammer: A small hammer is important for securing the caning pegs and tightening the cane strands during the weaving process. It helps maintain even tension and ensures that the furniture caning is securely attached to the chair frame.

10. Glue: Glue may be necessary for certain repair jobs, such as securing loose joints or damaged parts of the chair frame. It provides additional longevity to the repaired chair.

11. Spray Bottle: You use a spray bottle filled with water to keep the cane strands wet while you weave. This helps to keep the cane from getting dry and breaking while you’re working.

12. Bath Towel: A bath towel is used to wipe excess water from the cane strands and to press and shape the furniture caning as it dries gently. It aids in achieving a smooth and even surface.

How to Cane Chairs and Other Furniture

How to Cane Chairs and Other Furniture .jpg

Step 1: Prepare Your Work Area

To start chairs and other furniture caning, it’s important to make a neat and well-arranged workspace. Find a roomy and well-lit area where you can easily move around the furniture. Get all the tools you’ll need ready, such as cane strands, a chair caning kit, a sharp knife, scissors, a towel, and a bucket of warm water. This setup will make sure your caning project goes smoothly without any problems.

Step 2: Measure Correctly

Accurate measurements are major for a successful chair caning project. To get started, measure the seat opening of the chair frame carefully and think about both its length and width. Make sure your measurements are accurate and free of mistakes to prevent any fitting problems when you’re caning. Remember that caning materials come in different widths. So, it’s essential to choose the right size based on your measurements to achieve a smooth and perfect finish.

Step 3: Cutting Out The Old Seat

To start caning, first, you must take off the old seat. Flip the chair upside down safely and make sure it won’t wobble. Now, use a utility knife or chisel to gently cut around the edges of the old furniture caning, detaching it from the chair’s frame. Be careful to avoid harming the chair’s structure and go slowly. When you’ve completely removed the old caning, get rid of any leftover bits and give the seat frame a good cleaning.

Step 4: Remove Old Caning

After you’ve removed the old seat, the next thing to do is get rid of any leftover bits of the old cane material. You might need to use a utility knife to scrape away any remaining strands of cane or glue. Ensure the seat frame is nice and smooth, without anything in the way, so you can start fresh when putting on the new cane. Once you’ve cleared away all the old things and made the frame clean, you’re all set to begin the caning process.

Step 5. Measure and Cut

After taking off the old furniture caning and cleaning the seat frame, the next thing to do is to get the new cane sheets ready. First, lay out the cane material and measure it based on the size of the chair seat you measured earlier. Ensure the cane sheets are a bit bigger than the seat hole to fit well and be trimmed properly. Once you’ve measured and marked the cane sheets, cut them carefully to fit using scissors. Being accurate here will make sure they stay secure.

Step 6: Soak Cane Sheets

To prepare the cane for the chair seat, start by soaking the cane sheets in warm water. Put the sheets in a bucket of warm water for about 20-30 minutes. This soaking step makes the cane softer and easier to handle. Just be careful not to soak it for too long, as that can stretch and weaken the cane. Once you’ve finished soaking, take the cane sheets out of the water and gently dry them with a towel to get rid of extra moisture.

Step 7: Add Cane to The Chair Seat

Now that the cane sheets are flexible and ready let’s put them on the chair seat. Begin by putting the wet cane sheet over the seat hole, ensuring it covers the whole area. Carefully press the cane into the indents or grooves on the seat frame, starting from the middle and moving outward. Use a special tool or a wedge to push the cane firmly so it fits easily. Keep doing this, weaving the cane in a pattern of going over and under until the whole seat is covered. Cut off any extra cane, leaving a small edge around the seat.

Step 8: Remove Excess Cane

After you’ve attached the cane to the chair seat, the next thing to do is to get rid of any extra furniture caning material. To do this, use a utility knife or scissors to gently trim the parts of the cane that stick out along the edge of the seat. Be careful not to damage the newly woven cane, and cut as close to the frame as possible. This step is important to make the chair look tidy, and it also keeps away any rough or sharp edges that could make sitting in the chair uncomfortable.

Step 9: Clean out The Groove

Before you go on, look closely at the lines or dents on the chair frame where the woven cane is. While caning, some glue or bits of cane might have gotten stuck in these lines. To make the surface smooth and even, use a small chisel or a pointed tool to remove any extra cane or glue from these lines gently. This is a major step to make your work seem really good.

Step 10: Fill the Groove with Glue

Now that the grooves are clean and clear of any dirt or bits, it’s time to attach the cane in place for best firmly. To do this, put on a thin and even layer of wood glue inside those grooves. Make sure the glue covers everything evenly. This sticky thing will stick the cane to the seat frame and give it strong support that will last a long time. Be careful not to use too much glue, or it might spill out and make a mess. Just use enough to make a strong bond without any gooey overflow.

Step 11: Attach the New Spline

To make your cane chair stronger and more secure, you should add a new strip called a spline. A screen spline is a thin, bendable piece of wood or rattan that goes into the groove around the edge of the seat frame. First, measure how long the spline should be to match the chair seat’s outer edge. Then, carefully push the spline into the groove, on top of the cane and the glue. The spline does two important jobs: it keeps the cane in place and gives your caning project a neat finish.

Step 12: Press the Cane Into the Groove

Once you’ve put the spline in place, grab a caning tool or a mallet. Use it to push the cane into the groove firmly. Make sure the cane stays put and doesn’t have any loose or uneven spots. Doing this step makes the Furniture caning Seem strong and neat, improving both its strength and how it looks.

Where to Order Cane

Where to Order Cane .jpg

When you’re all set to start fixing chairs or repairing furniture by hand, it’s really important to find good quality cane. The best news is, there are several places where you can find it.

1. Craft Stores: Most craft stores have chair caning supplies, such as different-sized cane materials. You can either go to the store or look on their website to find what you need.

2. Online Retailers: Many websites sell everything you need for furniture caning, such as cane materials, tools, and instructions. You can begin your search on popular sites like Amazon and eBay, as well as specialty cane supply stores.

3. Specialty Woodworking Shop: If you have woodworking shops in your area, they might carry chair caning supplies or direct you to local suppliers.

Benefits of Caning Furniture by Hand

Benefits of Caning Furniture by Hand .jpeg

1. Authenticity: Hand caning is a method that keeps antique and vintage furniture true to its original artistry. It helps preserve the authentic appearance and character of these pieces, something that collectors often value greatly.

2. Unique Artistry: Hand caning is a skilled art form that allows artisans to showcase their talents and creativity. The unique patterns and weaves made by skilled caners can add a touch of artistic attraction to the furniture caning.

3. Increased Value: Antique and vintage furniture fans often find that having a piece that’s been hand-caned can make it much more valuable. People who appreciate old furniture really like it when the piece has been fixed up using the old-fashioned ways.

4. Repairability: Hand-caned furniture is relatively easy to repair if damage occurs in the future. Unlike factory-made, mass-produced seats, which may require complete replacement, hand-caned seats can often be patched or reworked by a skilled caner.

Conclusion

Learning how to repair cane chairs by hand is a valuable skill that can help you save money and preserve your lovely furniture caning. With practice and patience, you can become skilled at this craft and give old chairs a fresh lease on life. To get started, gather your materials, prepare the chair, weave the cane, and secure the ends. Take your time, follow the instructions carefully, and don’t get discouraged when facing challenges.

It’s important to choose the right type of cane for your project, whether it’s pre-woven sheets or individual strands. Each has its benefits, so pick the one that suits your needs best. Maintenance is also important to ensure your caned chairs last for years. Keep them clean and regularly check for loose strands or signs of wear.

It allows you to restore your furniture’s beauty and function while improving your crafting skills.

October 17, 2023 0 comments
0 FacebookTwitterPinterestEmail
How to Distress Furniture With Chalk Paint
FireplacePaints

A Complete Guide to Distressing Furniture with Chalk Paint

by David Parker October 17, 2023
written by David Parker

Chalk paint is a fantastic way to change your furniture into stylish, old, attractive pieces that will give a new look to your home. Whether you have an old wooden chair that’s seen better days or a dull dresser that needs a makeover, Chalk paint can work easily.

You’ll learn what materials you need, how to prepare your furniture for painting, and the clear techniques to achieve that beautifully distressed appearance. We’ll keep it simple and effortless to follow so anyone can give their furniture a simple, vintage beauty. We’ll explain the steps in easy-to-follow instructions with which you can give your furniture a vintage look. So, grab your chalk paint, and let’s start distressing your furniture.

Be ready to change your home one piece of furniture at a time and find out about distressing furniture with chalk paint.

What is Distressing?

What is Distressing?

Making old-looking furniture is a trendy thing in home design. It’s a fun way to give your home a special, comfy feel. So, how does it work? Well, it’s about making furniture appear older and worn on purpose. First, you might sand it down or use tools to give it little bumps and scratches. You know how old things can have dents, scrapes, and paint coming off? We’re copying that.

Once it seems just right, you can give it a new coat of paint, stain, or a clear finish to keep it strong. The result? Distressing furniture with chalk-style paint seems to have been around for a while. It has many different styles, like that comfy farmhouse view or the cool industrial vibe.

What is Chalk Paint?

What is Chalk Paint? .jpg

Chalk paint is a special kind of paint made by Annie Sloan in the 1990s. It’s different from regular paint because it’s really easy to use. You don’t have to do hard things like sanding or satin finish priming before you use it. Think about how you want to make your furniture better without doing a lot of work. It’s a quick and easy way to change your furniture appearance.

It’s great for people who like DIY projects or want to make their homes nicer. You can use it on tables, chairs, and dressers. It dries to a pretty matte finish, making your things look classic and cool. So, if you want paint that’s clear to use and perfect for making your distressing furniture with chalk paint awesome, give chalk paint a try. It saves you time and effort, and the results are amazing.

The Unique Qualities of Chalk Paint

The Unique Qualities of Chalk Paint

1. Matte Finish

It dries in a soft, non-shiny way, making your furniture look comfy and classy. Think about your old wooden chair or table getting a nice new spot without any fancy things. What’s neat about chalk paint is that it’s not glossy at all. When you use it, your furniture won’t be all bright and reflective. Instead, it will have a smooth and plain finish. Do you know how velvet feels soft when you touch it? Chalk paint makes your furniture view soft. This kind of paint is great if you want your furniture to seem classic and fancy. It’s like adding a touch of fancy to your home things. So, if you want to make your distressing furniture with chalk paint look stylish with no worry, try chalk paint. And the best part? It’s effortless to use, so you’ll be a DIY pro in no time.

2. Excellent Coverage

Chalk paint is perfect for painting. It’s good at hiding flaws, and most times, you only need to use it once or twice to make things look awesome. Think about you have an old, scratched-up chair that doesn’t seem so good anymore. You can grab some chalk paint and put it on the chair. It hides all those scratches and makes the chair view fantastic. No need to keep painting it again and again. That’s what makes chalk paint great. It’s easy to use and saves you time and effort because you don’t have to do lots of coats like with some other paints. So, if you want to give your things a fresh new spot without all the worry, chalk paint is your top choice.

3. Minimal Brush Marks

Chalk paint is amazing for your distressing furniture with chalk paint. When you use it, those annoying brush marks pretty much vanish, leaving your piece looking smooth and even. Think about painting your favorite chair. Regular paint sometimes leaves streaks or brush marks that make it uneven and messy. But chalk paint is different. It’s specially made to make those brush marks almost disappear. So, when you finish painting, your chair (or whatever you’re sprucing up) will be incredibly smooth and fancy-free. It’s almost like the paint knows how to hide the flaws and create a perfect finish. So, whether you’re a DIY pro or just trying to paint for the first time, chalk paint is your go-to choice for a beautiful, brush-mark-free spot. Your furniture will love you for it.

4. Distressing Capabilities

Chalk paint is like a beauty wand for making things look old and cool. It’s perfect for giving things a vintage, worn-out style, like a shabby attraction. Consider whether you have a piece of distressing furniture with chalk paint or something you want to change. Chalk paint is the way to go. It sticks well to all sorts of things, and it’s simple to use. After you paint your things with chalk paint, you can make it look even better. You can use multi-purpose sandpaper or special tricks to make it seem like it’s been around for ages. That’s how you get that awesome, weathered look that’s popular in shabby, attractive style. Give it a shot, and you’ll be amazed at the cool change.

5. Adherence to Various Surfaces

Chalk paint sticks well to different things like wood, metal, plastic, and even fabric. It’s like a perfect paint that can make old things seem cool again. Consider whether you have an old wooden chair, a metal lamp, or a plastic flower pot. Chalk paint can make them all look nice without any trouble. What’s great about chalk paint is that it sticks really well and won’t easily chip or peel off. It’s effortless to use, so you can have fun fixing up your things. So, if you want to make your things new and fancy, grab some chalk paint and start painting.

Materials You’ll Need for Distressing Furniture

Materials You'll Need for Distressing Furniture 

Before you get started, gather the following materials

  • Furniture piece of your choice
  • Chalk paint (various colors, if desired)
  • Paintbrushes (round or flat)
  • Sandpaper (medium and fine grit)
  • Wax or topcoat (optional)
  • Clean cloth or rags
  • Drop cloth or newspapers to protect your workspace
  • Gloves and a mask (for safety)

Step 1: Choose the Right Furniture Piece

Choose the Right Furniture Piece

Pick a piece of wooden furniture like a table, chair, dresser, or cabinet. Chalk paint works great on these, but it also sticks well to metal and plastic. Now, let’s have some fun. Get the furniture ready by giving it a light sanding. Next, choose your favorite chalk paint color and start painting. Don’t stress about making it perfect; little flaws make it seem cool. After the paint dries, take some sandpaper and gently rub the edges and corners to make it look old-fashioned. You can also try using a damp cloth or wax to make it more antique. Before you know it, your distressing furniture with chalk paint will turn into a stylish, vintage-looking piece that everyone will admire.

Step 2: Prepare Your Workspace

Prepare Your Workspace

Cover your work area with an old cloth or newspaper to protect it from paint spills. It’s important to have fresh air in the room for the paint to dry correctly. You can open a window or use a fan if you need to. This distressing furniture with chalk paint will help keep your project clean and the room smelling nice. Painting can be messy, and paint drops might fall on your work surface. To avoid this, lay down a cloth or some old newspapers. This will catch any stray paint and keep your space clean. Also, make sure there’s good airflow in the room. This means having fresh air moving around. If your room feels thingsy, open a window or turn on a fan. This will help the paint dry properly and prevent any strong paint smells from building up. By doing these simple things, you can enjoy your painting project while keeping your workspace neat and the air in the room fresh and pleasant.

Step 3: Clean the Furniture

Clean the Furniture

Before you get into painting, it’s important to prep your furniture. Start by making sure it’s really clean, with no dirt, dust, or grease. Just use a damp cloth to wipe it down gently and eliminate any yucky things. Then, let it sit and air dry completely. This distressing furniture with chalk paint is important because it helps the paint stick better and gives you a nice, smooth finish that looks good. So, don’t rush. Be patient and let your furniture dry well before you begin painting. Doing this will ensure that your painting project turns out great, and you’ll be proud of your results. It might seem small, but taking these simple steps can make a big difference in how your furniture looks when you’re done. So, take your time, follow these easy steps, and enjoy the process of changing your furniture with a fresh coat of paint.

Step 4: Apply Chalk Paint

Apply Chalk Paint

Let’s give your furniture a fresh spot. Start by dipping your paintbrush into the chalk paint. Then, paint a thin and even coat all over the furniture. You can use one color or get creative by adding different colors for a cool, worn-out style. Let each coat of paint dry completely before adding the next one. This distressing furniture with chalk paint ensures your furniture makeover view is great. You don’t want the colors to mix or smudge while they’re still wet. While you wait for each coat to dry, you’ll see your furniture change right before your eyes. So, enjoy the process, and soon, you’ll have a fantastic, refreshed piece of furniture that’ll brighten up your space.

Step 5: Sand the Edges

Sand the Edges

Once your paint is dry, it’s time to give your furniture a unique, worn view. Get some sandpaper with a medium level of grit, and let’s begin. Focus on the edges, corners, and any fancy parts of your furniture. These are the areas that naturally get worn out over time. Now, Gently rub the sandpaper in small circles. This distressing furniture with chalk paint will make the paint look aged and weathered. As you do this, you’ll see the wood or old layers of paint underneath starting to peek through, giving your piece a cool, simple vibe. Don’t forget to take your time and not sand too hard. You don’t want to remove too much paint all at once. Step back occasionally to see how it’s progressing and ensure you get the vintage spot you want.

Step 6: Add More Distressing

Add More Distressing .jpg

If you want your furniture to look older, you can do it easily. All you need is some sandpaper. Look for the parts of your furniture that get used often, like the top and the front of the drawers. Now, take the sandpaper and gently rub it on those spots. Don’t push too hard. Just let the sandpaper do its thing. As you keep going, you’ll start to see the wood underneath showing through, giving your distressing furniture with chalk paint that older appearance. But don’t forget, don’t rush it. You can always do more later if you want. Once you’re happy with how it seems, you’re all set. It’s an easy way to give your furniture that vintage view. No need for fancy tools or complicated techniques, just some sandpaper, a little patience, and your creativity. You’ll be amazed at the change you can achieve with such a simple trick.

Step 7: Protect Your Finish

Protect Your Finish

To keep your paint looking nice and shiny, you can use wax or a topcoat, but you don’t have to if you don’t want to. These things make your paint stronger and shinier. First, choose either wax or a topcoat. You can get them at the store. Then, read the instructions on the product. It’ll tell you how to use it, so do what it says. Use a brush or cloth to put the wax or topcoat on your paint. Ensure you cover everything, and try to make it thin and even. Now, the most important part is to let it dry. The instructions will tell you how long it takes. This distressing furniture with chalk paint makes sure it works right. Once it’s dry, observe at your work. Your paint should be stronger, and it should be spot-shiny. That’s all there is to it. These simple steps help protect your paint so it stays nice for a long time.

Step 8: Finish and Reassemble

Finish and Reassemble

Once your furniture is all dry and has that nice, worn appearance. It’s time to put it back together. If you took off any pieces like drawers or knobs during the process. First, check that everything is dry and clean. Get your basic tools like a screwdriver or a hammer, depending on how your distressing furniture with chalk paint is held together. If you have instructions, follow them. If not, use your common sight. Look for the holes or spots where the pieces fit, and gently attach them so you don’t mess up the distressed finish. Make sure everything is clean and in place. Finally, spot over your reassembled furniture to make sure it looks the way you want it to. Fix anything that’s not right. Following these steps, you’ll have your nicely worn furniture all put together and ready to use in no time.

Conclusion

Distressing furniture with chalk paint is a simple and creative way to give your old pieces a new and minimal look. All you need are some basic supplies like chalk paint, sandpaper, and a few brushes. First, clean your furniture thoroughly and apply a coat of chalk paint in the color of your choice. After it dries, use sandpaper to gently rub away some of the paint in areas that would naturally wear over time.

There are no strict rules when distressing with chalk paint. You can choose to distress just a little or a lot, depending on how you want it to appear. You can get creative with different paint colors and finishes to match your style. So, don’t be afraid to give it a try.

It’s a budget-friendly and fun way to improve your home decor while preserving the comfy, aged view that many of us love.

October 17, 2023 0 comments
0 FacebookTwitterPinterestEmail
How to Paint with Chalk Paint on Furniture
FurnitureHome Improvement

How to Paint Furniture with Chalk Paint

by David Parker October 17, 2023
written by David Parker

Chalk paint is a wonderful medium to change your tables, chairs, dressers, and more. We will find the simple and easy process of painting furniture with chalk paint. You’ll learn how to prepare your furniture, apply chalk paint smoothly, distress for that shabby-attractive look, and finish with a protective seal.

We’ll provide you with tips, tricks, and troubleshooting advice along the way to ensure your project is a success. We’ll find the basics, from selecting the right furniture piece to choosing the perfect chalk paint colors. We’ll learn how to prepare your furniture, apply chalk paint smoothly, and achieve that attractive distressed view that’s so popular. So, grab your paintbrush and be ready to find out how to change your furniture into one-of-a-kind pieces that reflect your style.

Let’s start and learn how to paint with chalk paint hutches on furniture, making your home decor dreams come true.

What is Chalk Paint?

What is Chalk Paint

Chalk paint is a cool kind of paint known for its smooth finish and how easy it is to use. Unlike regular paints, you don’t need to do much preparation work or use a special primer before using chalk paint cabinets. Annie Sloan made it in the early 1990s, and is popular because it can make your furniture and decorations look great without a ton of work. They call it chalk paint because it has a soft, dusty look that adds an old-timey beauty to whatever you’re painting. You can get it in many different colors, and you can even mix them or add water to make a lighter color. This paint is great for people just starting with a DIY challenge and for people who’ve been doing it for a while. With chalk paint, you can easily change up your things without much effort. Whether you’re new to DIY or a pro, it’s a fantastic choice. It comes in many colors and lets you get creative by mixing them or thinning them with water for a lighter touch.

Materials You’ll Need to Paint with Chalk Paint

Materials You'll Need to Paint with Chalk Paint 

Before you begin your chalk paint work, collect these items

  • Chalk Paint: Pick the color that goes well with your design idea.
  • Furniture: Find something that’s a bit messy or dirty. Make sure it’s clean and not covered in old paint.
  • Paintbrush: Use a good brush for chalk paint. It can be made of real or man-made bristles.
  • Sandpaper: You might need sandpaper to make things rougher or smoother.
  • Wax or Sealant: Chalk paint needs a special covering to keep it looking good. You can choose a clear or colored covering to give it extra style.
  • Cloth or Lint-Free Rags: To remove extra paint or wax, wipe it off.
  • Drop Cloth: Cover your work area to prevent any mess from spills and drips.
  • Stir Stick: Before you start, mix the paint well by stirring it.

Step-By-Step Guide to Paint with Chalk Paint

Step 1: Prepare Your Workspace

Prepare Your Workspace

Be ready for a mess-free and easy project. First, spread out a big cloth on the floor to stop any spills or stains. These chalk paint cabinets will help you avoid a lot of cleaning up later. Next, collect all the things you need and keep them close by so you don’t have to look for them while you’re working. It keeps everything neat. When your things close, it’s easier to focus on your task and get things done quickly. No more rushing around to find that one tool or paintbrush. By following these clear steps, you’ll make a comfy and organized workspace. It saves time and makes the whole process more fun. So, put that cloth down and gather your things. You’re all set for easy and successful work.

Step 2: Clean the Furniture

Clean the Furniture

Make sure your furniture is clean and free from any dust, dirt, or gross things. If you see any mess, grab a wet cloth and gently wipe it away. With chalk paint cabinets, your furniture will be awesome and stay comfy for you and your guests. A clean couch or table makes for a happier home. So, don’t forget to give your furniture some love now and then. Your comfortable chair and shiny table will be really happy about it.

Step 3: Mix the Paint

Mix the Paint

Confirm that the chalk paint has been properly mixed before applying. Just give it the best stir to make it smooth. If you want it to be thinner, add a little water and mix it well until it’s how you like it. These chalk paint cabinets help you make the paint just right for your challenge, whether you want it more see-through or thicker. So, a perfect stir and a bit of water can help you get the paint how you want it for your creative work.

Step 4: Apply the First Coat

Apply the First Coat

Prepare to make your furniture seem great. When you start painting, use long, smooth strokes going in the same direction as the wood’s lines. This will help your furniture look its best. After you’ve put on the first coat of paint, you’ll need to wait a bit. Let it dry completely, and this usually takes about 1-2 hours. This chalk paint hutch is important because it lets the paint dry properly and be fantastic when you’re done. You can use this time to relax, have a snack, or do something else you enjoy. Don’t forget not to rush the drying process. Once that first coat is completely dry, you can decide if you want to add another coat for extra coverage and a nicer finish. Enjoy giving your furniture a new appearance.

Step 5: Apply Additional Coats (if needed)

Apply Additional Coats (if needed)

How many times you need to paint something depends on the color and how smooth it is. If it’s a light color or smooth, one coat might be enough. But if it’s a dark color or not so smooth, you might have to paint it two or more times to make it look wonderful. After you put on one coat of paint, you have to wait until it’s completely dry before you can put on another. This makes sure that each layer sticks well and spots nicely. If you rush and don’t wait for it to dry, the paint might not seem even and perfect. So, to sum it up, take it step by step. Begin with one coat, let it dry, and then see if you need to chalk paint cabinets more. Patience is important when you’re painting, and it’s the key to getting that perfect spot you want.

Step 6: Distress – It’s Optional

Distress - It’s Optional

If you want your furniture to look old-fashioned and cool, try this simple trick: get some fine sandpaper and gently rub it on the edges and any bumpy parts of your furniture. This will give it a cool, worn-out way that’s popular right now. Think of your furniture as a vintage treasure and the sandpaper as an amazing tool. As you softly sand the edges and bumpy bits, you take your piece back in time, adding some character and history. Don’t forget to be gentle. You’re not trying to strip it down completely, just bringing out some attraction. When you’re finished, step back and enjoy your work. You’ll have turned your furniture into a stylish, old-looking gem that people will love to talk about. So, don’t hesitate to get a little crafty and try these chalk paint cabinets to get that shabby-attractive style.

Step 7: Apply Wax or Sealant

Apply Wax or Sealant

To keep your paint looking good, follow these clear steps: First, ensure the paint is completely dry. Then, grab some wax or a sealant, nothing fancy, just the regular things. Use a clean cloth or an everyday paintbrush to put it on gently, like you’re giving your paint a shiny hug. Next, rub it with the cloth until it’s shiny. Leave it alone for a whole day, 24 hours, so the wax or sealant can do its job and protect your paint. It’s as easy as that, and your chalk paint cabinets will look great for a long time.

Step 8: Reassemble and Decorate

Reassemble and Decorate

Once the wax is all dry, it’s time to return all the pieces you took off and start making your furniture view awesome. First, carefully put everything back together, making sure it fits just right. This chalk paint hutches step is important to make your furniture both pretty and useful. Now, let’s have some fun. Get creative with how you decorate it. You can paint it with your favorite colors, use stickers or stencils to make cool designs, or even change the knobs and handles for a fresh trend. Whether you like an effortless, modern, or mix-and-match style, personalizing your furniture is a fun and satisfying project. So, enjoy yourself and turn your furniture into something that shows off your unique way.

Tips and Tricks to Paint with Chalk Paint on Furniture

Tips and Tricks to Paint with Chalk Paint on Furniture

1. Choose the Right Furniture Piece

Before starting your chalk paint task, consider the furniture you want to clean up. Chalk paint is cool for all sorts of things like wood, metal, glass, plastic, and even fabric. Check if your furniture is in perfect shape and is the best match for your work. First, make sure your furniture is clean and doesn’t have any yucky mold or mildew. If you spot any of those things, clean it up before you start painting. Also, take an amazing spot at your furniture to see if it’s got any big problems or needs fixing. Chalk paint can hide little flaws, but it can’t fix major issues. It’s better to sort those out first to ensure your painting work turns out awesome and your furniture looks great for a long time. With these easy steps, you’ll be all set to create something fantastic with your chalk paint cabinets.

2. Prep and Clean Thoroughly

Looking forward to your chalk paint project? Begin by getting your items in order. First off, clean your furniture. Dust, dirt, and grime? We don’t want any of that. Just mix warm water with a little mild soap and clean it up. Once it’s clean, let your furniture dry completely. We don’t want any leftover wetness messing up your painting. So, take your time, do it right, and be ready to make your furniture view amazing with those chalk paint cabinets.

3. Sanding is Optional but Helpful

Chalk paint sticks well without hard sanding. But if your furniture is shiny, has big scratches, or isn’t smooth, you can improve it by using fine sandpaper, like 120-220 grit. This makes the chalk paint hutches stick and makes it smoother to paint on. Before you paint, make sure to clean off any dust from sanding. So, don’t worry about tough sanding. Chalk paint is here to make your DIY work easier and more fun.

4. Use Quality Chalk Paint

For the best results, use really good chalk paint. There are many brands out there, such as Annie Sloan Chalk Paint, Rust-Oleum Chalked, and Fusion Mineral Paint. These paints are fantastic because they cover things well and stick nicely. When you use awesome chalk paint, you can easily make things seem better. You often don’t need to put on many layers because it covers well and sticks well to all sorts of things, similar to wood, metal, or glass. So, whether you’re fixing up an old chair or giving your kitchen cabinets a fresh look, these chalk paints make the job easier. The quality of the chalk paint cabinets is important, so think about using these popular options for a successful do-it-yourself project.

5. Experiment with Colors and Techniques

Chalk paint is amazing for your furniture. It lets you make your furniture special in your own way. You can use all sorts of colors and ways to paint. Try different things to make cool effects, like making it old or like it has layers of paint. Consider turning a regular chair into something that is old and worn or changing a plain table into something that looks classic and old-fashioned. You can even get creative by putting different colors on top of each other. Chalk paint is all about making your furniture unique and your style. So, don’t be afraid to try it out. Get some chalk paint cabinets, use your creation, and watch your furniture become just how you want it.

6. Properly Mix and Apply the Paint

Mix the chalk paint before you begin your task. You can stir it with a stick or shake the can a lot. When you’re ready to paint, use a good brush or a foam roller for big areas. Be careful when you use the brush because it can give the piece a special appearance. It’s usually better to put on two thin coats instead of one thick one. With chalk paint cabinets, you won’t get drops, and the paint will cover better.

7. Distressing and Aging

Start by giving the chalk paint a good mix. You can stir it with a stick or shake the can a lot. When you’re ready to paint, use the best brush or a foam roller for big areas. Be careful when you use the brush because it can give the piece a special look. It’s usually better to put on two thin coats instead of one thick one. With chalk paint cabinets, you won’t get drops, and the paint will cover better.

8. Seal and Protect

To keep your chalk-painted furniture looking wonderful for a long time, you need to do a few simple things. First, you should add a clear topcoat to protect it. You have two common choices: wax and polyurethane. Wax gives your furniture a soft and not shiny finish, which can be nice for a plain or vintage spot. On the other hand, polyurethane makes it shiny and strong. When you put on the topcoat, make sure to do it in thin layers. Just follow the instructions on the label carefully. These chalk paint cabinets will help you get the best results and avoid any streaks or lumps. In short, to protect your chalk-painted furniture, all you need to do is choose the right topcoat wax for a soft view, polyurethane for a shiny one, and put it on in thin layers while following the instructions. Your furniture will stay beautiful for a long time.

Conclusion

Learning how to paint with chalk paint on furniture is a fun and accessible way to change your old pieces. We’ve learned the basics and with a little practice. You’ll become a chalk paint pro in no time. Clean your furniture well and give it a good sanding if needed. Don’t forget to protect your work area with some newspaper or an old sheet.

When it’s time to paint, apply thin coats and let each one dry before adding more. Distressing is a cool way to add character, and waxing or sealing your piece will keep it looking great for years to come. Chalk paint comes in many colors, so you can get creative and personalize your furniture to match your style. Painting with chalk paint is a low-stress DIY project that can make a big difference in your home.

Enjoy the process, and soon, you’ll have beautifully painted furniture to show off and be proud of.

October 17, 2023 0 comments
0 FacebookTwitterPinterestEmail
How to Bury a Gutter Downspout
Guide

Easy Steps to Bury a Gutter Downspout 

by David Parker August 9, 2023
written by David Parker

Want to hide your gutter downspout but don’t know how? How about adequately installing your gutter downspout so that it can be appropriately buried? Well, if that is so, then this blog may help you a lot.

Some tasks are easy to do but seem very hectic. This task is one of those tasks that is easy to do when done properly but becomes very hectic after every mistake.

If you want to improve your home’s drainage system while maintaining your lawn’s appearance, burying your gutter downspout is the way to go. By installing it underground, you can effectively guide rainwater away from your home and towards the areas of your lawn that need it most. Not only will this protect your home from drainage issues, but it can also save you money by turning the project into a DIY.

Don’t let expenses hold you back from improving your home’s functionality and aesthetics.

How Burying a Gutter Downspout Can be a Good Idea?

A significant advantage of burying a gutter downspout is that it evenly distributes water to the dry parts of your lawn, especially if your lawn has uneven water retention. This makes it an excellent solution for areas that frequently experience rainfall. Proper drainage of water away from your home is crucial as it can cause damage to the structural integrity of your house. Additionally, it can create puddles in your yard, ruining your footwear and causing your pets to leave footprints.

There are the following factors that can help your decision of either burying your gutter downspout or finding a different solution:

  1. The layout of your yard.
  2. The climate of the place where you live in.
  3. The amount of rain you get each year.

Tools Required for Burying Gutter Downspout

  1. Shovel
  2. Level
  3. 2×4
  4. Rubber mallet
  5. Chisel
  6. Utility Knife

Supplies Needed for Burying Gutter Downspout

  1. PVC Pipe
  2. Various PVC fittings
  3. Purple PVC primer and glue
  4. Black corrugated tiles and fittings
  5. Three downspout adapters
  6. One animal guard
  7. One sack of quick-rete

Steps to Bury a Gutter Downspout

Easy Steps to Bury a Gutter Downspout 

1. Identifying the Problem

Firstly, to start solving your lawn issues, it is important to pinpoint the problem accurately. Are you concerned about the appearance of your lawn, the drainage system, or the uneven distribution of water? Maybe it is all of these issues combined. Once you have identified the problem, you can start finding the best solution. Now that you know what is causing the problem, it is time to get to work.

2. Routing the Downspout

When it comes to managing rainwater in your yard, it is important to remember that each yard is unique. To start, decide where you want the water to go and create a diagram to map out the route for your gutter downspout. To prevent puddles and protect your foundation, it is recommended to drain the downspout on a hill several feet away from your home or into the sidewalk or street. Aluminum downspouts or PVC pipes above ground can work well in yards with rocky soil or lots of shrubs and bushes to hide the extension. The length of your buried downspouts will depend on the size and layout of your yard. Aim for a length of eight to ten feet to ensure that water stays away from your foundation.

3. Digging

Before embarking on your digging project, it is important to take precautions to avoid hitting any gas or utility lines. You can easily do this by contacting your state’s 811 or visiting their website.

Once you have taken care of this, it is time to get started on the fun part! Gather your tools and begin digging along the route you have mapped out for your gutter downspout. While your neighbors may be curious about your project, don’t let their questions distract you. It is important to bury your downspout at least one foot deeper than the ground level.

For those living in colder climates, keep in mind that the frost line typically falls between 36 and 48 inches below the ground. If this applies to you, dig even deeper to ensure proper installation.

Make sure the trench is wide enough to leave four inches of space on both sides of the pipe. Happy digging!

4. Demount the Old Gutter Downspout Extension

To install the plastic extension that will be buried, it is important first to remove any old aluminum extension using a screwdriver. Carefully unscrew the old extension and slide the plastic one into place. When laying down the pipe, ensure the other end is at least 8-10 feet from your home. It is crucial to maintain alignment during the process and handle the equipment with care to avoid injury.

5. New Extension Connection

A perfect plastic downspout extension should be flexible and durable. Using several solid layers of water tape and screws, connect the base of the gutter downspout carefully.

To ensure a reliable downspout extension, choose one that is both flexible and durable. Connect the base of the gutter downspout carefully using multiple layers of water tape and screws. It is important to select an extension that properly fits your gutter downspouts, which are typically either 2 by 3 or 3 by 4 inches.
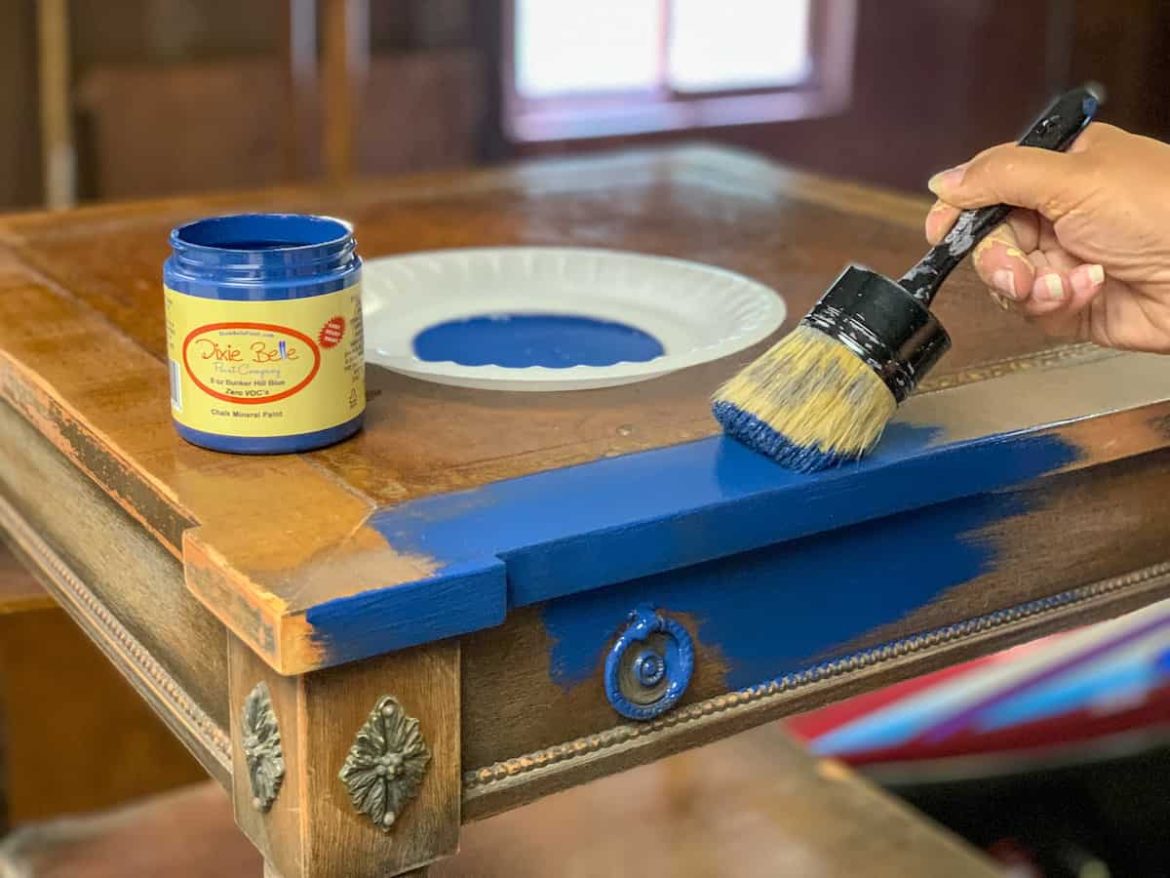
When it comes to color options, black, white, and brown are the most common options. While color may not be a top priority since the extension will likely be buried underground, it is still important to ensure that it coordinates well with your home’s aesthetic.

Additionally, consider purchasing a vent for easy and affordable gutter maintenance.

6. Setting Your Downspout

Now that you have completed digging your trench, it is time to install the downspout. Make sure to position the downspout extension at a gradual angle to avoid water backup. Before burying the downspout, conduct a final inspection to identify any potential issues, such as high spots, that may hinder water flow. If everything looks good, you can proceed to bury the downspout.

7. Fill the Trench

It is time for the shovel show again! By using your shovel. Cover the downspout extension and fill it with soil. Once it is covered, settle it down carefully and softly.

You are all caught up! Now the job is done, and all you have to do is wait for the coming rainy season to see if you have done a good job or not.

Advantages of Pop-Up Emitter

  • The flow of water gets maintained in the flat yards.
  • Doesn’t let scattered pieces of waste get into your drain pipe.
  • Disguising the end of your downspout extension

Bravo! It’s done. Now you got your gutter downspout fixed perfectly enough to do wonders in the next rainy season.

Benefits of Burying a Gutter Downspout

  1. Boosts the aesthetics
  2. Prevents icy spots during winters
  3. Enhances yard drainage system
  4. It paves the way for rainwater to move away from your foundation
  5. Minimalizes the risk of pooling in your yard
  6. Prevents water damage or leaks in your home

Now let’s begin the steps of burying your gutter downspout. But before we move into the steps, let’s have a quick look at the pieces of equipment you will need to carry out this DIY project efficiently.

Summing It Up

Now that you have come to the end of this blog, we hope that you have a solution to your foundation’s drainage problem. Burying a Gutter Downspout is not as easy a task as it seems. It takes hours of hard work and labor to get this task done.

However, getting this task done by yourself as a DIY is a better option in every way. You get to know more about the problems of your foundation deeply while doing this task. Since it is a task of your home, you will get it done more efficiently and with full dedication. You can even take help from your homies to make this task even more interesting and joyful for all of you. It can even turn into a fun-learning session for your kids and new thing that they will learn about their house maintenance.

All the best for your turn, and try this task!

Frequently Asked Questions

Is There Any Chance of Freezing in Buried Downspouts?

In cold weather, there is a possibility that buried downspouts may freeze if cold water flows through them. If you suspect that your buried downspout is frozen, you can carefully pour hot water down the top of the downspout to melt it. However, if this method fails, you may need to dig up the downspout. It is important not to use a hammer to break the ice as it can cause damage to your gutter downspout.

Should I Bury My Gutter Downspout?

It depends on your specific situation. If your downspout is currently dumping water too close to your house and causing damage to your foundation or basement, then burying it may be a good solution. However, if the downspout is already directing water away from your home and causing no issues, there may be no need to bury it.

How Much Does It Cost to Bury a Downspout?

Although it depends on the place and the motive because I believe the cost of burying a downspout can vary depending on a few factors, such as the length of the downspout and the depth at which it needs to be buried. It’s probably best to contact a local contractor or landscaper to get a more accurate estimate.

August 9, 2023 0 comments
0 FacebookTwitterPinterestEmail

Recent Posts

  • A Complete Chalked Paint Review fo Better Selection 
  • A Guide to Painting Furniture without Sanding
  • 15 Steps to Create Faux Shiplap DIY Wall in Budget
  • How to Paint Furniture without Sanding or Priming
  • A Guide to Achieving Texture with Saltwash Paint Techniques

Recent Comments

No comments to show.

Recent Posts

  • A Complete Chalked Paint Review fo Better Selection 

    October 18, 2023
  • A Guide to Painting Furniture without Sanding

    October 18, 2023
  • 15 Steps to Create Faux Shiplap DIY Wall in Budget

    October 18, 2023
  • How to Paint Furniture without Sanding or Priming

    October 18, 2023
  • A Guide to Achieving Texture with Saltwash Paint Techniques

    October 18, 2023

Categories

  • Bathroom (15)
  • Bedroom (4)
  • Brush (3)
  • Decor & Design (15)
  • Decorating (1)
  • Dining Room (3)
  • DIY (2)
  • DIY Projects (11)
  • Door (5)
  • Fireplace (3)
  • Flooring (2)
  • Furniture (9)
  • Gardening (1)
  • Guide (11)
  • Home Crafts (1)
  • Home Decor (7)
  • Home Improvement (9)
  • Ideas (63)
  • Kitchen (16)
  • Outdoor Living (1)
  • Paints (18)
  • Review (1)
  • Room Ideas (3)
  • Tutorial (1)
  • Uncategorized (2)
  • Wall (6)

Instagram

About Us

Maecenas nec odio et ante tincidunt tempus. Donec vitae sapien ut libero venenatis faucibus, nullam quis.

01 Central Park, US, New York City
Phone: (012) 345 6789
Fax: (012) 345 6789

  • Facebook
  • Twitter

@2021 - All Right Reserved. Designed and Developed by PenciDesign


Back To Top
DormyHome
  • Decor & Design
  • DIY
  • Guide
  • Home Improvement
  • Smart Home